Mastering Magento 2: Integrating Google Analytics 4 with Google Tag Manager

Standard

In the fast-evolving digital landscape, eCommerce platforms like Magento 2 need to leverage robust analytics tools for deeper insights and improved decision-making. Google Analytics 4 (GA4) emerges as a powerful successor to Universal Analytics, offering more intelligent insights and predictions. When integrated with Magento 2 through Google Tag Manager (GTM), it unlocks a new horizon of data analytics and user understanding. This comprehensive guide provides an advanced checklist for integrating Magento 2 with GA4 using GTM.

Magento 2 GA4 eCommerce Tracking

Set Up Magento GA4 (Google Analytics 4) eCommerce Tracking Data Layer Push Using Google Tag Manager

I. Setting the Stage for Integration

Understanding the Importance of GA4 and GTM in Magento 2

Before delving into the technicalities, it’s crucial to understand the why behind the integration. GA4 offers a more user-centric approach to analytics, providing valuable insights into customer behavior and journey. Coupled with GTM, it simplifies tag management, allowing for more efficient and accurate data collection.

Key Takeaways:

  • User-centric data model of GA4
  • Simplified tag management with GTM
  • Enhanced eCommerce tracking capabilities

II. Pre-Integration Checklist

1. Reviewing Your Current Magento 2 Setup

Ensure your Magento 2 environment is ready for integration. This includes checking for the latest updates, understanding current data flows, and assessing any custom functionalities that might affect data tracking.

2. Setting Up Your GA4 Property

Navigate to your Google Analytics account and create a GA4 property. This step is fundamental and should be approached with care to ensure accurate data collection in the future.

Detailed Steps:

  • Creating a GA4 property
  • Configuring data streams
  • Understanding GA4’s interface and features

3. Configuring GTM for Magento 2

Setting up GTM involves creating a new container for your Magento 2 store and understanding the basics of tags, triggers, and variables. This forms the backbone of your data tracking framework.

Focus Points:

  • GTM account and container setup
  • Basic understanding of tags, triggers, and variables

III. Advanced Integration Steps

4. Implementing a Data Layer

A well-structured data layer is critical for passing detailed information to GA4 via GTM. This step involves technical proficiency in JavaScript and a deep understanding of the Magento 2 architecture.

Key Elements:

  • Structuring a data layer
  • Ensuring compatibility with Magento 2
  • Testing for data accuracy

5. Advanced Tag Configuration

Beyond basic page view tracking, configure advanced tags for tracking user interactions, eCommerce events, and more. This requires a nuanced understanding of both Magento 2’s front-end events and GA4’s tracking capabilities.

Areas of Focus:

  • Setting up eCommerce tracking tags
  • Configuring event tracking for user interactions
  • Utilizing GA4’s enhanced measurement features

6. Custom Dimensions and Metrics

GA4’s custom dimensions and metrics offer a way to tailor your analytics to the specific needs of your Magento 2 store. Understand how to define and implement these for deeper insights.

Implementation Guide:

  • Identifying key custom dimensions and metrics
  • Setting them up in GA4 and GTM
  • Mapping them to Magento 2 data

7. Cross-Domain Tracking: If your Magento 2 store operates across multiple domains, this section would guide on setting up cross-domain tracking in GA4 via GTM.

8. Consent Mode and Privacy Compliance: With increasing concerns about user privacy, this part should discuss configuring GA4 and GTM to comply with GDPR, CCPA, and other privacy regulations.

9. Debugging and Validation: This section should focus on using GTM’s preview mode and GA4’s debug view to test and validate the setup.

10. Reporting and Analysis: Offer insights into using GA4’s reporting features to analyze data from your Magento 2 store, including setting up custom reports and utilizing AI-powered insights.

11. Ongoing Optimization and Maintenance: Discuss the importance of regularly updating and optimizing the GA4 and GTM setup to adapt to new features and changing business needs.

Conclusion:

Wrap up the article by emphasizing the importance of continuous learning and adaptation in the ever-changing field of eCommerce analytics. Encourage readers to stay updated with GA4 and GTM developments and to regularly review their Magento 2 integration for improvements.

Magento 2 GA4 eCommerce Tracking using Google Tag Manager

Standard

Magento 2 is a popular e-commerce platform used by many online retailers. GA4 (Google Analytics 4) is the latest version of Google Analytics, which offers improved tracking capabilities for e-commerce sites. By integrating Magento 2 with GA4, e-commerce site owners can gain valuable insights into their customers’ behavior, which can help them make data-driven decisions to improve their business.

Magento 2 GA4 eCommerce Tracking:

Magento 2 GA4 e-commerce tracking allows online retailers to track customer behavior on their website, including product views, add to cart, checkout, and purchase. With this data, e-commerce store owners can gain insights into their customers’ behavior, such as which products are the most popular, which pages have the highest bounce rate, and what the customer journey looks like from start to finish. By analyzing this data, they can optimize their site to improve the user experience, increase conversions, and boost revenue.

To enable Magento 2 GA4 e-commerce tracking, you will need to follow these steps:

Step 1: Create a GA4 Property and set up an Enhanced Ecommerce data stream

To get started with Magento 2 GA4 e-commerce tracking, you will need to create a GA4 property in your Google Analytics account and set up an Enhanced Ecommerce data stream. This will allow you to track all the e-commerce events on your website, such as product views, add to cart, checkout, and purchase.

Step 2: Configure Magento 2 integration with GA4

Next, you will need to configure the integration between Magento 2 and GA4. To do this, you can use the Google Tag Manager (GTM) extension for Magento 2, which allows you to add GA4 tracking code to your website. You can also use a custom code integration if you prefer.

Step 3: Set up Enhanced Ecommerce tracking in GTM

After configuring the integration between Magento 2 and GA4, you will need to set up Enhanced Ecommerce tracking in GTM. This involves setting up data layer variables, triggers, and tags that will capture the e-commerce events on your website and send them to GA4.

Step 4: Test and verify tracking

Finally, you will need to test and verify that your Magento 2 GA4 e-commerce tracking is working correctly. You can use the Google Analytics Debugger or the Real-Time reports in GA4 to check that the tracking is working as expected.

Benefits of Magento 2 GA4 eCommerce Tracking:

Magento 2 GA4 e-commerce tracking offers many benefits for online retailers, including:

Better insights into customer behavior: By tracking e-commerce events on your website, you can gain valuable insights into your customers’ behavior, such as which products they are interested in, how long they spend on your site, and what pages they visit.

Improved user experience: By analyzing customer behavior, you can identify pain points in the customer journey and optimize your site to improve the user experience.

Increased conversions: By optimizing your site for the user experience, you can increase conversions and revenue.

Customizable reporting: With GA4, you can create custom reports and dashboards that focus on the metrics that matter most to your business.

In Magento 2, an event is a notification that is triggered when a specific action or set of actions take place. The view_item_list event is triggered when a list of items is viewed, for example, a list of products in a category page.

Magento 2 GA4 eCommerce Tracking

Magento 2 Google Analytics 4 Enhanced Ecommerce tracking using Google Tag Manager

In Magento 2, the select_item event is triggered when a specific item is selected or clicked on, for example, when a product is added to the cart. To send a select_item event, you can create an instance of the event manager and then dispatch the event with the relevant data, such as the selected item’s ID or SKU.

Magento 2 GA4 eCommerce Tracking

Connect Google Analytics 4 to Magento 2 using Google Tag Manager

In Magento 2, the view_item event is triggered when a specific item is viewed, for example, when a product page is loaded. To send a view_item event, you can create an instance of the event manager and then dispatch the event with the relevant data, such as the viewed item’s ID or SKU.

Magento 2 Google Analytics 4 for Google Tag Manager

Magento 2 GA4 eCommerce Tracking via Google Tag Manager

In Magento 2, the add_to_cart event is triggered when a specific item is added to the cart. To send an add_to_cart event, you can create an instance of the event manager and then dispatch the event with the relevant data, such as the added item’s ID or SKU.

Magento 2 GA4 eCommerce Tracking

Setup Magento Google Analytics 2 (GA4) Ecommerce Tracking using Google Tag Manager

In Magento 2, the add_to_wishlist event is triggered when a customer adds a product to their wishlist. To send an add_to_wishlist event, you can create an instance of the event manager and then dispatch the event with the relevant data, such as the product ID or SKU.

magento 2 google analytics 4 (GA4) ecommerce tracking

Implement Google Analytics 4 (GA4) on Magento 2 using Google Tag Manager

In Magento 2, the view_cart event is triggered when the shopping cart is viewed by the customer. To send a view_cart event, you can create an instance of the event manager and then dispatch the event with the relevant data, such as the contents of the cart.

In Magento 2, the remove_from_cart event is triggered when a specific item is removed from the shopping cart. To send a remove_from_cart event, you can create an instance of the event manager and then dispatch the event with the relevant data, such as the removed item’s ID or SKU.

 GA4 Integration For Magento 2

Magento 2 Migrate from Google Universal Analytics to GA4 using Google Tag Manager

In Magento 2, the begin_checkout event is triggered when a customer begins the checkout process, for example, when they click the “Checkout” button. To send a begin_checkout event, you can create an instance of the event manager and then dispatch the event with the relevant data, such as the contents of the cart.

In Magento 2, the add_shipping_info event is triggered when a customer provides their shipping information during the checkout process. To send an add_shipping_info event, you can create an instance of the event manager and then dispatch the event with the relevant data, such as the customer’s shipping address and shipping method.

Magento 2 Google Analytics 4 (GA4) Enhanced eCommerce

Magento 2 google analytics 4 (GA4) eCommerce Tracking using Google Tag Manager

In Magento 2, the add_payment_info event is triggered when a customer provides their payment information during the checkout process. To send an add_payment_info event, you can create an instance of the event manager and then dispatch the event with the relevant data, such as the customer’s payment method and payment details.

In Magento 2, the purchase event is triggered when a customer completes a purchase, for example, when the order is placed and payment is processed. To send a purchase event, you can create an instance of the event manager and then dispatch the event with the relevant data, such as the order ID and the purchased items.

Google Analytics 4 in Magento 2

GA4 Integration For Magento 2 Enhanced Ecommerce Tracking using Google Tag Manager

Warning: If you don’t know about javascript or don’t have developing knowledge then don’t try to Magento 2 GA4 eCommerce Tracking using Google Tag Manager that can break your site, Cart and other functionality 

Disclaimer: Google tag manager belongs to Google property 

For Contact: mappchero@gmail.com

I am available for Hire on Freelancer: Freelancer.com

I am available for Hire on Upwork: Upwork.com

I am available for Hire on Peopleperhour: Peopleperhour.com

I am available for Hire on Guru: Guru.com

Magento Google Analytics 4 (GA4) Ecommerce Tracking using Google Tag Manager

Standard

Set Up Magento  GA4 (Google Analytics 4) eCommerce Tracking Data Layer Push Using Google Tag Manager

Magento GA4 eCommerce tracking is a method of tracking eCommerce data in Magento using Google Analytics 4 (GA4). With GA4 eCommerce tracking, you can track and analyze customer behavior and transactions on your Magento website to gain insights that can help you improve your eCommerce business.

GA4 eCommerce tracking allows you to see important metrics, such as revenue, conversion rates, and average order value, and can help you identify trends and opportunities for optimization. It also allows you to track specific user actions, such as adding items to a cart, initiating checkout, and completing purchases.

To implement GA4 eCommerce tracking in Magento, you need to set up a GA4 property in your Google Analytics account and configure the tracking code on your Magento site. This involves setting up a data layer to collect eCommerce data and creating triggers and tags to send this data to Google Analytics.

The Magento GA4 eCommerce Tracking Data Layer is a set of variables and values that contain information about customer behavior and transactions on your Magento site. This data is used to populate the eCommerce tracking events and parameters in Google Analytics 4.

To set up the data layer using Google Tag Manager (GTM), you’ll need to do the following:

  1. Install the GTM code on your Magento site.

2. Create a data layer in GTM that contains the eCommerce data you want to track. This can include information about product impressions, product detail views, add-to-carts, purchases, and more.

3. Map the data layer variables to the appropriate GA4 eCommerce tracking parameters in your GTM tags. For example, you might map the “product ID” variable in the data layer to the “item_id” parameter in your GA4 Purchase tag.

4. Test your implementation to make sure that the data is being collected and sent to Google Analytics correctly.

By setting up a Magento GA4 eCommerce Tracking Data Layer using GTM, you can easily track and analyze customer behavior and transactions on your Magento site, and gain valuable insights to improve your eCommerce business.

Implement Google Analytics 4 (GA4) on Magento using Google Tag Manager

Warning: If you do n’t know about javascript or do n’t have developing knowledge then do n’t try to Magento Google Analytics 4 (GA4) Ecommerce Tracking using Google Tag Manager that can broke your site, Cart and other functionality 

Disclaimer: Google tag manager belongs to Google property 

For Contact: mappchero@gmail.com

I am available for Hire on Freelancer: Freelancer.com

I am available for Hire on Upwork: Upwork.com

I am available for Hire on Peopleperhour: Peopleperhour.com

I am available for Hire on Guru: Guru.com

Implementation Google Analytics 4 (GA4) eCommerce Tracking on Magento 2 without Module

Standard

Setup  Google Analytics 4 (GA4) Magento 2 eCommerce Tracking without Module / Plugin using Google Tag Manager

Magento 2 GA4 ecommerce tracking without a module or plugin can be implemented using the data layer and Google Tag Manager (GTM). The data layer is a JavaScript object that contains information about the page and its content, including ecommerce data such as product information and transaction details.

Here are the steps to set up Magento 2 GA4 ecommerce tracking without a module or plugin using the data layer and GTM:

  1. Create a Google Tag Manager (GTM) account if you don’t already have one.

2. Install the GTM code on your Magento 2 website. This can typically be done by copying and pasting the code into the header of your site’s pages.

3. Create a data layer in Magento 2 to store ecommerce data. This can be done by adding a data layer script to your site’s pages. The data layer script should include information about the products on the page, transaction details, and any other relevant data.

4. Create a GTM tag for GA4 ecommerce tracking. Choose “Google Analytics: GA4 Configuration” as the tag type and configure the tag with your GA4 tracking ID.

5. In the tag configuration, select “Use Data Layer” and map the data layer variables to the appropriate GA4 ecommerce tracking fields.

6. Preview and publish the GTM container to make sure that the data layer and GA4 ecommerce tracking are working correctly.

By using the data layer and GTM, you can implement GA4 ecommerce tracking on your Magento 2 website without using a module or plugin. This setup will allow you to track ecommerce data and insights in GA4, giving you a better understanding of your site’s performance and allowing you to make data-driven decisions to improve your e-commerce business.

Magento 2 Google Analytics 4 Ecommerce tracking

Magento 2 Google Analytic (GA4) Purchase eCommerce tracking without Module using Google Tag Manager

Warning: If you do n’t know about javascript or do n’t have developing knowledge then do n’t try to Google Analytics 4 (GA4) eCommerce Tracking on Magento 2 without Module that can broke your site, Cart and other functionality 

Disclaimer: Google tag manager belongs to Google property 

For Contact: mappchero@gmail.com

I am available for Hire on Freelancer: Freelancer.com

I am available for Hire on Upwork: Upwork.com

I am available for Hire on Peopleperhour: Peopleperhour.com

I am available for Hire on Guru: Guru.com


Implement Google Analytics 4 (GA4) For Ecommerce & Enhanced Ecommerce using Google Tag Manager

Standard

Without Touch Back-end Code Google Analytics 4 (GA4) For Ecommerce & Enhanced Ecommerce

Recently Google release Google Analytics 4 (GA4) After that so many request to implement Google Analytics 4 (GA4) For Ecommerce & Enhanced Ecommerce using Google Tag Manager on Magento, Woocommerce, Volusion, Bigcommerce, Neto, Shopify, Custom Website, SquareSpace, Opencart, Wix, weebly, osCommerce, Joomla, Drupal, OpenCart, PestaShop, ClickFunnels, SamCart and also comfortable to any other Plateform

  1. Recently implement Google Analytics 4 (GA4) For eCommerce & Enhanced eCommerce for Woocommerce using Google Tag Manager
  2. Recently implement Google Analytics 4 (GA4) For eCommerce & Enhanced eCommerce for BigCommerce using Google Tag Manager
  3. Recently implement Google Analytics 4 (GA4) For eCommerce & Enhanced eCommerce for Shopify using Google Tag Manager
  4. Recently implement Google Analytics 4 (GA4) For eCommerce & Enhanced eCommerce for Wix using Google Tag Manager
  5. Recently implement Google Analytics 4 (GA4) For eCommerce & Enhanced eCommerce for Squarespace using Google Tag Manager
  6. Recently implement Google Analytics 4 (GA4) For eCommerce & Enhanced eCommerce for Weebly using Google Tag Manager
  7. Recently implement Google Analytics 4 (GA4) For eCommerce & Enhanced eCommerce for Magento & Magento 2 using Google Tag Manager
  8. Recently implement Google Analytics 4 (GA4) For eCommerce & Enhanced eCommerce for Volusion using Google Tag Manager
  9. Recently implement Google Analytics 4 (GA4) For eCommerce & Enhanced eCommerce for Shopify Plus using Google Tag Manager
  10. Recently implement Google Analytics 4 (GA4) For eCommerce & Enhanced eCommerce for OpenCart using Google Tag Manager
  11. Recently implement Google Analytics 4 (GA4) For eCommerce & Enhanced eCommerce for nopCommerce using Google Tag Manager
  12. Recently implement Google Analytics 4 (GA4) For eCommerce & Enhanced eCommerce for Netsuite using Google Tag Manager
  13. Recently implement Google Analytics 4 (GA4) For eCommerce & Enhanced eCommerce for 1ShoppingCart using Google Tag Manager
  14. Recently implement Google Analytics 4 (GA4) For eCommerce & Enhanced eCommerce for 3dcart using Google Tag Manager
  15. Recently implement Google Analytics 4 (GA4) For eCommerce & Enhanced eCommerce for Ecwid using Google Tag Manager
  16. Recently implement Google Analytics 4 (GA4) For eCommerce & Enhanced eCommerce for PrestaShop using Google Tag Manager
  17. Recently implement Google Analytics 4 (GA4) For eCommerce & Enhanced eCommerce for X- Cart using Google Tag Manager

Any other eCommerce Platforms for implement Google Analytics 4 (GA4) For eCommerce & Enhanced eCommerce using Google Tag Manager

Google Analytics 4 (GA4) ecommerce

Google Analytics 4 (GA4) For Enhanced Ecommerce using Google Tag Manager

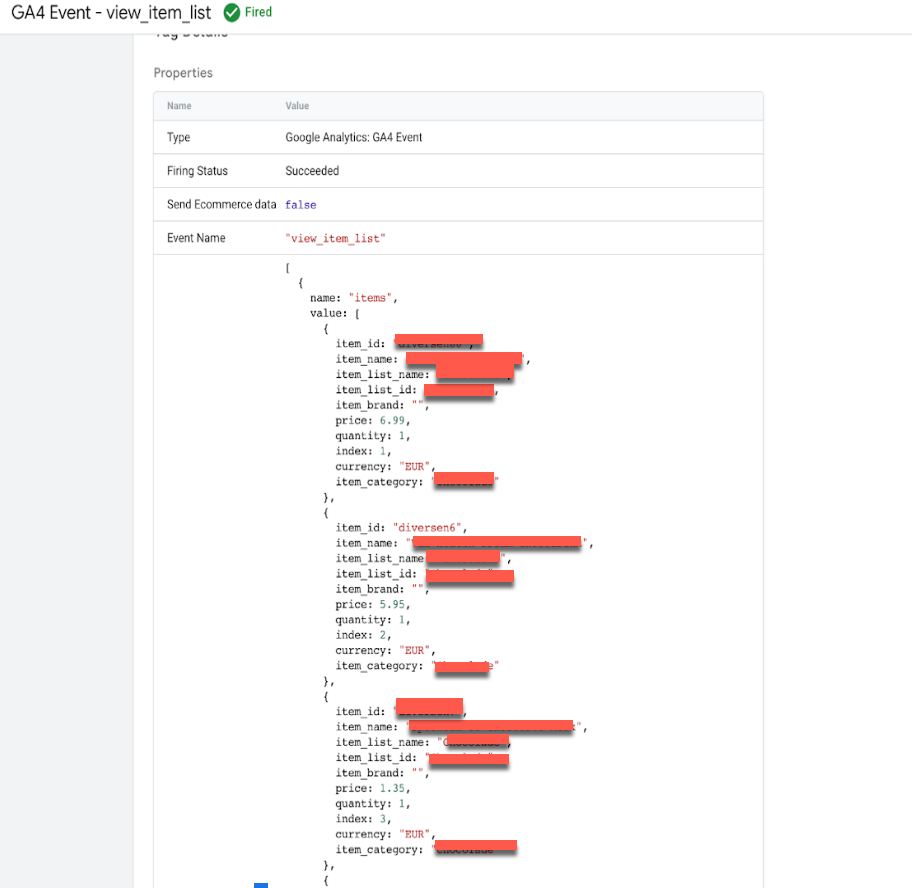
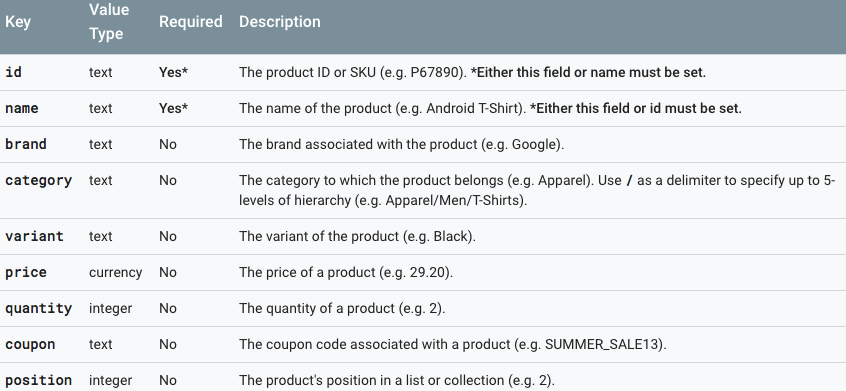
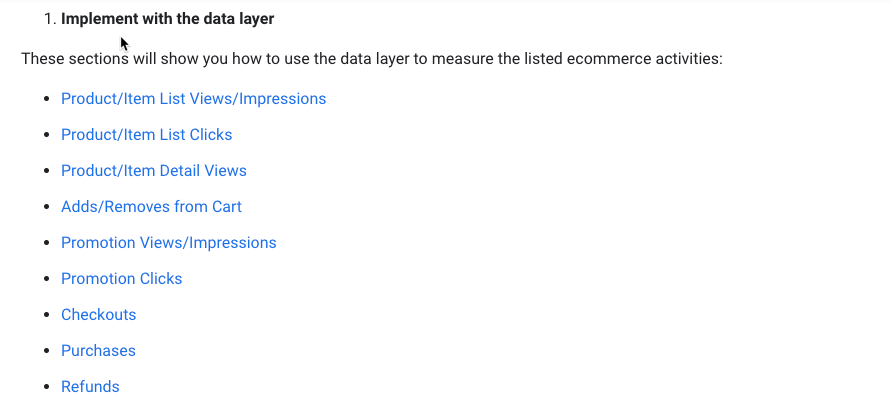
1. Ecommerce (GA4) to measure product/item list views/impressions using Google Tag Manager without touching website code 

To measure item list views/impressions using Google Tag Manager

// Measure product views / impressions
dataLayer.push({
  'event': 'view_item_list',
  'ecommerce': {
    'items': [
     {
       'item_name': 'Triblend Android T-Shirt',       // Name or ID is required.
       'item_id': '12345',
       'price': '15.25',
       'item_brand': 'Google',
       'item_category': 'Apparel',
       'item_category_2': 'Mens',
       'item_category_3': 'Shirts',
       'item_category_4': 'Tshirts',
       'item_variant': 'Gray',
       'item_list_name': 'Search Results',
       'item_list_id': 'SR123',
       'index': 1,
       'quantity': '1'
     },
     {
       'item_name': 'Donut Friday Scented T-Shirt',
       'item_id': '67890',
       'price': '33.75',
       'item_brand': 'Google',
       'item_category': 'Apparel',
       'item_category_2': 'Mens',
       'item_category_3': 'Shirts',
       'item_category_4': 'Tshirts',
       'item_variant': 'Black',
       'item_list_name': 'Search Results',
       'item_list_id': 'SR123',
       'index': 2,
       'quantity': '1'
     }]
  }
});

To verify measure item list views/impressions – implement Google Analytics 4 (GA4) ecommerce using Google Tag Manager

Enhanced Ecommerce to GA4 Ecommerce using Google Tag Manager

GA4 Enhanced Ecommerce and Purchase Event Setup using Google Tag Manager

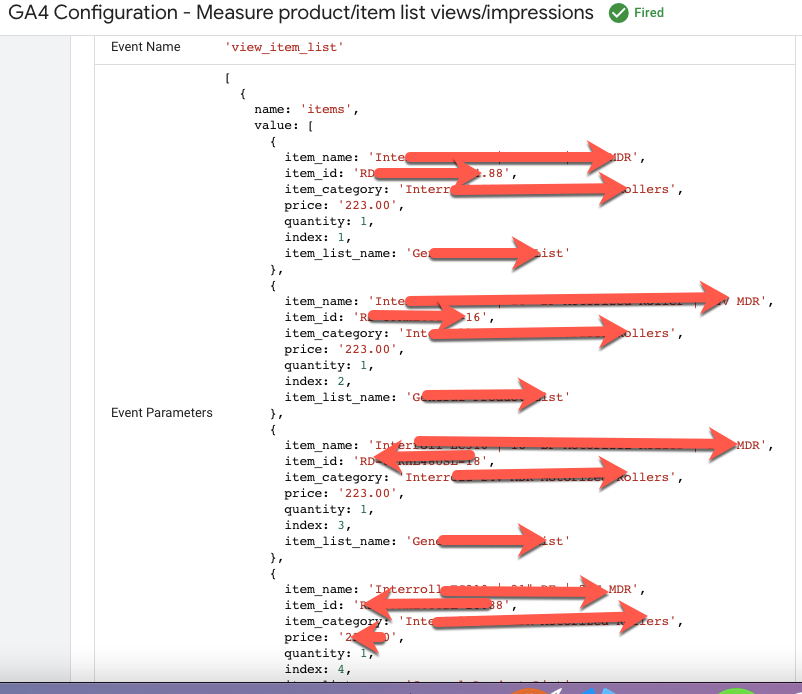
2. Ecommerce (GA4) To measure product/item list clicks using Google Tag Manager without touching website code 

To measure product/item list clicks using Google Tag Manager

/**
 * Call this function when a user clicks on a product link.
 * @param {Object} productObj An object that represents the product that is clicked.
 */
function(productObj) {
  dataLayer.push({
    'event': 'select_item',
    'ecommerce': {
      'items': [{
        'item_name': productObj.name, // Name or ID is required.
        'item_id': productObj.id,
        'item_brand': productObj.brand,
        'item_category': productObj.category,
        'item_category_2': productObj.category_2,
        'item_category_3': productObj.category_3,
        'item_category_4': productObj.category_4,
        'item_variant': productObj.variant,
        'item_list_name': productObj.list_name,
        'item_list_id': productObj.list_id,
        'index': productObj.index,
        'quantity': productObj.quantity,
        'price': productObj.price
      }]
    }
  });
}

To verify measure item list views/impressions – implement Google Analytics 4 (GA4) Ecommerce & Enhanced Ecommerce using Google Tag Manager

Google Analytics 4 ecommerce

Set Up Ecommerce Tracking in GA4 for Google Tag Manager

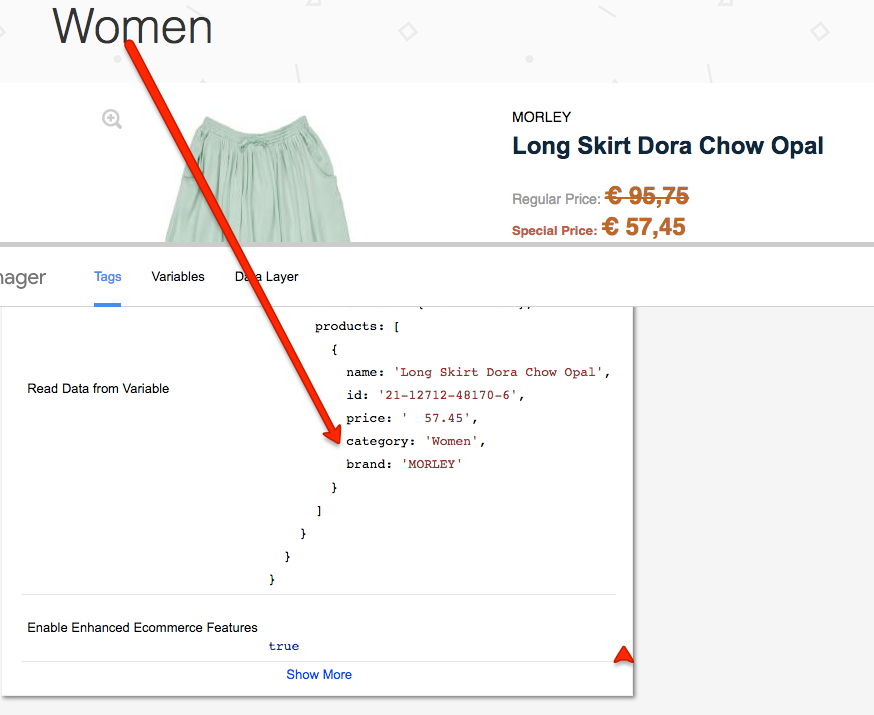
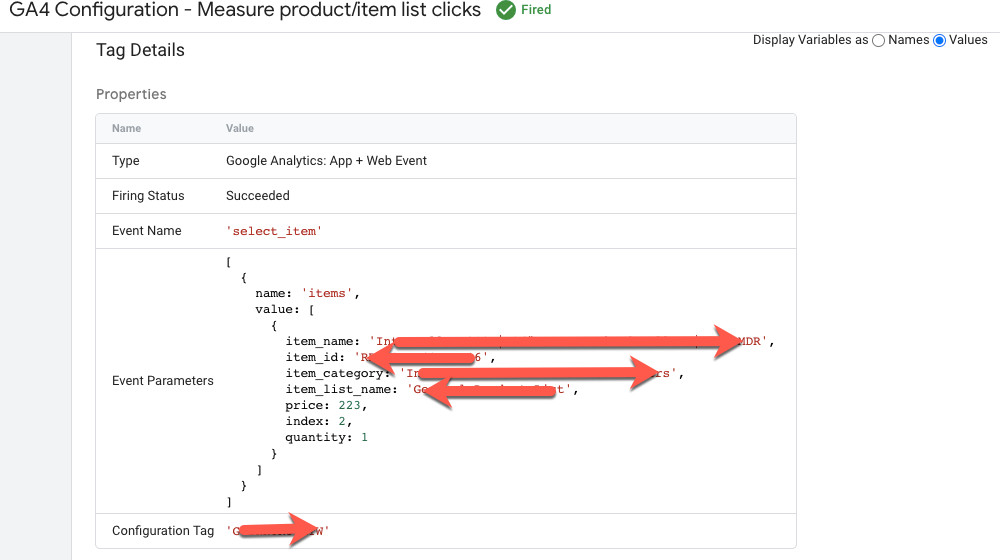
3. Ecommerce (GA4) To measure views/impressions of product/item details using Google Tag Manager without touching website code 

To measure views/impressions of product/item details using Google Tag Manager

// Measure a view of product details. This example assumes the detail view occurs on pageload,
dataLayer.push({
  'event': 'view_item',
  'ecommerce': {
    'items': [{
      'item_name': 'Donut Friday Scented T-Shirt', // Name or ID is required.
      'item_id': '67890',
      'price': '33.75',
      'item_brand': 'Google',
      'item_category': 'Apparel',
      'item_category_2': 'Mens',
      'item_category_3': 'Shirts',
      'item_category_4': 'Tshirts',
      'item_variant': 'Black',
      'item_list_name': 'Search Results',  // If associated with a list selection.
      'item_list_id': 'SR123',  // If associated with a list selection.
      'index': 1,  // If associated with a list selection.
      'quantity': '1'
    }]
  }
});

To verify measure views/impressions of product/item details – implement Google Analytics 4 (GA4) Ecommerce & Enhanced Ecommerce using Google Tag Manager

Google Analytics 4 Events

GA4 Ecommerce and Purchase using Google Tag Manager

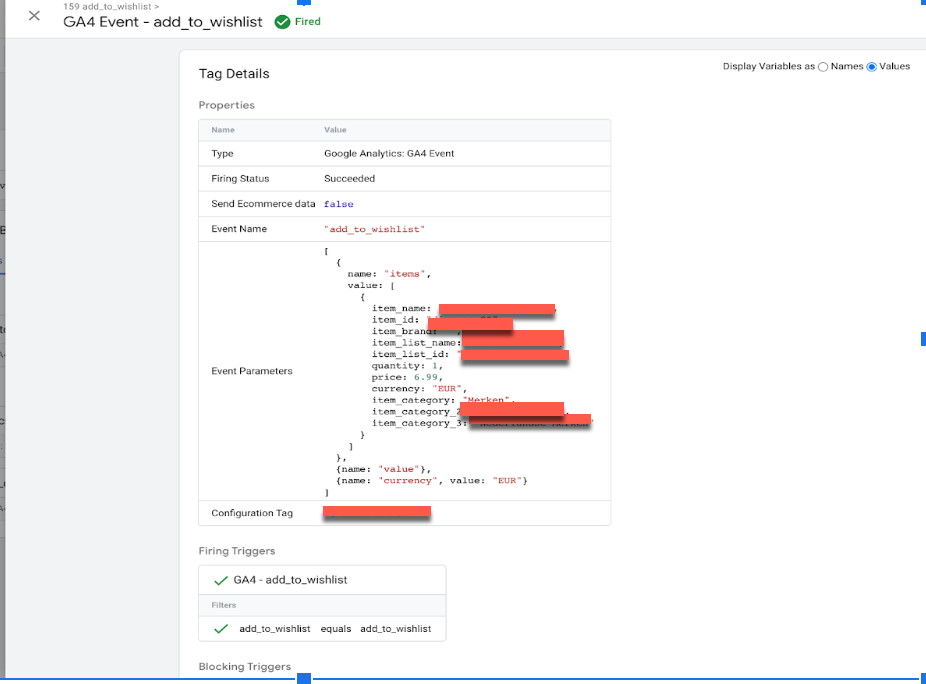
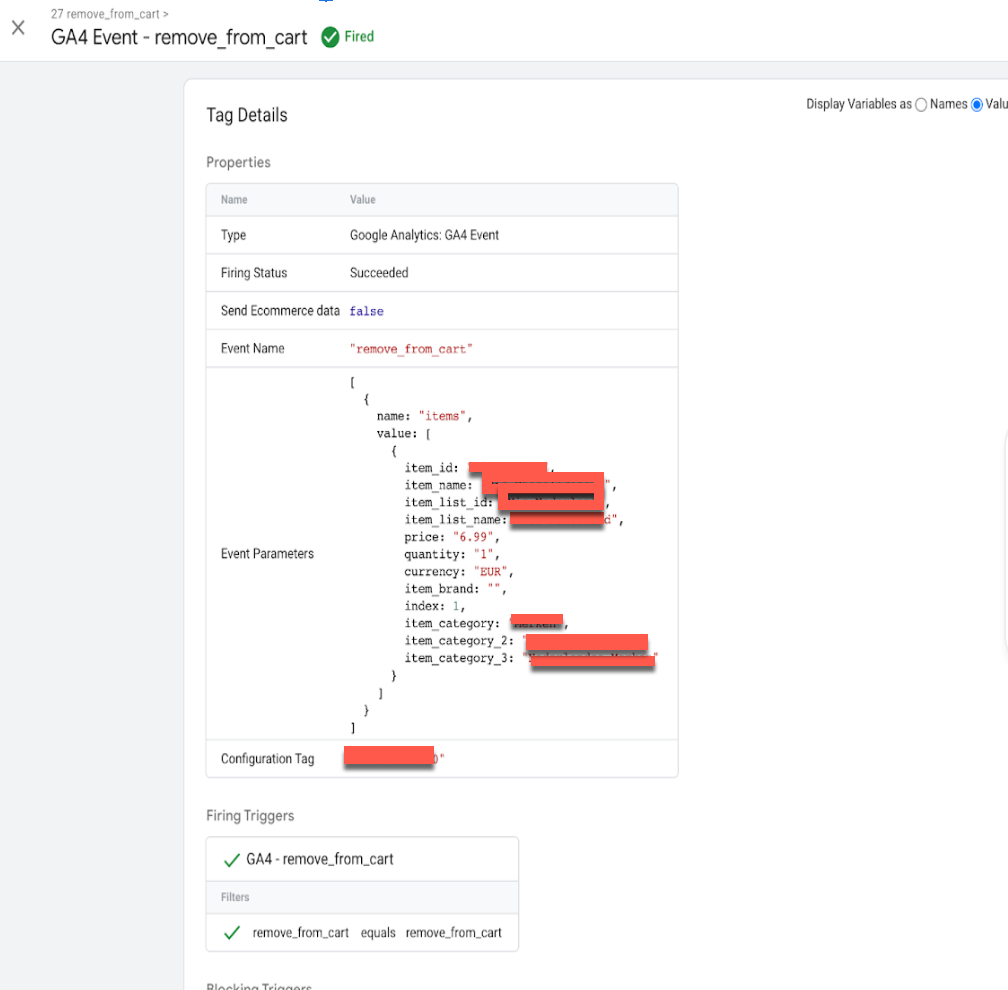
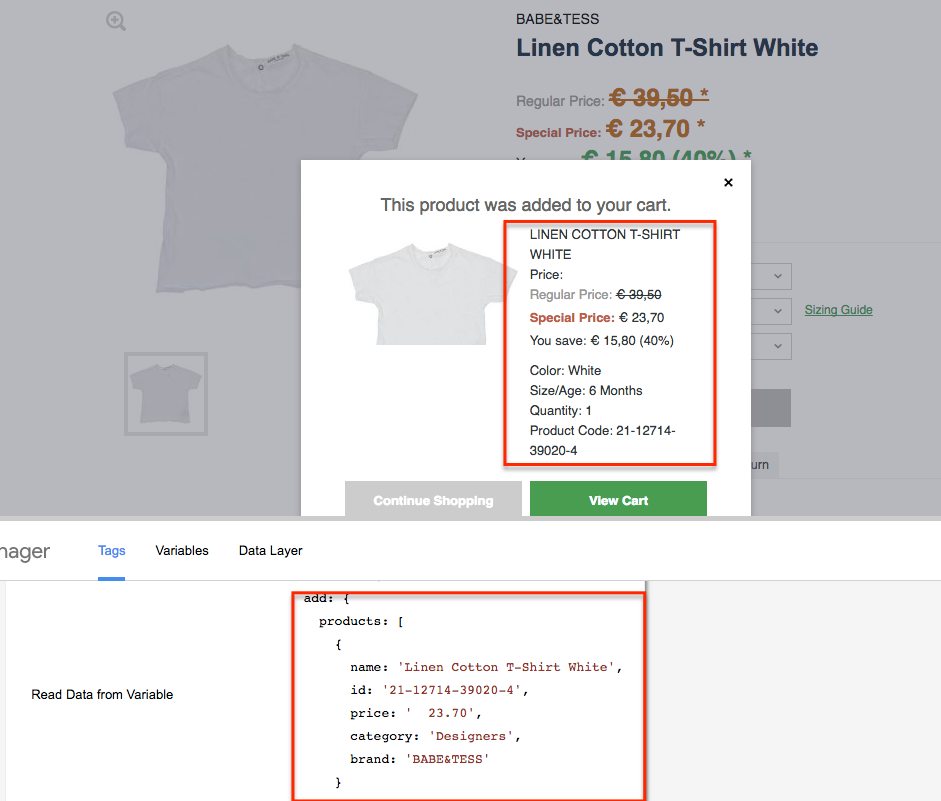
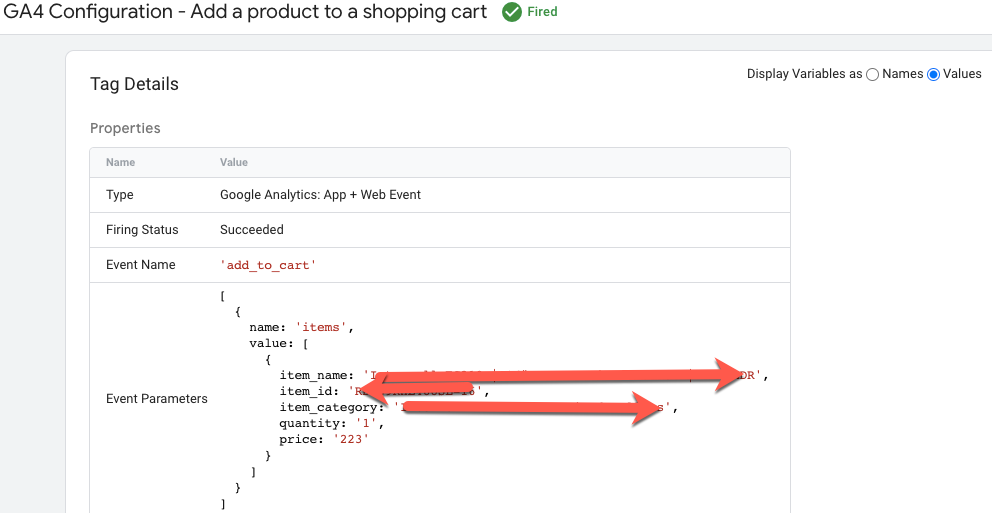
4. Ecommerce (GA4) To add a product to a shopping cart using Google Tag Manager without touching website code

To add a product to a shopping cart using Google Tag Manager

// Measure a view of product details. This example assumes the detail view occurs on pageload,
dataLayer.push({
  'event': 'view_item',
  'ecommerce': {
    'items': [{
      'item_name': 'Donut Friday Scented T-Shirt', // Name or ID is required.
      'item_id': '67890',
      'price': '33.75',
      'item_brand': 'Google',
      'item_category': 'Apparel',
      'item_category_2': 'Mens',
      'item_category_3': 'Shirts',
      'item_category_4': 'Tshirts',
      'item_variant': 'Black',
      'item_list_name': 'Search Results',  // If associated with a list selection.
      'item_list_id': 'SR123',  // If associated with a list selection.
      'index': 1,  // If associated with a list selection.
      'quantity': '1'
    }]
  }
});

To verify add a product to a shopping cart – Implement Google Analytics 4 (GA4) Ecommerce & Enhanced Ecommerce using Google Tag Manager

Track Events with Google Analytics 4(GA4)

Ecommerce (GA4) Tracking using Google Tag Manager

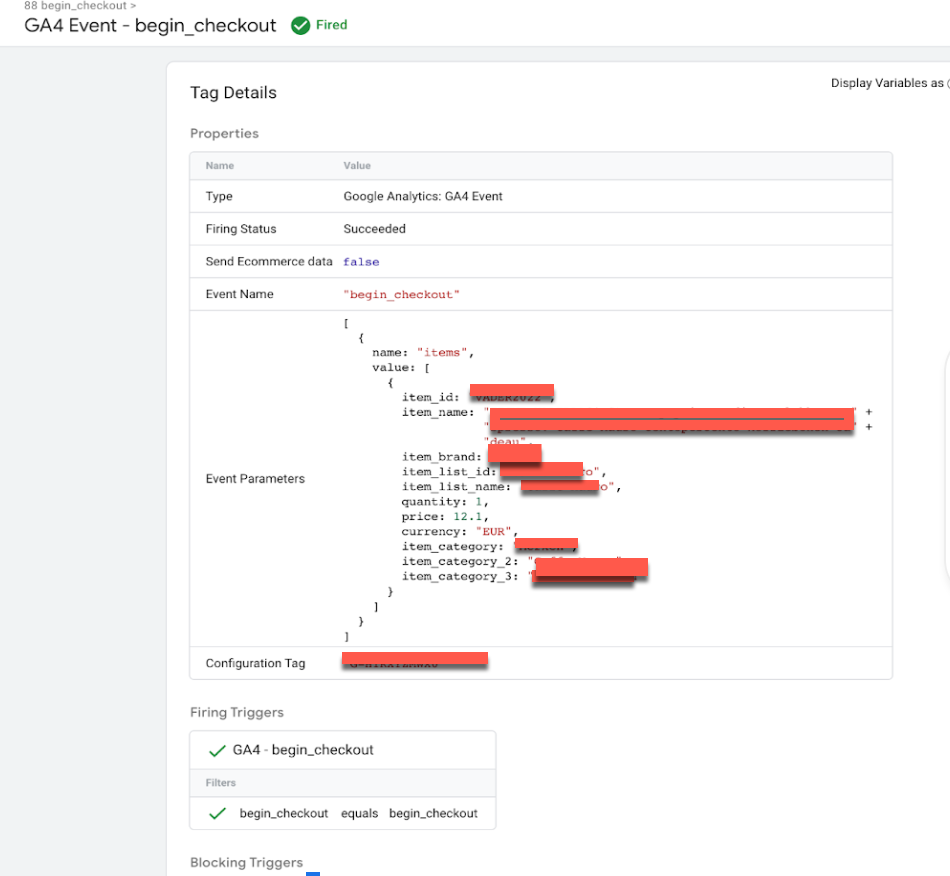
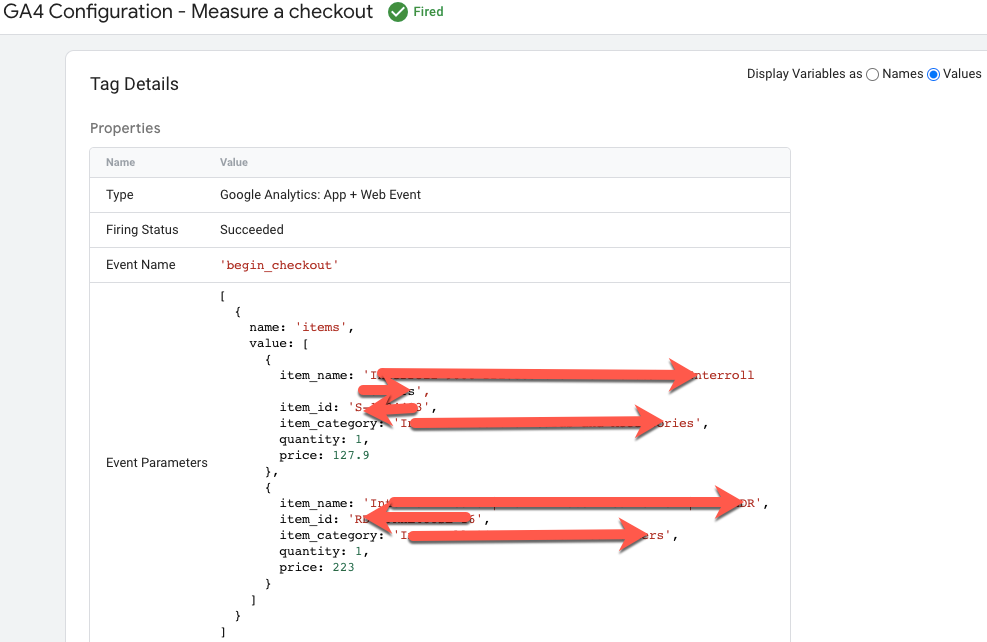
5. Ecommerce (GA4) To measure a checkout using Google Tag Manager without touching website code

/**
 * A function to handle a click on a checkout button.
 */
function onCheckout() {
  dataLayer.push({
    'event': 'begin_checkout',
    'ecommerce': {
      'items': [{
        'item_name': 'Donut Friday Scented T-Shirt', // Name or ID is required.
        'item_id': '67890',
        'price': '33.75',
        'item_brand': 'Google',
        'item_category': 'Apparel',
        'item_category_2': 'Mens',
        'item_category_3': 'Shirts',
        'item_category_4': 'Tshirts',
        'item_variant': 'Black',
        'item_list_name': 'Search Results',
        'item_list_id': 'SR123',
        'index': 1,
        'quantity': '1'
      }]
    }
  });
}

To verify measure a checkout – Implement Google Analytics 4 (GA4) Ecommerce & Enhanced Ecommerce using Google Tag Manager

Google Analytics 4 (GA4) For Ecommerce

GA4 Ecommerce Purchase using Google Tag Manager

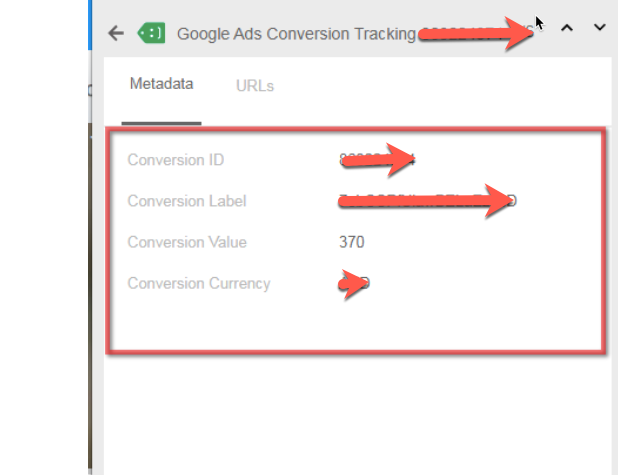
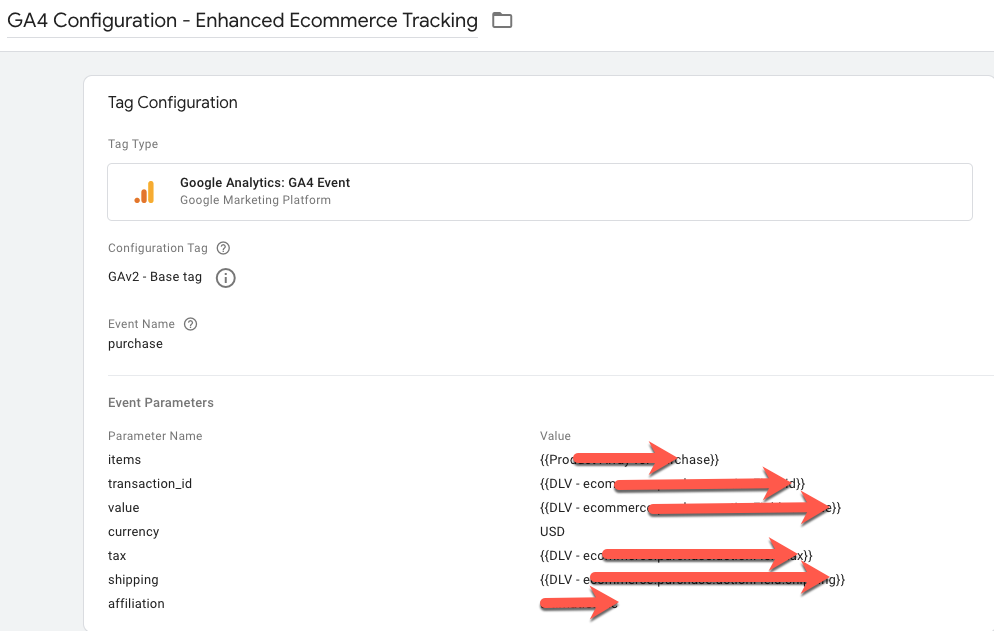
6. Ecommerce (GA4) To measure purchases using Google Tag Manager without touching website code

dataLayer.push({
  'event': 'purchase',
  'ecommerce': {
    'purchase': {
      'transaction_id': 'T12345',
      'affiliation': 'Online Store',
      'value': '35.43',
      'tax': '4.90',
      'shipping': '5.99',
      'currency': 'EUR',
      'coupon': 'SUMMER_SALE',
      'items': [{
        'item_name': 'Triblend Android T-Shirt',
        'item_id': '12345',
        'item_price': '15.25',
        'item_brand': 'Google',
        'item_category': 'Apparel',
        'item_variant': 'Gray',
        'quantity': 1,
        'item_coupon': ''
      }, {
        'item_name': 'Donut Friday Scented T-Shirt',
        'item_id': '67890',
        'item_price': '33.75',
        'item_brand': 'Google',
        'item_category': 'Apparel',
        'item_variant': 'Black',
        'quantity': 1
      }]
    }
  }
});

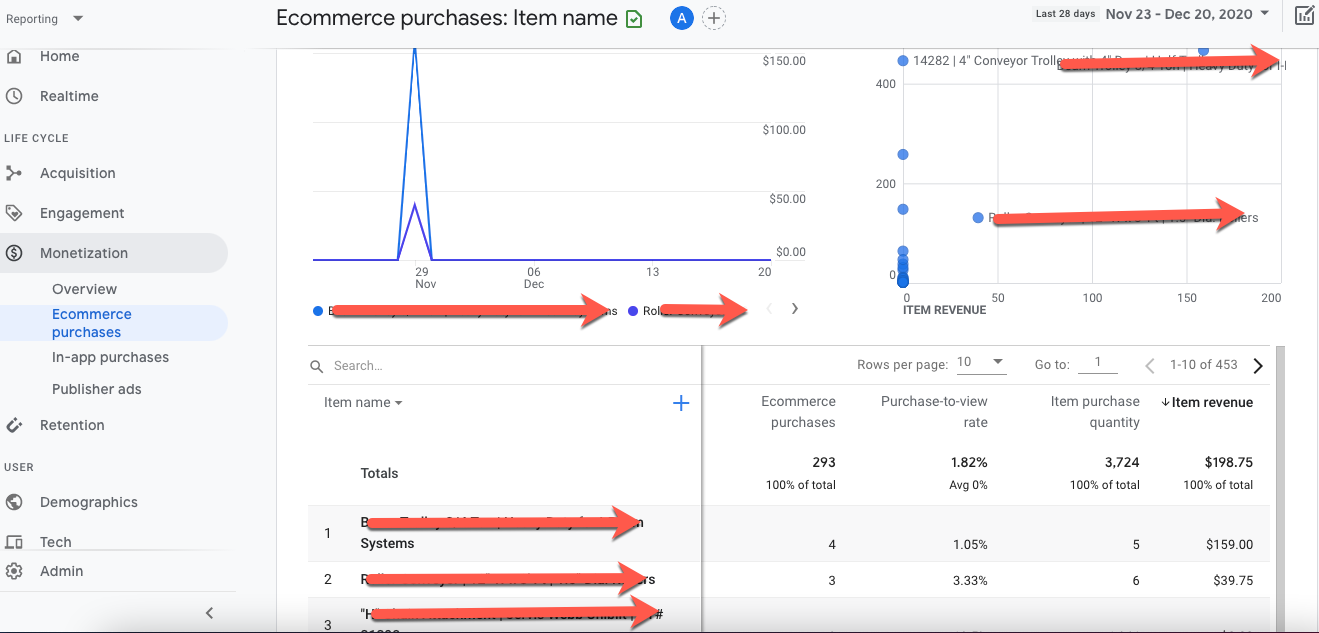
To verify measure purchases and Google Analytic – Implement Google Analytics 4 (GA4) Ecommerce & Enhanced Ecommerce using Google Tag Manager

GA4 Ecommerce Tracking

Implement GA4 Ecommerce Tracking with Google Tag Manager for GA4

Ecommerce to GA4 Ecommerce

Enhanced Ecommerce to GA4 Ecommerce using Google Tag Manager

Warning: If you do n’t know about javascript or do n’t have developing knowledge then do n’t try to Implement Google Analytics 4 (GA4) For Ecommerce & Enhanced Ecommerce using Google Tag Manager that can broke your site, Cart and other functionality 

Disclaimer: Google tag manager belongs to Google property 

For Contact: mappchero@gmail.com

I am available for Hire on Freelancer: Freelancer.com

I am available for Hire on Upwork: Upwork.com

I am available for Hire on Peopleperhour: Peopleperhour.com

I am available for Hire on Guru: Guru.com

Setup Dynamic Google Adwords Conversion Tracking in Magento 2

Standard

Setup Dynamic Google Adwords Conversion Tracking in Magento/Magento 2 using Google Tag Manager without any plugins

Recently one client asks me to implement dynamic google ads conversion tracking in Magneto/Magento 2 using Google Tag Manager without any plugins, In Magento, the Order confirmation page you will not see any amount, you will see only order id, I used another technique to use get the total amount from order confirmation Magneto / Magento 2 using Google Tag Manager without any plugins, Get total amount of transaction from Order confirmation page of Magento / Magento 2 using Google Tag Manager to pass dynamically pass total revenue.

Step 1: Install Google Tag Manager on Magento / Magento 2 using Google Tag Manager to setup dynamic adword conversion tracking without any plugins 

Paste this code as high in the <head> of the page as possible:
<!– Google Tag Manager –>
<script>(function(w,d,s,l,i){w[l]=w[l]||[];w[l].push({‘gtm.start’:
new Date().getTime(),event:’gtm.js’});var f=d.getElementsByTagName(s)[0],
j=d.createElement(s),dl=l!=’dataLayer’?’&l=’+l:”;j.async=true;j.src=
‘https://www.googletagmanager.com/gtm.js?id=’+i+dl;f.parentNode.insertBefore(j,f);
})(window,document,’script’,’dataLayer’,’GTM-XXXX’);</script>
<!– End Google Tag Manager –>
Additionally, paste this code immediately after the opening <body> tag:
<!– Google Tag Manager (noscript) –>
<noscript><iframe src=”https://www.googletagmanager.com/ns.html?id=GTM-XXXX”
height=”0″ width=”0″ style=”display:none;visibility:hidden”></iframe></noscript>
<!– End Google Tag Manager (noscript) –>

Note: Make you will replace GTM Tracking Code with your GTM ID XXXXX

It’s time to verify Get value of Dynamic adword/ Ads conversion tracking in Magento / Magento 2 using Google Tag Manager without any plugins 

Adwords Conversion Tracking in Magento

Get Dynamic Values in AdWords Conversion Tracking in Magento / Magento 2 using Google Tag Manager without any plugins

Warning: If you do n’t know about javascript or do n’t have developing knowledge then do n’t try to Setup Dynamic Google Adwords Conversion Tracking in Magento 2 that can broke your site, Cart and other functionality 

Disclaimer: Google tag manager belongs to Google property 

For Contact: mappchero@gmail.com

I am available for Hire on Freelancer: Freelancer.com

I am available for Hire on Upwork: Upwork.com

I am available for Hire on Peopleperhour: Peopleperhour.com

I am available for Hire on Guru: Guru.com

Integrate Facebook Conversion Pixel on Magento using Google Tag Manager

Standard

Integrate Facebook Pixel with Magento/Magento 2 using Google Tag Manager without any plugins

Recently once of client asked to implement Facebook pixel on Magento/Magneto 2 using Google Tag Manager without touching any code and Plugin of Mangento. Also client mentioned they want run dynamic Facebook pixel, so that he can retargeting with Facebook pixel with Manento/Magento 2 using Google Tag Manager without any plugins.

Standard Events for Facebook Pixel with Magneto/Mangento 2 using Google Tag Manager without any Plugin with dynamic parameters like content_type and either content_ids or contents

Facebook Conversion Pixel on Magento

Facebook Audience Pixel Tracking using Google Tag Manager

Step 1: Install Google Tag Manager on Advanced Magento Facebook Pixel Events for Dynamic Ads without Any Plugins using Google Tag Manager

Paste this code as high in the <head> of the page as possible:
<!– Google Tag Manager –>
<script>(function(w,d,s,l,i){w[l]=w[l]||[];w[l].push({‘gtm.start’:
new Date().getTime(),event:’gtm.js’});var f=d.getElementsByTagName(s)[0],
j=d.createElement(s),dl=l!=’dataLayer’?’&l=’+l:”;j.async=true;j.src=
‘https://www.googletagmanager.com/gtm.js?id=’+i+dl;f.parentNode.insertBefore(j,f);
})(window,document,’script’,’dataLayer’,’GTM-XXXX’);</script>
<!– End Google Tag Manager –>
Additionally, paste this code immediately after the opening <body> tag:
<!– Google Tag Manager (noscript) –>
<noscript><iframe src=”https://www.googletagmanager.com/ns.html?id=GTM-XXXX”
height=”0″ width=”0″ style=”display:none;visibility:hidden”></iframe></noscript>
<!– End Google Tag Manager (noscript) –>

Note: Make you will replace GTM Tracking Code with your GTM ID XXXXX

Step 2 – Product Page (ViewContent)– User visited to Product Page to setup viewContent get parameters pass to dynamic value to Facebook Pixel Remarketing on Magento/Magento 2

Facebook Pixels in Magento 2

Integrate Facebook Pixel On Magento/Magento 2 using Google Tag Manager without any plugins

Step 3 – Product Page (AddToCart)– User Visited to Product Page and Click on AddToCart, Product added to Shopping cart to setup Magento/ Magento 2 Facebook Pixel using Google Tag Manager without Any plugins

Facebook Pixel Integration Magento 2

Facebook Pixel implementation for magento 2 using Google Tag Manager without any plugins

Step 4InitiateCheckout –  When user started process to buy a product Magento 2 Facebook Pixel using Google Tag Manager without Any plugins

 Install Facebook Pixel on Magento 2

Magento 2 Facebook Pixel using Google Tag Manager without any plugins

Step 5Purchase –  When user completed purchase setup Facebook Pixel into Magento/Magento 2 using Google Tag Manager without any plugins

Facebook Pixel Integration Magento 2

Magento 2 Facebook Pixe using Google Tag Manager without any plugins

Warning: If you do n’t know about javascript or do n’t have developing knowledge then do n’t try to Advanced Mangento 2 Facebook Pixel Events for Dynamic Ads without Any Plugins  using Google Tag Manager that can broke your site, Cart and other functionality 

Disclaimer: Google tag manager belongs to Google property 

For Contact: mappchero@gmail.com

I am available for Hire on Freelancer: Freelancer.com

I am available for Hire on Upwork: Upwork.com

I am available for Hire on Peopleperhour: Peopleperhour.com

I am available for Hire on Guru: Guru.com

Magento 2 Google Analytics Ecommerce Tracking Using Google Tag Manager

Standard

                     Magento 2 Ecommerce and Enhanced Ecommerce (UA) Tracking using Google Analytic and Google Tag Manager

Recently once client asks me to implement e-commerce/enhanced Ecommerce tracking in Magneto 2 using Google Tag Manager! Way Magento 2 coding is different from Magento 1.1 – 1.9 . once I looked on Magento 2 , I said it’s possible both with google tag manager and putting datalayer on Magento 2 or Without touch code Magento 2 Also possible E-commerce tracking using Google Tag Manager!

When you will write e-commerce/ecommerce tracking for Magneto 2 , quite different from Magento to other version Mangento 1.1 -1.9. 

When you are write code Mangento 2 e-commerce make sure you are aware coding knowledge of Mangento other you will broke website!

Magento 2 Ecommerce & Enhanced Ecommerce Tracking using Google Tag Manager

Magento 2 Google Analytics Ecommerce

Magento 2 Google Analytics Ecommerce & Enhanced Ecommerce Tracking

First Install Google Tag Manager on Manento 2 Google Tag Manager Ecommerce Tracking on  Putting code <head> and <body>

Paste this code as high in the <head> of the page as possible:
<!– Google Tag Manager –>
<script>(function(w,d,s,l,i){w[l]=w[l]||[];w[l].push({‘gtm.start’:
new Date().getTime(),event:’gtm.js’});var f=d.getElementsByTagName(s)[0],
j=d.createElement(s),dl=l!=’dataLayer’?’&l=’+l:”;j.async=true;j.src=
‘https://www.googletagmanager.com/gtm.js?id=’+i+dl;f.parentNode.insertBefore(j,f);
})(window,document,’script’,’dataLayer’,’GTM-XXXX’);</script>
<!– End Google Tag Manager –>
Additionally, paste this code immediately after the opening <body> tag:
<!– Google Tag Manager (noscript) –>
<noscript><iframe src=”https://www.googletagmanager.com/ns.html?id=GTM-XXXX”
height=”0″ width=”0″ style=”display:none;visibility:hidden”></iframe></noscript>
<!– End Google Tag Manager (noscript) –>

Note: Make you will replace GTM Tracking Code with your GTM ID XXXXX

Written Php Code to get the value of product Array, total order value, Shipping value , Tax value and Order number on Magento 2 E-commerce/eCommerce Tracking using Data Layer on the website  

Written custom for Magento 2 E-commerce tracking using Google Tag Manager

<script type=”text/javascript”>
//<![CDATA[
window.dataLayer = window.dataLayer || [];
<?php >
dataLayer.push({
‘ecommerce’: {
‘purchase’: {
‘actionField’: {
‘id’: ‘<?php echo $order->getIncrementId()?>’, // Transaction ID. Required for purchases and refunds.
‘affiliation’: ‘test’,
‘revenue’: ‘<?php echo $orderTotal?>’, // Total transaction value (incl. tax and shipping)
‘tax’: ‘<?php echo $Tax?>’,

Now it’s time to verify result in Google Analytic tracking Implemented on Magento 2 E-commerce tracking 

Magento 2 Google Analytics Ecommerce

Magento 2 Google Analytics Enhanced Ecommerce

Warning:if you do n’t know about javascript/ Datalayer/Jquery or do n’t have developing knowledge then do n’t try Magento 2 Google Tag Manager Ecommerce Tracking without touching Codea custom javascript without using Any plugin that can broke your site, Cart and other functionality 

Disclaimer: Google tag manager belongs to Google property 

Disclaimer: Google tag manager belongs to Google property 

For Contact: mappchero@gmail.com

I am available for Hire on Freelancer: Freelancer.com

I am available for Hire on Upwork: Upwork.com

I am available for Hire on Peopleperhour: Peopleperhour.com

I am available for Hire on Guru: Guru.com

No Fields Found.

Magento Enhanced Ecommerce (UA) Tracking using Google Tag Manager without using Any plugin

Standard

Magento Enhanced Ecommerce (UA) Tracking using Google Tag Manager without using Any plugin or without any data layer code on the Magneto used only Custom Javascript

Recently once client asks to setup Magento Enhanced Ecommerce/Ecommerce Tracking (UA) Tracking using Google Tag Manager without any plugin or without putting a single code on the website , he scared because of customized theme. Once I have looked the website discussed which all possible using Custom Javscript using Google Tag Manager all the versions of Magento both edition community and enterprise.

Before tracking start project let me tell you what require to setup Enhanced Ecommerce/Ecommerce Tracking using Google Tag Manager for Magento.

Implement using a Custom JavaScript Macro using Google Tag Manager for Magento

Impression Data using Google Tag Manager

Impression Data using Google Tag Manager

Step 1. Measuring Product Impressions – To measure product impression to view a product to setup Magento Enhanced Ecommerce Tracking using Google Tag Manager without using Any plugin

Written a javascript to get the value of Name, SKU = ID, Price , Category and Brand

enhanced eCommerce Tracking

Setup Google Analytics Enhanced Ecommerce for Magento

Step 2. Measuring Additions – To measure add to cart from a shopping Cart to setup Magento Enhanced Ecommerce Tracking using Google Tag Manager without using Any plugin

Write a javascript to get the value of Name, SKU = ID, Price , Category and Brand

Magento Enhanced Ecommerce Tracking

Magento Google Tag Manager Enhanced Ecommerce

Step 3. Measuring a Checkout – To measure step of Checkout to setup Magento Enhanced Ecommerce Tracking using Google Tag Manager without using Any plugin


Step 4. Measuring a Purchases – To Measuring Purchases to setup Magento Enhanced Ecommerce Tracking using Google Tag Manager without using Any plugin

Google Analytics for Magento eCommerce Tracking

Implemented E-Commerce Tracking on Magento via Google Tag Manager

Warning:if you do n’t know about javascript or do n’t have developing knowledge then do n’t try to Magento Enhanced Ecommerce Tracking using Google Tag Manager without using Any plugin that can broke your site, Cart and other functionality 

Disclaimer: Google tag manager belongs to Google property 

For Contact: mappchero@gmail.com

No Fields Found.