To Implement Advance Facebook Pixel Setup Woocommerce using Google Tag Manager without Any Plugins
Recently once client asked me to set up Advance Faebook Pixel using Google Tag Manager in Woocommerce without putting Code on the website and he said website is fully customized but not update with Woocommerce version and not even use any plugin on the website. Then I have decided to implement through Google Tag Manager.
What is challenge here to set up entire advance facebook pixel using Google Tag Manager
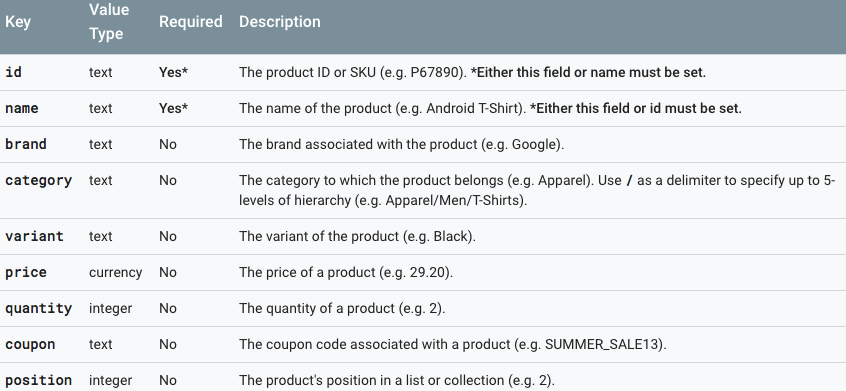
- ViewContent : To implement ‘ViewContent’ (viewed such as a product page) Require to value, currency, content_name, content_type, content_ids
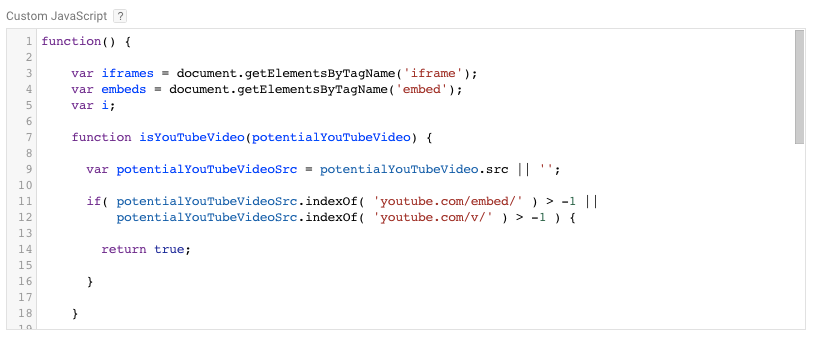
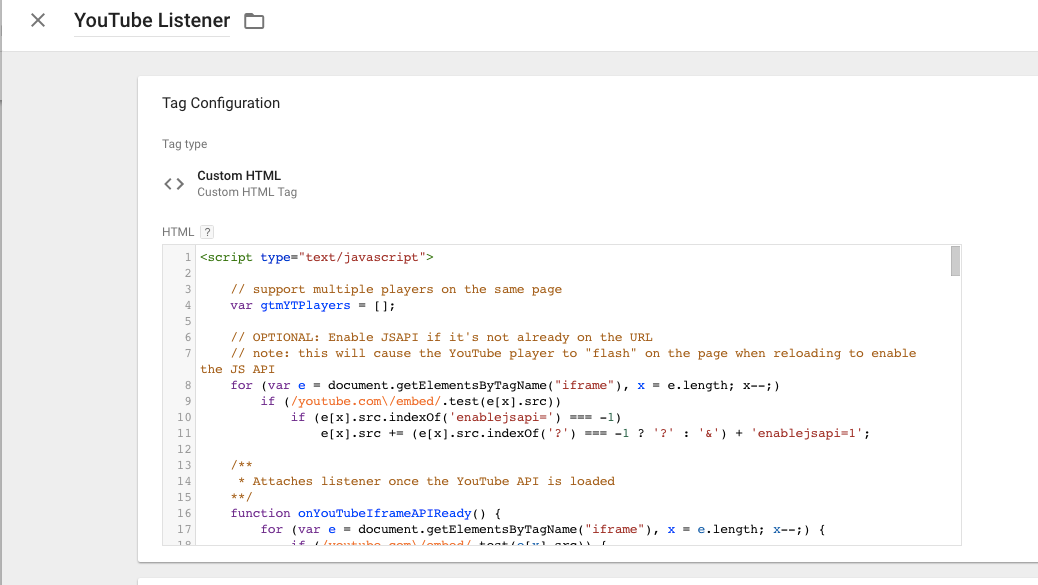
Here is difficult Part is How to get ‘content_ids’ I have decided to write a javascript to get product so that will work . After making couple hours testing to get product finally get its product using google tag manager that’s actually working.
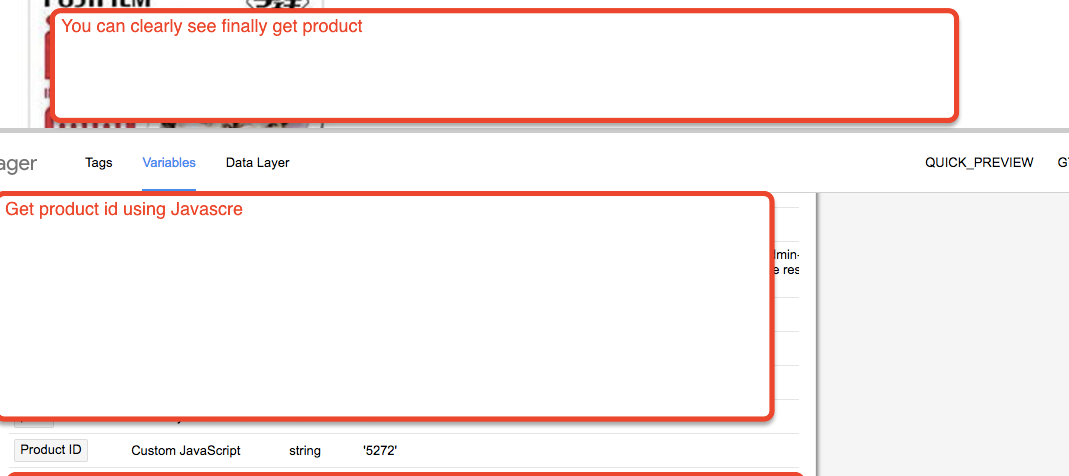
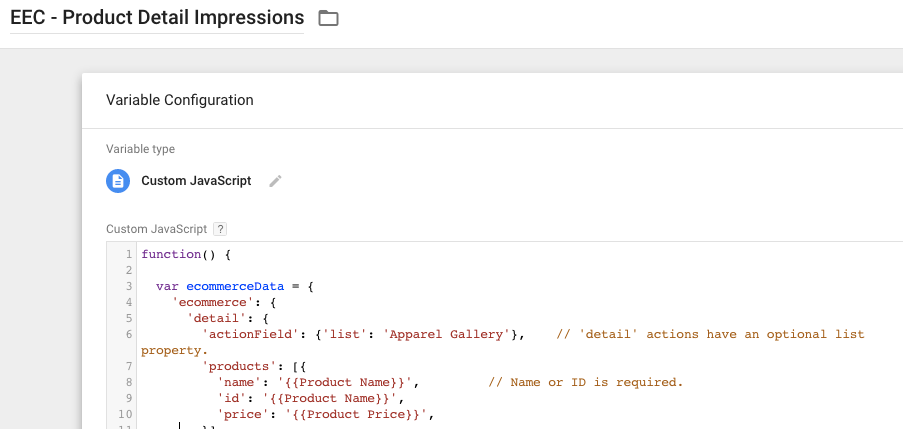
Woocommerce Product id using Google Tag Manager
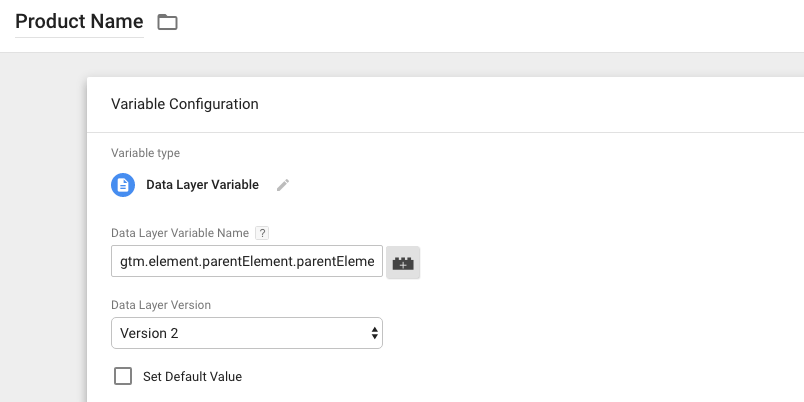
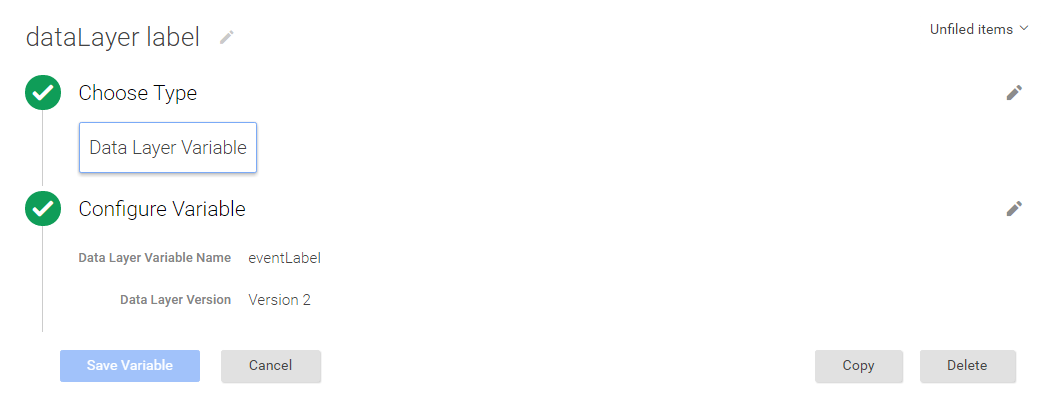
content_name: Now it’s time product name using Google Tag Manager and obviously using custom javascript and Jquery, it’s quite easy to get product name easily using custom javascript
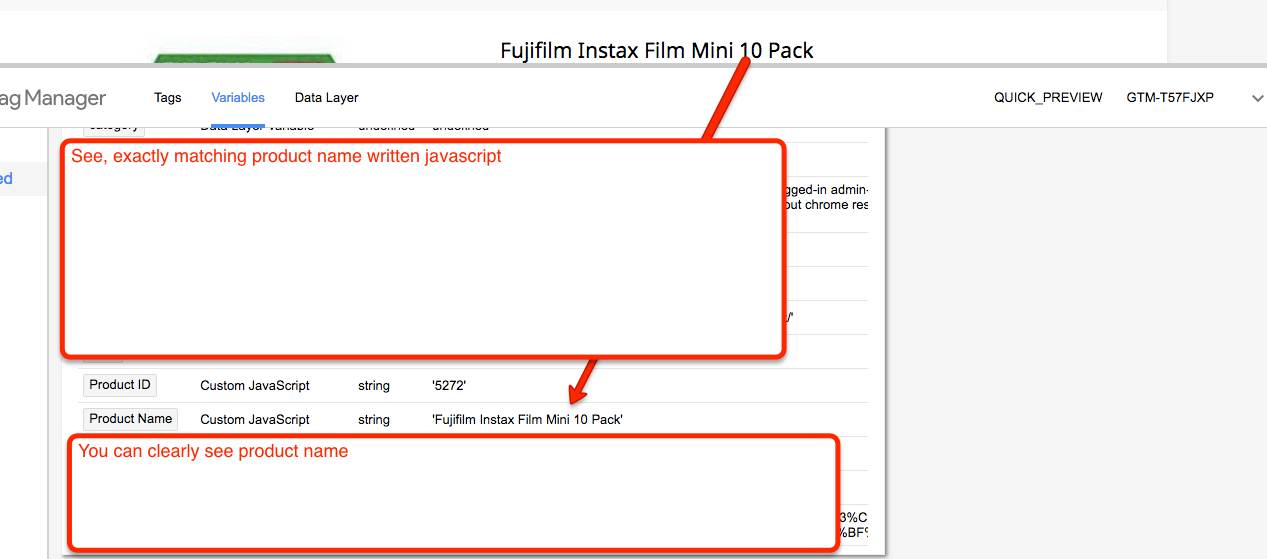
Product Name for Advance Facebook pixel
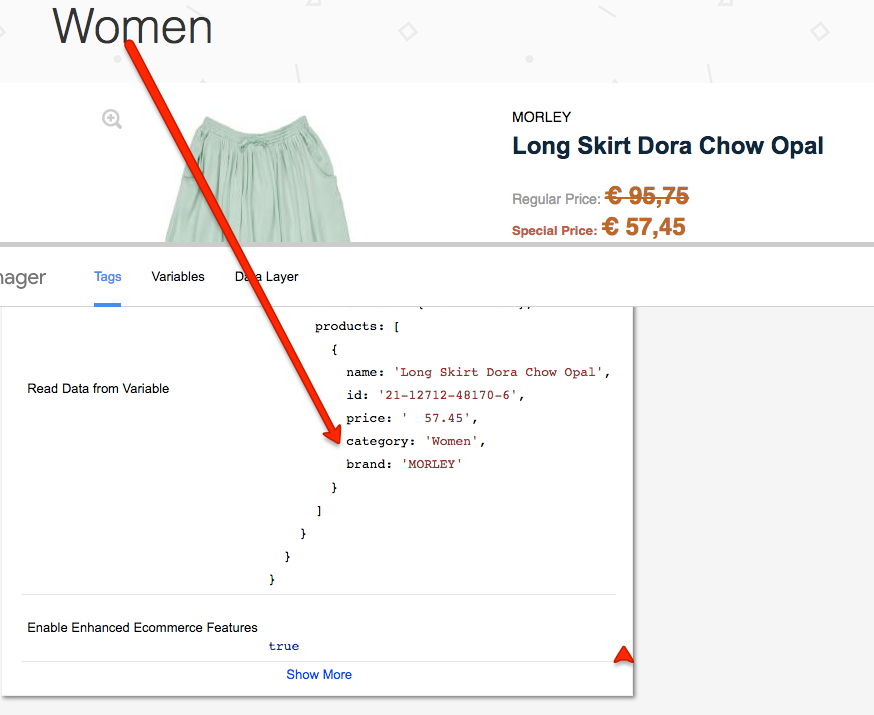
Value: Actually ‘value’ means product price without including revenue, symbol, To get product does not take much time getting the product price without revenue.
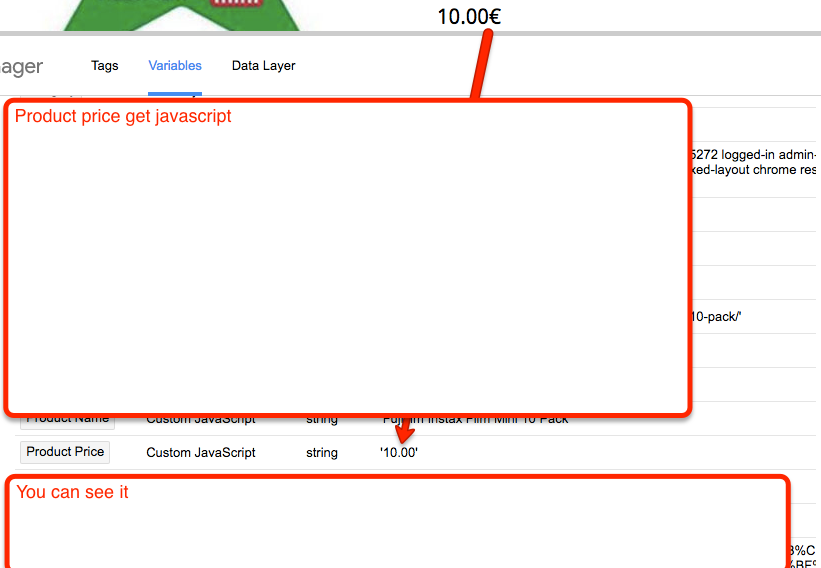
Get Product Price in Woocommerce using Google Tag Manager
content_type: For this ‘content_type’ actually does not require any javascript, just simply write “content_type: ‘product’ “only that must be fire on product Pages
Finally got all the value now ready to implement on website let see result on Woocommerce for Advance Facebook Pixel.
Step 1.1 First Require to Setup Basic Facebook pixel on all the pages on Woocommerce with help of Google Tag Manaager
The pixel base code tracks activity on your website, providing a baseline for measuring specific events.
Copy the base code below and paste it between the header tags on every page of your website:
<!– Facebook Pixel Code –>
<script>
!function(f,b,e,v,n,t,s)
{if(f.fbq)return;n=f.fbq=function(){n.callMethod?
n.callMethod.apply(n,arguments):n.queue.push(arguments)};
if(!f._fbq)f._fbq=n;n.push=n;n.loaded=!0;n.version=’2.0′;
n.queue=[];t=b.createElement(e);t.async=!0;
t.src=v;s=b.getElementsByTagName(e)[0];
s.parentNode.insertBefore(t,s)}(window,document,’script’,
fbq(‘init’, ‘xxxxxxxxxxxxxx’);
fbq(‘track’, ‘PageView’);
</script>
<noscript>
<img height=”1″ width=”1″
&noscript=1″/>
</noscript>
<!– End Facebook Pixel Code –>
Note: Make sure you will replace ‘xxxxxxxxxxxxxx’ with actually facebook conversion id
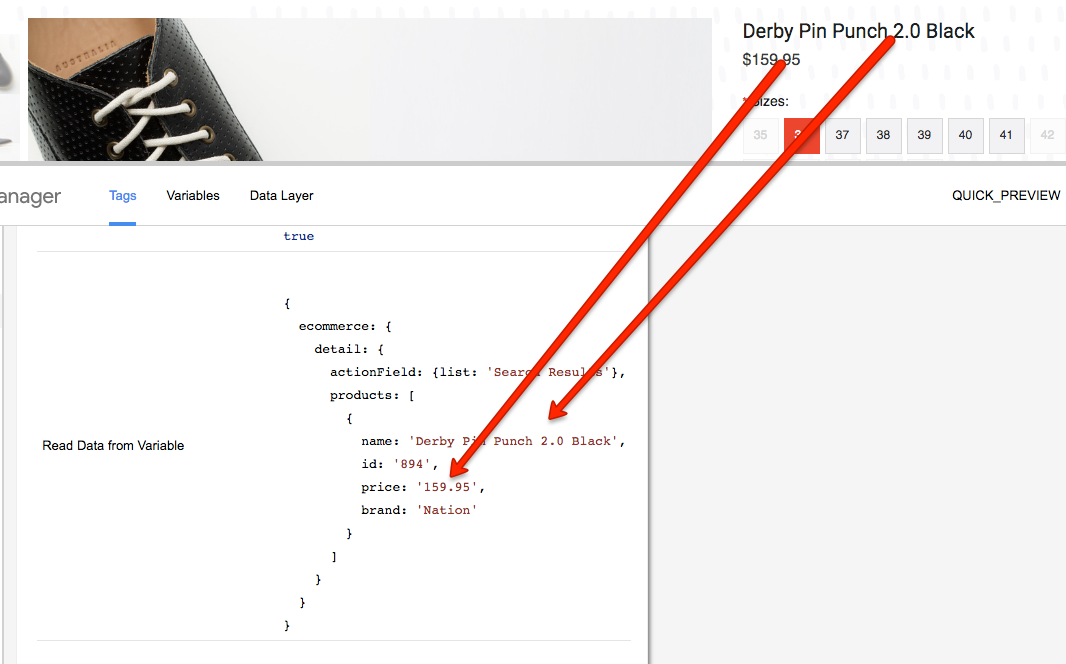
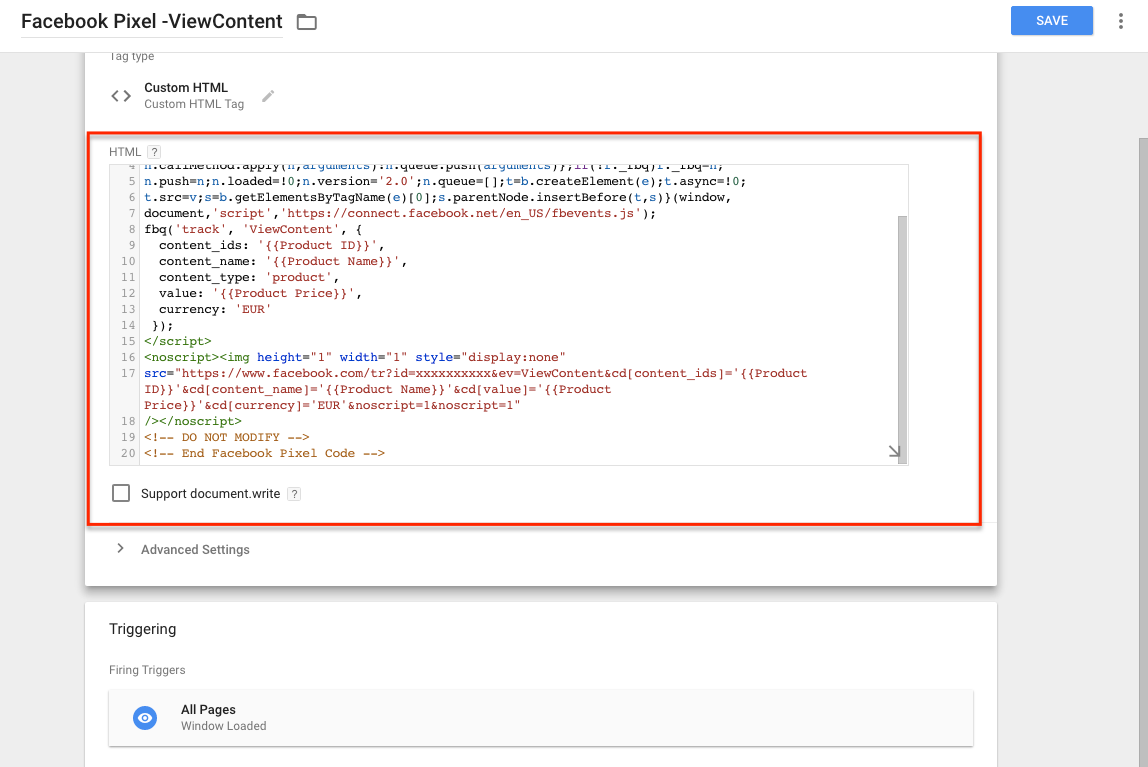
Step 1.2 ViewContent : Now it’s time to Set up ‘ViewContent’ pixel on the website on Woocommerce with help of Google Tag Manager.
<!– Facebook Pixel Code –>
<script>
!function(f,b,e,v,n,t,s){if(f.fbq)return;n=f.fbq=function(){n.callMethod?
n.callMethod.apply(n,arguments):n.queue.push(arguments)};if(!f._fbq)f._fbq=n;
n.push=n;n.loaded=!0;n.version=’2.0′;n.queue=[];t=b.createElement(e);t.async=!0;
t.src=v;s=b.getElementsByTagName(e)[0];s.parentNode.insertBefore(t,s)}(window,
document,’script’,’https://connect.facebook.net/en_US/fbevents.js’);
fbq(‘track’, ‘ViewContent’, {
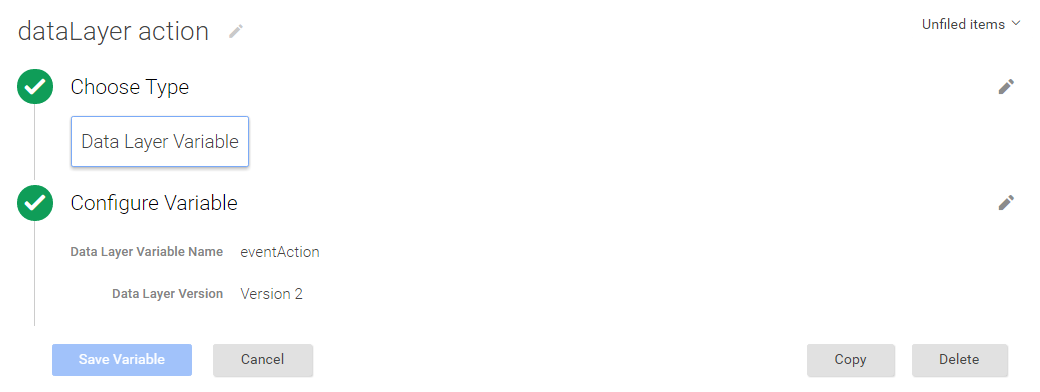
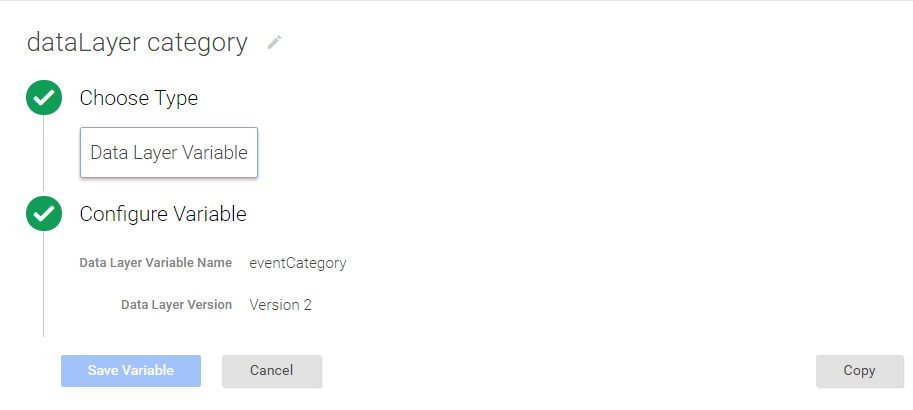
content_ids: ‘{{Product ID}}’,
content_name: ‘{{Product Name}}’,
content_type: ‘product’,
value: ‘{{Product Price}}’,
currency: ‘EUR’
});
</script>
<noscript><img height=”1″ width=”1″ style=”display:none”
src=”https://www.facebook.com/tr?id=xxxxxxxxx&ev=ViewContent&cd[content_ids]='{{Product ID}}’&cd[content_name]='{{Product Name}}’&cd[value]='{{Product Price}}’&cd[currency]=’EUR’&noscript=1&noscript=1″
/></noscript>
<!– DO NOT MODIFY –>
<!– End Facebook Pixel Code –>
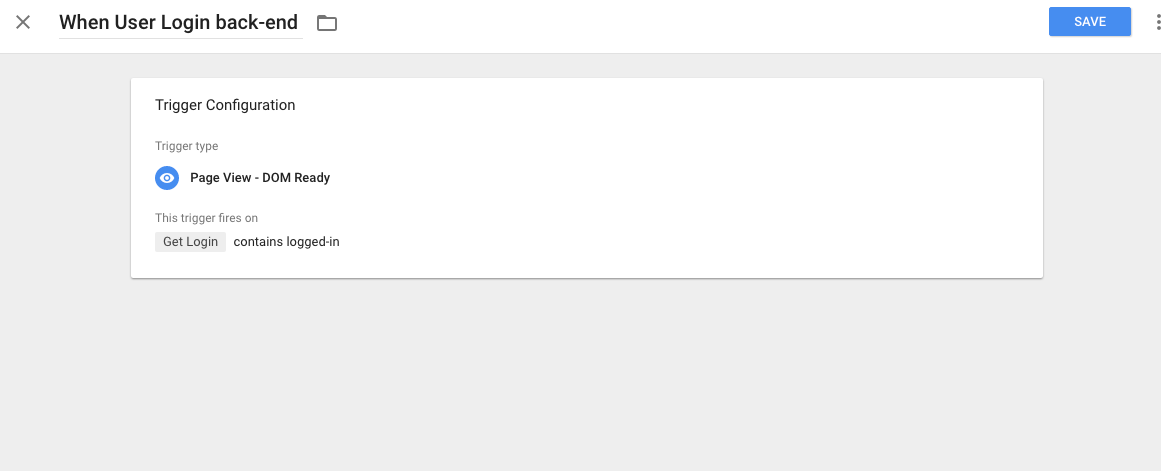
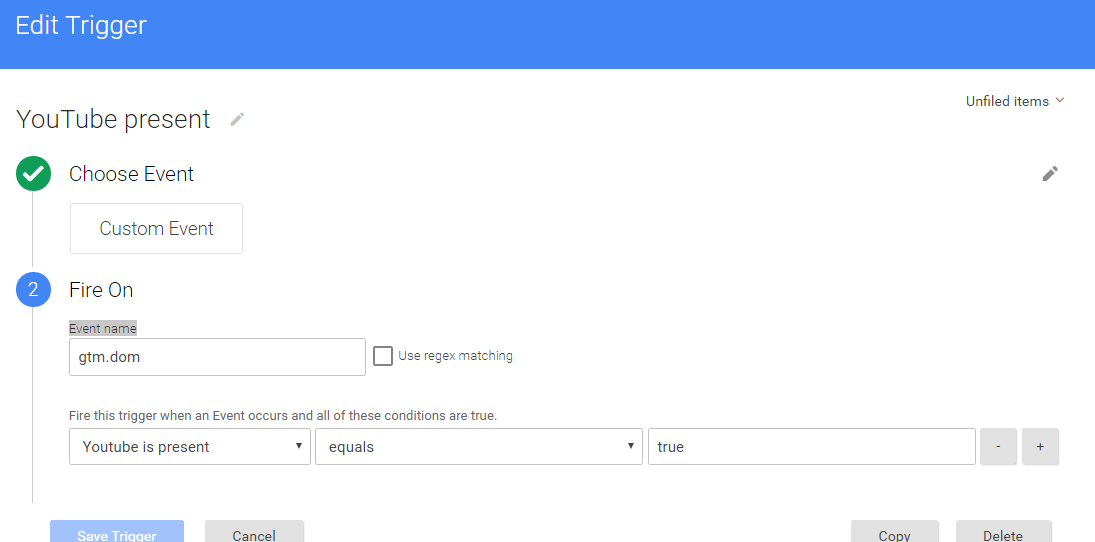
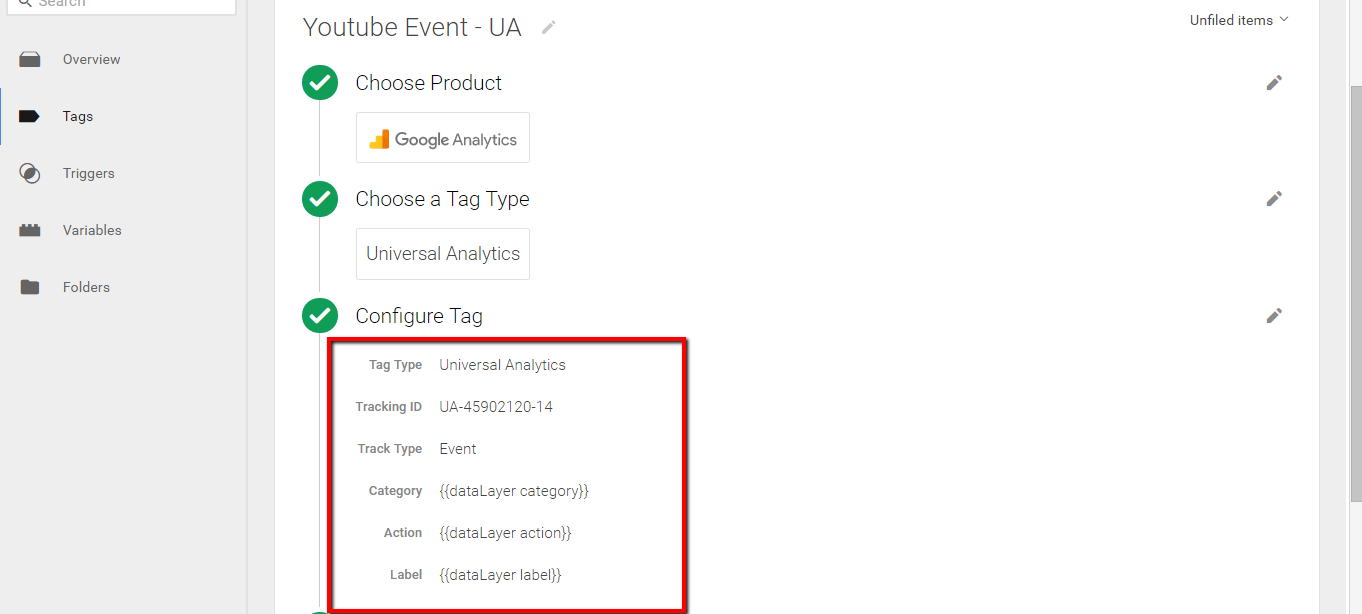
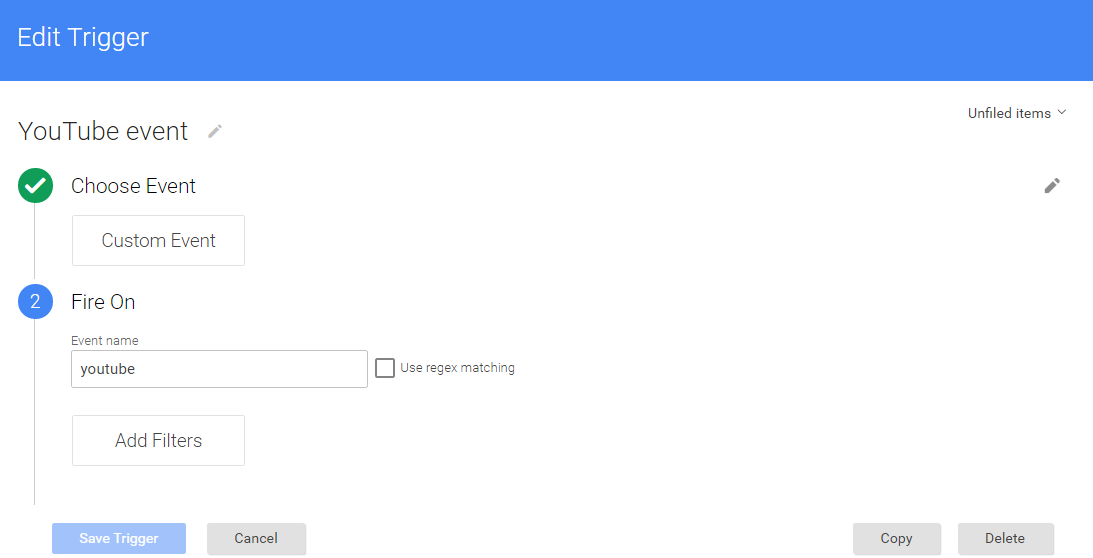
Now Configure Trigger, Tag and Event Triggers in Google Tag Manager in Woocommerce For Facebook Advance Pixel
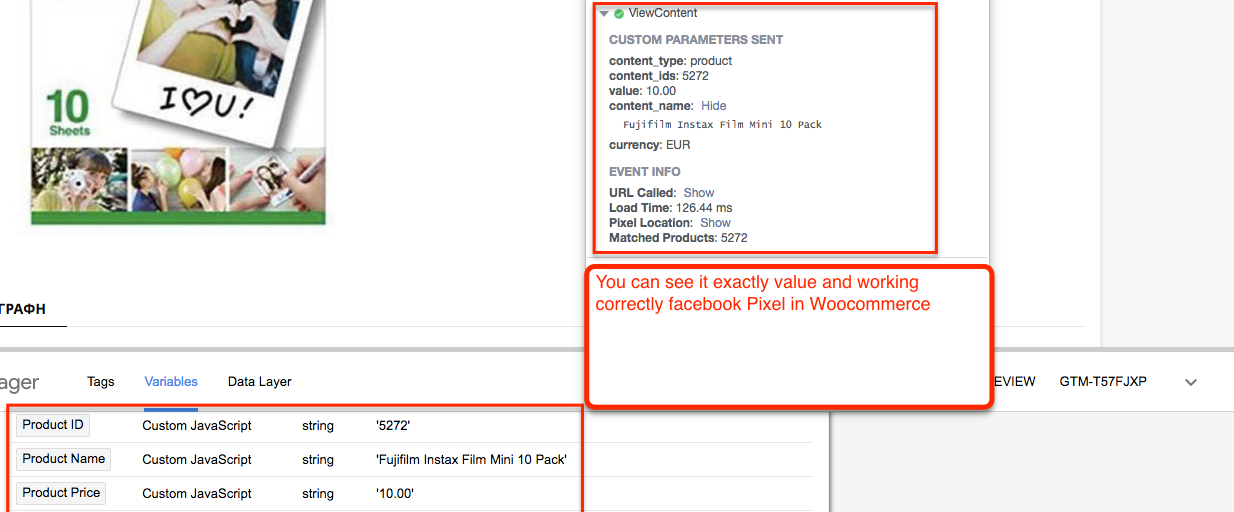
ViewContent Woocommerce Facebook Pixel using Google Tag Manager
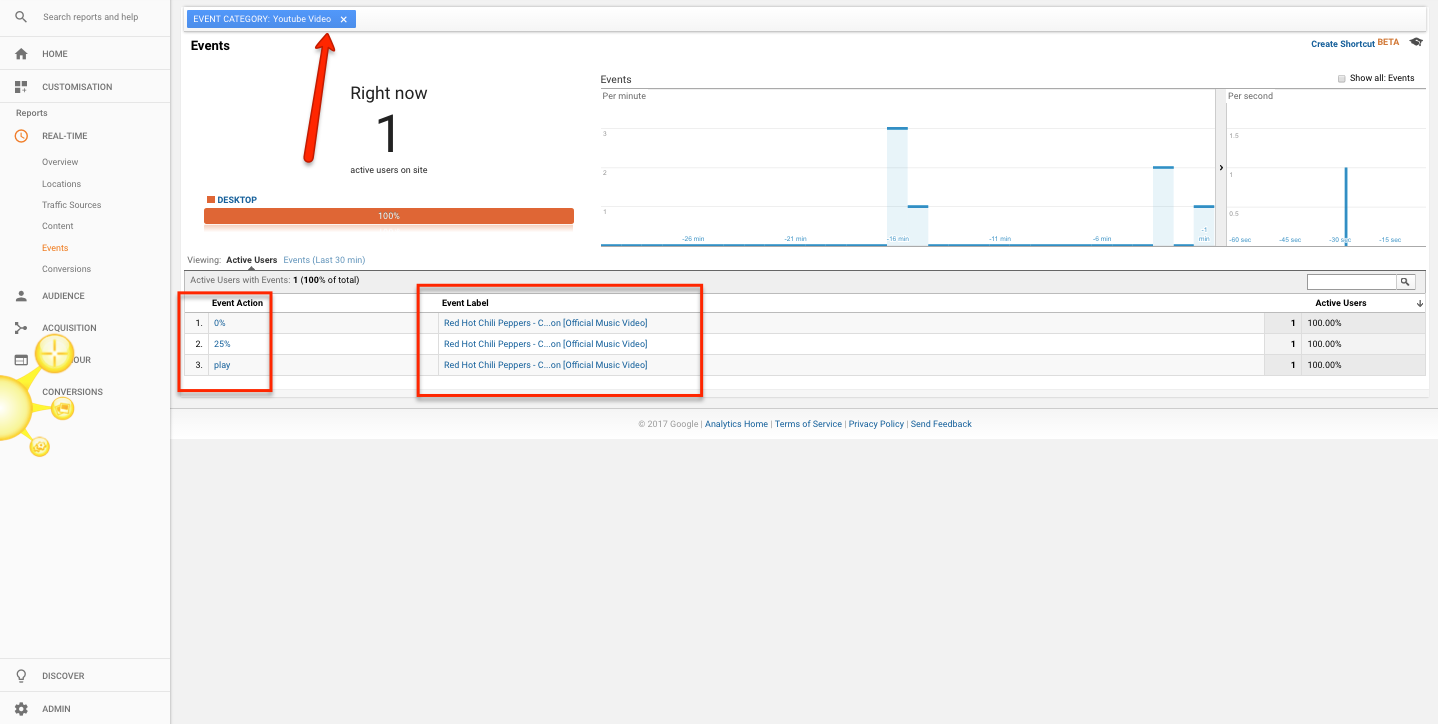
Now it’s time verify result using Facebook Pixel Helper.
Facebook Pixel to WordPress Without A Plugin
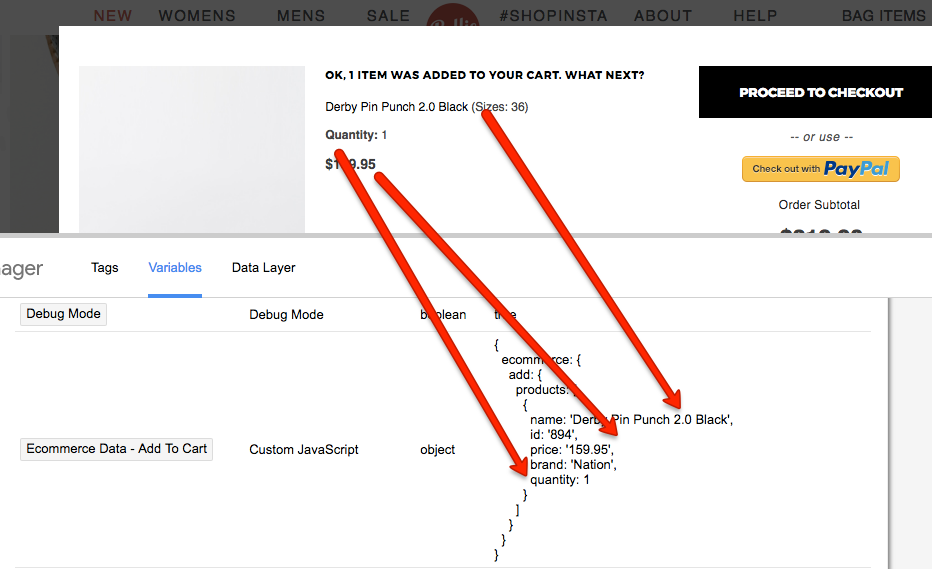
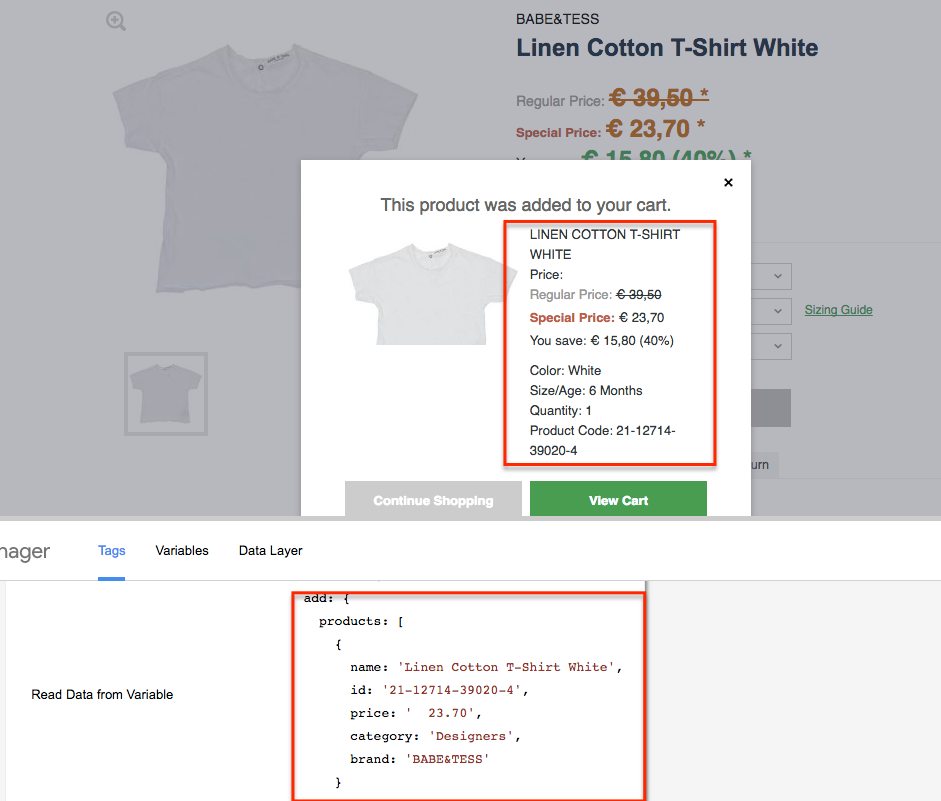
2. AddToCart: To implement ‘AddToCart’ (Product adding to shopping cart) Require to value, currency, content_name, content_type, content_ids, all the value already get above
<!– Facebook Pixel Code –>
<script>
!function(f,b,e,v,n,t,s){if(f.fbq)return;n=f.fbq=function(){n.callMethod?
n.callMethod.apply(n,arguments):n.queue.push(arguments)};if(!f._fbq)f._fbq=n;
n.push=n;n.loaded=!0;n.version=’2.0′;n.queue=[];t=b.createElement(e);t.async=!0;
t.src=v;s=b.getElementsByTagName(e)[0];s.parentNode.insertBefore(t,s)}(window,
document,’script’,’https://connect.facebook.net/en_US/fbevents.js’);
fbq(‘track’, ‘Add to cart’, {
content_ids: ‘{{Product ID}}’,
content_name: ‘{{Product Name}}’,
content_type: ‘product’,
value: ‘{{Product Price}}’,
currency: ‘EUR’
});
</script>
<noscript><img height=”1″ width=”1″ style=”display:none”
src=”https://www.facebook.com/tr?id=xxxxxxxxx&ev=Add to cart&cd[content_ids]='{{Product ID}}’&cd[content_name]='{{Product Name}}’&cd[value]='{{Product Price}}’&cd[currency]=’EUR’&noscript=1&noscript=1″
/></noscript>
<!– DO NOT MODIFY –>
<!– End Facebook Pixel Code –>
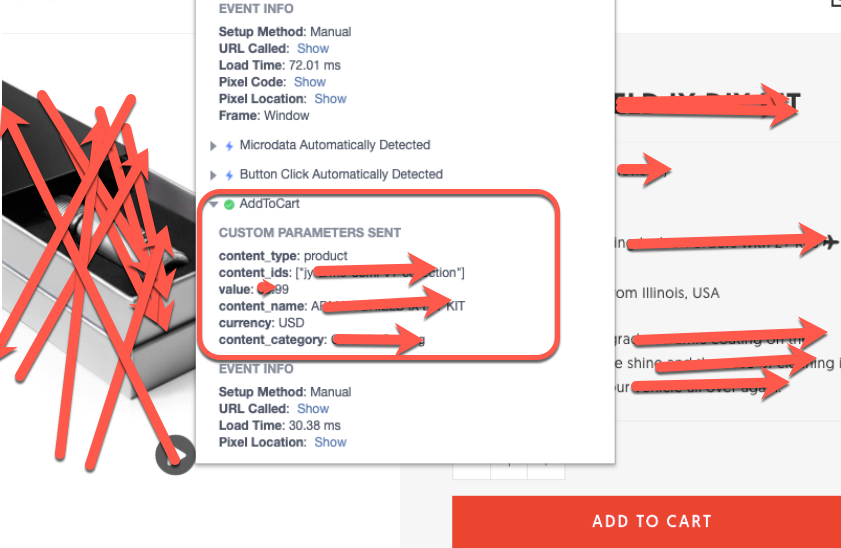
WooCommerce Facebook pixel with Dynamic Ads using Google Tag Manager
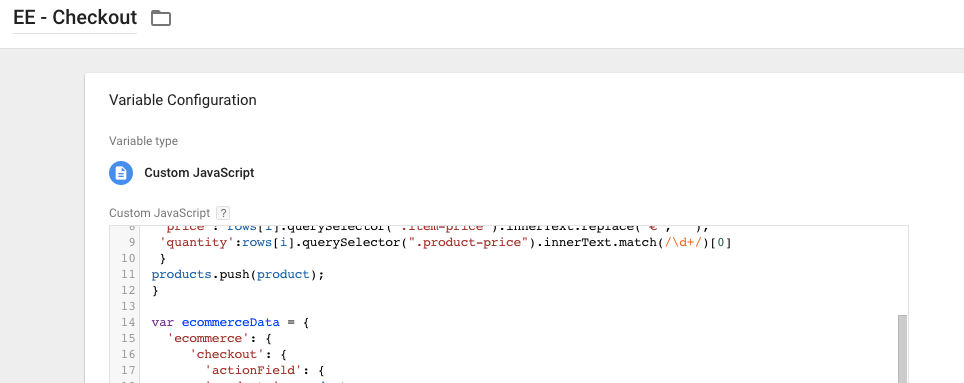
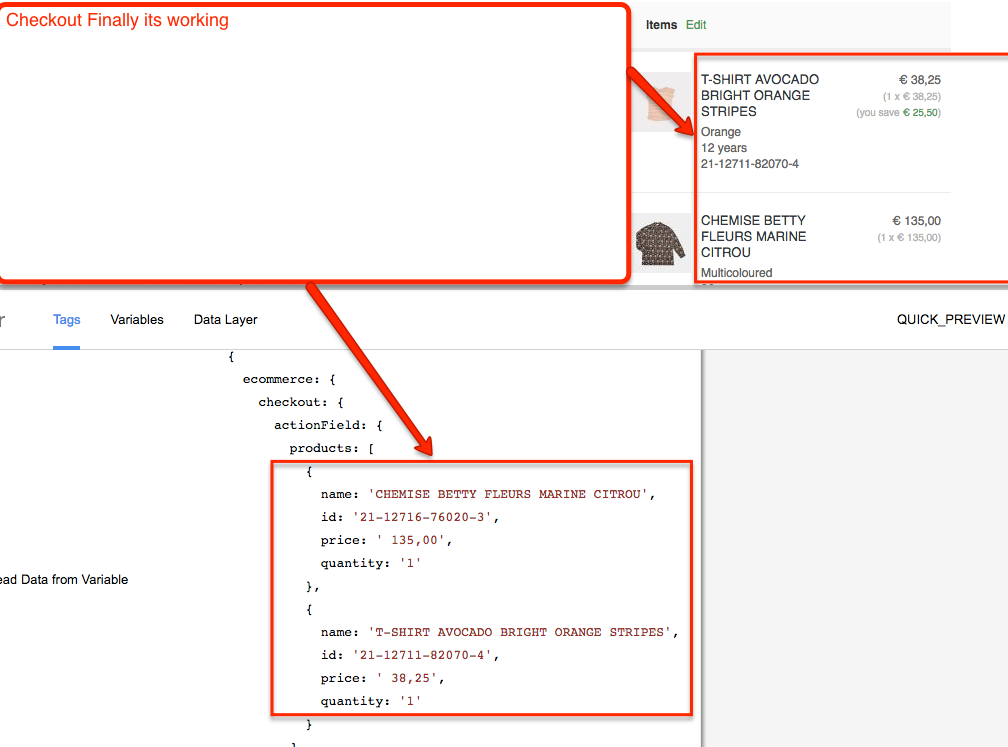
3. InitiateCheckout: To implement ‘InitiateCheckout‘ (Product adding to checkout page) Require to value, currency, content_name, content_type, content_ids, all the value already get above using Google Tag Manager without touching any Plugin
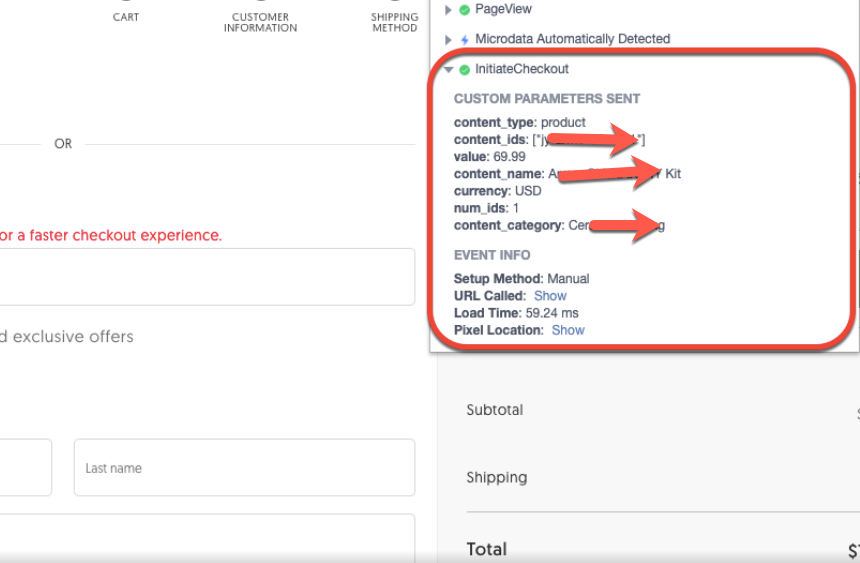
WooCommerce Facebook pixel using Google Tag Manager
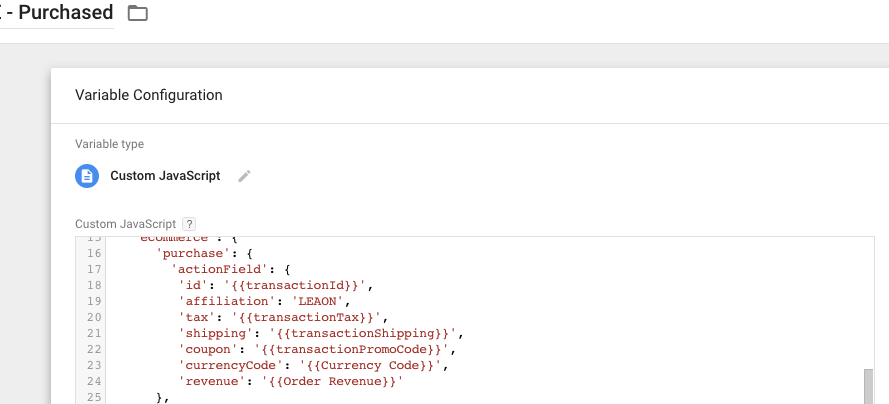
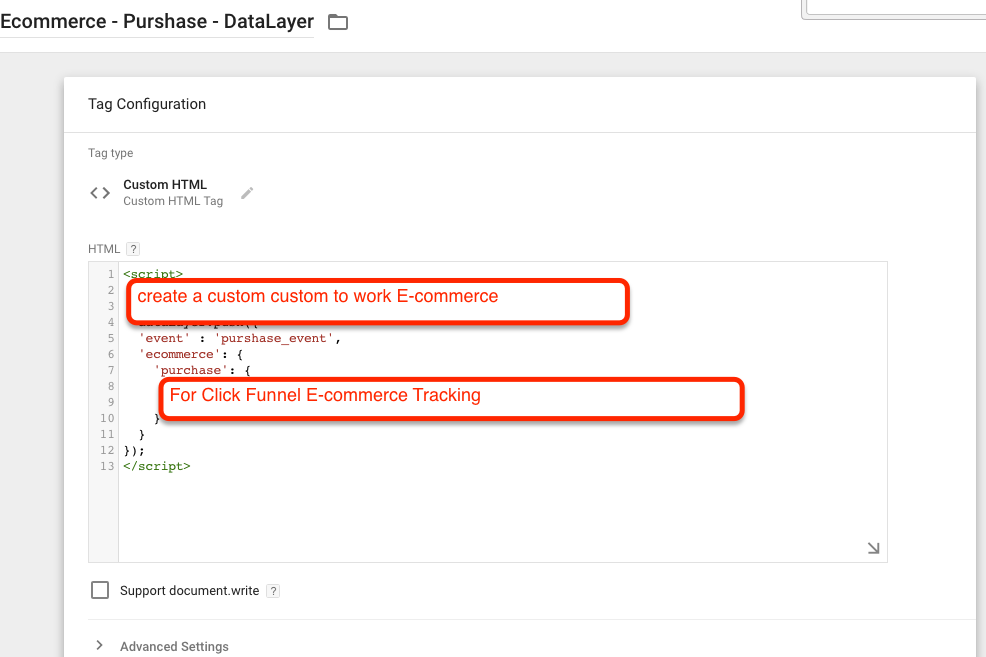
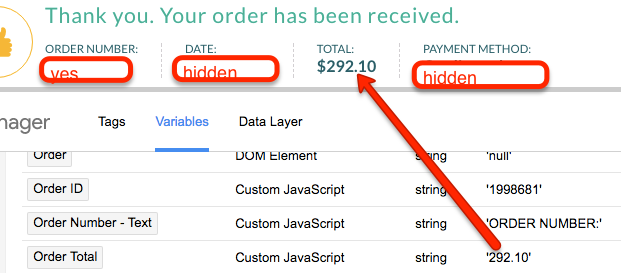
4. Purchase: To implement ‘Purchase‘ (on Order confirmation page for woocommerce ) Require to value, currency, content_name, content_type, content_ids, all the value already get above using Google Tag Manager without touching any Plugin
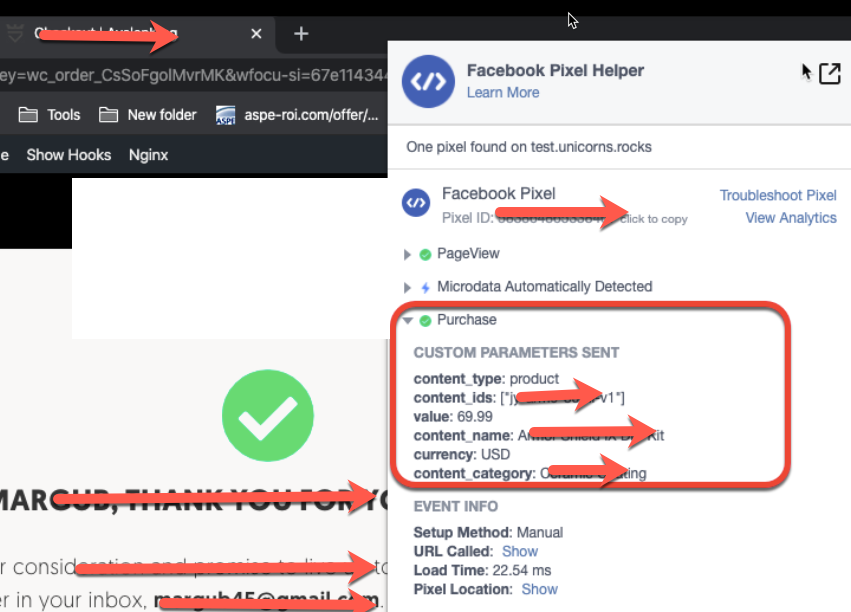
Track Facebook Pixel Conversion on WooCommerce using Google Tag Manager
Warning: If you do n’t know about javascript or do n’t have developing knowledge then do n’t try to Advance Facebook Pixel Setup for Woocommerce without Plugin using Google Tag Manager without touching website Code that can broke your site, Cart and other functionality
Disclaimer: Google tag manager belongs to Google property
For Contact: mappchero@gmail.com
I am available for Hire on Upwork: Upwork.com
I am available for Hire on Freelancer: Freelancer.com
I am available for Hire on Peopleperhour: Peopleperhour.com
I am available for Hire on Guru: Guru.com