GA4 Custom Event Tracking using Google Tag Manager

Standard

Google Analytics 4 (GA4) is the latest version of Google Analytics that provides enhanced tracking and analysis capabilities. GA4 Custom Event Tracking is a powerful tool within GA4 that allows website owners to track specific events on their website that are not tracked by default.

What is GA4 Custom Event Tracking?

GA4 Custom Event Tracking is a feature within Google Analytics 4 that allows website owners to track specific events on their website. These events can be anything from a button click to a form submission or any other custom interaction that occurs on your website. By tracking these events, you can gain valuable insights into how users are interacting with your website and make data-driven decisions to improve your website’s user experience.

Why is GA4 Custom Event Tracking important?

GA4 Custom Event Tracking is important because it allows you to track specific interactions on your website that are not tracked by default. This means that you can gain a more complete picture of how users are interacting with your website and identify areas for improvement. For example, if you have a contact form on your website, you may want to track how many users are submitting the form and which fields they are filling out. By tracking these events, you can identify any issues with the form that may be causing users to abandon it and make changes to improve the form’s user experience.

How does GA4 Custom Event Tracking work?

GA4 Custom Event Tracking works by using code snippets to send event data to Google Analytics. To set up custom event tracking in GA4, you will need to add code snippets to your website that send event data to GA4 when a specific interaction occurs. There are two main types of code snippets that you can use for custom event tracking in GA4: Global Site Tag (gtag.js) and Google Tag Manager (GTM).

Why Use Custom Event Tracking?

Custom event tracking provides valuable insights into user behavior that are not available through standard GA4 tracking. By tracking specific actions on your website or mobile app, you can:

Measure conversion rates: Custom event tracking allows you to track specific actions that lead to conversions on your website or mobile app. For example, if you want to track how many users completed a purchase, you can set up a custom event to track the “checkout complete” action.

Analyze user behavior: Custom event tracking allows you to understand how users interact with your website or mobile app. For example, if you want to track how many users clicked on a particular button, you can set up a custom event to track the “button click” action.

Optimize user experience: Custom event tracking allows you to identify areas of your website or mobile app that need improvement. For example, if you find that many users are abandoning their shopping carts, you can set up a custom event to track the “cart abandonment” action and optimize the checkout process.

How to Set Up Custom Event Tracking in GA4

Setting up custom event tracking in GA4 involves three main steps:

Define the event: The first step is to define the event you want to track. An event consists of four main components:
Event name: A descriptive name that identifies the event you want to track. For example, “button click” or “download file.”
Event parameters: Additional information about the event, such as the value of a button clicked or the name of a file downloaded.

Best Practices for Custom Event Tracking

To get the most out of custom event tracking in GA4, there are some best practices you should follow:

Define clear event parameters: Make sure you define clear and consistent event parameters across your website. This will make it easier to analyze the data and identify trends.

Don’t track too many events: While it’s tempting to track every user interaction on your website, this can lead to an overwhelming amount of data. Instead, focus on tracking the events that are most important for achieving your business goals.

Warning: If you don’t know about javascript or don’t have developing knowledge then don’t try to GA4 Custom Event Tracking using Google Tag Manager that can break your site, Cart and other functionality 

Disclaimer: Google tag manager belongs to Google property 

For Contact: mappchero@gmail.com

I am available for Hire on Freelancer: Freelancer.com

I am available for Hire on Upwork: Upwork.com

I am available for Hire on Peopleperhour: Peopleperhour.com

I am available for Hire on Guru: Guru.com

Migrating from Universal Analytics (GA) to GA4

Standard

Migrating from Universal Analytics (GA) to GA4 involves transitioning from the older, more established web analytics platform to the new and improved version. This process can be a bit complicated, but it’s worth it if you want to stay up-to-date with the latest features and functionality.

To start with the process, you will need to create a new GA4 property. This can be done through the Google Analytics interface by selecting the “Create Property” button and following the prompts. The new property will be separate from your existing Universal Analytics property, and you can have both properties running simultaneously during the migration process.

Once you have set up the new property, you’ll need to install the GA4 tracking code on your website or app. This is done by replacing the old Universal Analytics tracking code with the new GA4 tracking snippet. This code should be placed on every page of your website, and you should test to ensure that it’s working properly.

One of the significant differences between GA4 and Universal Analytics is the way event tracking is handled. In GA4, events are collected using an event-driven data model. This means that events are sent to Google Analytics when they occur, rather than when a page is loaded. As such, you’ll need to update any event tracking you have set up to match the new model. This may require more extensive changes to your tracking setup than a simple upgrade, and you should carefully evaluate your needs and goals before deciding to make the switch.

If you want to compare GA4 data to your existing Universal Analytics data, you can set up data imports to bring your historical data into GA4. This will allow you to see how your website or app has performed in the past and compare it to how it’s performing under the new tracking model.

It’s important to note that GA4 is not a direct replacement for Universal Analytics, and some features and reports may not be available in GA4. Additionally, because GA4 is a newer platform, some of the reports and features are still in beta and may change over time. However, GA4 does offer many new and improved features, including more advanced machine learning capabilities and cross-device tracking, which can help you better understand your audience and improve your marketing efforts.

Finally, once you have migrated to GA4, you will need to create new reports in the GA4 interface to view and analyze your data. The new interface may take some getting used to, but it offers many powerful tools for understanding your website or app’s performance.

Some of the new reports available in GA4 include:

User acquisition: This report shows how users are finding your website or app, including which channels are driving the most traffic and which campaigns are the most effective.

User engagement: This report provides insights into how users are interacting with your website or app, including which pages are the most popular and which actions users are taking.

Retention: This report shows how many users are returning to your website or app over time, and how often they are returning.

Monetization: This report provides insights into how your website or app is generating revenue, including which products or services are the most popular and which users are the most valuable.

In conclusion, migrating from Universal Analytics to GA4 requires some effort, but it’s worth it to take advantage of the new features and capabilities. By following the steps outlined above, you can make the transition smoothly and start benefiting from the new insights and data that GA4 provides.

Warning: If you don’t know about javascript or don’t have developing knowledge then don’t try to Migrating from Universal Analytics (GA) to GA4  that can break your site, Cart and other functionality 

Disclaimer: Google tag manager belongs to Google property 

For Contact: mappchero@gmail.com

I am available for Hire on Freelancer: Freelancer.com

I am available for Hire on Upwork: Upwork.com

I am available for Hire on Peopleperhour: Peopleperhour.com

I am available for Hire on Guru: Guru.com

Pestashop Google Ads Dynamic Remarketing Tags

Standard

Prestashop is an open-source e-commerce platform that allows businesses to create and manage an online store. It is a popular platform that is used by many businesses to sell their products online. Google Ads is an advertising platform that allows businesses to create and display ads on Google’s search engine and partner sites. Dynamic remarketing is a feature in Google Ads that allows businesses to show personalized ads to people who have previously visited their website or app.

Prestashop Google Ads Dynamic Remarketing Tags are a set of code snippets that need to be added to the Prestashop store’s pages in order to enable dynamic remarketing with Google Ads. These tags allow Google Ads to collect data about the products that people are viewing on the Prestashop store and use this data to show personalized ads to them on the Google Display Network.

The process of setting up Prestashop Google Ads Dynamic Remarketing Tags involves a few steps. First, the business needs to have a Google Ads account set up and linked to their Prestashop store. They also need to have enabled the Google Ads dynamic remarketing feature. Once these prerequisites are met, they can proceed with the following steps.

Install the Google Ads remarketing tag: The first step is to install the Google Ads remarketing tag on the Prestashop store. This involves copying the code provided by Google Ads and pasting it into the Prestashop store’s header section. The remarketing tag is a piece of JavaScript code that allows Google Ads to track the people who visit the store.

Add the product ID to the tag: The next step is to modify the Google Ads remarketing tag to include the product ID of the products that people view on the store. This is important because it allows Google Ads to collect data about the products that people are interested in and use this data to show personalized ads to them.

Add the product details to the tag: In addition to the product ID, businesses can also add other product details such as the product name, category, and price to the Google Ads remarketing tag. This information is useful for creating more personalized ads.

Configure the Google Ads campaign: Once the Google Ads remarketing tag is set up on the Prestashop store, the business needs to configure the Google Ads campaign. This involves setting up the targeting options, ad format, and ad content. The ads can be customized to show the products that people have viewed on the Prestashop store, as well as other related products.

By using dynamic remarketing with Google Ads, businesses can show highly relevant ads to people who have already shown an interest in their products. This can help increase conversions and drive more sales for the business. The personalized nature of the ads can also help build brand loyalty and keep people coming back to the store.

In addition to the benefits mentioned above, Prestashop Google Ads Dynamic Remarketing Tags offer several other advantages. For example:

Easy to set up: Setting up the Google Ads remarketing tag on a Prestashop store is relatively easy and can be done by anyone with basic technical knowledge.

Cost-effective: Dynamic remarketing with Google Ads can be a cost-effective way to drive more sales for the business. Since the ads are only shown to people who have already shown an interest in the products, the likelihood of conversion is higher.

Customizable: The ads can be customized to show the products that people have viewed on the Prestashop store, as well as other related products. This allows businesses to tailor the ads to the interests of the people who are most likely to convert.

In conclusion, Prestashop Google Ads Dynamic Remarketing Tags are an important tool for businesses that want to increase sales and build brand loyalty. By using dynamic remarketing with Google Ads, businesses

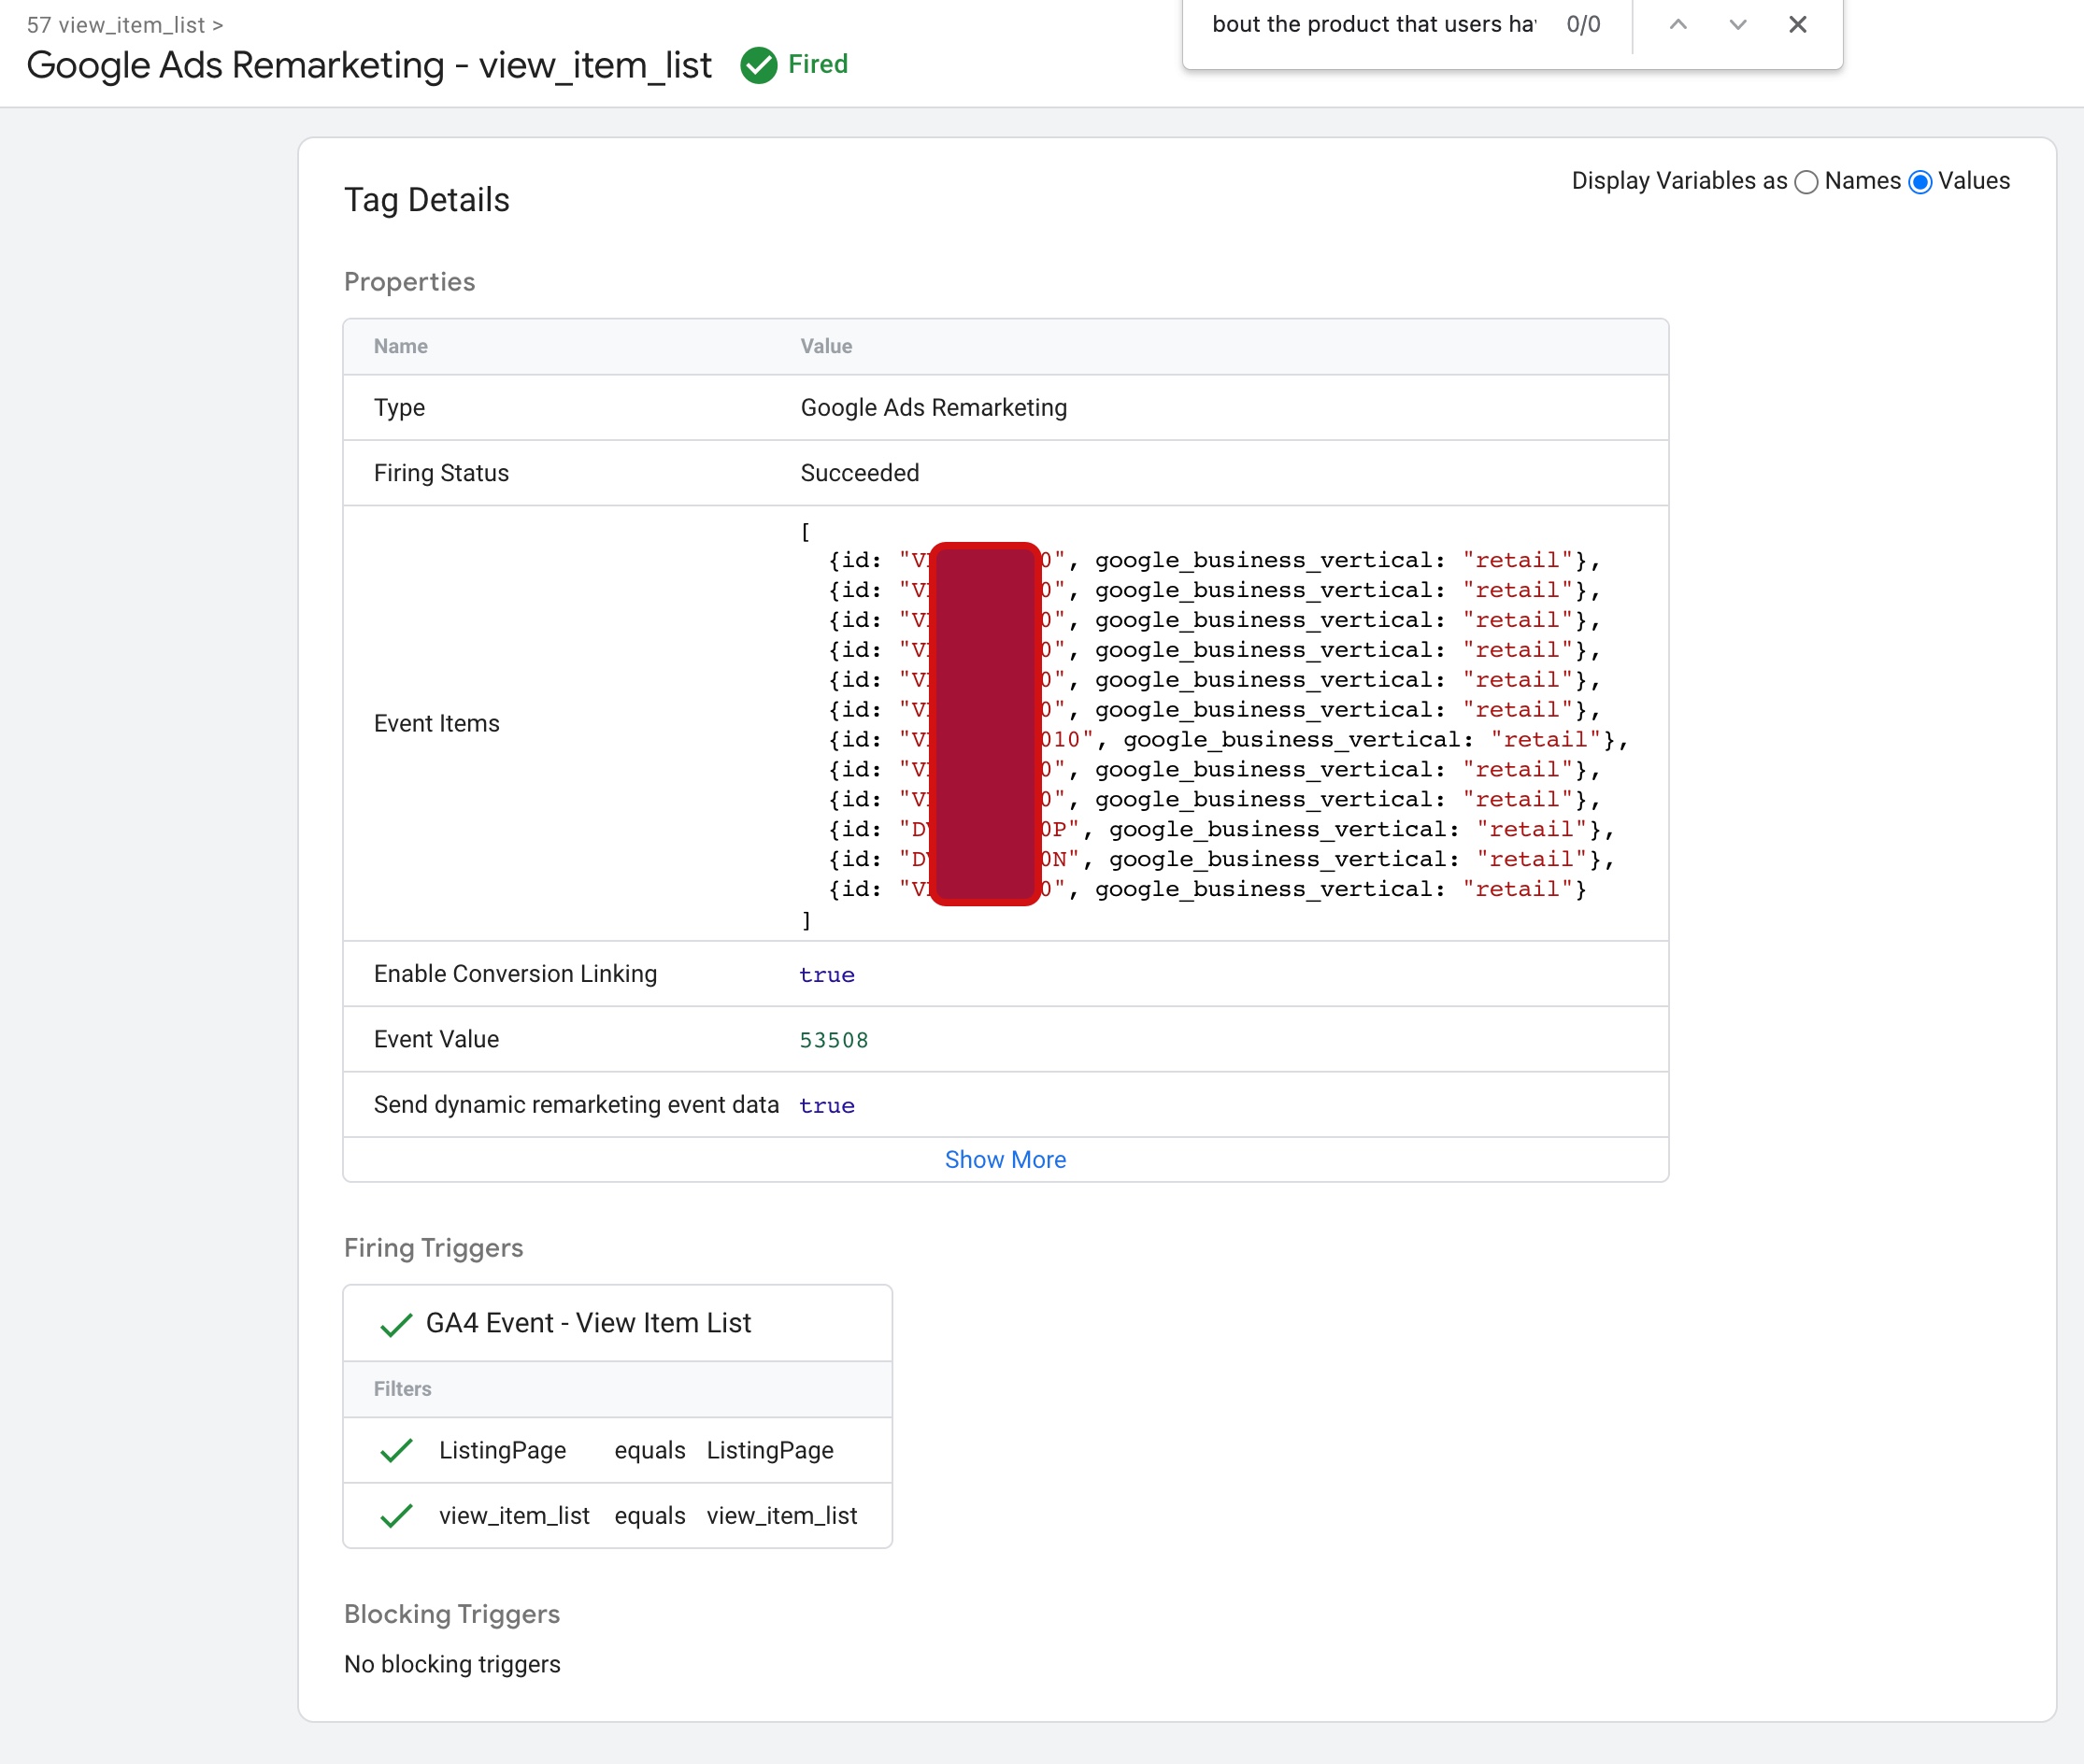
The Prestashop Dynamic Remarketing Tag view_item_list is a code snippet that can be added to a Prestashop store to track when a user views a list of products on a page. This tag is used in dynamic remarketing campaigns to collect data about the products that users have viewed and use this data to show personalized ads to them on the Google Display Network.

Dynamic Remarketing Google Ads

Google Dynamic Remarketing for PrestaShop using Google Tag Manager

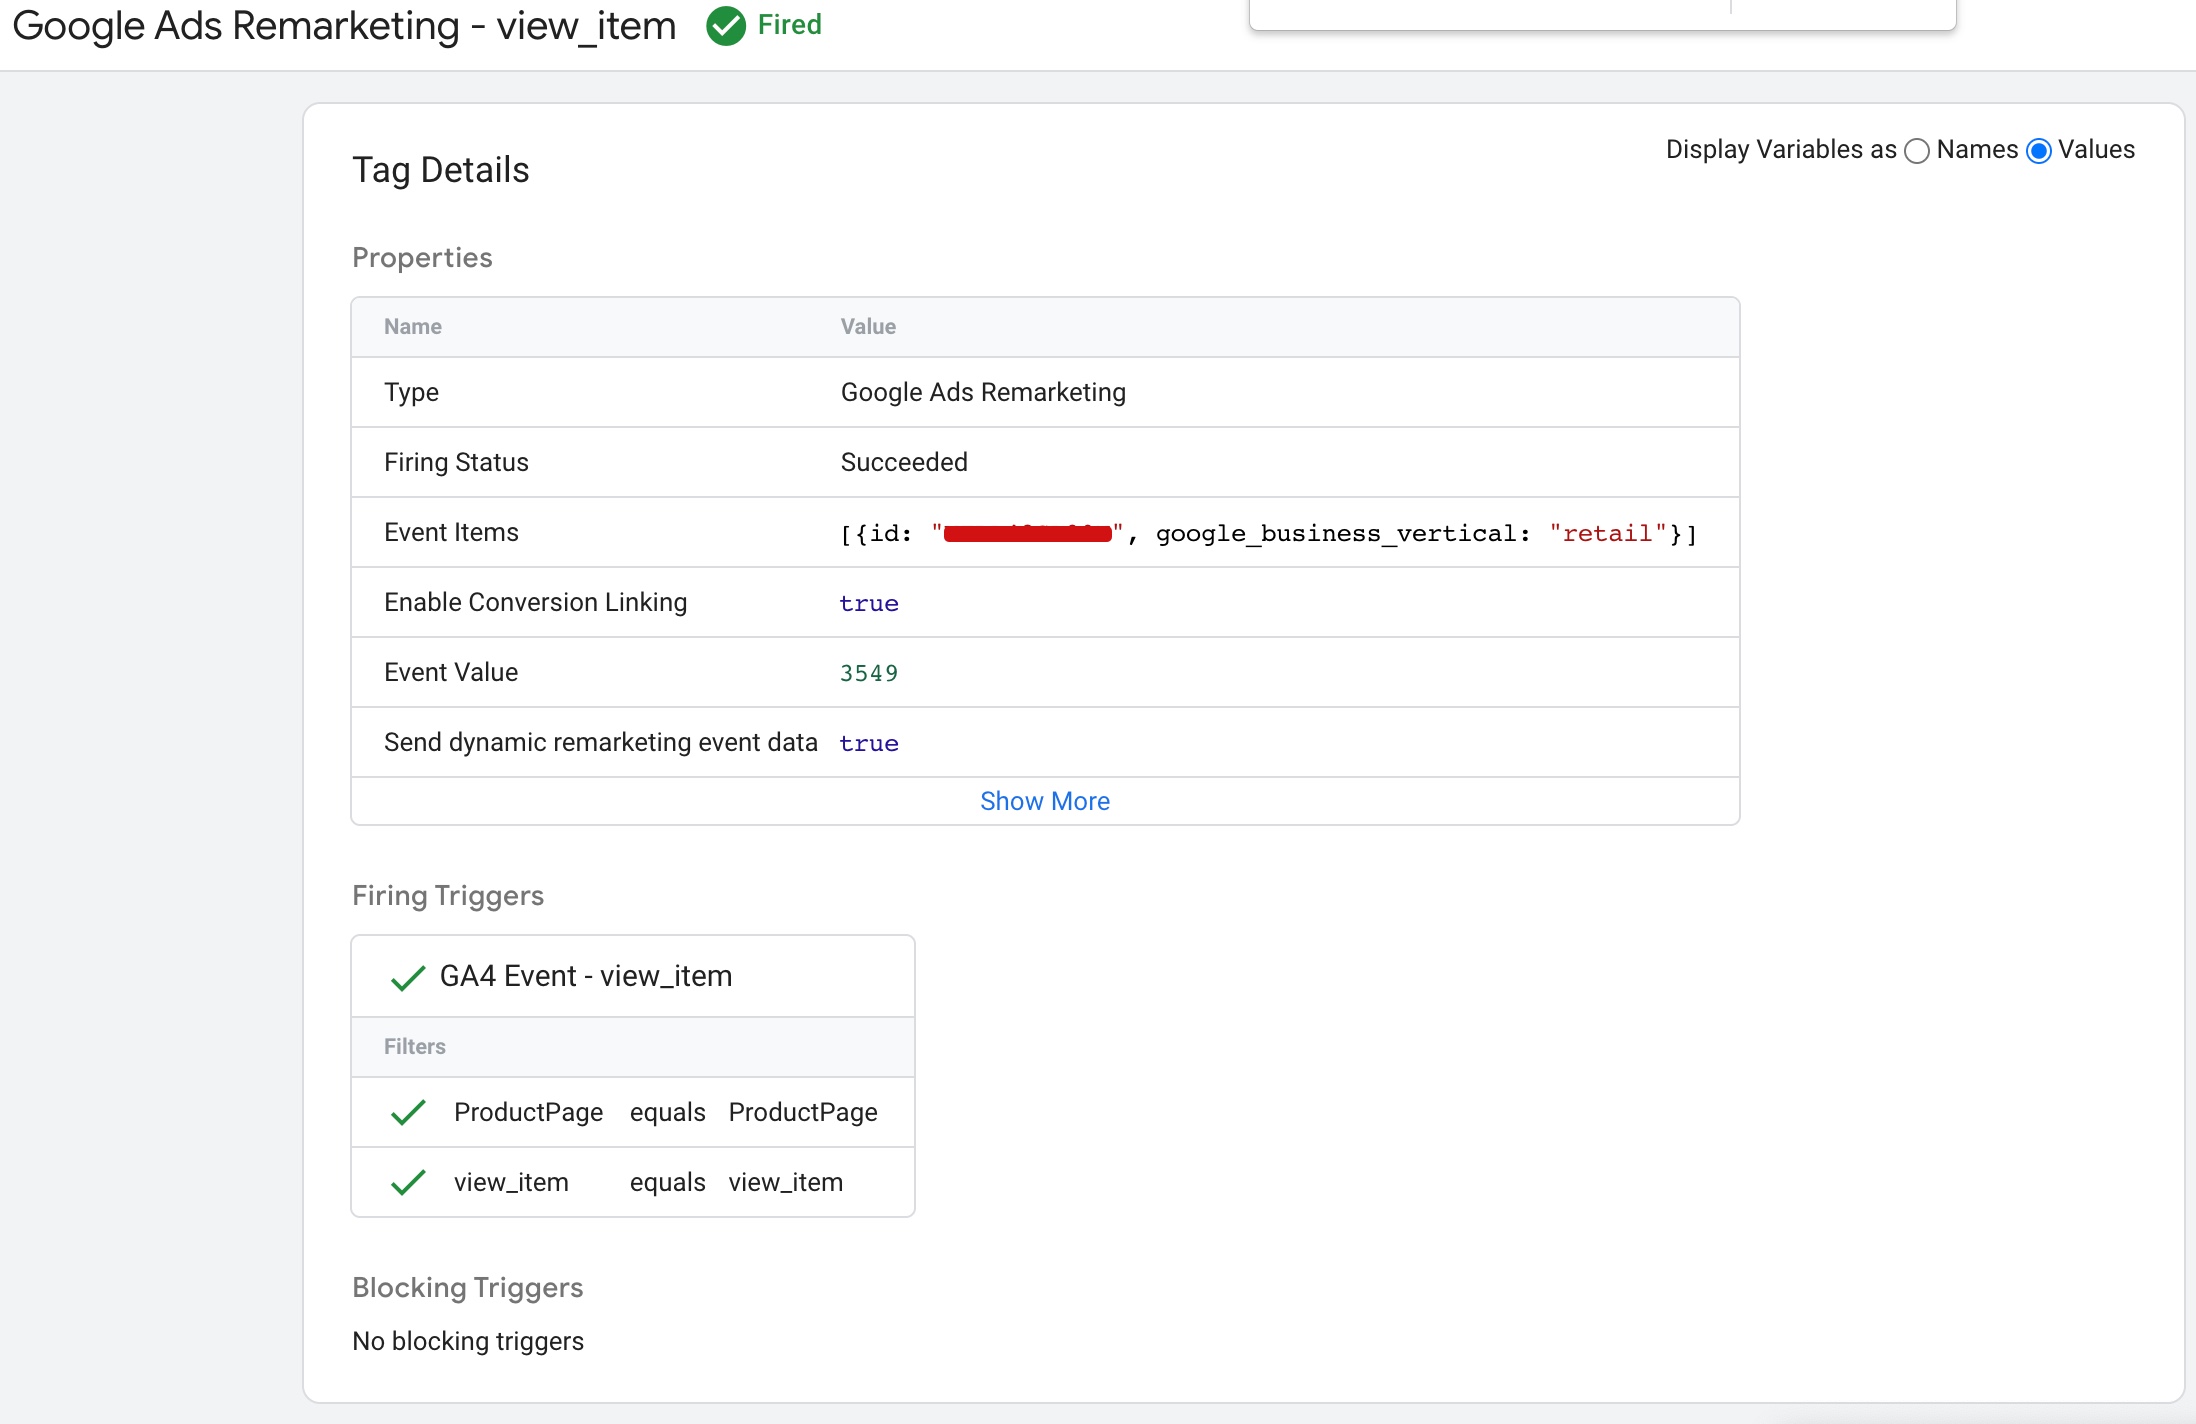
The Prestashop Dynamic Remarketing Tag view_item is a code snippet that can be added to a Prestashop store to track when a user views a specific product on a page. 

Google Dynamic Remarketing Tag for Prestashop

Prestashop Google Ads Dynamic Remarketing Tag Implementation using Google Tag Manager

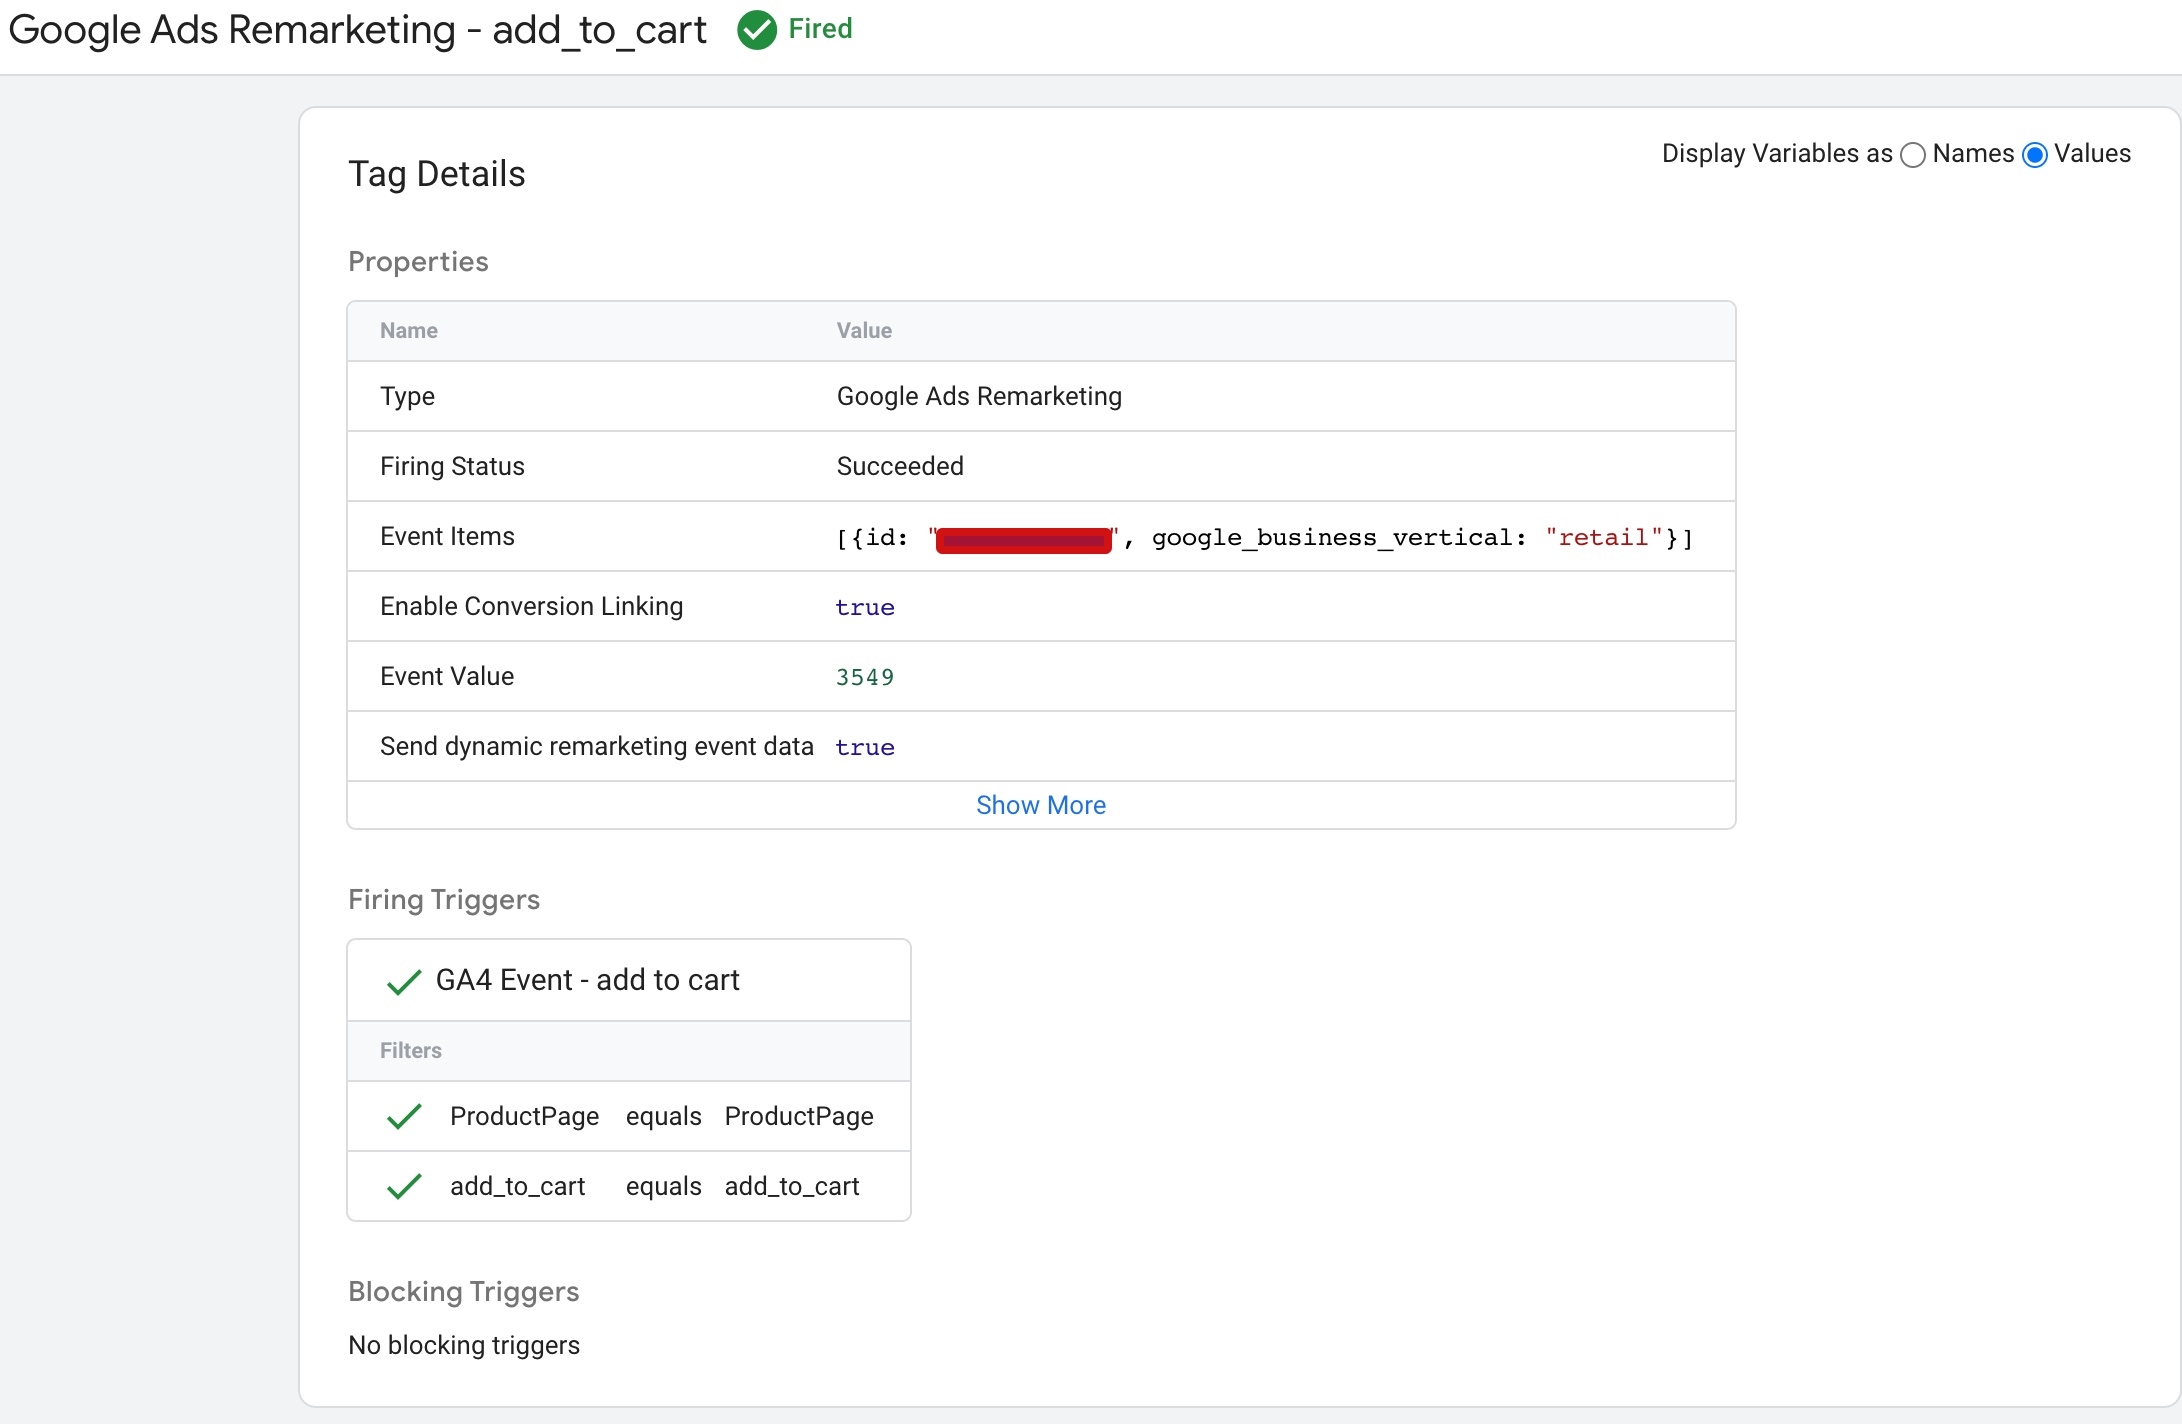
The Prestashop Dynamic Remarketing Tag add_to_cart is a code snippet that can be added to a Prestashop store to track when a user adds a product to their cart.

PrestaShop Dynamic Remarketing Google Ads

Google Dynamic Remarketing Tag for PrestaShop using Google Tag Manager

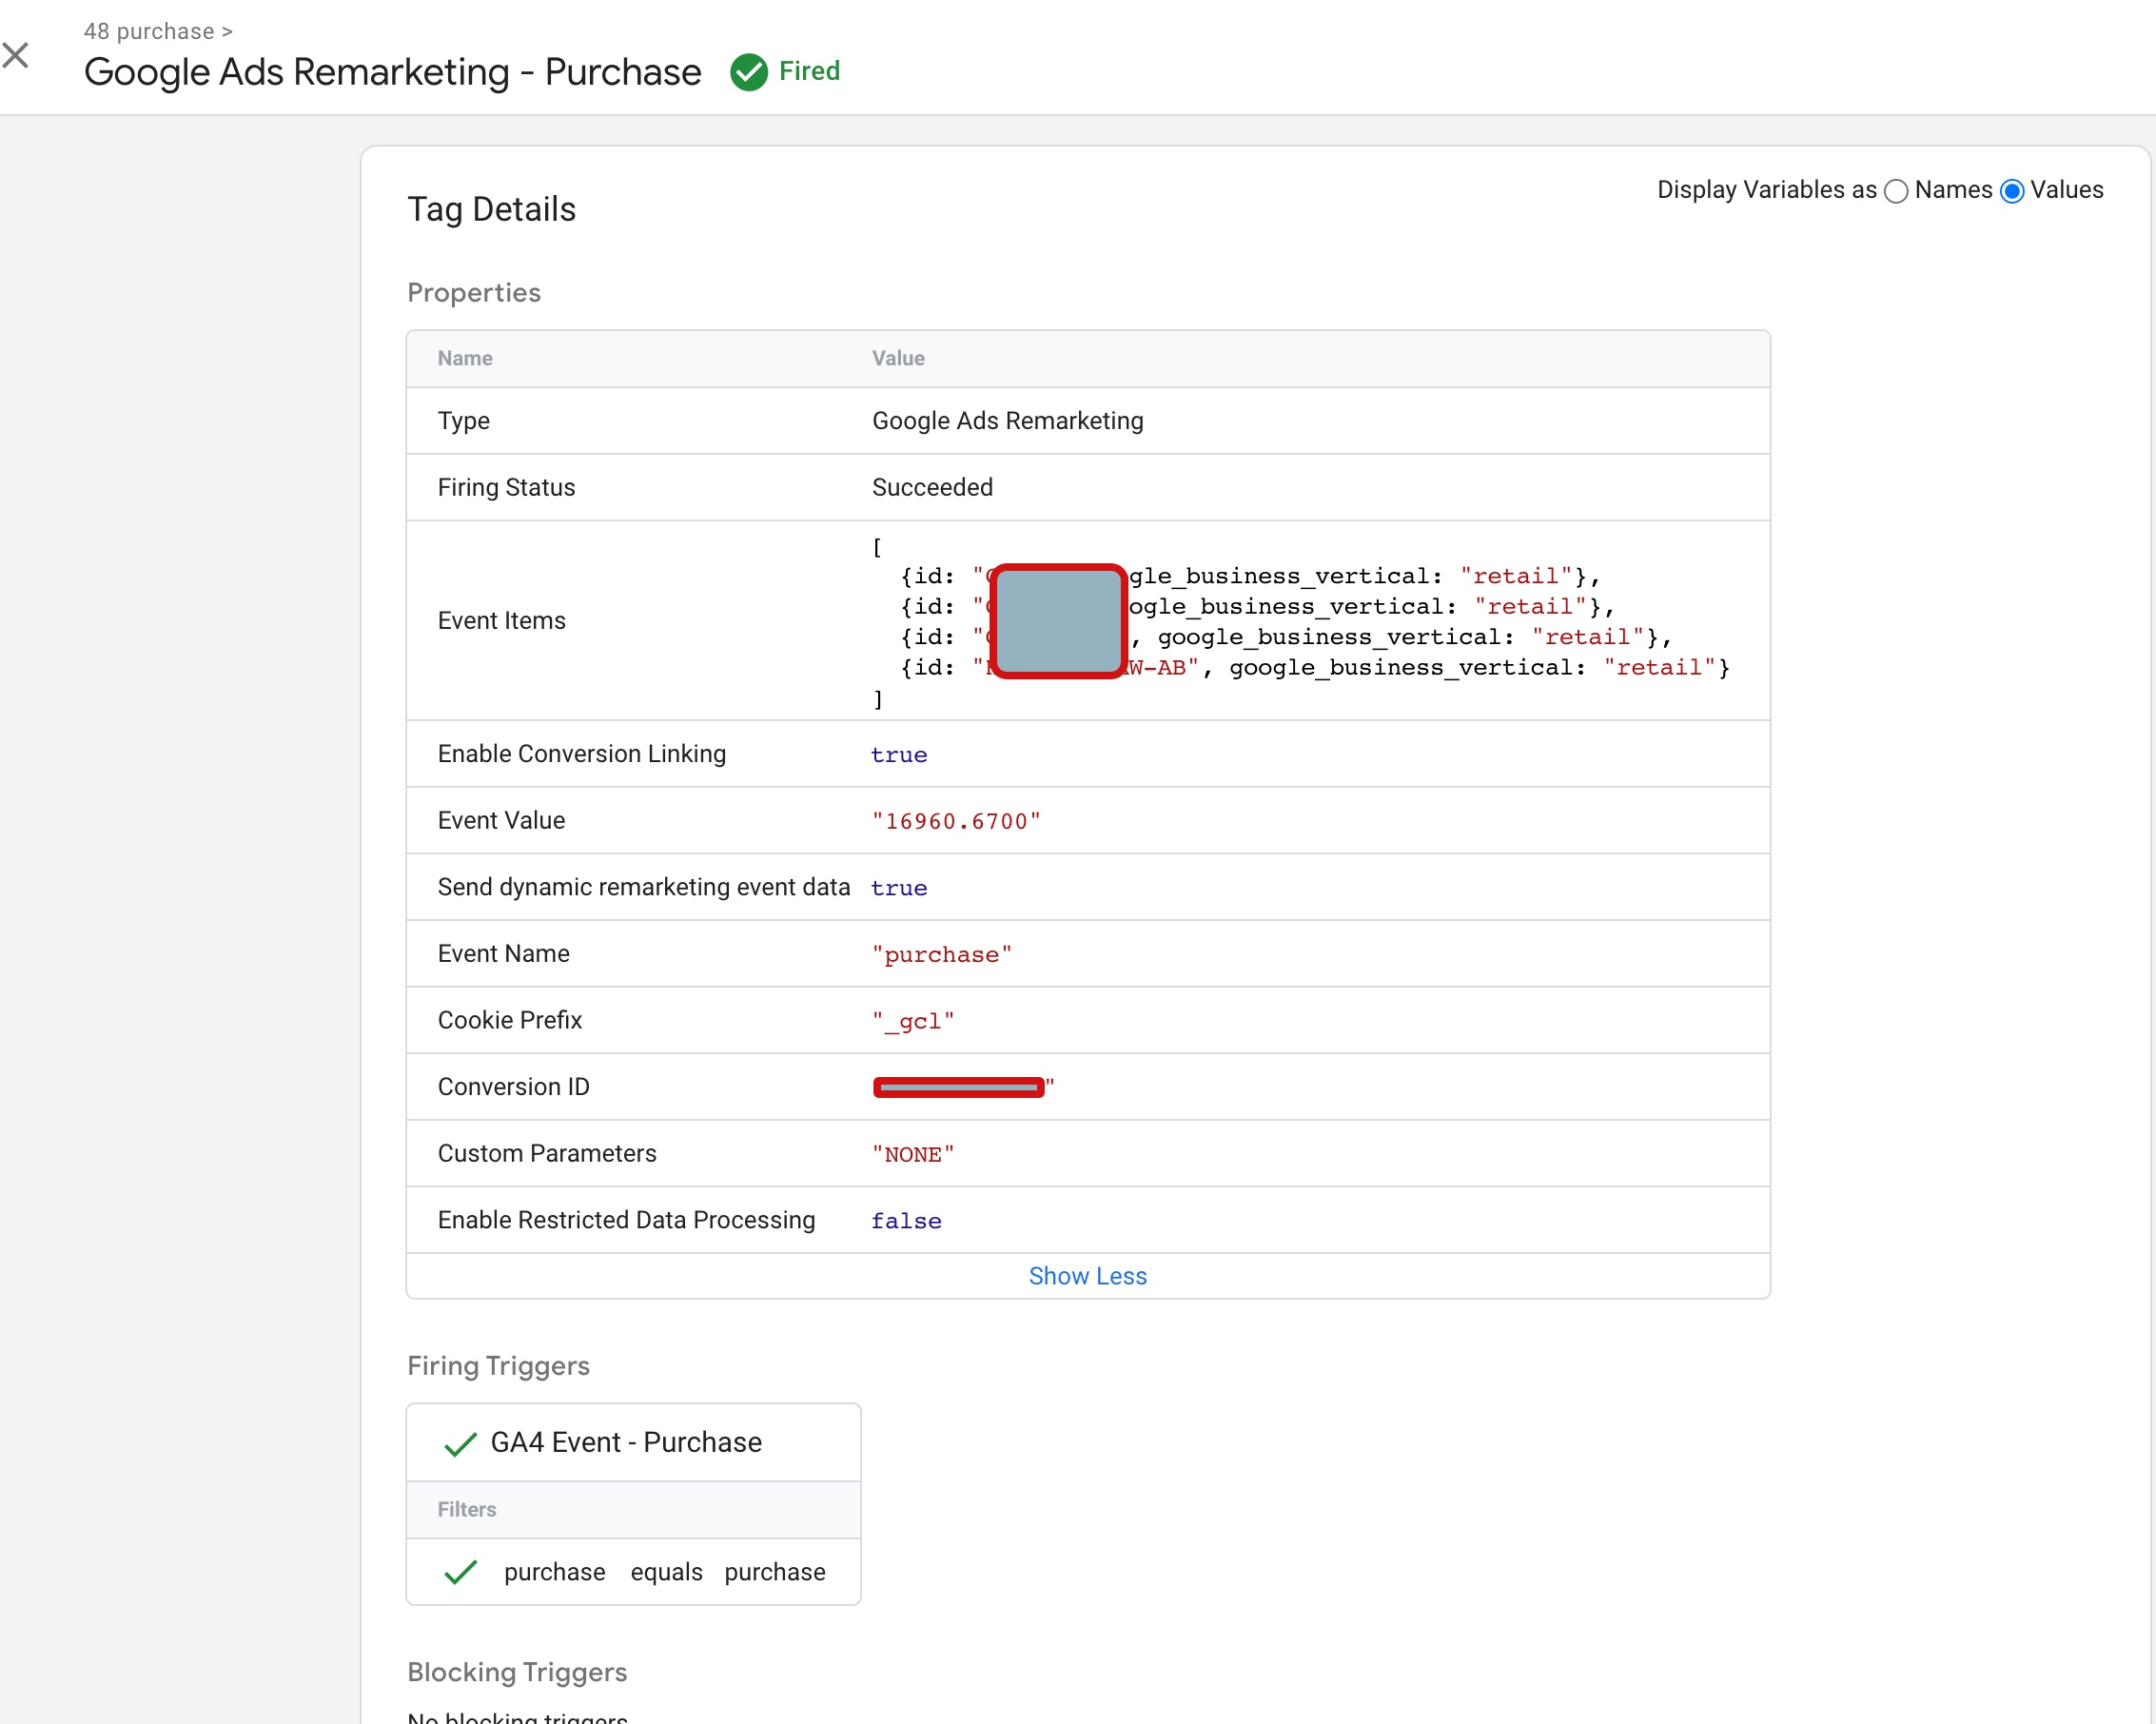
The Prestashop Dynamic Remarketing Tag purchase is a code snippet that can be added to a Prestashop store to track when a user makes a purchase.

Warning: If you don’t know about javascript or don’t have developing knowledge then don’t try to Pestashop Google Ads Dynamic Remarketing Tags using Google Tag Manager that can break your site, Cart and other functionality 

Disclaimer: Google tag manager belongs to Google property 

For Contact: mappchero@gmail.com

I am available for Hire on Freelancer: Freelancer.com

I am available for Hire on Upwork: Upwork.com

I am available for Hire on Peopleperhour: Peopleperhour.com

I am available for Hire on Guru: Guru.com

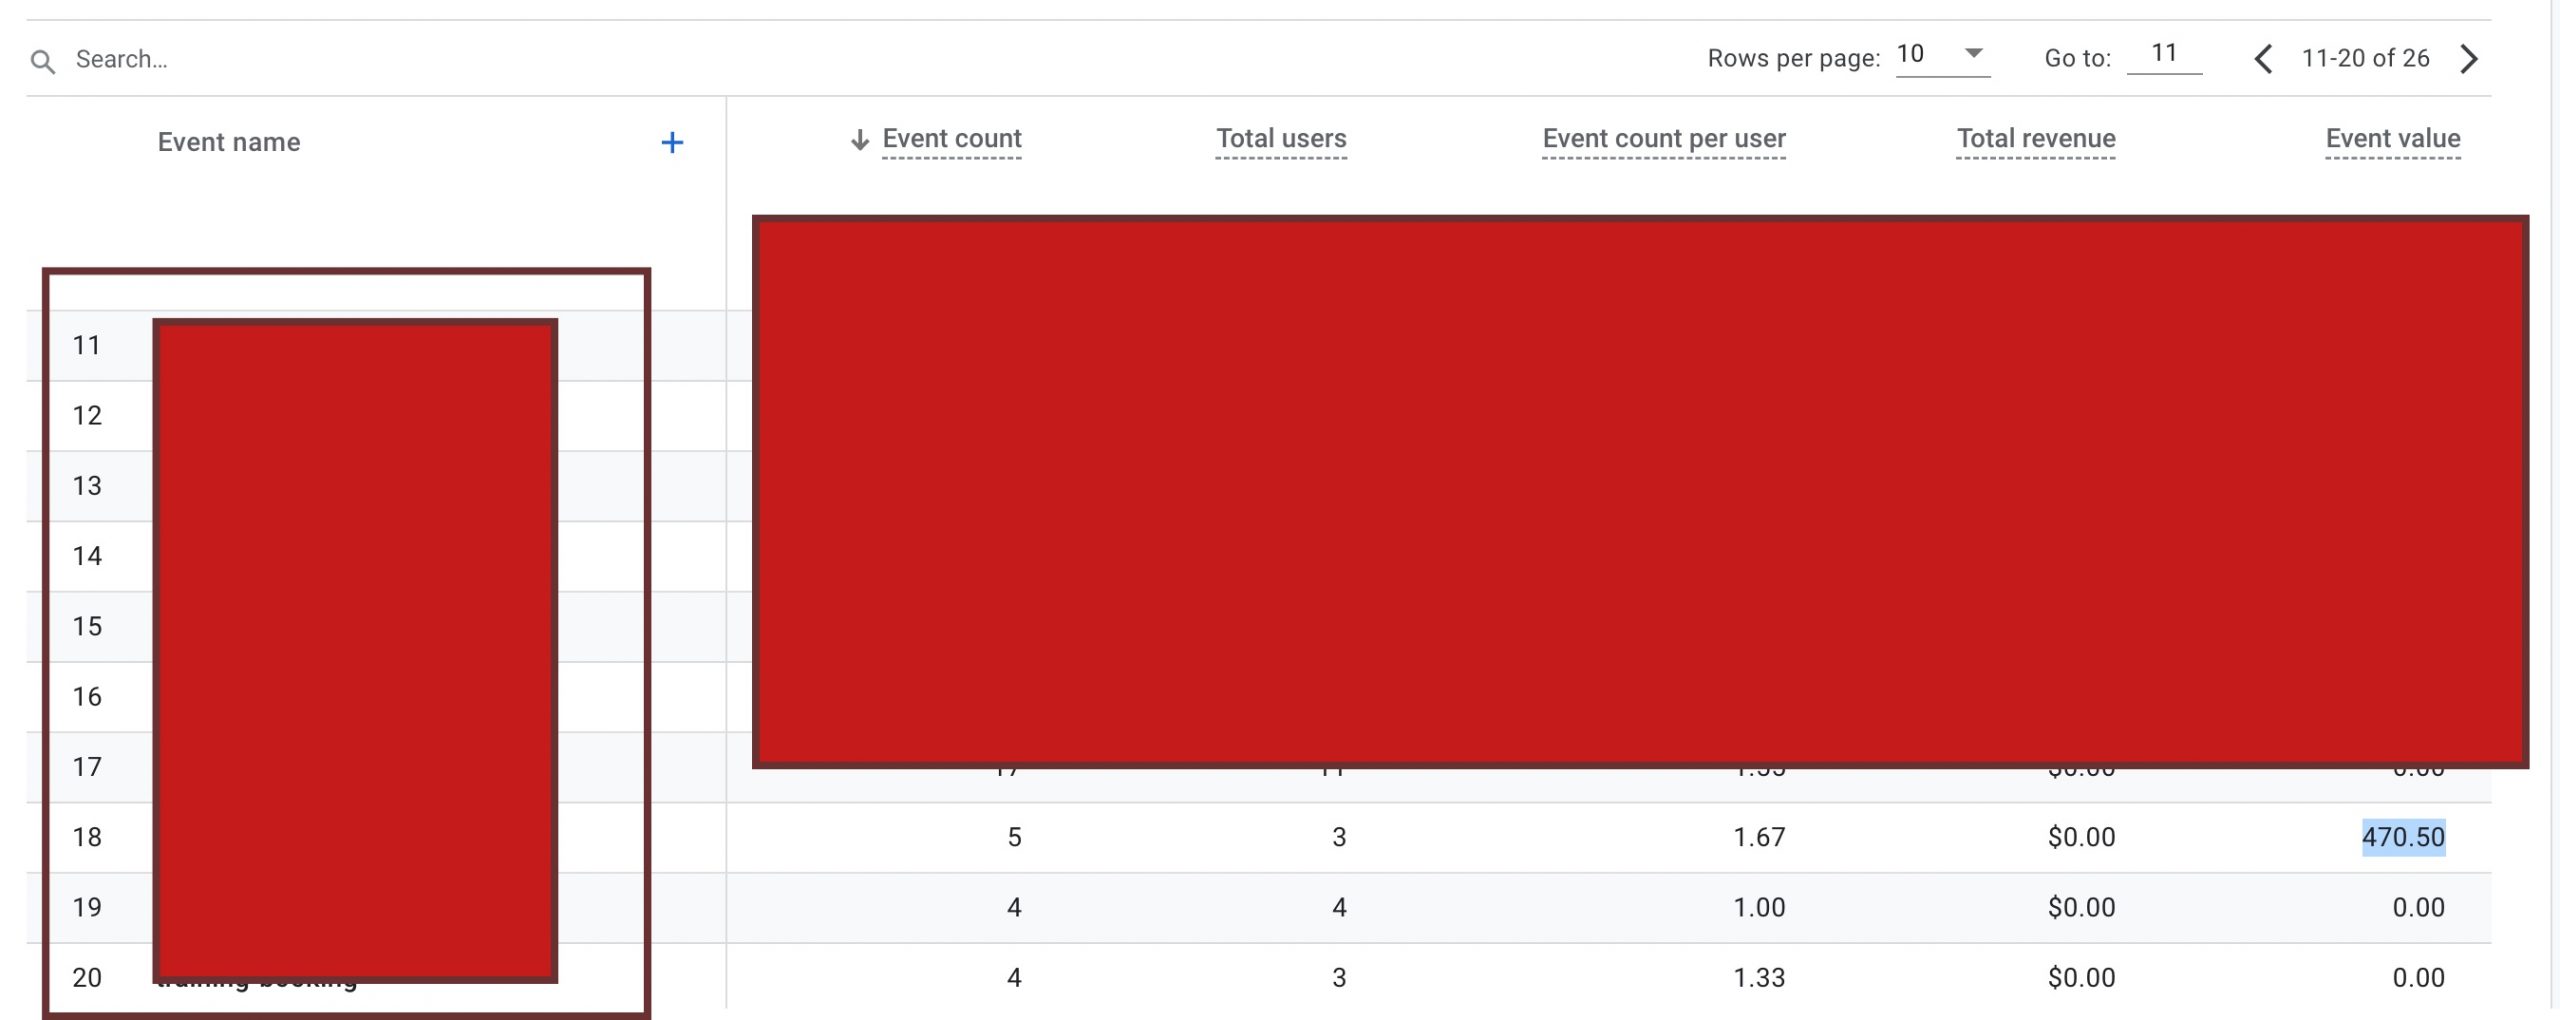
Displaying GA4 event parameters (Event Value) in Google Data Studio

Standard

Displaying GA4 event parameters in Google Data Studio involves adding event parameters as dimensions and metrics in a report. GA4 event parameters are custom data that you can send along with events to track additional information about user behavior on your website or app. For example, you can use event parameters to track the product category or SKU that a user viewed or purchased, the video ID that a user watched, or the button label that a user clicked.

By displaying GA4 event parameters in Google Data Studio, you can gain insights into how users are interacting with your website or app and use this information to optimize your marketing and user experience strategies. In addition, you can combine event parameters with other GA4 dimensions and metrics to create custom reports that meet your specific business needs.

To display GA4 event parameters in Google Data Studio, you need to connect your GA4 property to Data Studio and select the event and event parameters you want to display. You can then add the event parameters as dimensions and metrics in your report to analyze and visualize the data.

To display GA4 event parameters in Google Data Studio, follow these steps:

  1. Connect your GA4 property to Google Data Studio.
    2. Create a new report in Google Data Studio or open an existing one.
    3. Add a new data source by clicking on the “Create New Data Source” button.
    4. In the “Connector” section, select “Google Analytics 4”.
    5. Choose the GA4 property that contains the event parameters you want to display.
    6. Select the event you want to display parameters for.
    7. In the “Dimensions” section, click on “Add a Dimension”.
    8. Select “Event Parameter Name” and “Event Parameter Value” from the dropdown menus.
    9. In the “Metrics” section, click on “Add a Metric”.
    10. Select the metric that corresponds to the event parameter you want to display (e.g. “Event Count” for the number of times the event was triggered).
    11. Save your data source and use the dimensions and metrics you selected to create your report.

You can repeat steps 7-10 for each event parameter you want to display in your report.


Display GA4 event parameter in google data studio

Display GA4 event value show in google data studio with GA4 Event parameter

Warning: If you do n’t know about javascript or do n’t have developing knowledge then do n’t try to Displaying GA4 event parameters (Event Value) in Google Data Studio that can broke your site, Cart and other functionality 

Disclaimer: Google tag manager belongs to Google property 

For Contact: mappchero@gmail.com

I am available for Hire on Freelancer: Freelancer.com

I am available for Hire on Upwork: Upwork.com

I am available for Hire on Peopleperhour: Peopleperhour.com

I am available for Hire on Guru: Guru.com

GA4 Setup Install and Configure in 10 Steps with Google Tag Manager

Standard

Setting up and configuring GA4 is important for businesses and website owners who want to track and analyze user behavior on their website or mobile app. GA4 is the latest version of Google Analytics and has several new features and enhancements that can provide more detailed insights into user behavior.

By setting up GA4 properly, you can:

  1. Track user behavior and actions on your website or app, such as pageviews, clicks, and purchases.

2. Analyze user demographics, interests, and behavior patterns to understand your audience better.

3. Identify opportunities to optimize your website or app, such as improving page load times or optimizing the user experience.

4. Create custom audiences based on user behavior and other criteria to better target your marketing campaigns.

5. Track the performance of your marketing campaigns and understand how users interact with your ads.

10 steps to install and configure GA4 (Google Analytics 4):

  1. Create a Google Analytics 4 property in your Google Analytics account by clicking on the “Admin” button, selecting your account and then clicking on “Create Property” button.
  2. Follow the setup wizard, providing information about your website or app, such as the property name, industry category, and time zone.
  3. Choose the type of data stream you want to create, either a website or mobile app data stream, and then click “Create Stream.”
  4. Follow the instructions provided to add the tracking code to your website or app.
  5. Verify that the tracking code is installed correctly by checking the real-time reports in GA4.
  6. Set up events and conversions that you want to track in GA4 by defining the relevant parameters for each event, such as the event name, category, and action.
  7. Enable enhanced measurement features such as cross-domain tracking, scroll tracking, and outbound link tracking to get more detailed insights into user behavior.
  8. Create custom audiences based on user behavior or other criteria that you define, such as users who have abandoned their shopping cart.
  9. Create custom reports and dashboards to monitor your website or app’s performance and visualize the data that is most important to you.
  10. Finally, integrate GA4 with other Google Marketing Platform products such as Google Ads, Google Tag Manager, and Google Optimize to get even more insights into your marketing campaigns and user behavior.

That’s it! By following these 10 steps, you should be able to install and configure GA4 and start tracking your website or app’s performance.

Disclaimer: Google tag manager belongs to Google property 

For Contact: mappchero@gmail.com

I am available for Hire on Freelancer: Freelancer.com

I am available for Hire on Upwork: Upwork.com

I am available for Hire on Peopleperhour: Peopleperhour.com

I am available for Hire on Guru: Guru.com

Create a Remarketing Audience in Google Analytics 4 (GA4)

Standard

Built a Custom Remarketing Audience with Google Ads in Google Analytics 4 (GA4)

In Google Analytics 4 (GA4), an Audience is a group of users who share similar characteristics or behavior. Audiences can be created based on different criteria, such as demographics, interests, or engagement. Audiences can be used to better understand your users and to create targeted marketing campaigns.

There are two types of Audiences in GA4:

  1. Predefined Audiences: These are audiences that are automatically created by GA4 based on certain criteria, such as users who have made a purchase or users who have visited the website from a specific geographic location.

2. Custom Audiences: These are audiences that you create yourself based on any combination of user properties and events. For example, you could create an audience of users who have viewed a specific page on your website or who have a certain value for a user property.

Once you have created an audience, you can use it to analyze the behavior and characteristics of that group of users and to create targeted marketing campaigns. You can also use audiences to create segments in GA4, which allow you to compare the behavior of different groups of users.

Audiences can be used in conjunction with GA4’s new feature such as Smart Goals, that helps you to understand your website’s conversion rate and to optimize your marketing campaigns. Additionally, you can use GA4’s integration with Google Ads to create targeted ads that reach specific audiences.

Creating an audience in Google Analytics 4 (GA4) is a way to segment and group users based on certain characteristics, such as behavior or demographics. This can be done by using the Audiences feature in the GA4 property. Here are the steps to create an audience:

  1. Go to the GA4 property and select the Audiences tab from the navigation menu.

2. Click the “+ Create Audience” button.

3. Select the type of audience you want to create. There are several options, including based on behavior, demographics, or custom criteria.

4. Define the audience by setting the criteria for inclusion. For example, if you’re creating an audience of users who have made a purchase on your website, you can set the criteria to include users who have completed a purchase event.

5. Give your audience a name and save it.

6. You can now use this audience to segment your reports and analyze the behavior of users within that audience. Additionally, you can use this audience to retargeting or personalize your marketing campaigns.

Warning: If you do n’t know about javascript or do n’t have developing knowledge then do n’t try to Create a Remarketing Audience in Google Analytics 4 (GA4) that can broke your site, Cart and other functionality 

Disclaimer: Google tag manager belongs to Google property 

For Contact: mappchero@gmail.com

I am available for Hire on Freelancer: Freelancer.com

I am available for Hire on Upwork: Upwork.com

I am available for Hire on Peopleperhour: Peopleperhour.com

I am available for Hire on Guru: Guru.com


Install Google Analytics 4 (GA4) on Squarespace

Standard

Switch to Google Analytics 4 on a Squarespace using Google Tag Managaer

Google Analytics 4 (GA4) is a new version of Google Analytics that replaces the Universal Analytics (UA) tracking code. GA4 is designed to provide a more integrated and user-friendly experience for tracking website and app data, and includes new features such as cross-device tracking, automated insights, and enhanced ecommerce tracking.

Squarespace is a web content management and website building platform. It provides users with an intuitive drag-and-drop interface for building websites, as well as powerful e-commerce tools for creating online stores. Squarespace offers a range of templates and design options, making it easy for users to create a unique and professional-looking website without the need for coding skills. The platform also includes features such as analytics, SEO optimization, and integrated hosting, making it a complete solution for website creation and management. Squarespace is widely used by individuals, small businesses, and organizations for creating and managing websites for personal, portfolio, and e-commerce purposes.

To install Google Analytics 4 (GA4) on Squarespace:

  1. Create a GA4 property in your Google Analytics account.
  2. Copy the GA4 tracking code from the GA4 property in Google Analytics.
  3. Log into Squarespace and navigate to the “Settings” panel.
  4. Click on “Advanced” and then “Code Injection”.
  5. Paste the GA4 tracking code into the “Header” code injection section.
  6. Save the changes.
  7. Verify the installation by checking the real-time reports in GA4.

To enable ecommerce tracking in Google Analytics 4 (GA4) on Squarespace:

he Squarespace data layer is a JavaScript object that provides information about the content, behavior, and context of a website. The data layer is designed to provide a common interface for passing data between the website and various marketing and analytics tools, including Google Analytics.

The data layer collects information about page views, product information, and events, and makes this data available to other tools through a standardized format. This allows website owners to track and analyze user behavior on their site, and use this information to make informed decisions about website optimization and marketing campaigns.

The Squarespace data layer is implemented on a site-by-site basis, and can be customized to meet the specific needs of each website. To use the data layer, a website owner would typically install the necessary tracking code and configure their analytics or marketing tools to receive data from the data layer.

Warning: If you do n’t know about javascript or do n’t have developing knowledge then do n’t try to Install Google Analytics 4 (GA4) on Squarespace without module that can broke your site, Cart and other functionality 

Disclaimer: Google tag manager belongs to Google property 

For Contact: mappchero@gmail.com

I am available for Hire on Freelancer: Freelancer.com

I am available for Hire on Upwork: Upwork.com

I am available for Hire on Peopleperhour: Peopleperhour.com

I am available for Hire on Guru: Guru.com


GA4 Event Track Contact Form 7 with Google Tag Manager

Standard

GA4 Event Contact Form 7 Event Tracking with Google Tag Manager

Tracking Contact Form 7 conversions allows you to measure the effectiveness of your forms in converting visitors into leads or customers. There are several ways to track Contact Form 7 conversions, including using Google Tag Manager (GTM) and Google Analytics 4 (GA4), and using JavaScript events.

With GTM, you can create a “Form Submission” trigger that fires when a Contact Form 7 form is submitted, and then create a tag for the appropriate tracking code (such as Google Analytics or GA4) that fires on that trigger.

With GA4, you can use the “wpcf7submit” event to track Contact Form 7 conversions. This event is triggered when a form is submitted, and you can add GA4 event tracking code to run when the event is fired.

To track Contact Form 7 conversions with Google Analytics 4 (GA4) using JavaScript events, you can use the “wpcf7submit” event that is triggered when a form is submitted. Here’s an example of how you can set this up:

  1. Add the following JavaScript code to your WordPress site using Google Tag Manager
document.addEventListener( 'wpcf7submit', function( event ) {
  // Your tracking code here
}, false );

2. Replace “// Your tracking code here” with the appropriate tracking code for the service you are using. For example, if you are using Google Analytics, you can add the following code:

ga('send', 'event', 'Form', 'submit', 'Contact Form 7');

3. Make sure that GA4 tracking code is installed on your site and the script runs after the GA4 tracking code.

4. Once you have added the tracking code, the “wpcf7submit” event will fire whenever a Contact Form 7 form is submitted, and the GA4 event code will run.

Warning: If you do n’t know about javascript or do n’t have developing knowledge then do n’t try to GA4 Event Contact Form 7 Event Tracking with Google Tag Manager without module that can broke your site, Cart and other functionality 

Disclaimer: Google tag manager belongs to Google property 

For Contact: mappchero@gmail.com

I am available for Hire on Freelancer: Freelancer.com

I am available for Hire on Upwork: Upwork.com

I am available for Hire on Peopleperhour: Peopleperhour.com

I am available for Hire on Guru: Guru.com

Google Tag Manager Lookup Table Regular Expression

Standard

Google Tag Manager (GTM) Lookup Table is a built-in feature that allows you to map one set of values to another using regular expressions. This can be useful for situations where you want to simplify complex data, standardize data, or map data from one format to another.

Here are the steps to set up a Lookup Table using regular expressions in Google Tag Manager:

  1. In GTM, go to the Variables tab and create a new variable of the type Lookup Table.
  2. In the Lookup Table variable, create a new row for each mapping you want to make.
  3. In the Input column, enter the regular expression that will match the original value.
  4. In the Output column, enter the value that you want to map to the original value.
  5. In the Triggers or Tag, set the variable you want to map as the Input variable, and the Lookup Table variable as the output variable.
  6. Publish the container.

Regular expressions are a powerful tool that allows you to match complex patterns of characters in a string, making it possible to use GTM Lookup Table for a wide range of use cases.

^product– matches any string that starts with “product-“
[0-9]{3} matches any 3 digits
^(?!.*error).*$ matches any string that doesn’t contain the word “error”

It is important to note that you need to have a good understanding of regular expressions and their syntax to be able to use them effectively in GTM Lookup Table.

Also, it’s recommended to test the regular expressions before using them in production to ensure they are working as expected.

Using Regex (Regular Expressions) Lookup Google Tag Manager

RegEx Lookup Table Variable In Google Tag Manager

Warning: If you do n’t know about javascript or do n’t have developing knowledge then do n’t try to Google Tag Manager Lookup Table Regular Expression without Plugin that can broke your site, Cart and other functionality 

Disclaimer: Google tag manager belongs to Google property 

For Contact: mappchero@gmail.com

I am available for Hire on Freelancer: Freelancer.com

I am available for Hire on Upwork: Upwork.com

I am available for Hire on Peopleperhour: Peopleperhour.com

I am available for Hire on Guru: Guru.com

Way To Filter Out Internal IP Traffic In GA4 Include IP Filtering

Standard

Who Else Wants To Know The Mystery Behind Is There Any Other Way To Filter Out Internal Traffic In GA4 Include IP Filtering

An IP address filter in Google Analytics (GA4) is a feature that allows you to include or exclude certain IP addresses from your GA4 data. This can be useful if you want to exclude traffic from your own office or exclude traffic from known bots and spiders.

For example, if you have a website that is only accessible from a specific IP range, you can set up an IP filter to exclude all other IP addresses, so you only see data from that specific IP range in your GA4 reports. Similarly, you can use an IP filter to exclude traffic from known bots and spiders, which can skew your data and make it difficult to get accurate insights.

To set up IP filters in Google Analytics 4, you will need to follow these steps:

  1. Log in to your Google Analytics account and navigate to the “Admin” section.

2. In the “Property” column, click on “Data Streams” and select the stream for which you want to set up the IP filter.

3. Click on the “Configure Data Stream” button and then select the “Data Processing” tab.

4. Under “IP Filter,” select “Exclude” or “Include” depending on whether you want to exclude or include certain IP addresses.

5. Enter the IP addresses you want to include or exclude, separated by commas. You can also use wildcards (*) to include or exclude ranges of IP addresses.

6. Click “Save” to apply the changes.

7. It’s important to note that IP filters will only apply to data collected after the filter is set up, and it does not affect historical data.

GA4 Include IP Filtering

Way to Filter out Internal Traffic in GA4 IP Filtering

Warning: If you do n’t know about javascript or do n’t have developing knowledge then do n’t try to Way To Filter Out Internal IP Traffic In GA4 Include IP Filtering Woocommerce without Plugin that can broke your site, Cart and other functionality 

Disclaimer: Google tag manager belongs to Google property 

For Contact: mappchero@gmail.com

I am available for Hire on Freelancer: Freelancer.com

I am available for Hire on Upwork: Upwork.com

I am available for Hire on Peopleperhour: Peopleperhour.com

I am available for Hire on Guru: Guru.com