Implement Dynamic Remarketing Tag in Volusion using Google Tag Manager

Standard

Recently I have worked for one of my client who want to Implement volution dynamic remarketing Tag

Dynamic Remarketing means who has visited your website and re-engaged with users who has already visited with Custom Parameters of Dynamic Remarketing. To help you convert more visitor with Volusion Dynamic Remarketing using Google Tag Manager. Less CPC with maximize ROI of your Store with Volusion Dynamic Remarketing Tag 

Setting up Volution Dynamic Remarketing Tag via Google Tag Manager

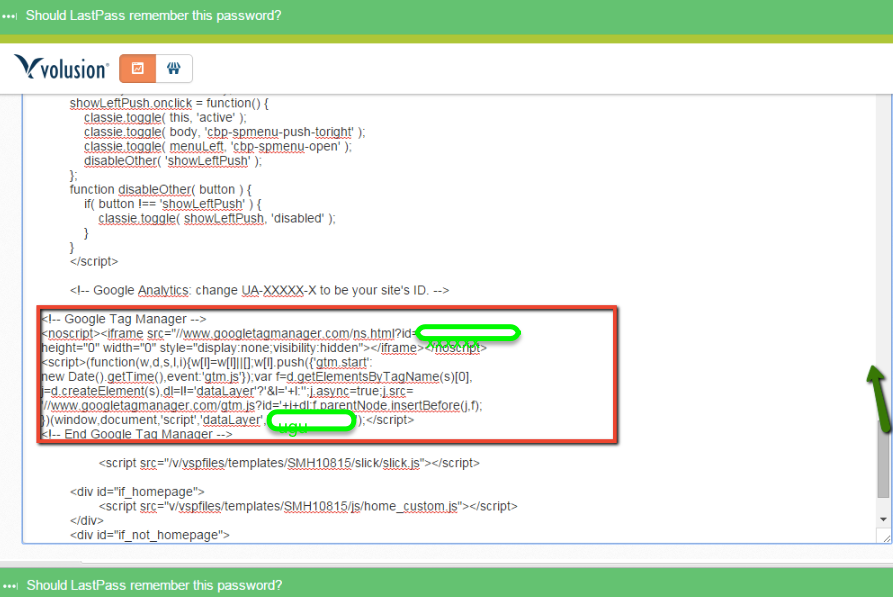
Step 1. First Need to be installed Google Tag Manager on Volusion Store for Dynamic Remarketing

Copy the code below and paste it onto every page of your website. Place it immediately after the opening <body> tag.

<!– Google Tag Manager –>
<noscript><iframe src=”//www.googletagmanager.com/ns.html?id=GTM-XXXXXX
height=”0″ width=”0″ style=”display:none;visibility:hidden”></iframe></noscript>
<script>(function(w,d,s,l,i){w[l]=w[l]||[];w[l].push({‘gtm.start’:
new Date().getTime(),event:’gtm.js’});var f=d.getElementsByTagName(s)[0],
j=d.createElement(s),dl=l!=’dataLayer’?’&l=’+l:”;j.async=true;j.src=
‘//www.googletagmanager.com/gtm.js?id=’+i+dl;f.parentNode.insertBefore(j,f);
})(window,document,’script’,’dataLayer’,’GTM-XXXXXX‘);</script>
<!– End Google Tag Manager –>

Step 2. For Install Google Tag Manager in your Volution Store your admin area, got t to Design > File Editor in your Admin Area —->In the Live Edit page, click on your template.htm

add Google Dynamic Remarketing Code in Volusion

Volusion Dynamic Remarketing Using Google Tag Manager

Step 3. Below Customization Code need to place on Volusion for Dynamic Remarketing Tag 

Volusion Dynamic RemarketingIf home page 

<!--If home page-->
if(pathname == "/" || pathname == "Default.asp" || pathname == "default.asp"){
var pagetype = 'home';
var googleprice = '';
var googleprodid ='';
};

If Product Page

if(pathname.indexOf('-p/') > -1){
var pagetype = 'product';
var googleprice = $('span[itemprop="price"]').html().split('<')[0].replace('£','').replace(',','').trim();
var googleprodid = global_Current_ProductCode;
};

Step 4. Need to be Setup Remarketing Campaign in AdWords

Volution AdWords dynamic remarketing Using Google Tag Manager

Volution AdWords dynamic remarketing Using Google Tag Manager

Step 5. Configure Tags, Variable and Rule for Setup Volusion Dynamic Re-marketing Tag Campaign in Google Tag Manager

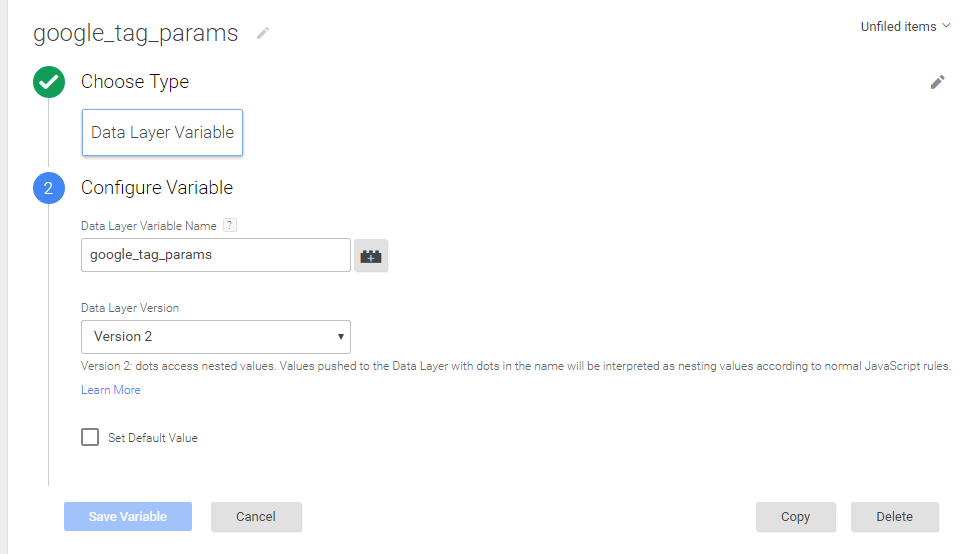
  1. You need create a variable to Data Layer Variable called google_tag_params to Choose this option to supply custom parameters in a data layer variable.
Volusion Dynamic Remarketing Setup

Add Google Dynamic Remarketing Code in Volusion Store

Google Dynamic Re-marketing Setup Using Google Tag Manager Article – https://support.google.com/tagmanager/answer/6106009?hl=en&rd=1

For Developer Guide For Remarketing Setup – https://developers.google.com/adwords-remarketing-tag/parameters

For Troubleshoot of Dynamic Re marketing using Google Tag Manager –  Use Tag Assistance  – https://chrome.google.com/webstore/detail/tag-assistant-by-google/kejbdjndbnbjgmefkgdddjlbokphdefk?hl=en

For Contact: mappchero@gmail.com

Warning:if you do n’t know about javascript or do n’t have developing knowledge then do n’t try to implement on Volusion Dynamic Re-marketing Setup using Google Tag Manager  that can broke your site, Cart and other functionality 

Disclaimer: Google tag manager belongs to Google property 

Track Ecommerce transaction with Google Tag Manager in Vb.net

Standard

Recently, one of the client has asked to implement e-commerce tracking on ASP.NET ( Vb.net) website using Google Tag Manager

E-commerce tracking is one of most challenging part to implement in ASP.NET (Vb.net)

E-Commerce tracking even allows you to see your conversions to improve. Doesn’t that sound thrilling? It is fairly easy to empower your site for creating such advice. All that you need is a couple of codes that are additional. Naturally, you even have to examine the information presented to make the most of it.Transaction data passed back by the payment gateway or is usually saved in your back end systems.

You have to pass this info to the script that is analytics. To put it differently, you will use a server side language like PHP write a JavaScript directly to the resultant HTML page and to get the data.

You can see this features set up ecommerce tracking using Google Tag Manager in .net website.

  • Transaction Revenue
  • Transaction Tax
  • Transaction Shipping
  • Item Revenue
  • Revenue per Transaction
  • Revenue per Visit
  • Total Value
  • Revenue per Item
    Implementing E-Commerce Tracking via Google Tag Manager

    E-Commerce Conversion Tracking Using Google Tag Manager

    Google Tag Manager eCommerce Tracking installation

    Google Tag Manager integration (GTM)

    Step 1. First Install Google Tag Manager on Your ASP.NET ( Vb.net) website for Setup E-commerce Tracking using Google Tag Manager

    Copy the code below and paste it onto every page of your website. Place it immediately after the opening <body> tag.

    <!– Google Tag Manager –>
    <noscript><iframe src=”//www.googletagmanager.com/ns.html?id=GTM-XXXXXX
    height=”0″ width=”0″ style=”display:none;visibility:hidden”></iframe></noscript>
    <script>(function(w,d,s,l,i){w[l]=w[l]||[];w[l].push({‘gtm.start’:
    new Date().getTime(),event:’gtm.js’});var f=d.getElementsByTagName(s)[0],
    j=d.createElement(s),dl=l!=’dataLayer’?’&l=’+l:”;j.async=true;j.src=
    ‘//www.googletagmanager.com/gtm.js?id=’+i+dl;f.parentNode.insertBefore(j,f);
    })(window,document,’script’,’dataLayer’,’GTM-XXXXXX‘);</script>
    <!– End Google Tag Manager –>

    Note: Make you will replace GTM Tracking Code with your GTM ID.

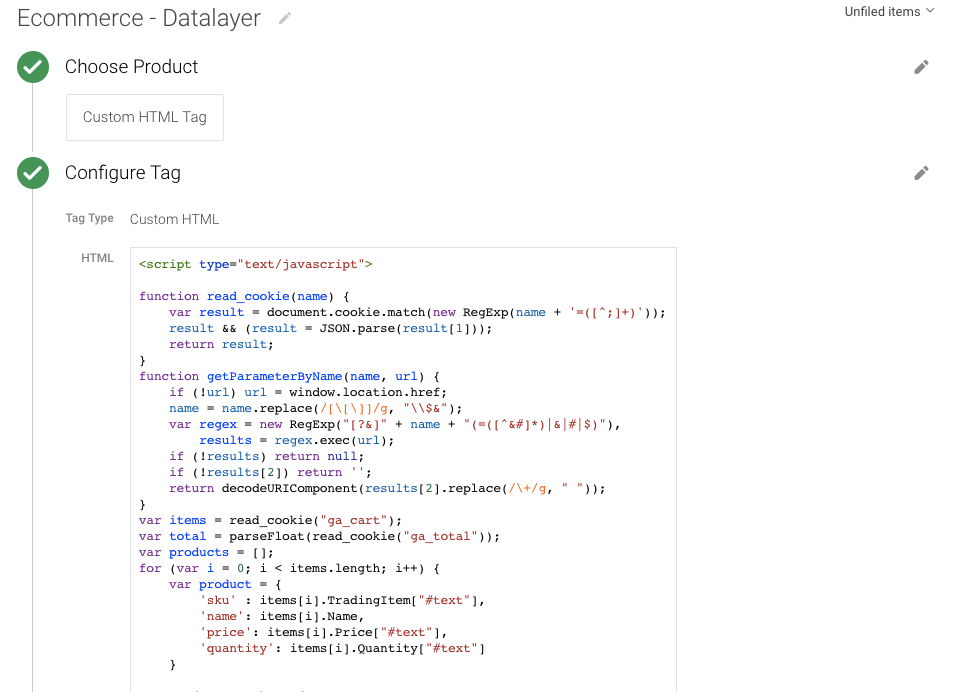
Step 2. Create a data layer using Custom HTML Tag 

<script type=”text/javascript”>

function read_cookie(name) {
var result = document.cookie.match(new RegExp(name + ‘=([^;]+)’));
result && (result = JSON.parse(result[1]));
return result;
}
function getParameterByName(name, url) {
if (!url) url = window.location.href;
name = name.replace(/[\[\]]/g, “\\$&”);
var regex = new RegExp(“[?&]” + name + “(=([^&#]*)|&|#|$)”),
results = regex.exec(url);
if (!results) return null;
if (!results[2]) return ”;
return decodeURIComponent(results[2].replace(/\+/g, ” “));
}
var items = read_cookie(“ga_cart”);
var total = parseFloat(read_cookie(“ga_total”));
var products = [];
for (var i = 0; i < items.length; i++) {
var product = {
‘sku’ : items[i].TradingItem[“#text”],

 DataLayer In Custom JavaScript Variables

Google Tag Manager Data Layer ECommerce

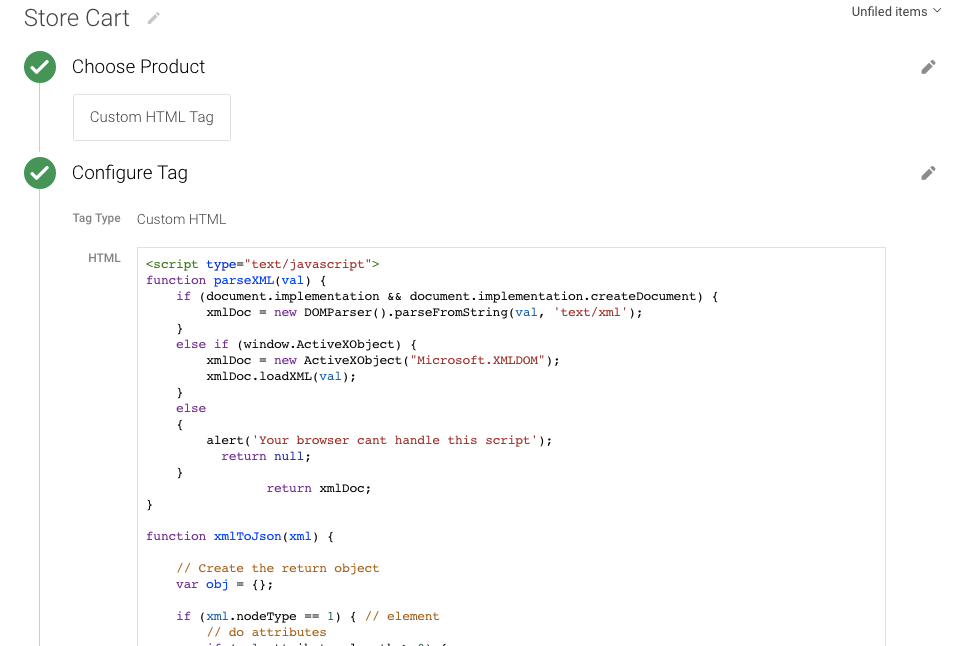
Step 3. Create a data layer using Custom HTML Tag for Store

<script type=”text/javascript”>
function parseXML(val) {
if (document.implementation && document.implementation.createDocument) {
xmlDoc = new DOMParser().parseFromString(val, ‘text/xml’);
}
else if (window.ActiveXObject) {
xmlDoc = new ActiveXObject(“Microsoft.XMLDOM”);
xmlDoc.loadXML(val);
}
else
{
alert(‘Your browser cant handle this script’);
return null;
}
return xmlDoc;
}

function xmlToJson(xml) {

// Create the return object
var obj = {};

if (xml.nodeType == 1) { // element
// do attributes
if (xml.attributes.length > 0) {
obj[“@attributes”] = {};
for (var j = 0; j < xml.attributes.length; j++) {
var attribute = xml.attributes.item(j);
obj[“@attributes”][attribute.nodeName] = attribute.nodeValue;
}

Google Tag Manager E-commerce data Layer

Implement using the Data Layer

For Contact: mappchero@gmail.com

Warning:if you do n’t know about javascript or do n’t have developing knowledge then do n’t try to implement on ASP.NET () E-commerce  Setup using Google Tag Manager  that can broke your site, Cart and other functionality 

Disclaimer: Google tag manager belongs to Google property 

Enhanced E-comerce and eCommerce Tracking for OpenCart using Google Tag Manager

Standard

Are you looking to implement Enhanced Ecommerce and eCommerce Tracking for OpenCart using Google Tag Manager using Javascript without making any change on the openCart.

Recently once client want to implement e-commerce tracking without any plugin or without making changes on the website and challenges accepted and implemented through Google Tag Manager.

Google Analytics Improved Enhanced Ecommerce enable sales information,product impression, promotion, sales data to be sent with any of occasions and your Google Analytics pageviews. Use pageviews to monitor product purchases and product impressions, and use occasions to monitor product clicks and checkout measures.

What is Enhanced E-commerce Tracking for OpenCart using Google Tag Manager?

Because Opencart is an Ajax website, I decided to implement through Using a Custom JavaScript Macro

opencart google analytics ecommerce tracking

Custom Javascritp opencart analytics ecommerce tracking

To Implement Enhanced Ecommerce Tracking OpenCart using Google Tag Manager

  1. First Install Google Tag Manager on Your OpenCart for Set Up E-commerce Tracking using Google Tag Manager without touch Code of OpenCart
Paste this code as high in the <head> of the page as possible:
<!– Google Tag Manager –>
<script>(function(w,d,s,l,i){w[l]=w[l]||[];w[l].push({‘gtm.start’:
new Date().getTime(),event:’gtm.js’});var f=d.getElementsByTagName(s)[0],
j=d.createElement(s),dl=l!=’dataLayer’?’&l=’+l:”;j.async=true;j.src=
‘https://www.googletagmanager.com/gtm.js?id=’+i+dl;f.parentNode.insertBefore(j,f);
})(window,document,’script’,’dataLayer’,’GTM-XXXX’);</script>
<!– End Google Tag Manager –>
Additionally, paste this code immediately after the opening <body> tag:
<!– Google Tag Manager (noscript) –>
<noscript><iframe src=”https://www.googletagmanager.com/ns.html?id=GTM-XXXX”
height=”0″ width=”0″ style=”display:none;visibility:hidden”></iframe></noscript>
<!– End Google Tag Manager (noscript) –>

Note: Make you will replace GTM Tracking Code with your GTM ID XXXXX

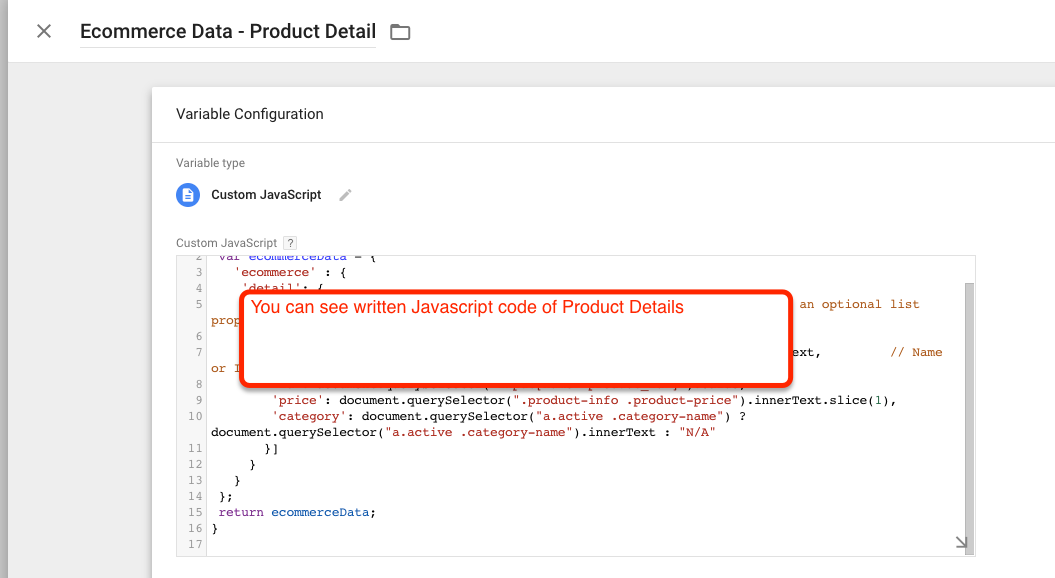
2. Product Detail Impressions: To Track product impression for OpenCart E-commerce and Enhanced E-commerce Tracking using Google Tag Manager used custom javascript to get the value of price, product and brand etc

Implementation of Google Tag Manager in OpenCart

Ecommerce Tracking through Google Tag Manager to Opencart

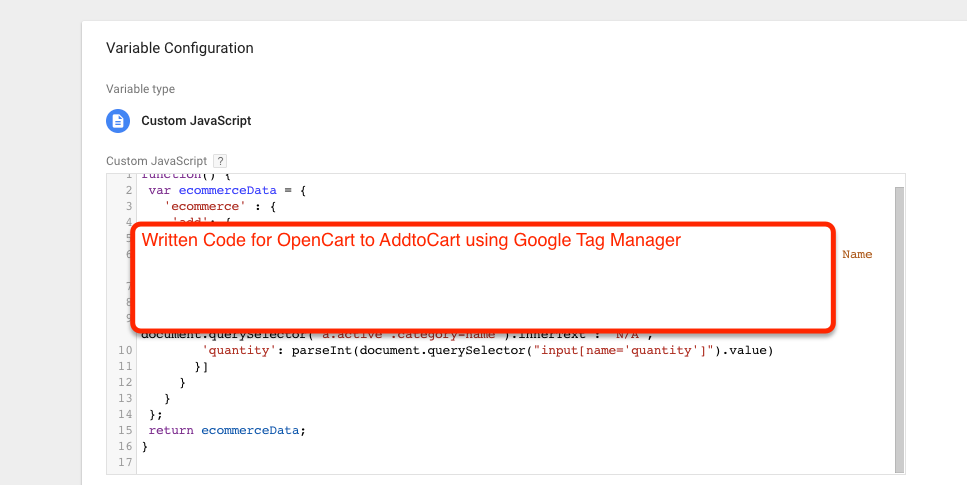
2.  Add to Cart: To measure additions add to Cart Product added for OpenCart Enhanced Ecommerce Tracking using Google Tag Manager used custom javascript to get the value of price, product and brand etc

eCommerce Tracking for OpenCart

Opencart Enhance Ecommerce with Google Tag Manager

3.  Measuring Checkout Steps: To measure Checkout Steps that will tell us , How many people reach to till checkout and drop out and went till another step for Opencart Enhanced Ecommerce with Google Tag Manager

OpenCart Google Tag Manager Ecommerce Tracking

Google Tag Manager Ecommerce Tracking on Opencart

Warning: If you do n’t know about javascript or do n’t have developing knowledge then do n’t try to Enhanced E-comerce and eCommerce Tracking for OpenCart using Google Tag Manager that can broke your site, Cart and other functionality 

Disclaimer: Google tag manager belongs to Google property 

For Contact: mappchero@gmail.com

I am available for Hire on Freelancer: Freelancer.com

I am available for Hire on Upwork: Upwork.com

I am available for Hire on Peopleperhour: Peopleperhour.com

I am available for Hire on Guru: Guru.com

No Fields Found.

Volusion eCommerce Conversion Tracking into Google Analytics using Google Tag Manager

Standard

Capturing Ecommerce Transaction Data Details On Your Volusion store in Google Analytic using Google Tag Manager

Recently I have worked one of client to implement e-commerce tracking on Volusion using Google Tag Manager.

To set up GA4 conversion tracking in Volusion eCommerce, you will need to enter your GA4 measurement ID in the Volusion “Settings” and enable enhanced e-commerce tracking and GA4 conversion tracking. Then, create a conversion event in your GA4 property and specify the trigger type. After completing these steps, Volusion will send data to your GA4 property, and you’ll be able to see conversion data in your GA4 reports.

Google Analytics 4 (GA4) Volusion eCommerce Tracking without Module with data layer using Google Tag Manager

Setting Up GA4 Volusion Enhanced eCommerce Tracking via Google Tag Manager

Volusion E-commerce monitoring permits you to measure the number of transactions and sales that your website generates. Google Analytics that allows for you to monitor on-line transactions on e-commerce web sites. It presents specific analytical knowledge to help set up the proper route to maximum ROI.

Volusion E-Commerce tracking even allows you to see on-line traffic sources to enhance your conversions. It’s as a substitute simple to enable your website for generating such information. All you need is a couple of additional codes. Of path, you additionally have got to analyze the information presented to benefit from it.

What data you will get it form Implement E-commerce tracking in Volusion using Google Tag Manager?

  • Revenue from product sales from your volusion Store
  • Average order value from your volusion Store
  • Total transactions and product purchases from your volusion Store
  • Number of days/sessions before a transaction occurred from your volusion Store
  • Sales performance on particular dates from your volusion Store

Volusion Ecommerce Tracking using Google Tag Manager can be generated Transaction Data by JavaScript on the OrderFinished.asp page within your Volusion Store.

Volusion E-commerce Tracking Two type of JavaScript that help you to track E-commerce Sales using Google Tag Manager 

Volusion E-commerce Tracking using Google Tag Manager by Transaction Array Contents

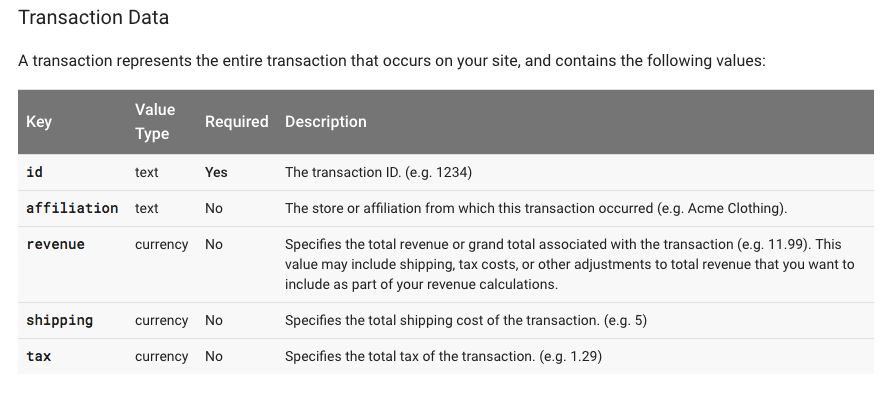
  • Order[0] = Order ID
  • Order[1] = Unused
  • Order[2] = Payment Amount
  • Order[3] = Affiliate Commissionable Value
  • Order[4] = Sales Tax
  • Order[5] = Total Shipping Cost
  • Order[6] = Billing City
  • Order[7] = Billing State
  • Order[8] = Billing Country
  • Order[9] = Email Address

Volusion Ecommerce Tracking using Google Tag Manager by Order Details Array Contents

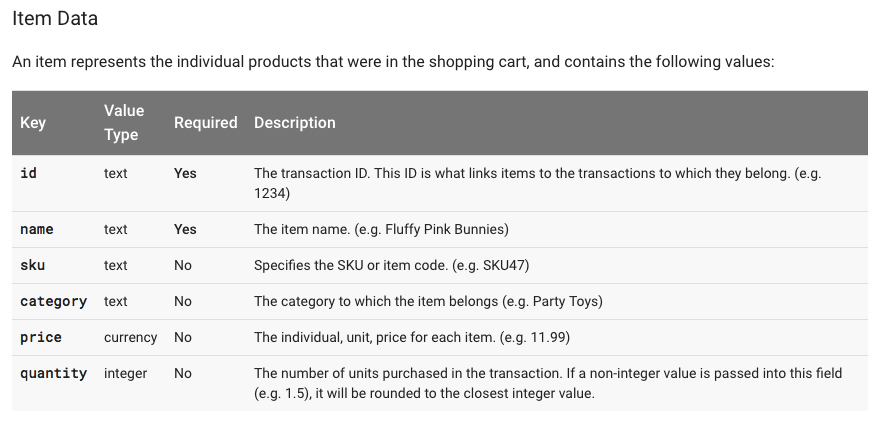
  • OrderDetails[X][0] = Order ID
  • OrderDetails[X][1] = Order Detail ID
  • OrderDetails[X][2] = Product Code
  • OrderDetails[X][3] = Product Name
  • OrderDetails[X][5] = Product Price
  • OrderDetails[X][6] = Quantity

Step 1. First Install Google Tag Manager on Your Volusion for Setup E-commerce Tracking using Google Tag Manager

Copy the code below and paste it onto every page of your website. Place it immediately after the opening <body> tag.

<!– Google Tag Manager –>
<noscript><iframe src=”//www.googletagmanager.com/ns.html?id=GTM-XXXXXX
height=”0″ width=”0″ style=”display:none;visibility:hidden”></iframe></noscript>
<script>(function(w,d,s,l,i){w[l]=w[l]||[];w[l].push({‘gtm.start’:
new Date().getTime(),event:’gtm.js’});var f=d.getElementsByTagName(s)[0],
j=d.createElement(s),dl=l!=’dataLayer’?’&l=’+l:”;j.async=true;j.src=
‘//www.googletagmanager.com/gtm.js?id=’+i+dl;f.parentNode.insertBefore(j,f);
})(window,document,’script’,’dataLayer’,’GTM-XXXXXX‘);</script>
<!– End Google Tag Manager –>

Note: Make you will replace GTM Tracking Code with your GTM ID 

Step 2. For Install Google Tag Manager in your Volution Store your admin area, got t to Design > File Editor in your Admin Area —->In the Live Edit page, click on your template.htm

Google Analytics Ecommerce Tracking On Volusion

Google Analytics Ecommerce Tracking On Volusion using Google Tag Manager

Step 3. E-commerce data layer code will be implemented in Volusion using Google Tag Manager to track Sales data in Google Analytic 

<!– Start – Volusion E-commerce Tracking Google Tag Manager Transaction Script  –>
<script>
dataLayer = [{
‘transactionId’: Order[0],
‘transactionAffiliation’: ‘smileherb’,
‘transactionTotal’: Order[2],
‘transactionTax’: Order[4],
‘transactionShipping’: Order[5]
}];
var transactionProducts = [];
for(var i=0;i<OrderDetails.length;i++) {
transactionProducts.push({
‘sku’: OrderDetails[i][2],
‘name’: OrderDetails[i][3],
‘category’: ‘none’,
‘price’: OrderDetails[i][5],
‘quantity’: OrderDetails[i][6]
})}
dataLayer.push({
    ‘transactionProducts’: transactionProducts
});
</script>
<!– End – Volusion E-commerce Tracking Google Tag Manager Transaction Script –>

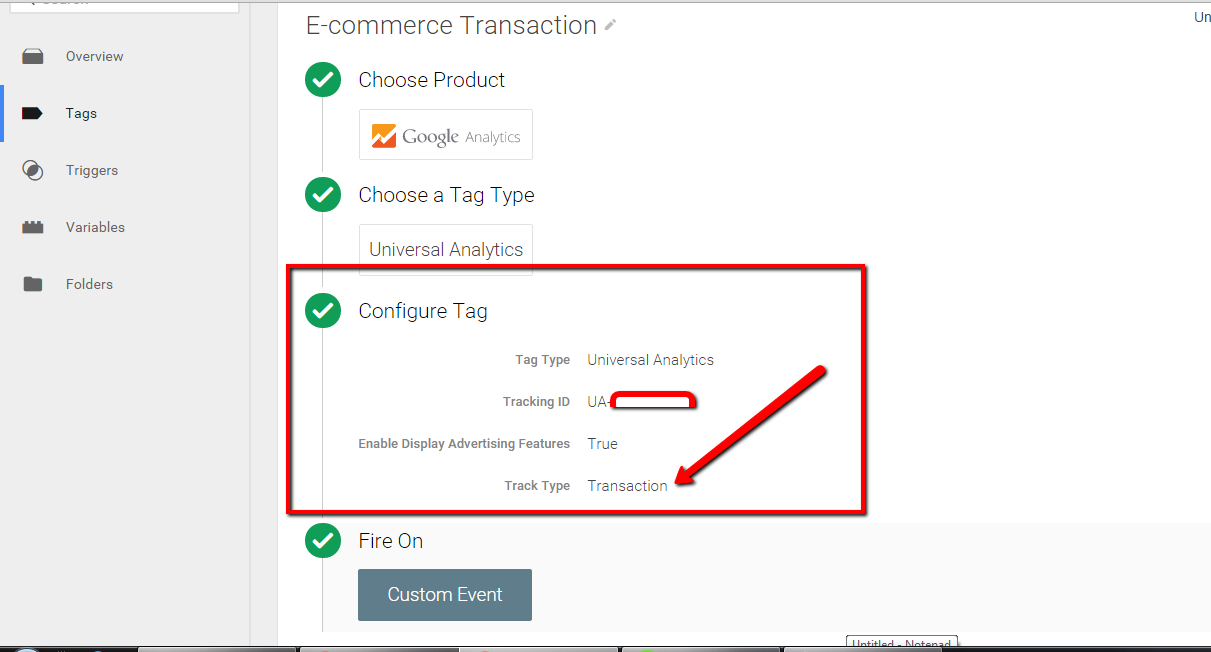
Step 4. Now Configure Trigger , Tag and Event Triggers in Google Tag Manager for Volution E-commerce Tracking 

Installing Tracking Tag in Volusion

Google Analytics Ecommerce Tracking On Volusion

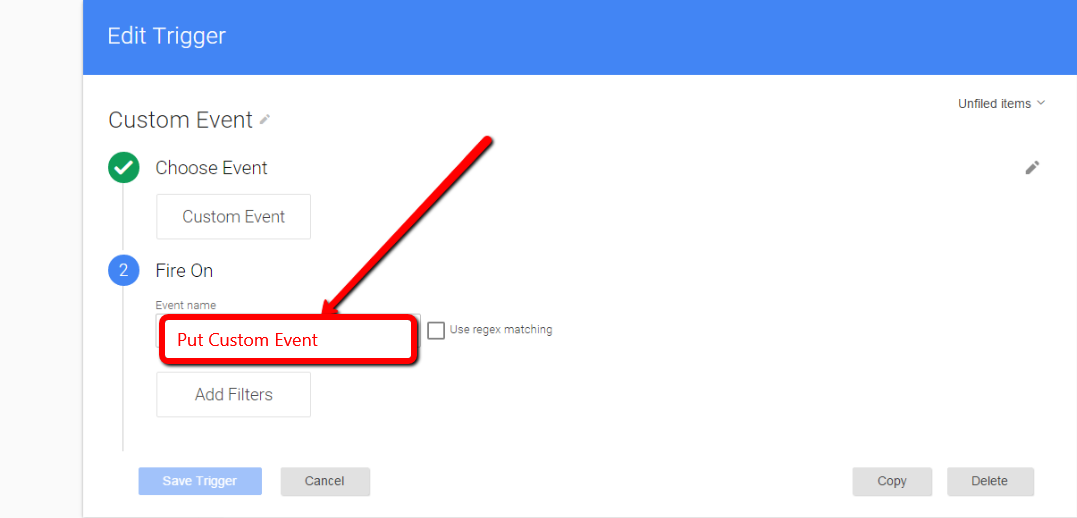
Step 5.  Now Create Google Tag Manager Custom Event to firing E-commerce Datalayer in Volusion Store in Google Tag Manager 

Setup Ecommerce custom event for Bigcommerce

Installing Tracking Tag in Volusion

Volusion E-commerce Tracking using Google Tag Manager – https://support.google.com/tagmanager/answer/6107169?hl=en

For Troubleshoot of Volution E-commerce tracking using Google Tag Manager –  Use Tag Assistance  – https://chrome.google.com/webstore/detail/tag-assistant-by-google/kejbdjndbnbjgmefkgdddjlbokphdefk?hl=en

For Contact: mappchero@gmail.com

Warning:if you do n’t know about javascript or do n’t have developing knowledge then do n’t try to implement on Volusion E-commerce tracking using Google Tag Manager  that can broke your site, Cart and other functionality 

Disclaimer: Google tag manager belongs to Google property 

I am avaible for Hire on Freelancer: Freelancer.com

I am avaible for Hire on Upwork: Upwork.com

I am avaible for Hire on Peopleperhour: Peopleperhour.com

I am avaible for Hire on Guru: Guru.com
Implement Google Ads Dynamic Remarketing for Shopify

Standard

Tag your website for Google Ads dynamic remarketing to Shopify

To exhibit dynamic advertisements to persons who have visited your web page, add the dynamic remarketing tag with customized parameters to your website. The dynamic remarketing tag collects knowledge, such because the IDs of the products or services that folks viewed for your site, the types of pages considered to corresponding to looking cart pages, and the complete value of items.

To implement Google Ads Dynamic Remarketing for Shopify, you can follow these steps:

  1. Create a Google Ads account and link it to your Shopify store.

2. Set up Google Ads Conversion Tracking on your Shopify store to track the conversion events that you want to use for remarketing.

3. Create a Google Ads Remarketing tag and install it on your Shopify store.

4. Set up a Google Ads Remarketing campaign in Google Ads, selecting the Dynamic Remarketing campaign type and the appropriate product or service category.

5. Customize your Dynamic Remarketing campaign by creating product feeds that include your product information, such as images, descriptions, and prices.

6. Set up your Dynamic Remarketing ad templates, which will automatically pull the product information from your product feeds and generate ads for each product.

7. Launch your Dynamic Remarketing campaign and monitor its performance to optimize your ad targeting and bidding strategy.

More factors to use dynamic remarketing Tags for Shopify Dynamic Remarketing Campaign

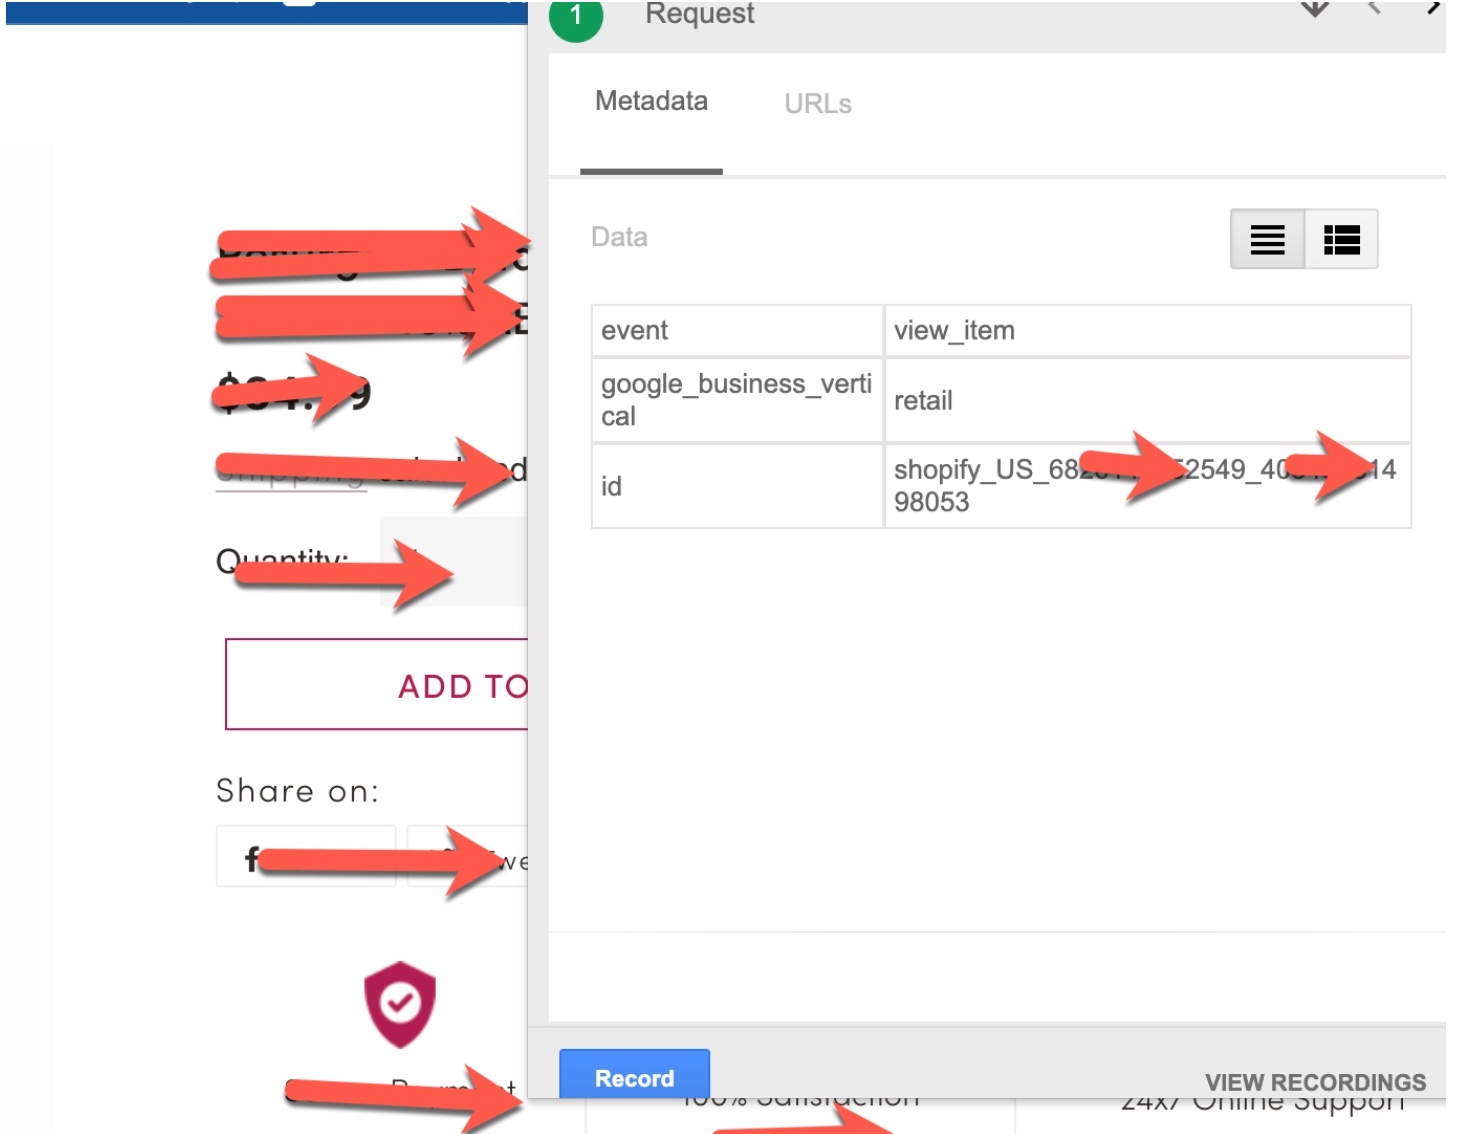
To implement Google Ads Dynamic Remarketing for Shopify, you can use the following events to track user actions on your website:

view_item: This event should be triggered when a user views a specific product page. You can use this event to track which products a user has shown interest in and use this data to create highly targeted remarketing campaigns for those products. view_item_list: This event should be triggered when

view_item_list: This event should be triggered when a user views a list of products, such as a collection page or search results page. You can use this event to track which products a user has shown interest in.

view_search_results: This event should be triggered when a user performs a search on your website and views the search results page. You can use this event to track which search queries a user has performed and which products they have shown interest in.

add_to_cart: This event should be triggered when a user adds a product to their cart. You can use this event to track which products a user is interested in purchasing.

purchase: This event should be triggered when a user completes a purchase. You can use this event to track which products were purchased and how much revenue was generated.

By tracking these events, you can use the data to create highly-targeted remarketing campaigns that show users the products they have shown interest in or abandoned in their cart. To implement these events, you can use Google Tag Manager to set up event tracking and trigger the appropriate events based on user actions. Once the events are tracked, you can use them to create custom audiences and dynamic remarketing campaigns in Google Ads.

Implementation Google Ads Dynamic Remarketing for Shopify using Google Tag Manager

  • High performance layouts: AdWords calls which advertising layout that is dynamic is likely to perform best for the individual, arrangement, and stage where the advertisement will show. 

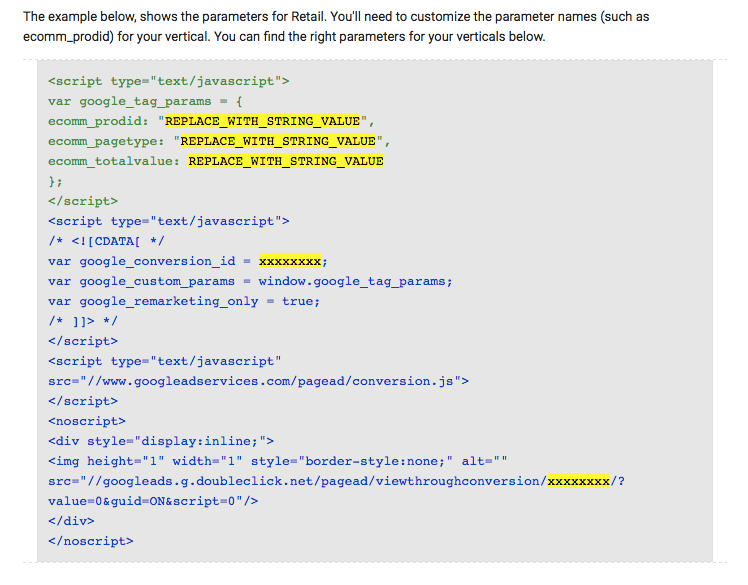
Custom Dynamic Tag with custom parameters for Shopify Dynamic Remarketing 

<script type=”text/javascript”>
var google_tag_params = {
ecomm_prodid: “REPLACE_WITH_STRING_VALUE“,
ecomm_pagetype: “REPLACE_WITH_STRING_VALUE“,
ecomm_totalvalue: REPLACE_WITH_STRING_VALUE
};
</script>

Dynamic Remarketing Tags Implement  in Shopify

  1.   Following the below instruction to set up dynamic Remarketing tags for Shopify

Login with Admin —–> Go to Online Store —–> Themes. (Place it immediately before the closing <body> tag.)

<script type=”text/javascript”>
{% if template contains ‘product’ %}
var google_tag_params = {
ecomm_prodid: ‘{{ product.id }}’,
ecomm_pagetype: ‘product’,
ecomm_totalvalue: {{ product.price | money_without_currency | replace: ‘,’, ” }}
};
{% elsif template contains ‘cart’ %}
var google_tag_params = {
{% if cart.item_count > 1 %}
ecomm_prodid: [{% for item in cart.items %}'{{ item.product_id }}_{{ item.variant.id }}'{% if forloop.last != true %},{% endif %}{% endfor %}],
{% elsif cart.item_count == 1 %}
ecomm_prodid: {% for item in cart.items %}'{{ item.product_id }}_{{ item.variant.id }}'{% endfor %},
{% else %}
ecomm_prodid: ”,
{% endif %}
ecomm_pagetype: ‘cart’,
ecomm_totalvalue: {{ cart.total_price | money_without_currency | replace: ‘,’, ” }}
};
{% elsif template contains ‘search’ %}
var google_tag_params = {
ecomm_prodid: ”,
ecomm_pagetype: ‘searchresults’,
ecomm_totalvalue: ”
};
{% elsif template contains ‘index’ %}
var google_tag_params = {
ecomm_pagetype: ‘home’,

};
{% else %}
var google_tag_params = {
ecomm_prodid: ”,
ecomm_pagetype: ‘other’,
ecomm_totalvalue: ”
};
{% endif %}
</script>
<script type=”text/javascript”>
/* <![CDATA[ */
var google_conversion_id = xxxxxx;
var google_custom_params = window.google_tag_params;
var google_remarketing_only = true;
/* ]]> */
</script>
<script type=”text/javascript” src=”//www.googleadservices.com/pagead/conversion.js”>
</script>
<noscript>
<div style=”display:inline;”>
<img height=”1″ width=”1″ style=”border-style:none;” alt=”” src=”//googleads.g.doubleclick.net/pagead/viewthroughconversion/xxxxxxx/?value=0&amp;guid=ON&amp;script=0″/>
</div>
</noscript>

Note: Make you will replace with your google_conversion_id

2. Shopify Dynamic Remarketing Tags for Order Confirmation Page

 <script type=”text/javascript”>
var google_tag_params = {
ecomm_prodid: [{% for line_item in order.line_items %}'{{ line_item.id }}'{% unless forloop.last %},{% endunless %}{% endfor %}],
ecomm_pagetype: ‘purchase’,
ecomm_totalvalue: {{order.total_price  | money_without_currency }},
};
</script>

<script type=”text/javascript”>
/* <![CDATA[ */
var google_conversion_id = xxxxxxxx;
var google_custom_params = window.google_tag_params;
var google_remarketing_only = true;
/* ]]> */
</script>
<script type=”text/javascript” src=”//www.googleadservices.com/pagead/conversion.js”>
</script>
<noscript>
<div style=”display:inline;”>
<img height=”1″ width=”1″ style=”border-style:none;” alt=”” src=”//googleads.g.doubleclick.net/pagead/viewthroughconversion/948315090/?value=0&amp;guid=ON&amp;script=0″/>
</div>
</noscript>

Set Up Google Ads Dynamic Remarketing in Shopify

Dynamic Remarketing Setup for Google Ads in Shopify

Note: Make you will replace with your google_conversion_id

Dynamic Remarketing for Shopify– https://support.google.com/tagmanager/answer/6107169?hl=en

For Troubleshoot of Dynamic Remarketing –  Use Tag Assistance  – https://chrome.google.com/webstore/detail/tag-assistant-by-google/kejbdjndbnbjgmefkgdddjlbokphdefk?hl=en

For Contact: mappchero@gmail.com

Warning:if you do n’t know about javascript or do n’t have developing knowledge then do n’t try to implement on Dynamic Remarketing that can broke your site, Cart and other functionality 

Disclaimer: Google tag manager belongs to Google property 

I am avaible for Hire on Freelancer: Freelancer.com

I am avaible for Hire on Upwork: Upwork.com

I am avaible for Hire on Peopleperhour: Peopleperhour.com

I am avaible for Hire on Guru: Guru.com
Embadded Tracking Vimeo video in Google Analytics using Tag Manager

Standard

Are you looking to Track Vimeo Videos with Google Tag Manager and Google Analytics (with iframe or without iframes on Vimeo) or Vimeo tracking inside a lightbox 

Get more insights than before into how people are participating with our powerful analytics tools with your Vimeo videos using Google Tag Manager and Google Analytic

To track embedded Vimeo videos in Google Analytics using Google Tag Manager, you can follow these steps:

Go to your Google Tag Manager account and create a new tag for your Vimeo video tracking.

Choose “Custom HTML” as your tag type and paste the Vimeo player code into the HTML box.

Add a listener to the Vimeo player to track the events you want to capture, such as play, pause, and finish.

Set up a trigger to fire the tag when the video starts playing.

Configure your tag to send data to Google Analytics, using the appropriate tracking code and event categories.

Test your tag and preview it in your Tag Manager account to ensure that it is working correctly.

Publish your tag and monitor your Google Analytics reports to track the performance of your Vimeo videos.

Note that Vimeo also offers its own analytics tools that can be used to track video performance, including views, engagement, and retention. These can be accessed by logging into your Vimeo account and going to the “Stats” section for your videos.

The setup of all of these options requires javascript and dependent on regardless if you are using Google Tag Manager you can put script directly into custom HTML in Google Tag Manager

This can provide you with an understanding of the way people have interacted embadded Vimeo  along using Google Tag Mag Manager. like

  • Play events
  • Pause events
  • Watch to End events
  • 10, 25, 50, 75, & 90% Completion events

Step 1. Tracking Vimeo Video views with Google Tag Manager

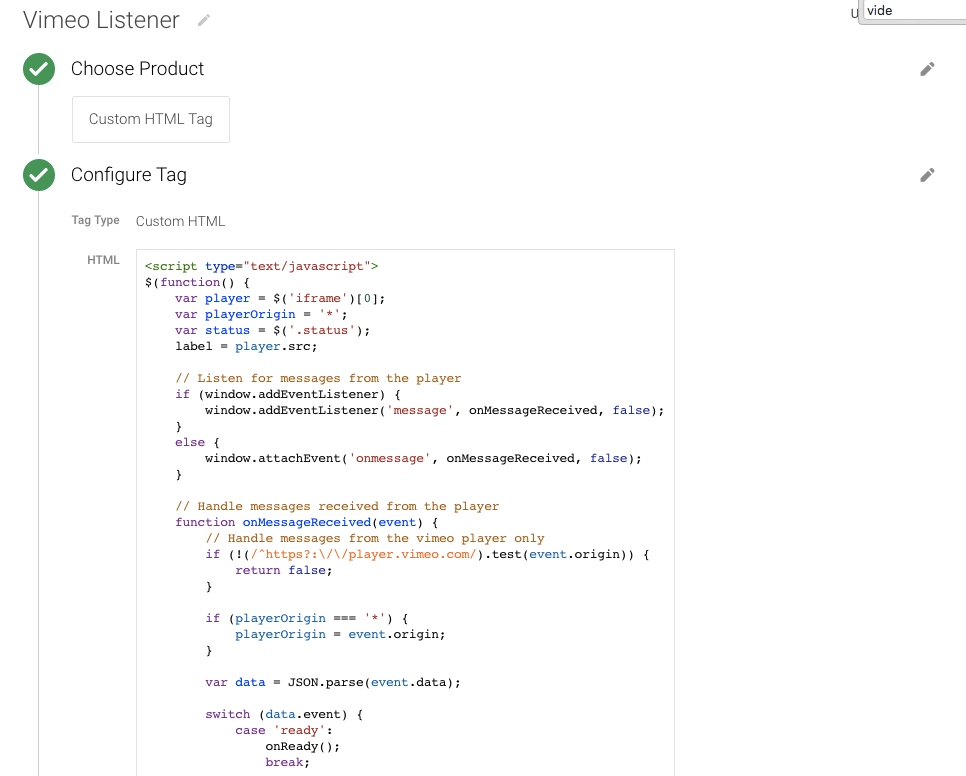
Tag Name:  Track Vimeo Video Engagement In Google Analytics Using Google tag manager
Tag Type: Custom HTML Tag

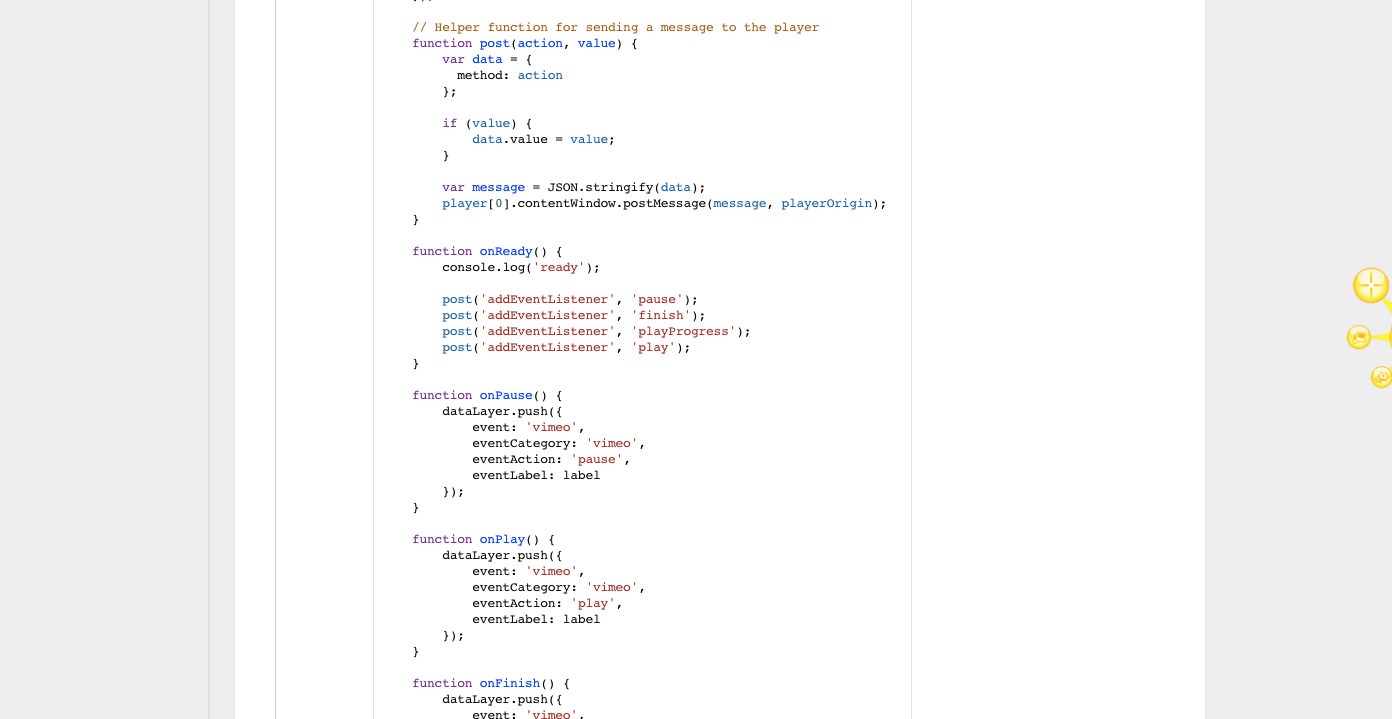
Note:  You need to modify below HTML Code according to Embedded Tracking Vimeo Video using  using below custom html Code 

Videmo

Track Vimeo via Google Tag Manager

Tracking Vimeo using Google Tag Manager

Tracking Vimeo using Google Tag Manager

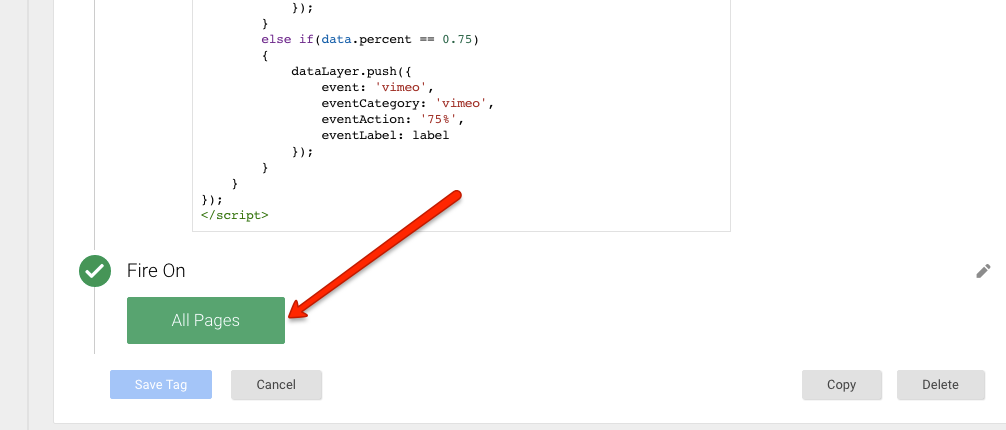
Firing Rules 

Rule Name: All Pages

Embedded Tracking Vimeo Video with Google Tag Manager

Embedded Tracking Vimeo Video with Google Tag Manager

Step 3. Create Macros for Event Action, Event Category, and Event Label Tracking Vimeo Video  with Google Tag Manager

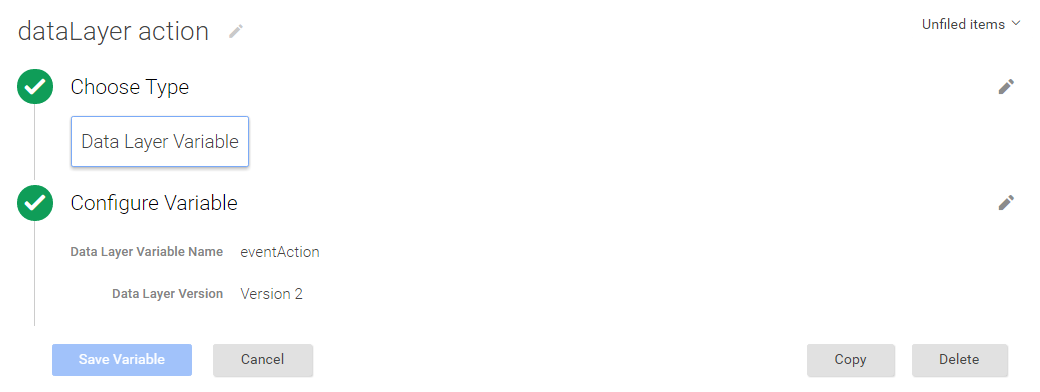
A: Event Action Macro using Tracking Vimeo Video views with Google Tag Manager

Macro Name: dataLayer action
Macro Type: Data Layer Variable
Data Layer Variable Name: eventAction
Data Layer Version: Version 2
Default Value: (blank)

Google Analytics Vimeo Video Tracking

Google Analytics Vimeo Video Tracking

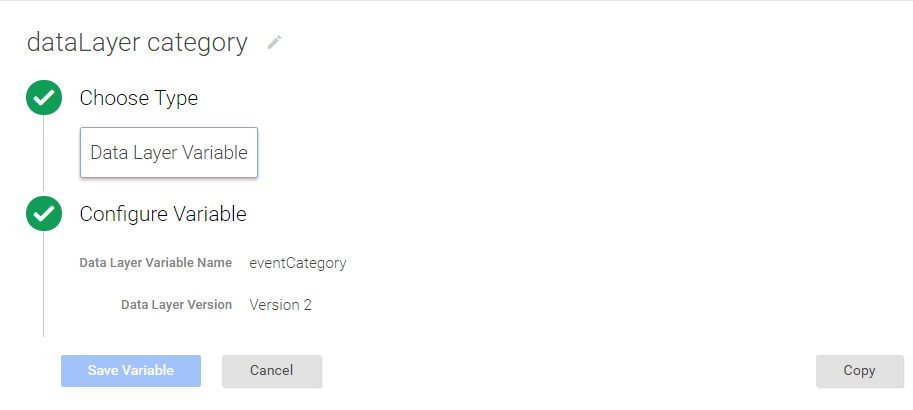
B: Event Category Macro Tracking using Vimeo Video views with Google Tag Manager

Macro Name: dataLayer category
Macro Type: Data Layer Variable
Data Layer Variable Name: eventCategory
Data Layer Version: Version 2
Default Value: (blank)

Event tracking for Vimeo in Google Tag Manager

Event tracking for Vimeo in Google Tag Manager

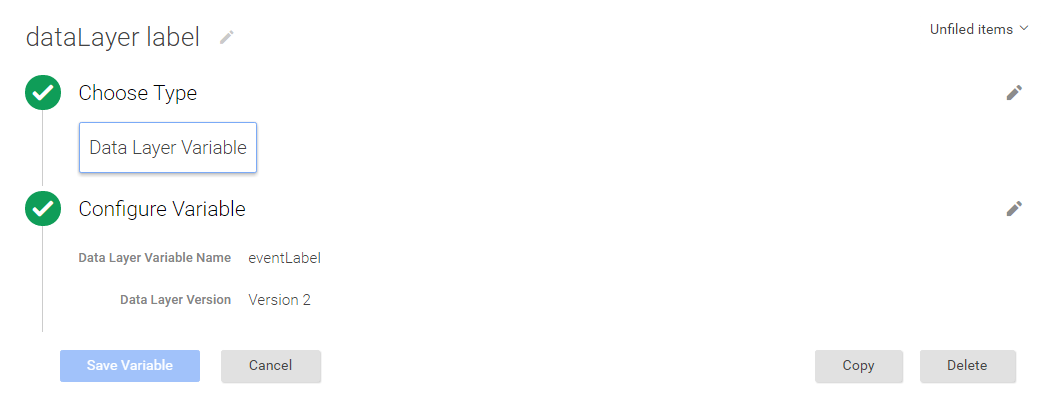
C: Event Label Macro using Tracking Vimeo Video views with Google Tag Manager

Macro Name: dataLayer label
Macro Type: Data Layer Variable
Data Layer Variable Name: eventLabel
Data Layer Version: Version 2
Default Value: (blank)

GTM and Vimeo Tracking

GTM and Vimeo Tracking

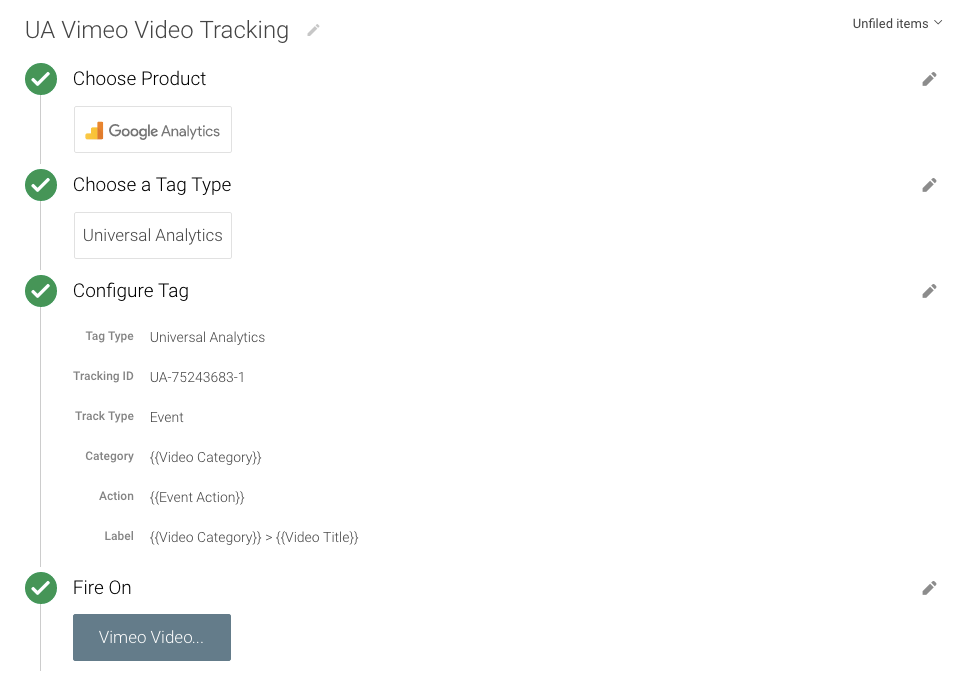
Step 4. Create UA Vimeo Video Event – UA Tag & Check for Vimeo Event Rule  Vimeo Video Tracking using Google Tag Manager

Tag Name: UA Vimeo Video Tracking – Video Page
Tag Type: Universal Analytics
Tracking ID: (your Google Analytics ID)
Track Type: Event
Event Tracking Parameters:
Category: {{dataLayer category}}
Action: {{dataLayer label}}
Label: {{dataLayer action}}

Vimeo Video Tracking

Google Tag Manager Vimeo Video Tracking – Tags

Firing Rules

Rule Name: Viemo event

Fire On

Event name equals vimeo

vimeo

Result Behavior under Event in Google Analytic 

bb


Warning:if you do n’t know about javascript or do n’t have developing knowledge then do n’t try to implement on Vimeo Video Tracking using Google Tag Manager that can broke your site, Cart and other functionality 

Disclaimer: Google tag manager belongs to Google property 

I am avaible for Hire on Freelancer: Freelancer.com

I am avaible for Hire on Upwork: Upwork.com

I am avaible for Hire on Peopleperhour: Peopleperhour.com

I am avaible for Hire on Guru: Guru.com