Dynamic Remarketing Tags for a Shopify store

Standard

Google Ads Dynamic Remarketing Tags for a Shopify store using Google Tag Manager 

Dynamic remarketing tags for a Shopify store are a powerful tool that can help you reach potential customers who have previously interacted with your store. This technology allows you to create personalized ads that show products or services that are relevant to each visitor, based on their previous interactions with your Shopify store.

Dynamic remarketing tags work by tracking the pages that each visitor has viewed on your Shopify store, as well as the products that they have added to their cart or purchased. This data is then used to create ads that are tailored to each visitor’s interests and preferences, increasing the likelihood that they will return to your store and make a purchase.

To set up dynamic remarketing tags for your Shopify store, you will need to create a Google Ads account and connect it to your store. This involves installing a tracking code on your Shopify store that allows Google to track the actions of each visitor, such as the pages they view, the products they add to their cart, and their purchase history.

Once you have installed the tracking code, you can create remarketing lists in Google Ads that target specific groups of visitors based on their behavior on your Shopify store. For example, you could create a remarketing list that targets visitors who have added items to their cart but haven’t completed a purchase, or visitors who have viewed a particular category of products.

When you create dynamic ads in Google Ads, you can choose to show specific products or categories of products to each visitor, based on their behavior on your Shopify store. For example, if a visitor has added a particular item to their cart but hasn’t completed the purchase, you can show them an ad that features that specific product, along with a personalized message encouraging them to complete the purchase.

One of the key benefits of dynamic remarketing tags for Shopify stores is that they allow you to create highly personalized ads that are tailored to each visitor’s interests and preferences. This can be particularly effective in encouraging visitors to return to your store and complete a purchase, as they are more likely to engage with ads that are relevant to their needs and interests.

Another benefit of dynamic remarketing tags for Shopify stores is that they allow you to track the effectiveness of your advertising campaigns and optimize them for better performance. By tracking the behavior of each visitor and measuring the success of your ads in converting them into customers, you can make informed decisions about how to adjust your campaigns to achieve better results.

Overall, dynamic remarketing tags are an essential tool for any Shopify store owner who wants to increase their sales and attract more customers to their store. By creating personalized ads that are tailored to each visitor’s interests and preferences, you can build stronger relationships with your audience and encourage them to return to your store time and time again.

However, it’s important to note that setting up dynamic remarketing tags for your Shopify store requires some technical expertise and a good understanding of Google Ads. If you are not familiar with these technologies, it may be worth seeking the advice of an expert to help you get started and ensure that your campaigns are set up correctly.

In conclusion, dynamic remarketing tags for a Shopify store are a powerful tool that can help you reach potential customers who have previously interacted with your store. By creating personalized ads that are tailored to each visitor’s interests and preferences, you can increase the likelihood that they will return to your store and make a purchase. With the right strategy and expertise, dynamic remarketing tags can be an effective way to grow your Shopify store and achieve your business goals.

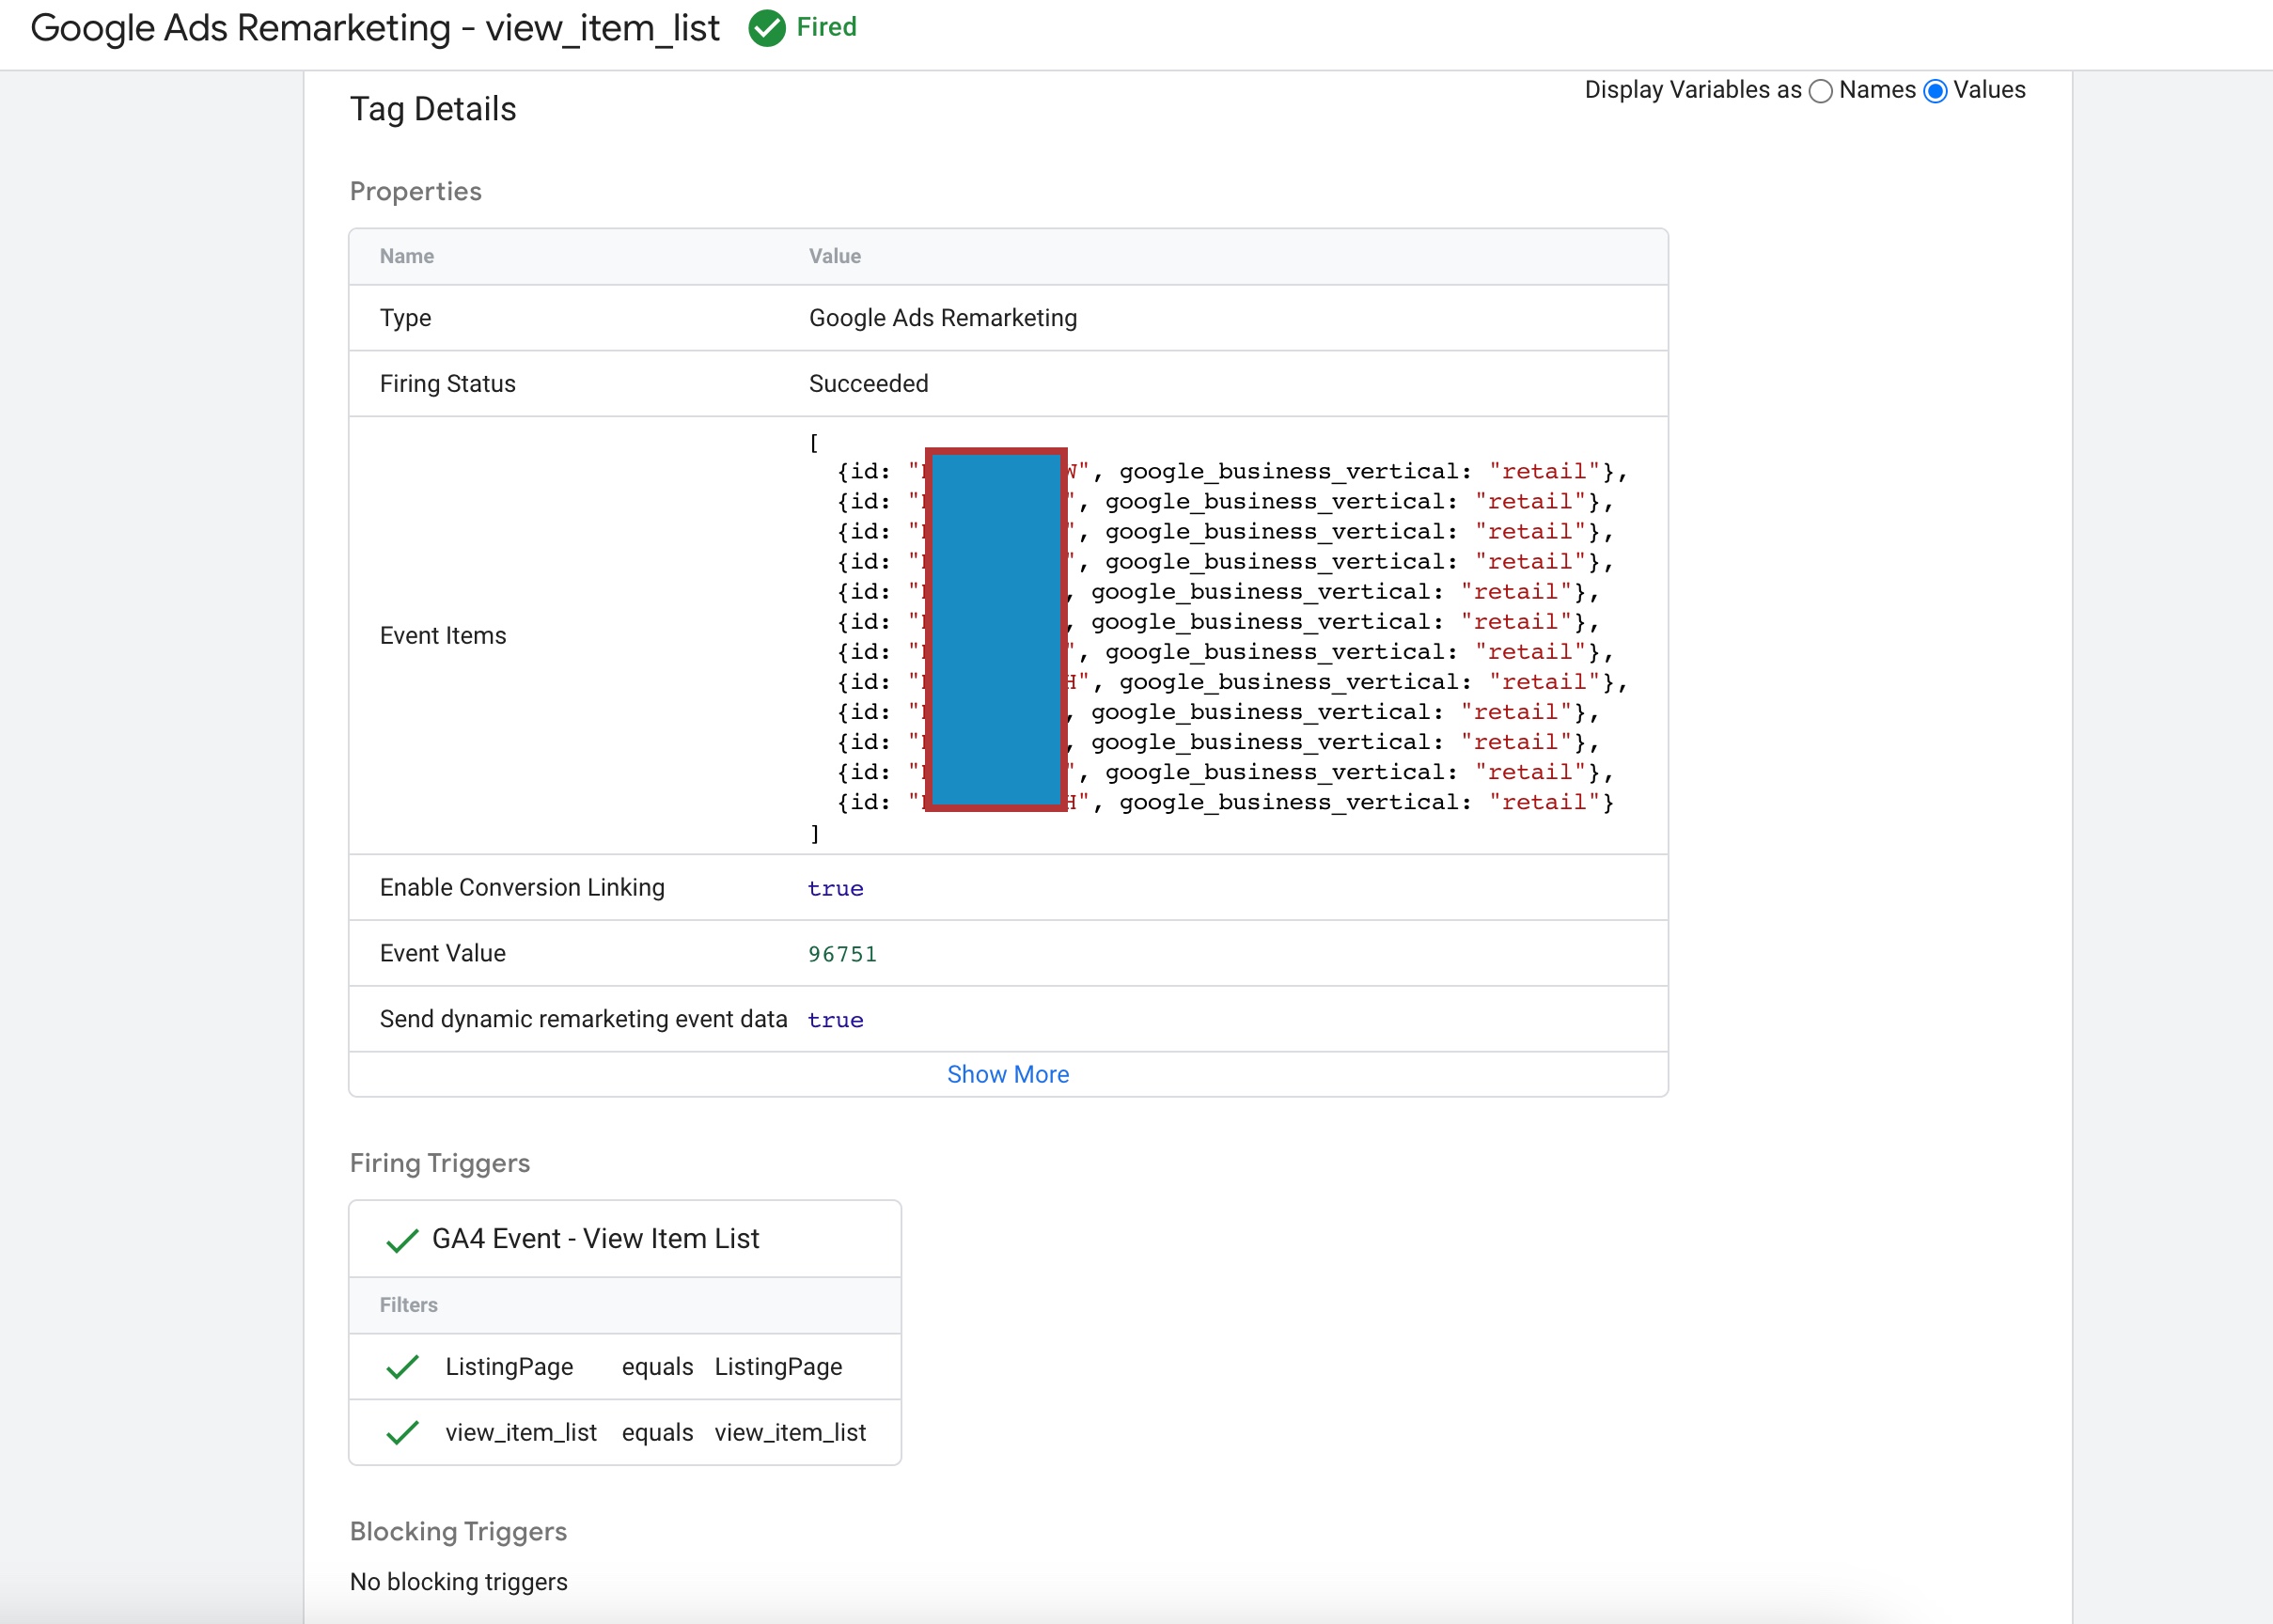
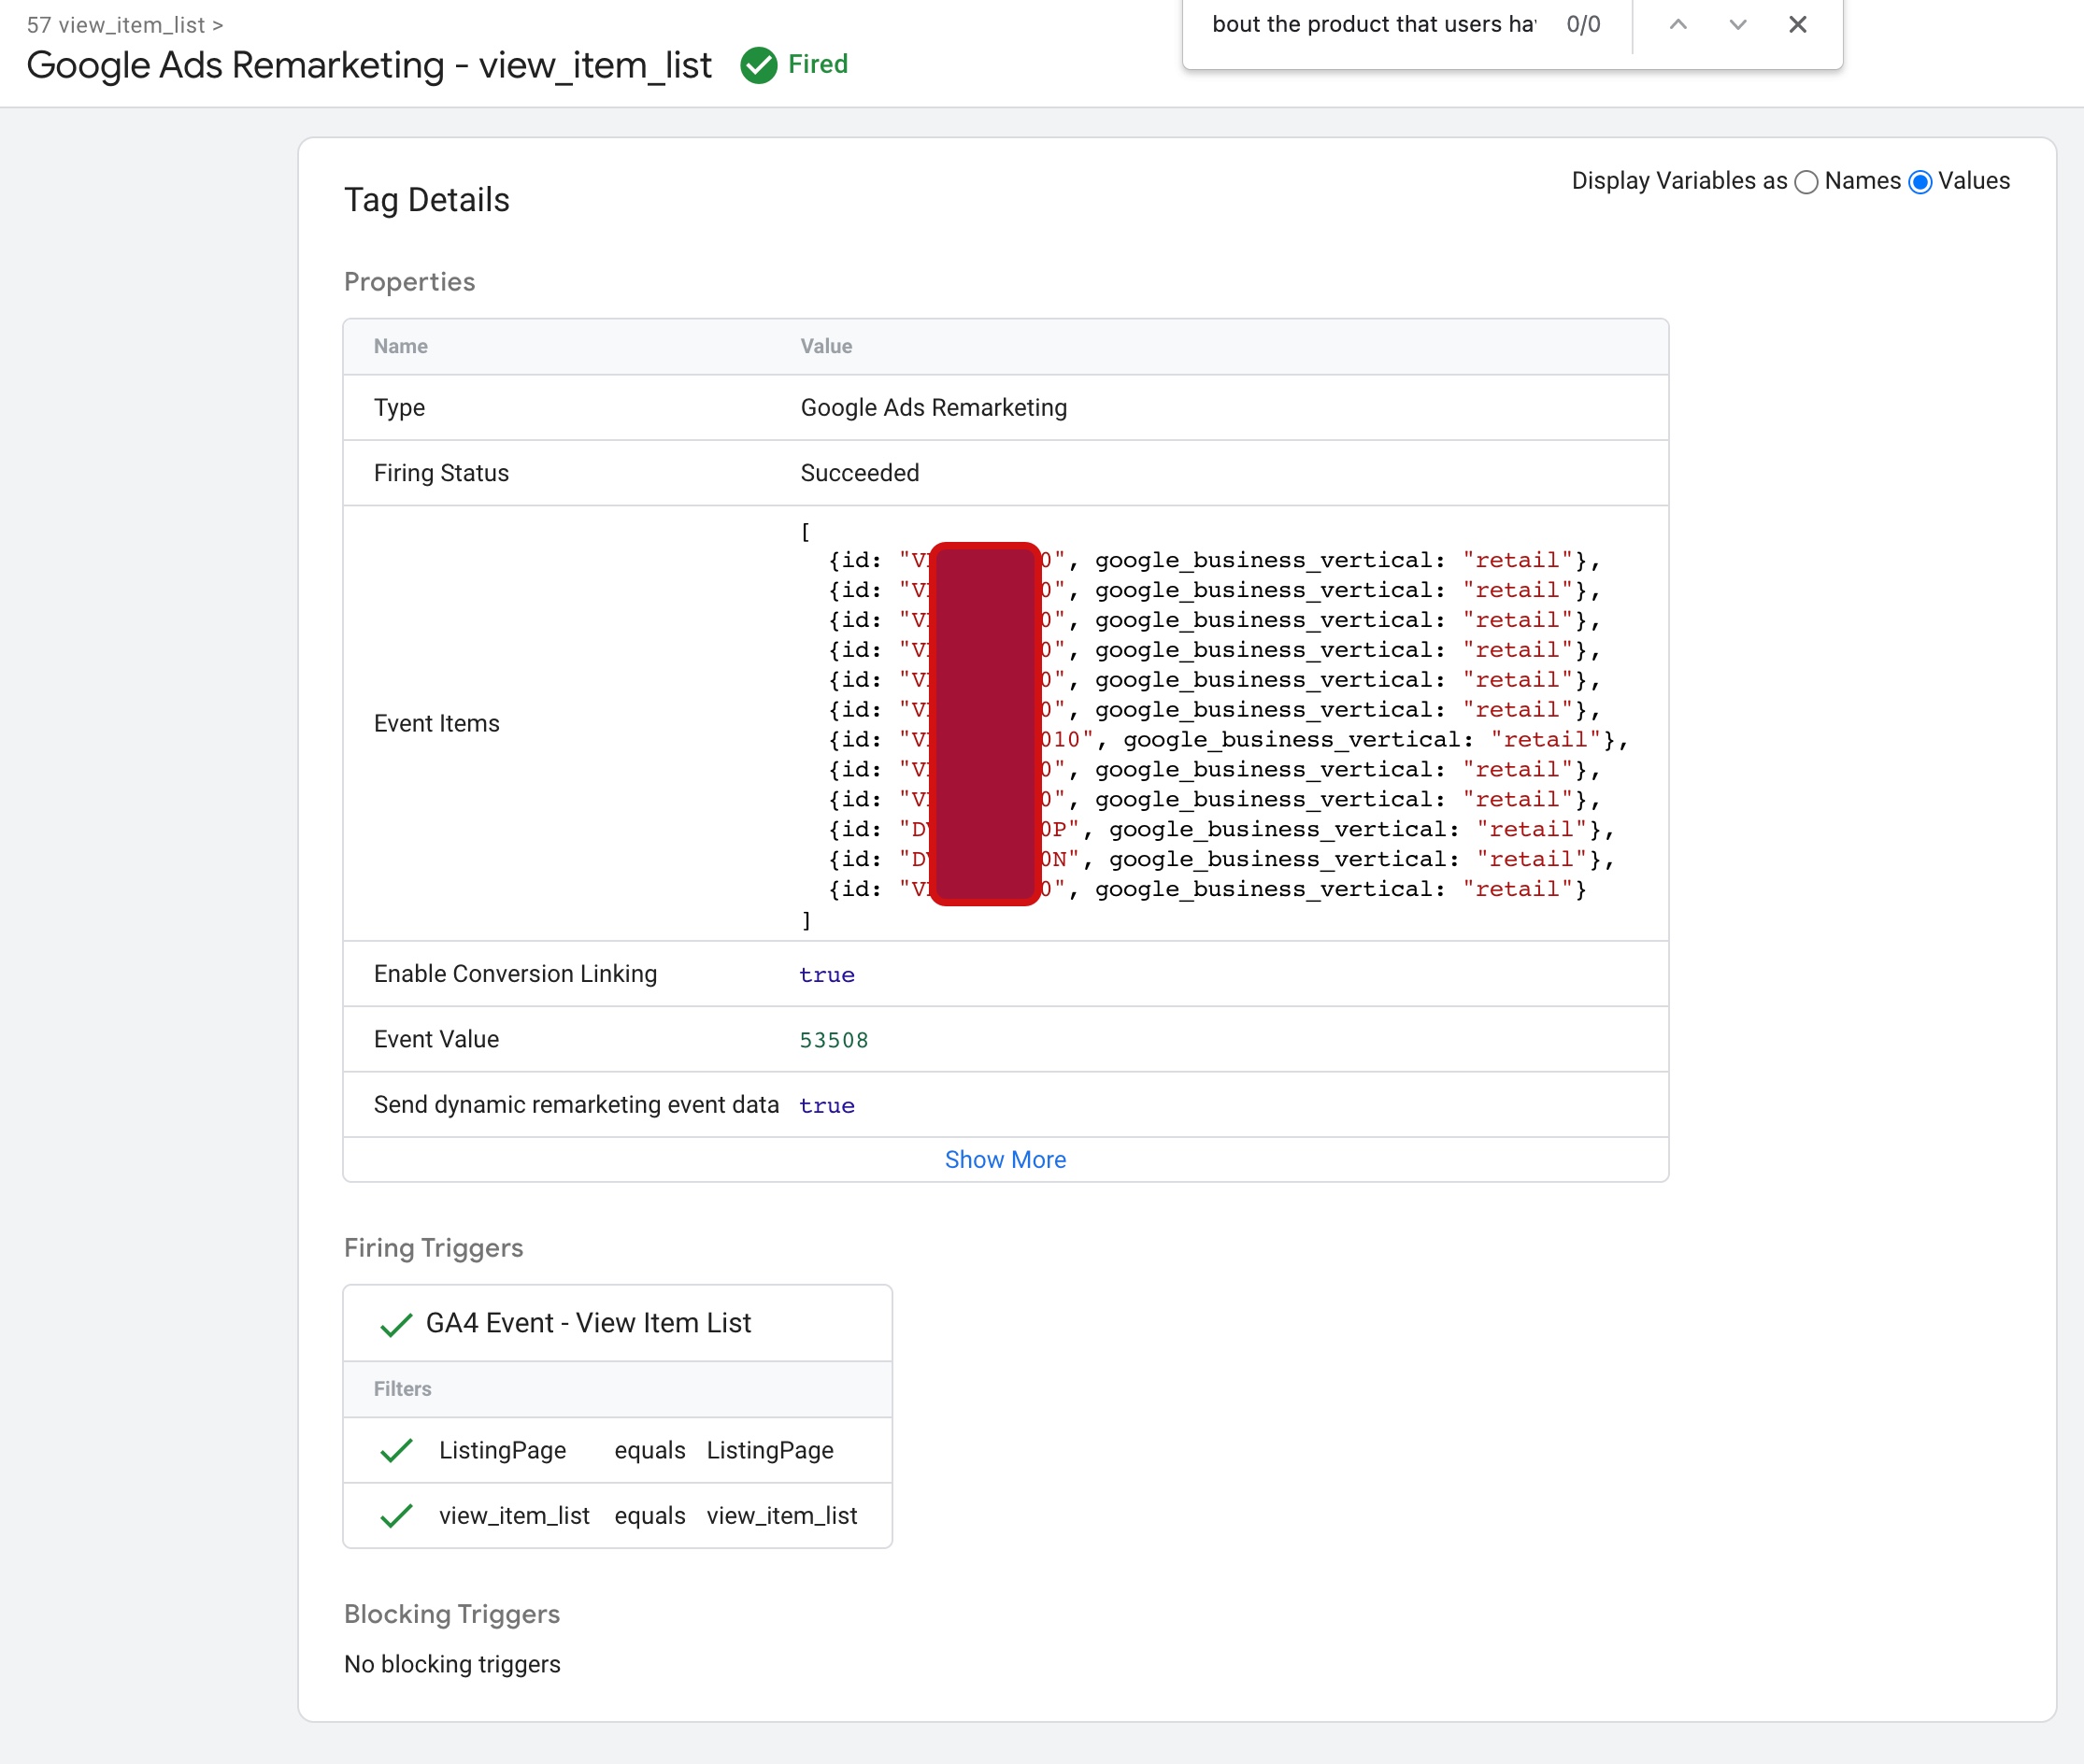
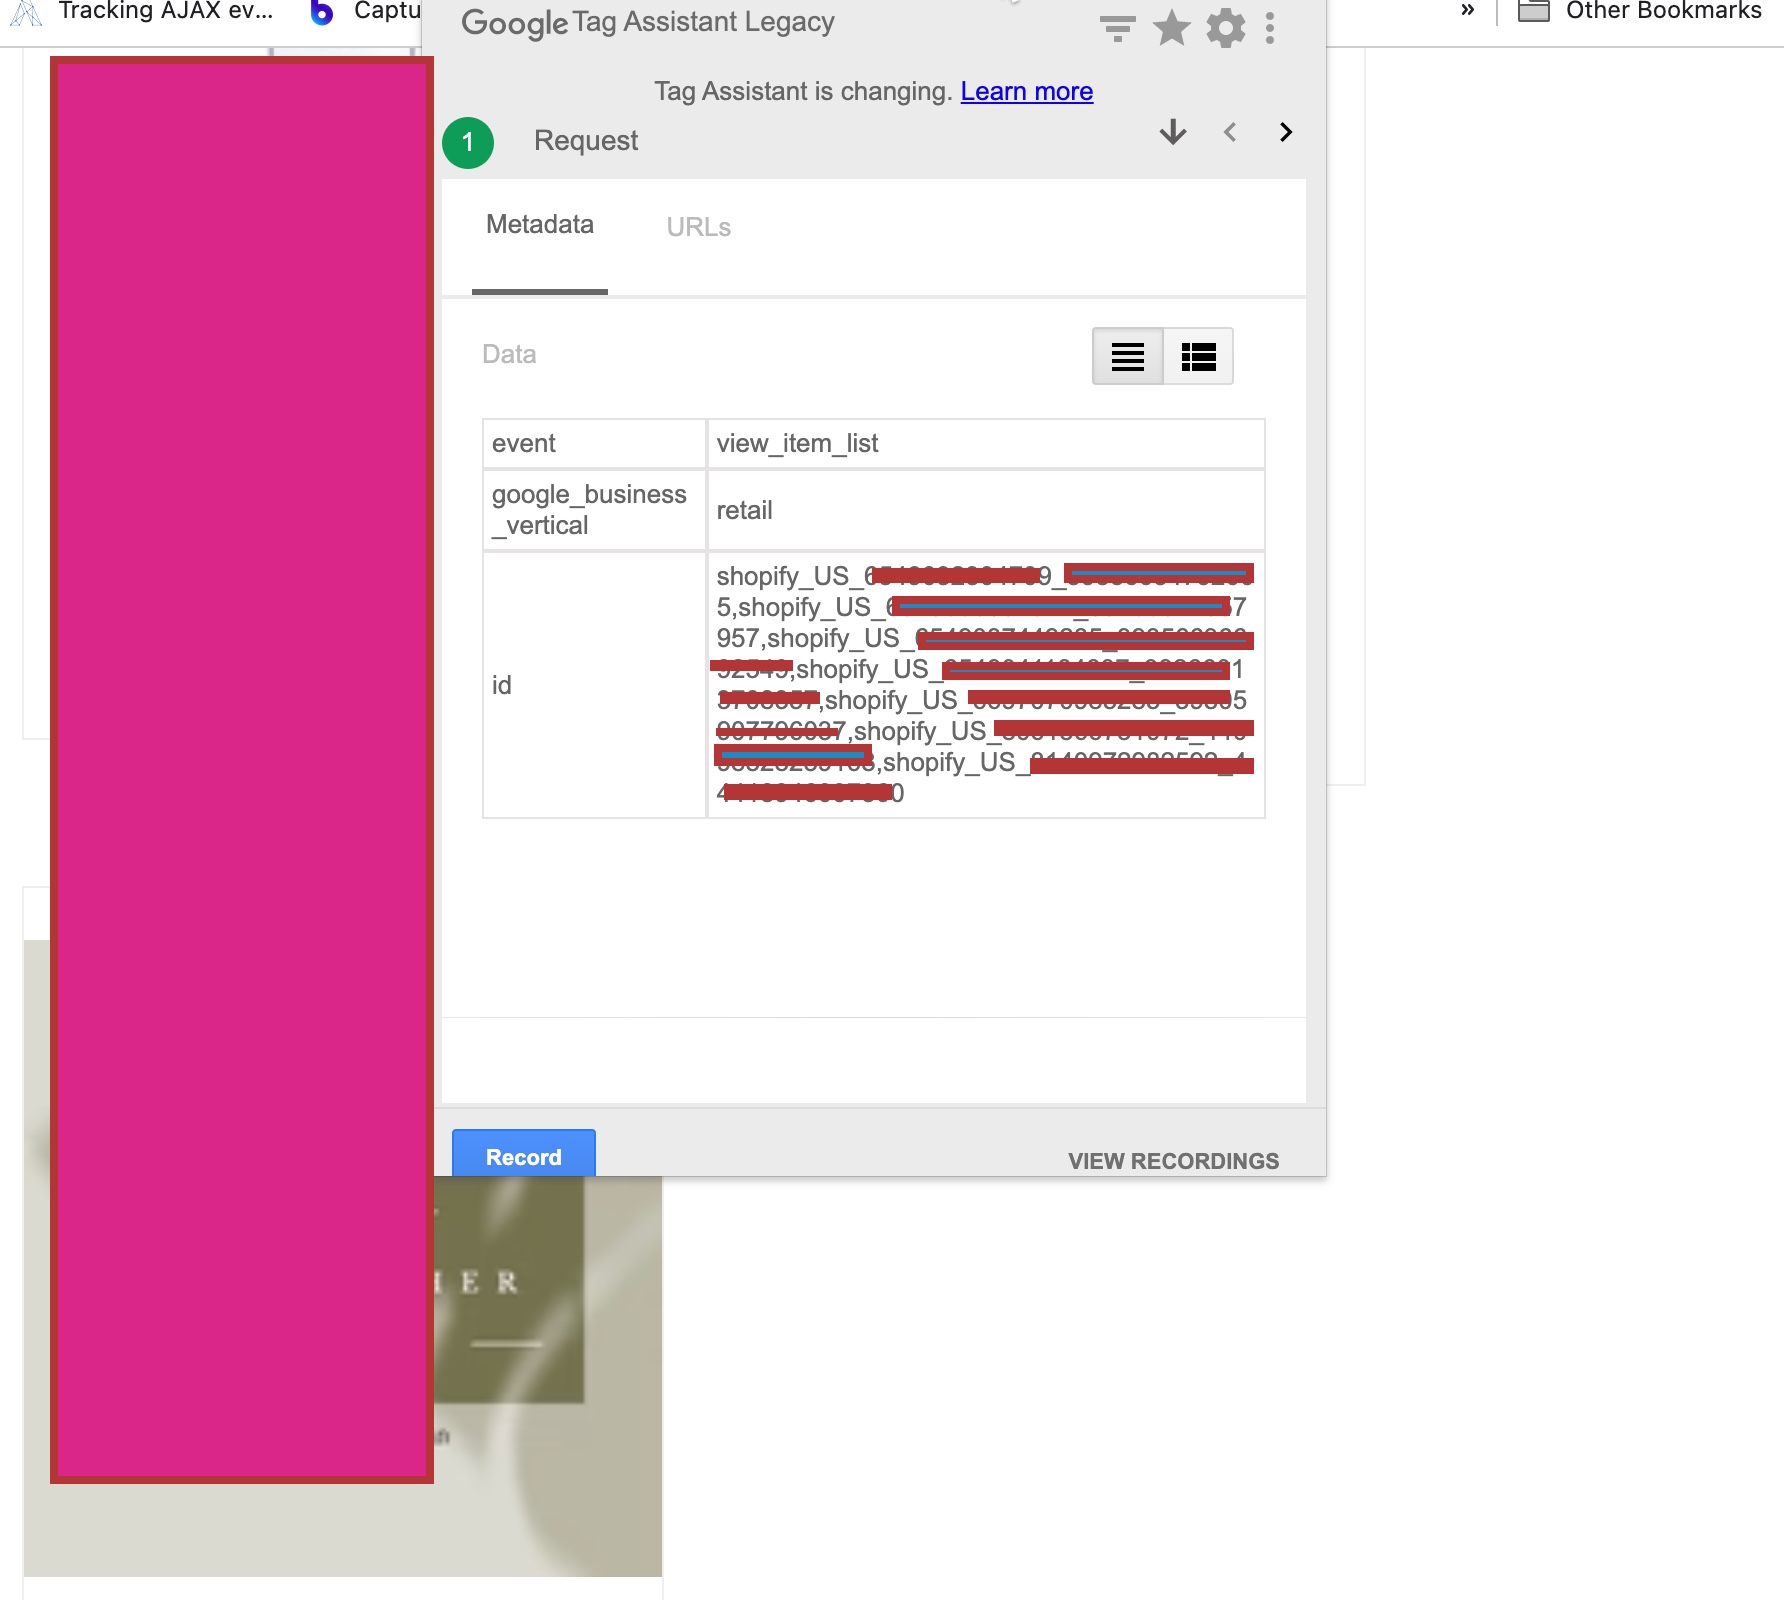
The ‘event’, ‘view_item_list‘ dynamic remarketing tag for a Shopify store is a powerful tool that allows you to track when a visitor views a list of products on your store. This data can then be used to create personalized ads that show relevant products to each visitor, increasing the likelihood that they will return to your store and make a purchase.
Google Ads Remarketing on Shopify

Setup Google Ads Dynamic Remarketing Tag on Shopify using Google Tag Manager

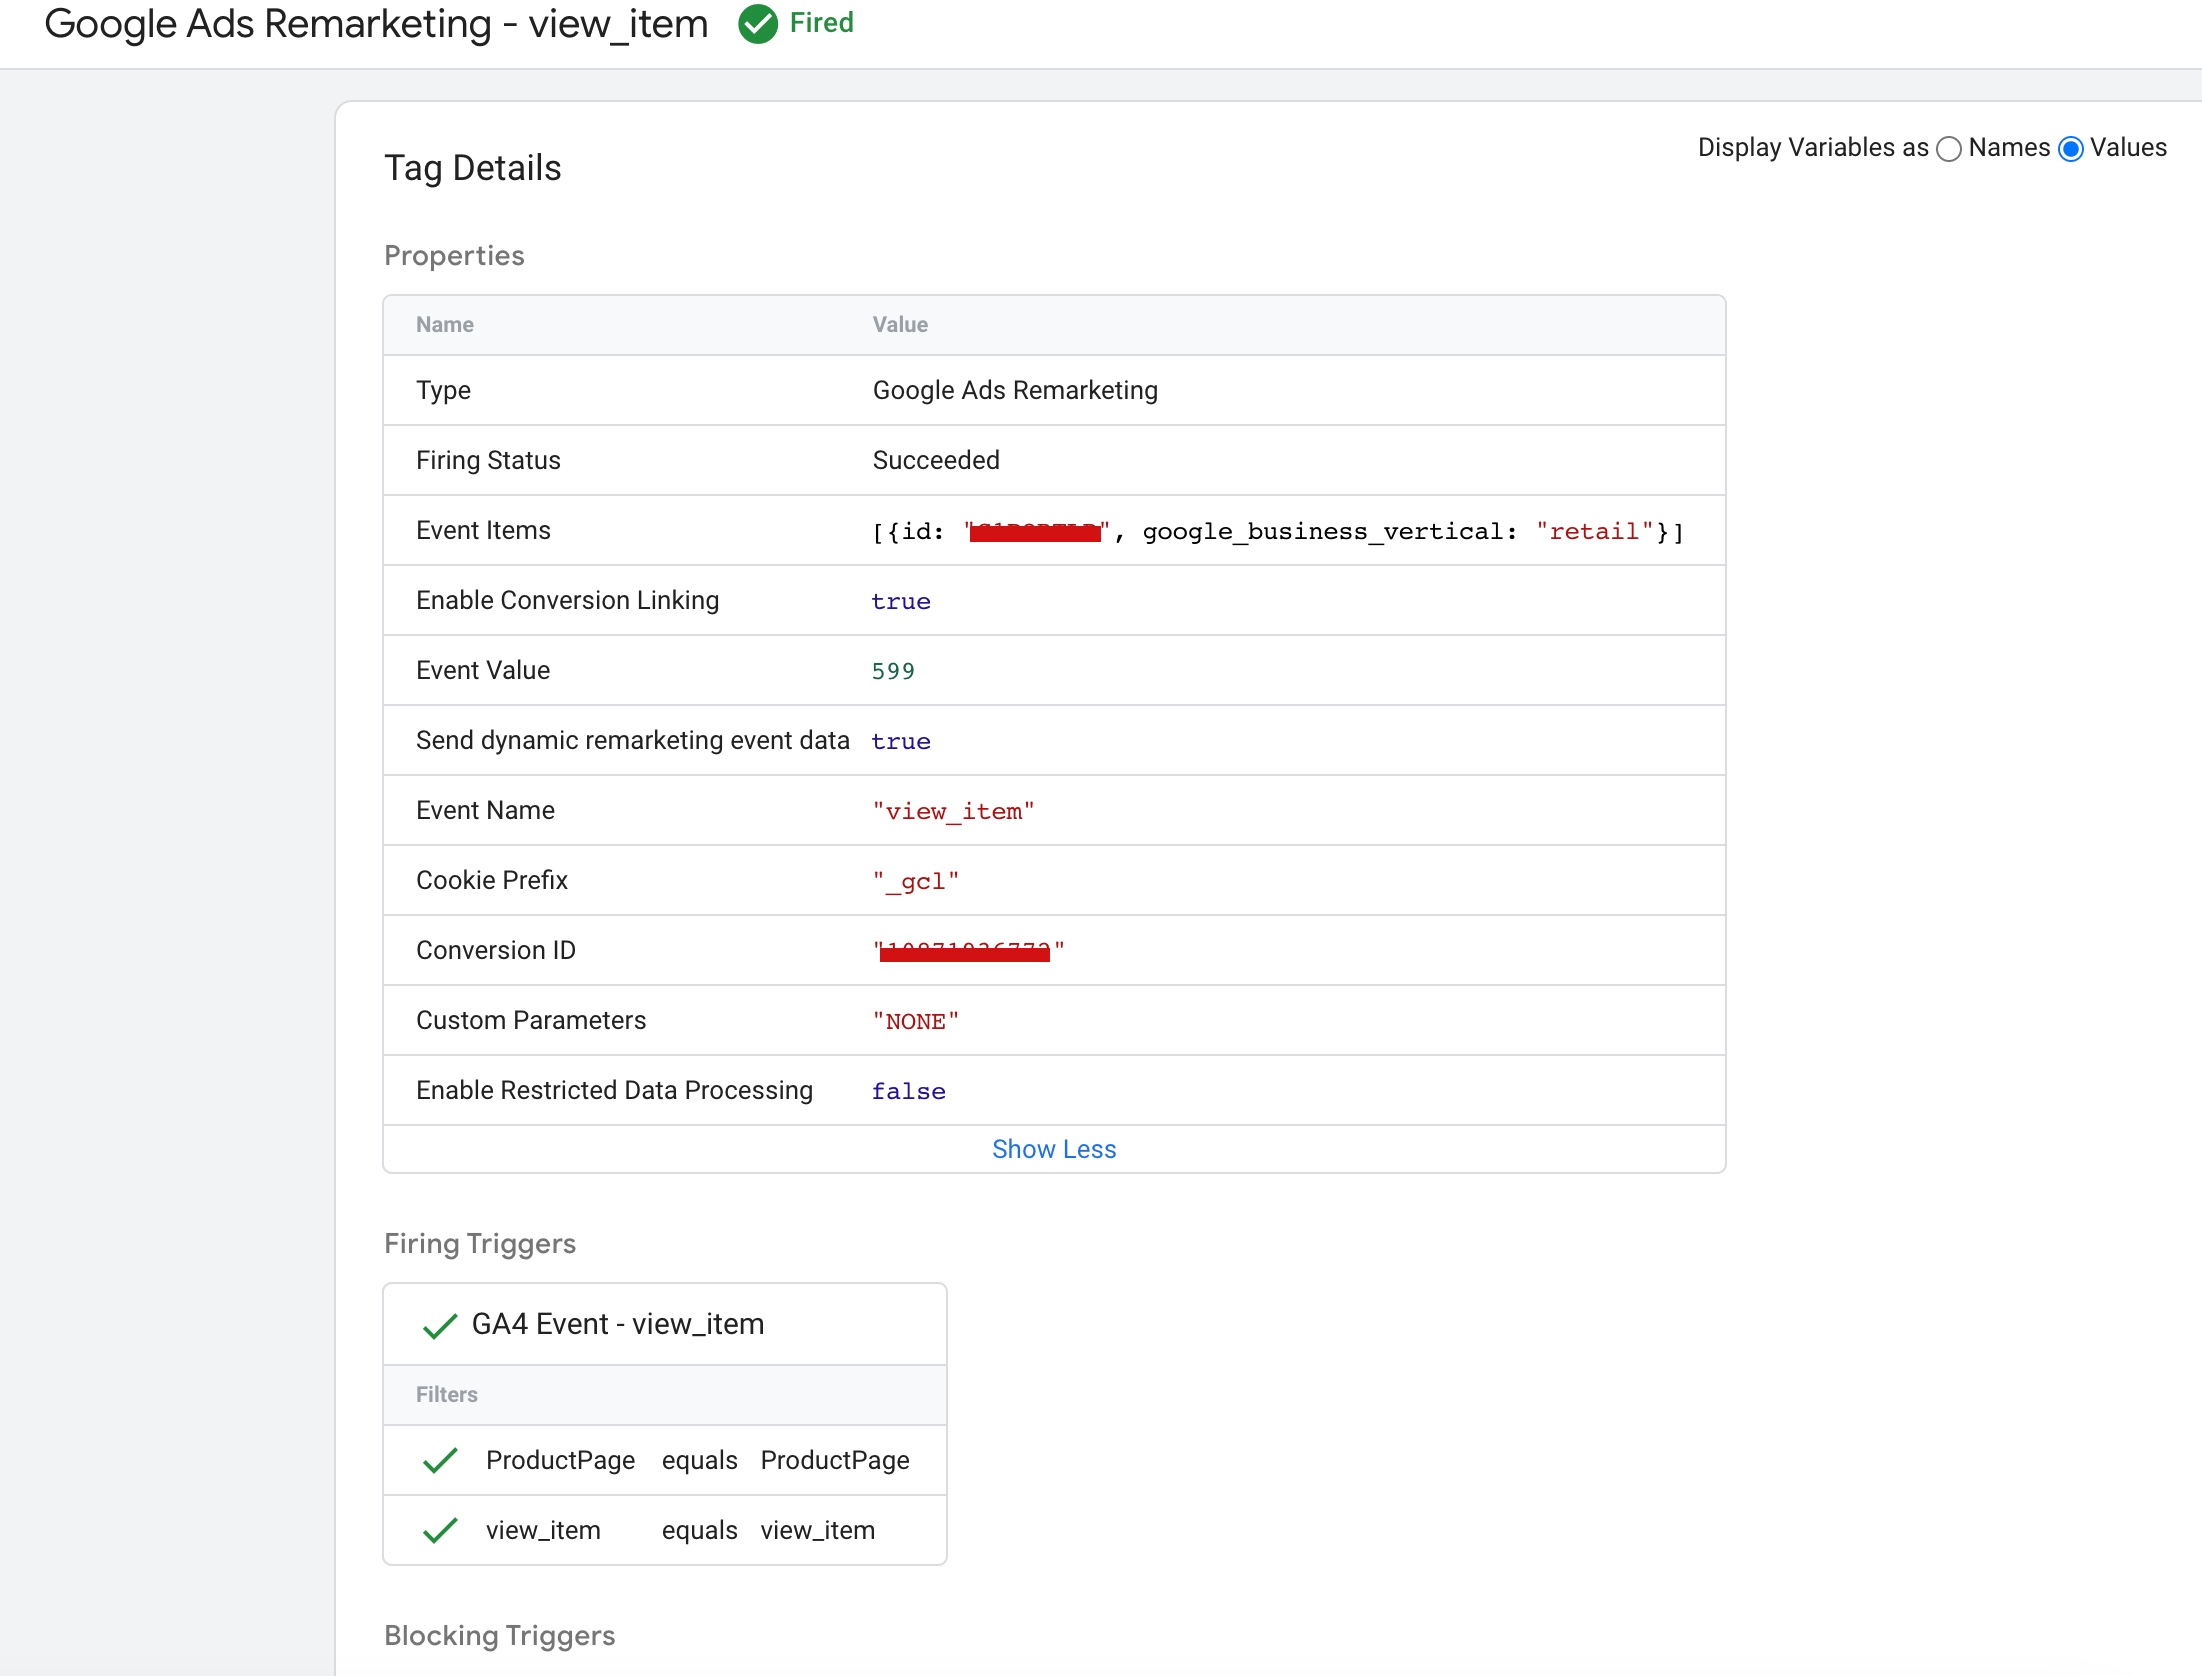
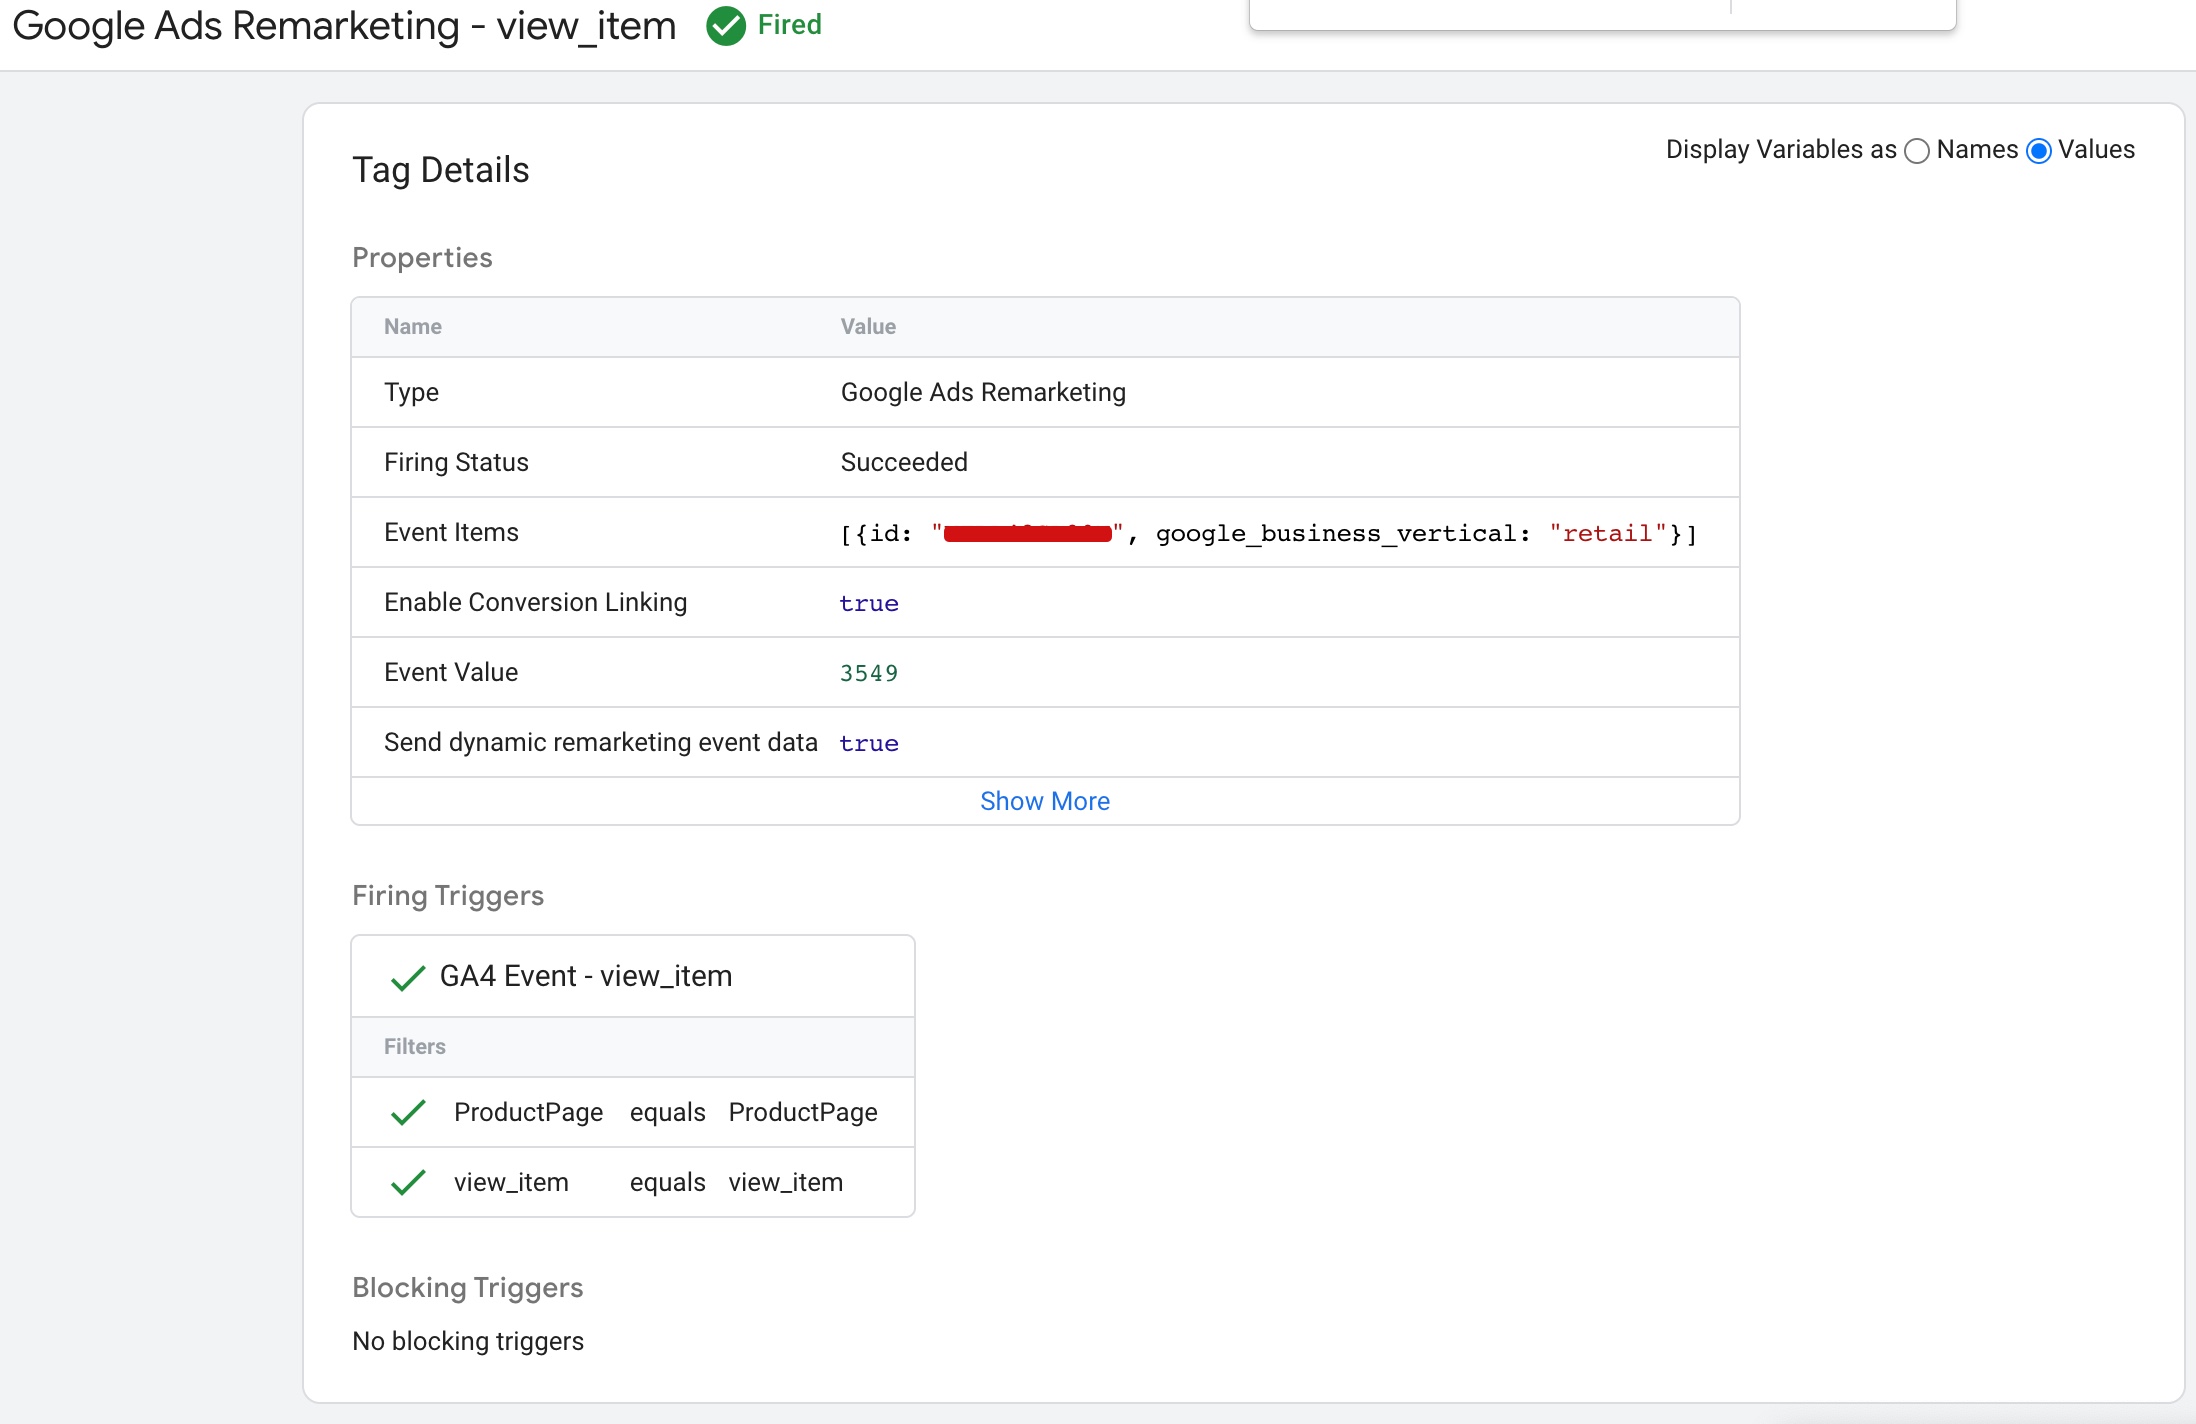
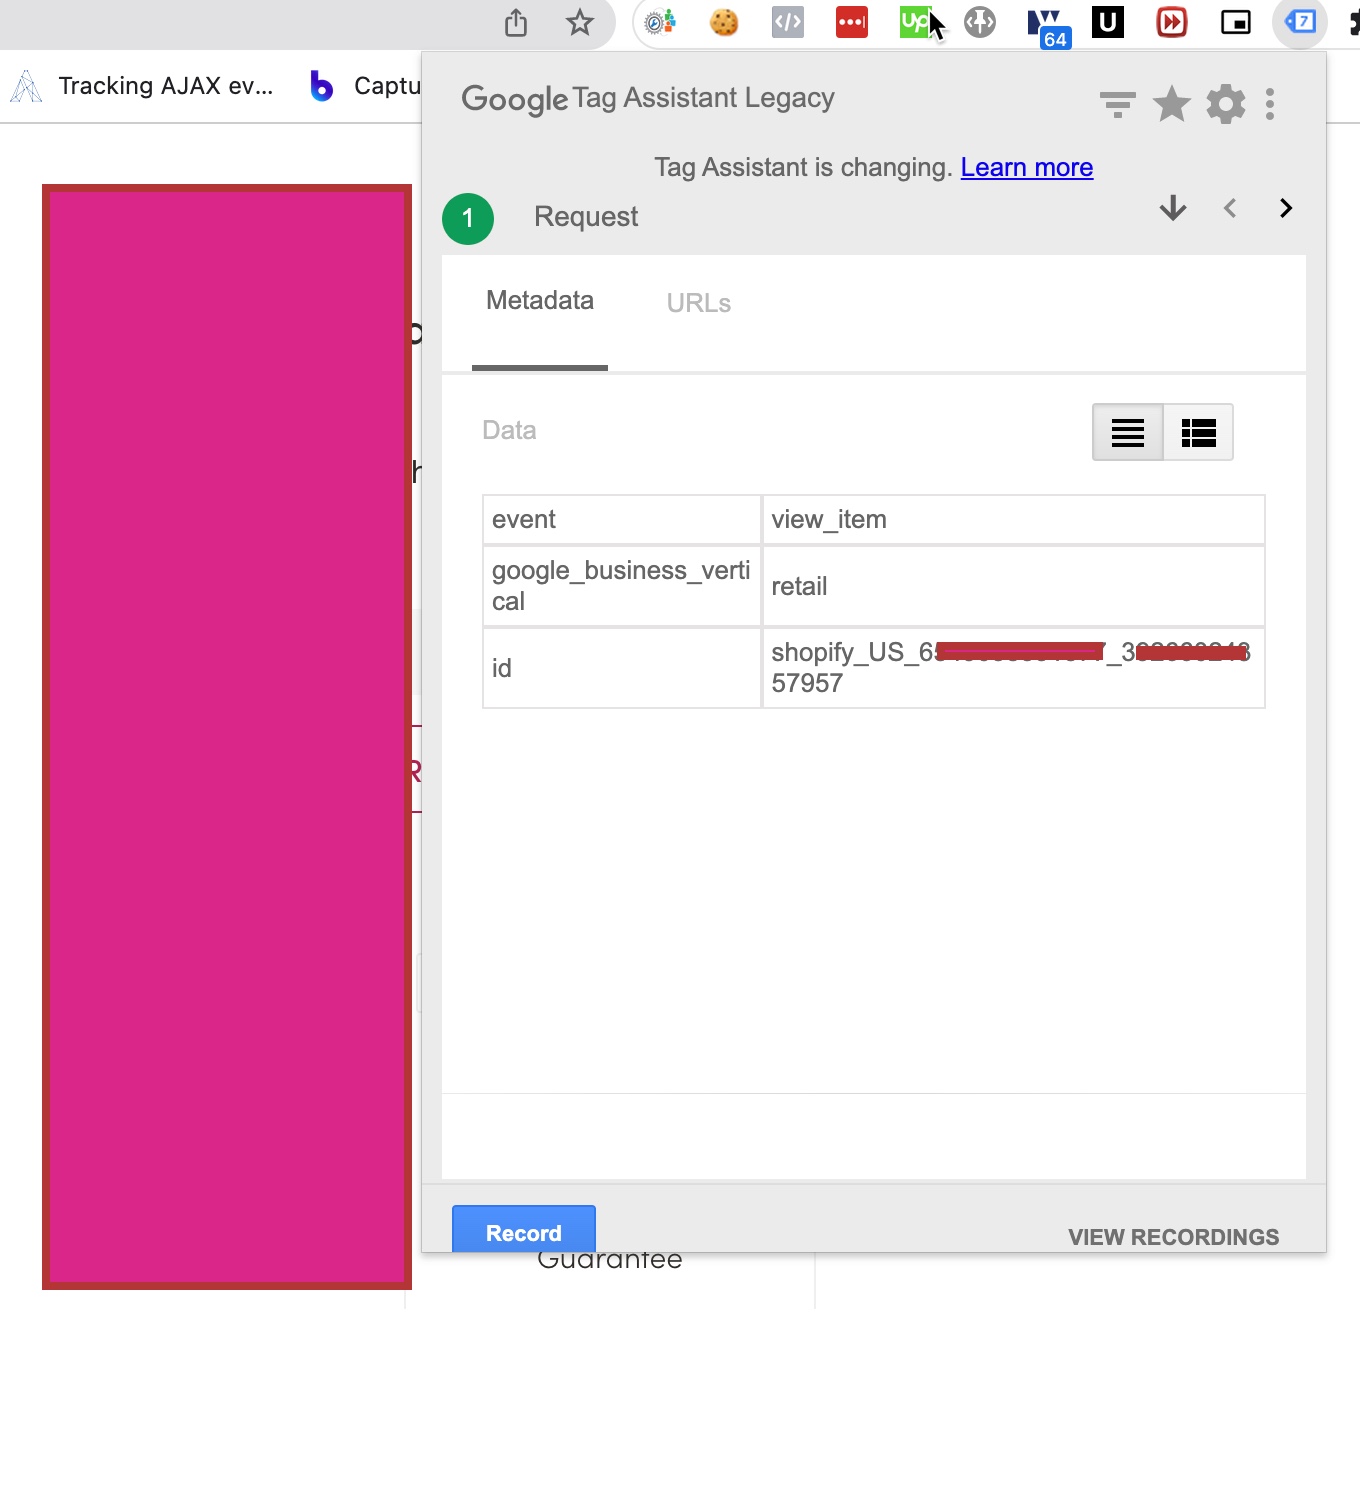
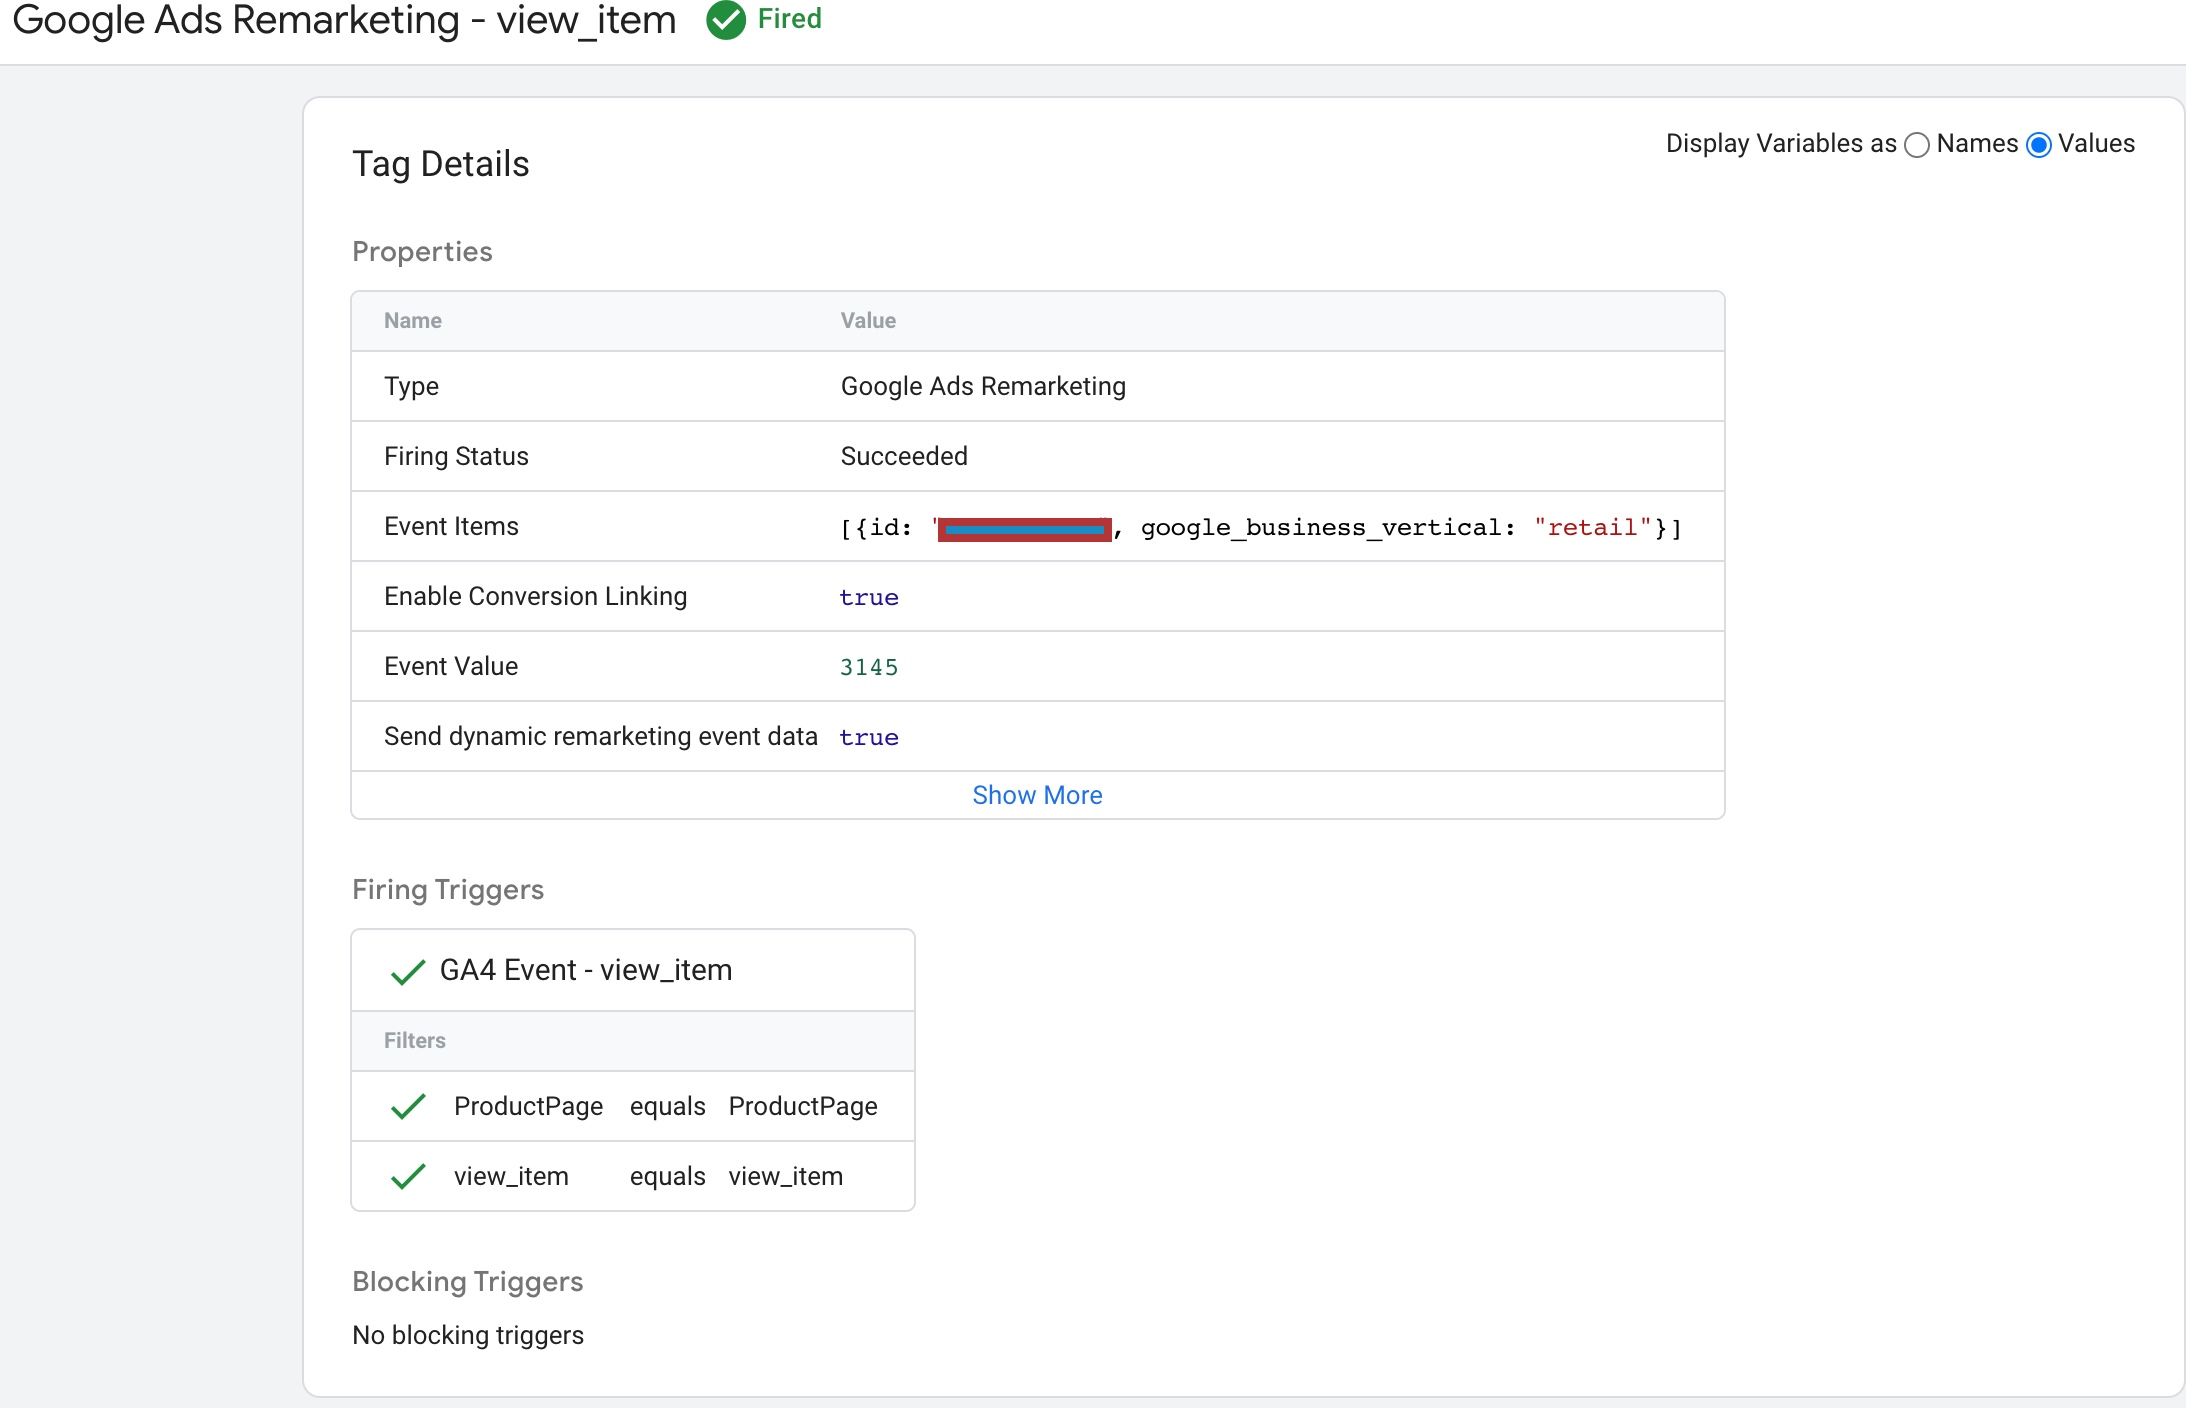
The ‘event’, ‘view_item’ dynamic remarketing tag for a Shopify store is a tracking code that allows you to monitor when a visitor views a specific product page on your store. By using this tag, you can create customized ads that show the exact product or related products to the visitor when they are browsing other websites or platforms.
Set Up Dynamic Remarketing Tag for Shopify

Install Google Ads Dynamic Remarketing on Shopify using Google Tag Manager

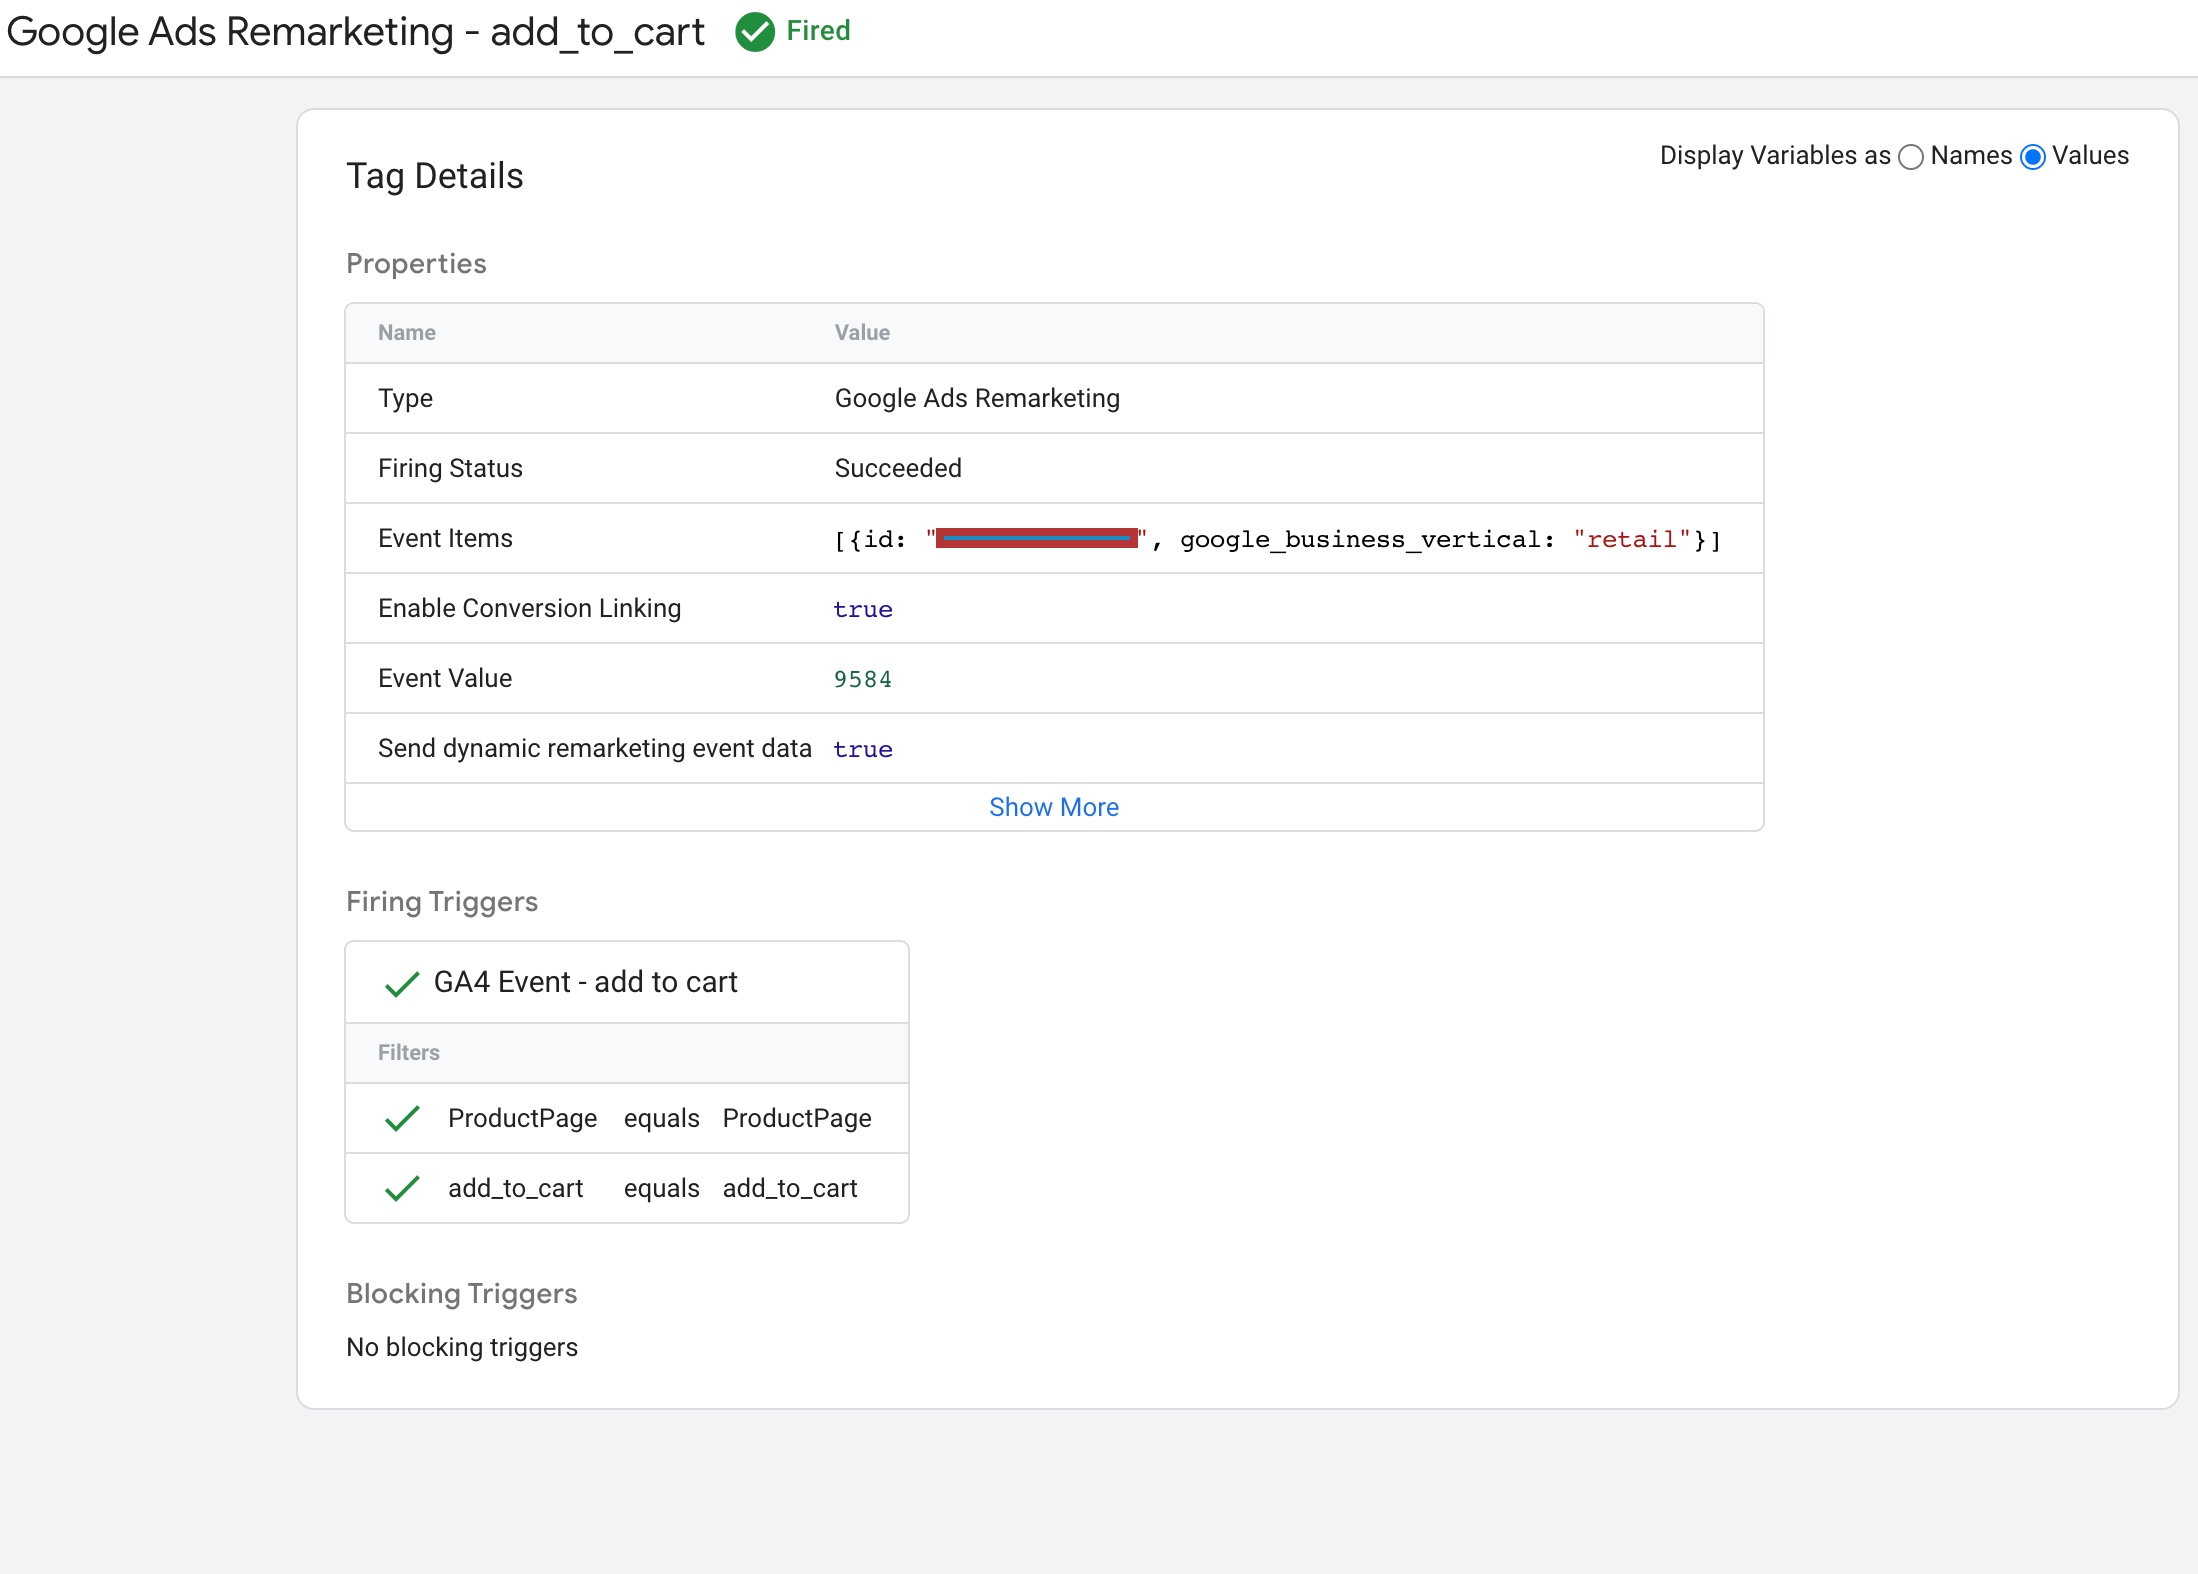
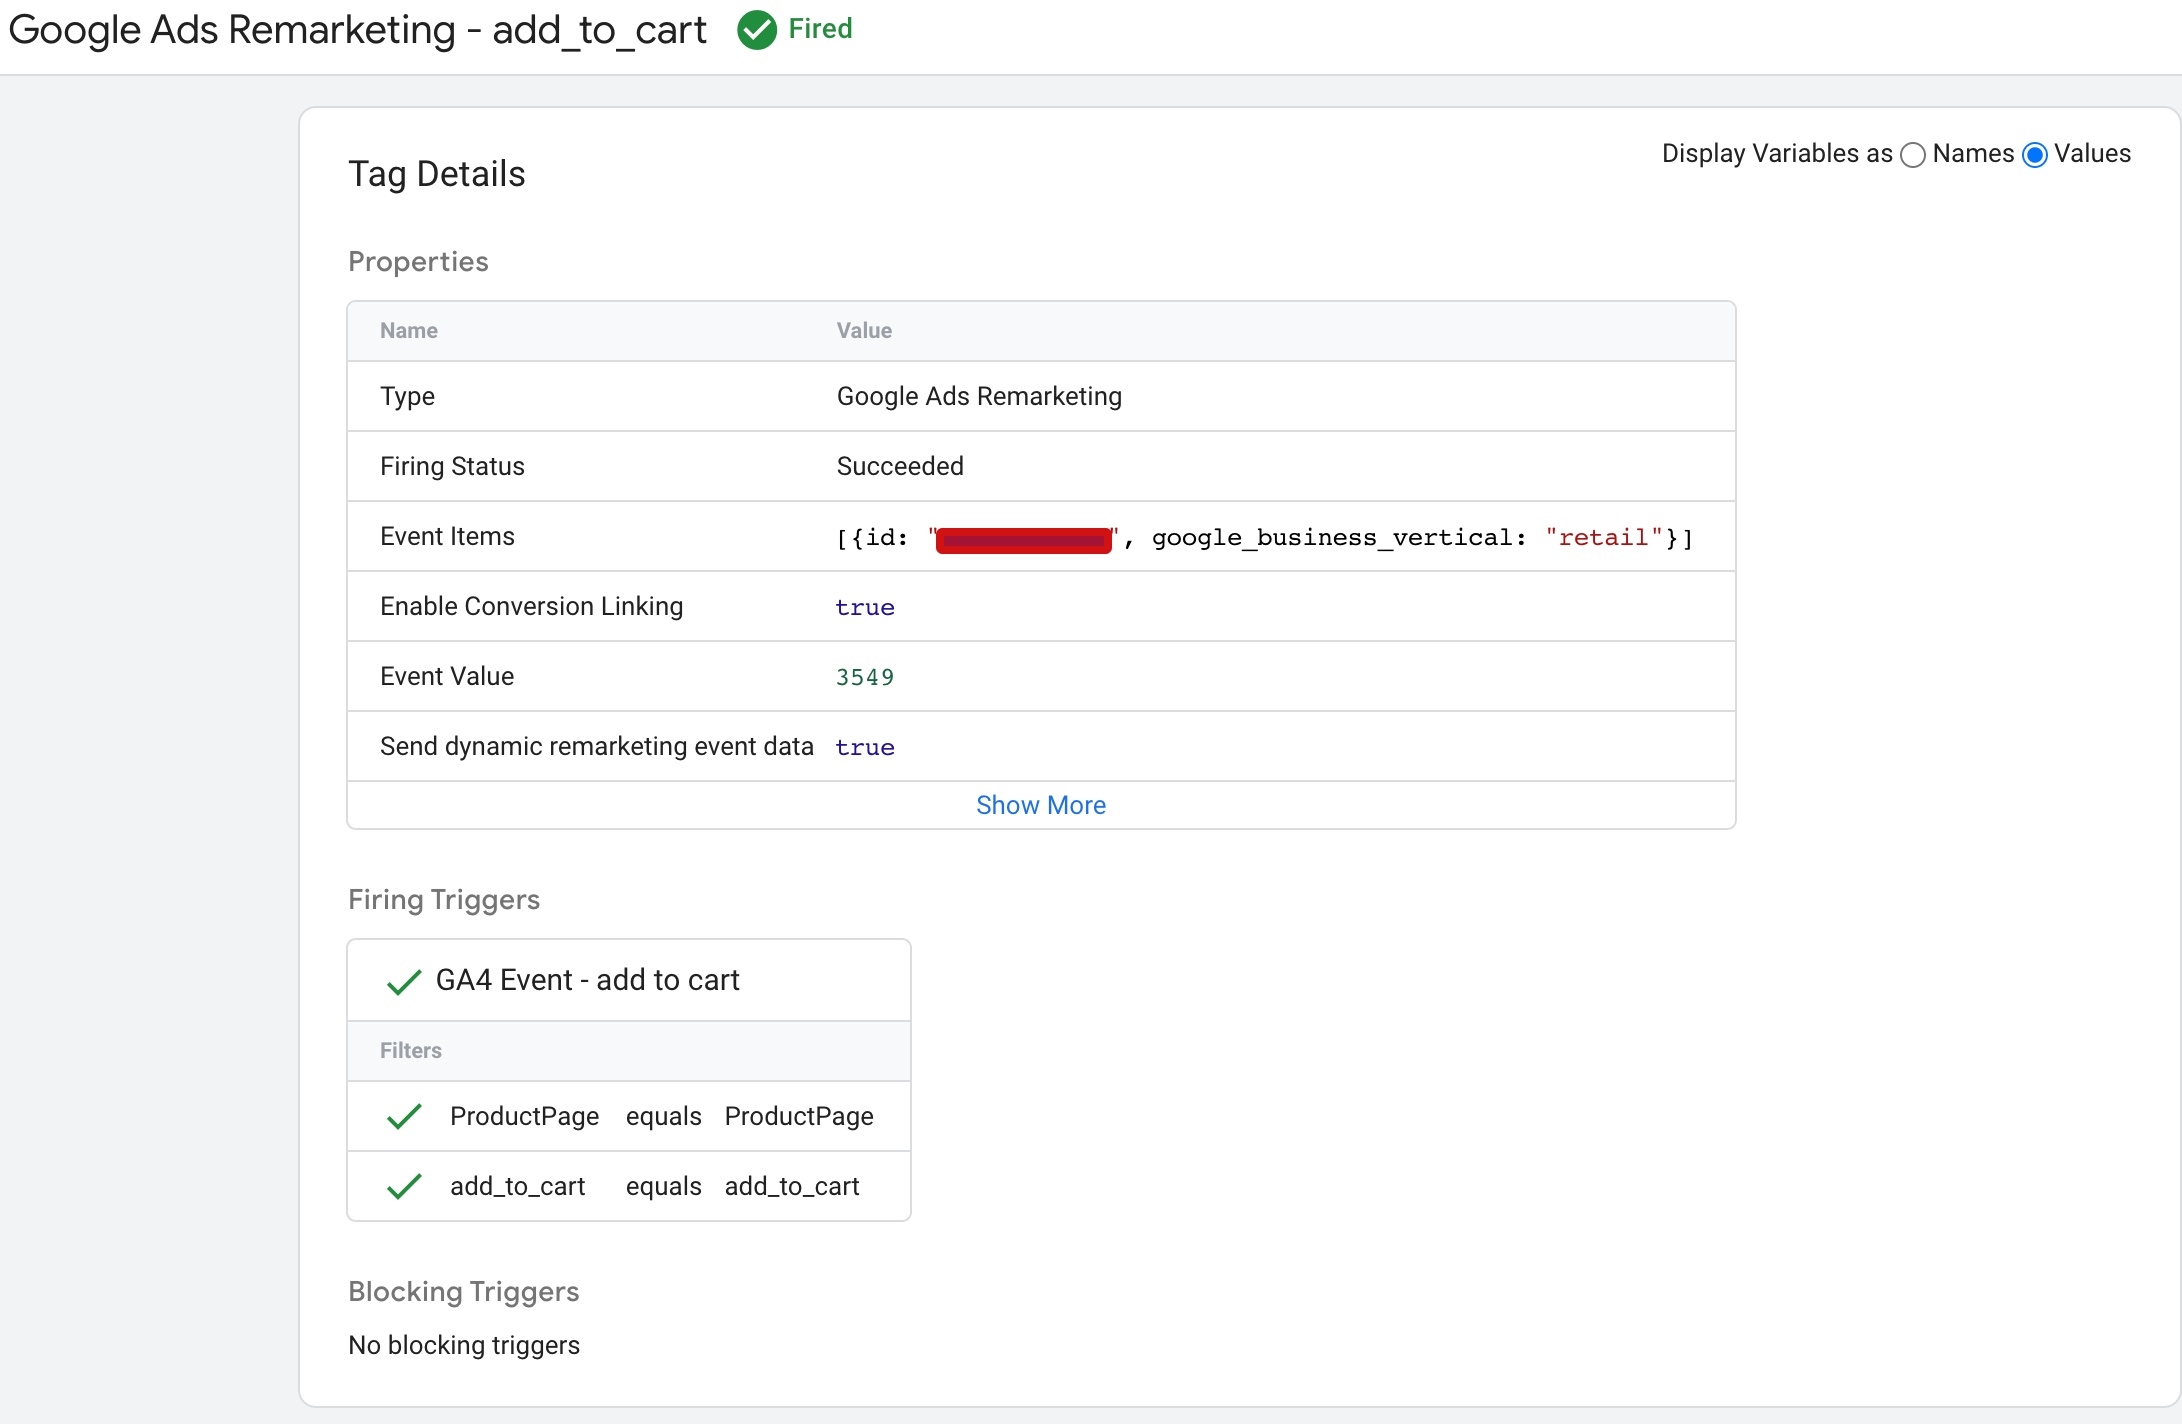
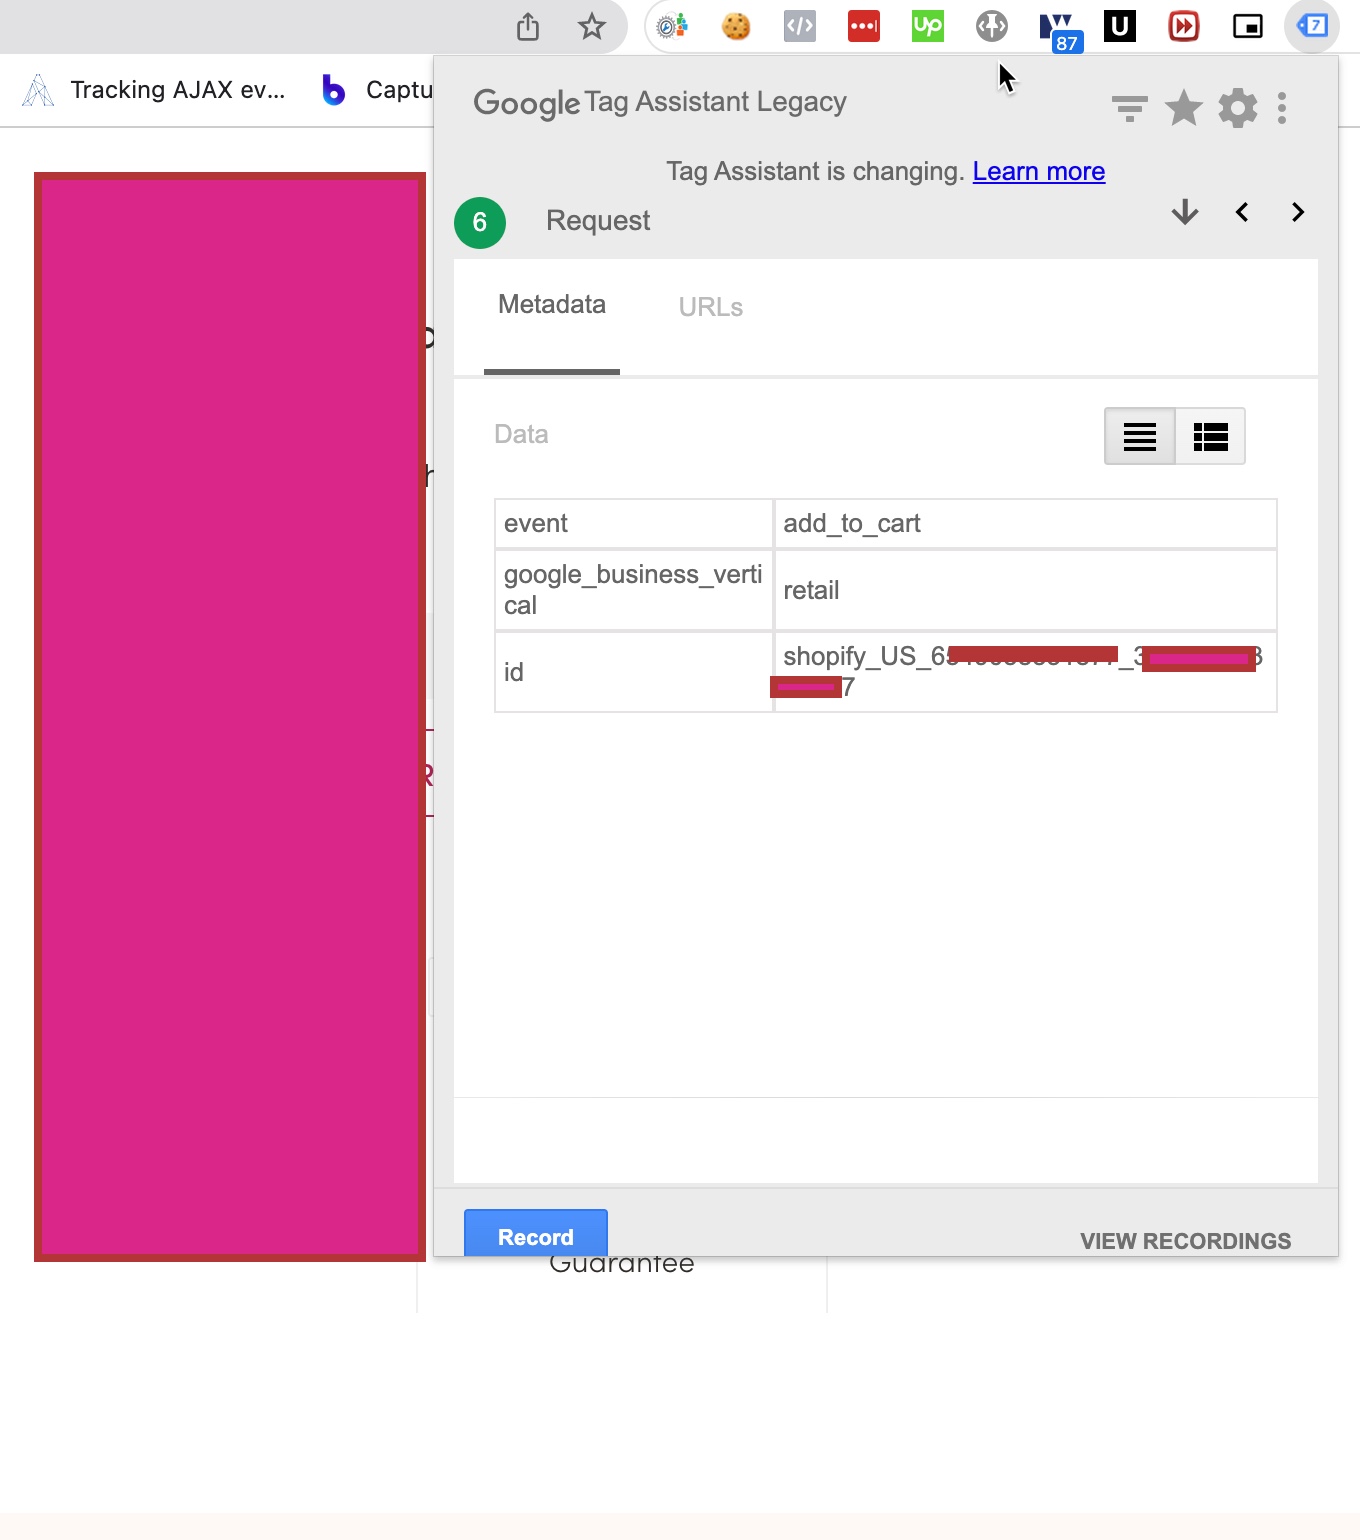
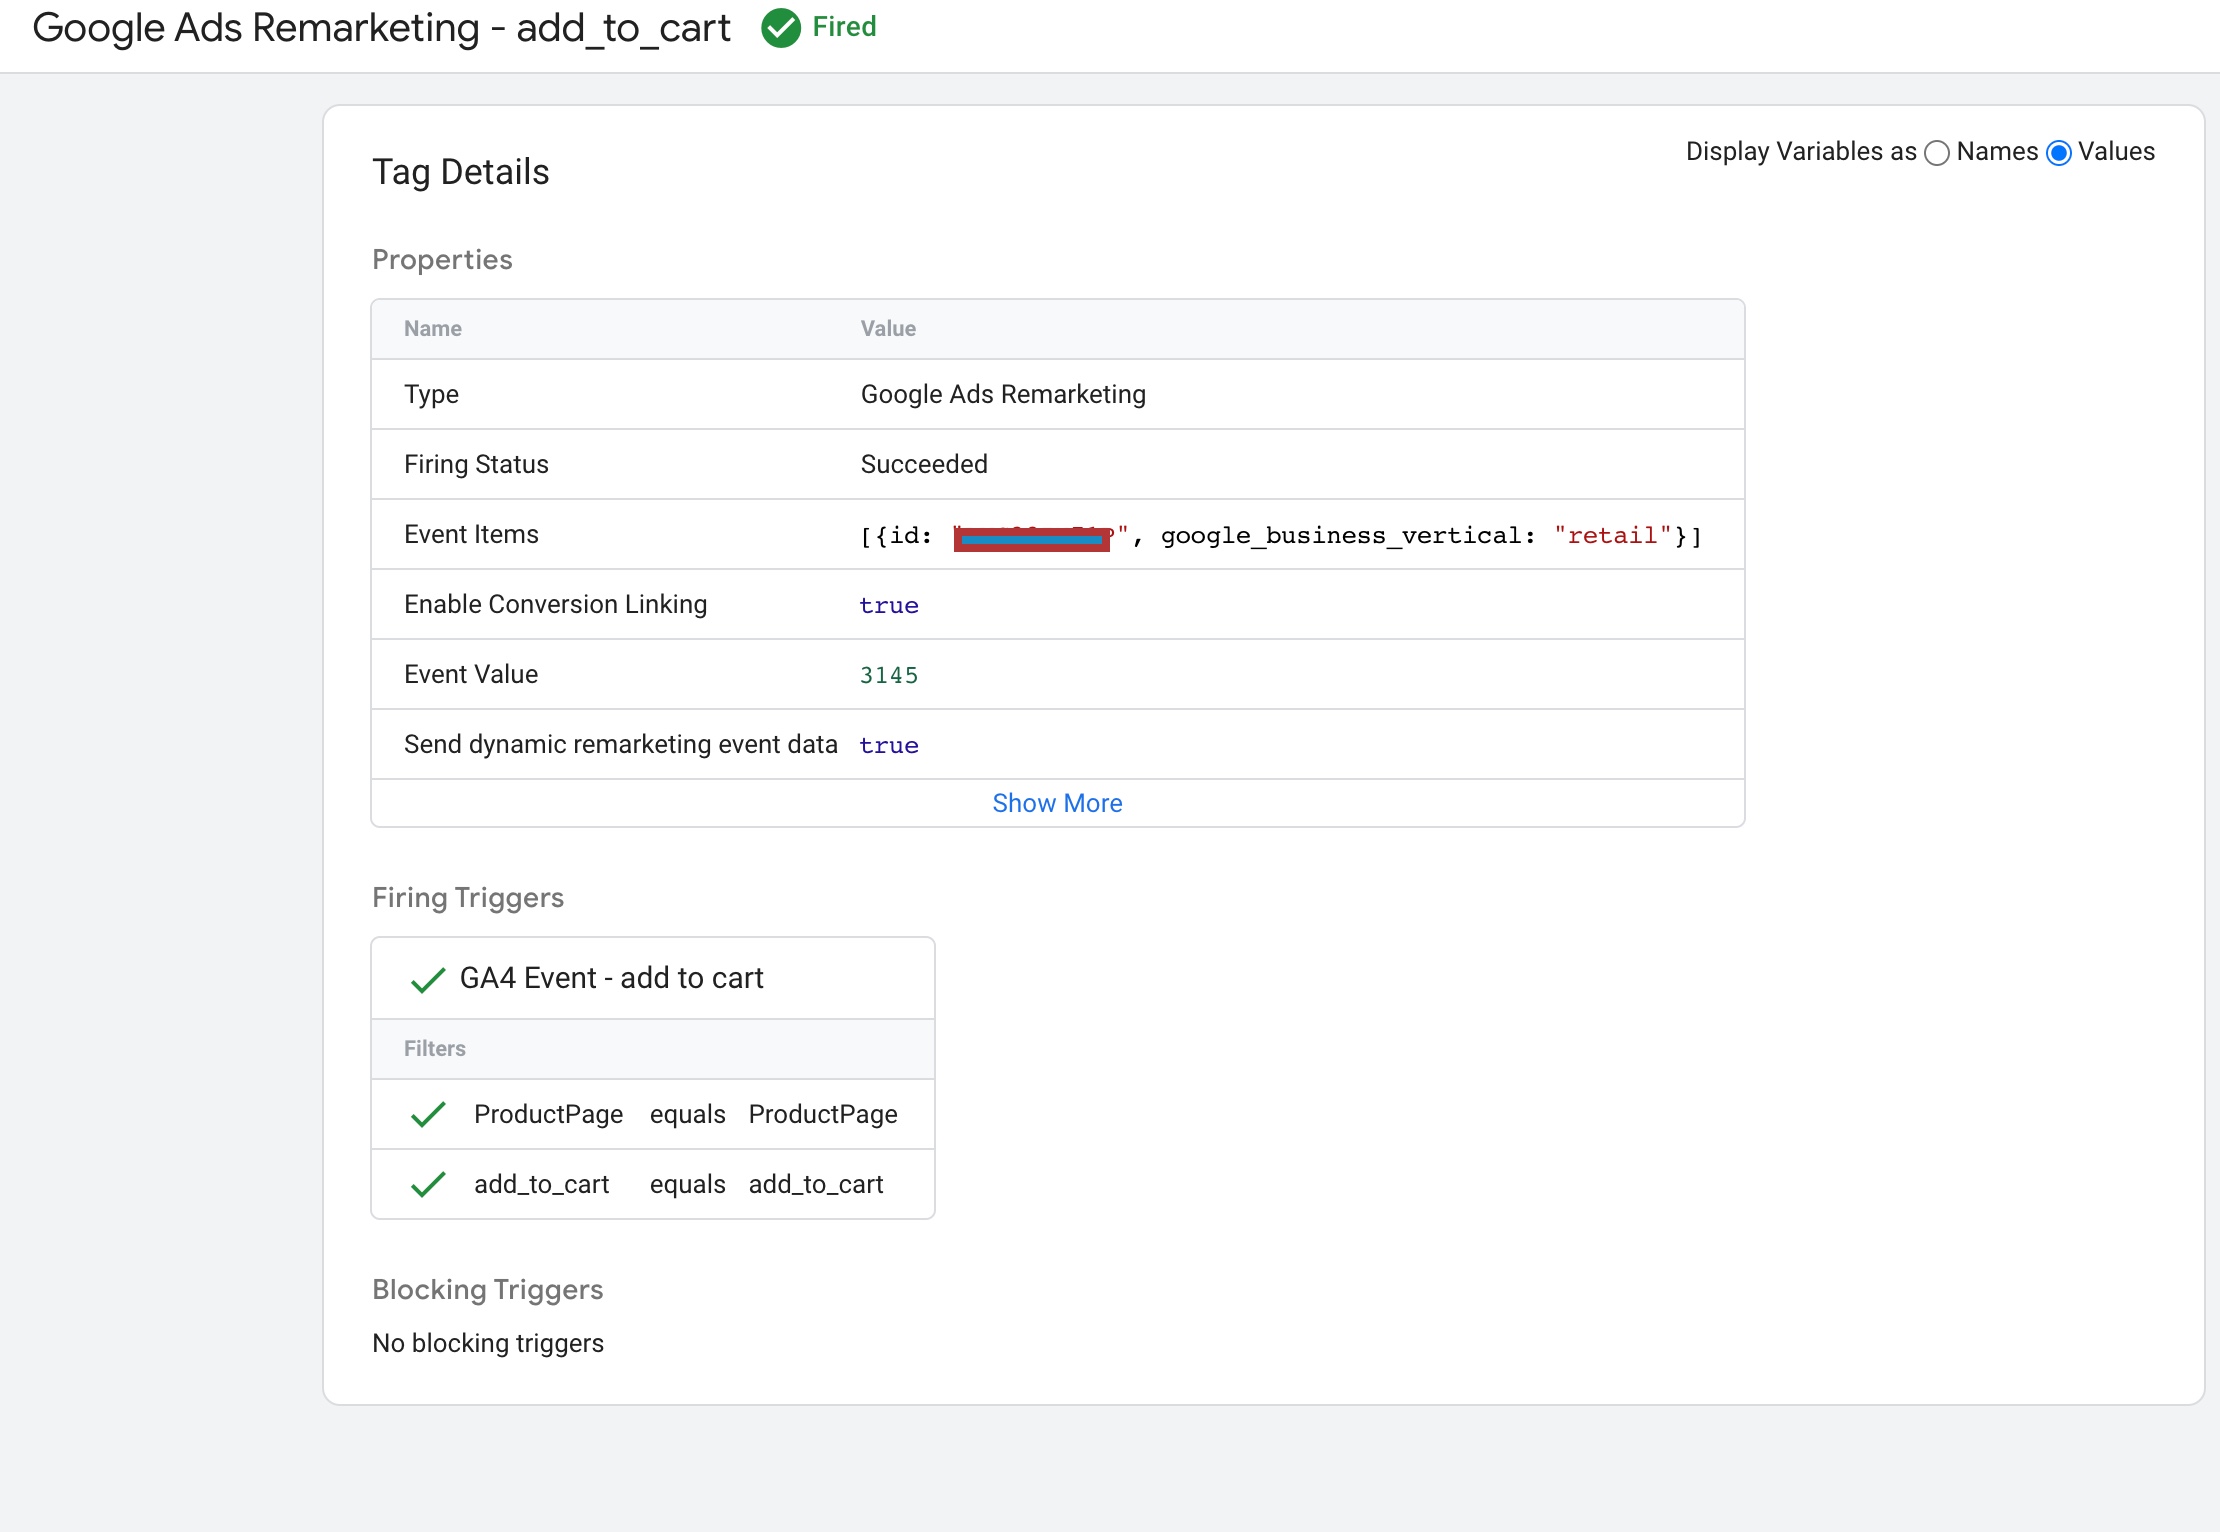
The ‘event’, ‘add_to_cart‘ dynamic remarketing tag for a Shopify store is a tracking code that allows you to monitor when a visitor adds a specific product to their cart on your store. By using this tag, you can create customized ads that show the product the visitor added to their cart or related products to the visitor when they are browsing other websites or platforms. This can help to increase the chances of conversion by reminding the visitor about the product they were interested in and potentially prompting them to return to your Shopify store to complete the purchase.
Dynamic Remarketing Google Ads Shopify

Adding Dynamic Remarketing Tags for Google Ads in Shopify using Google Tag Manager

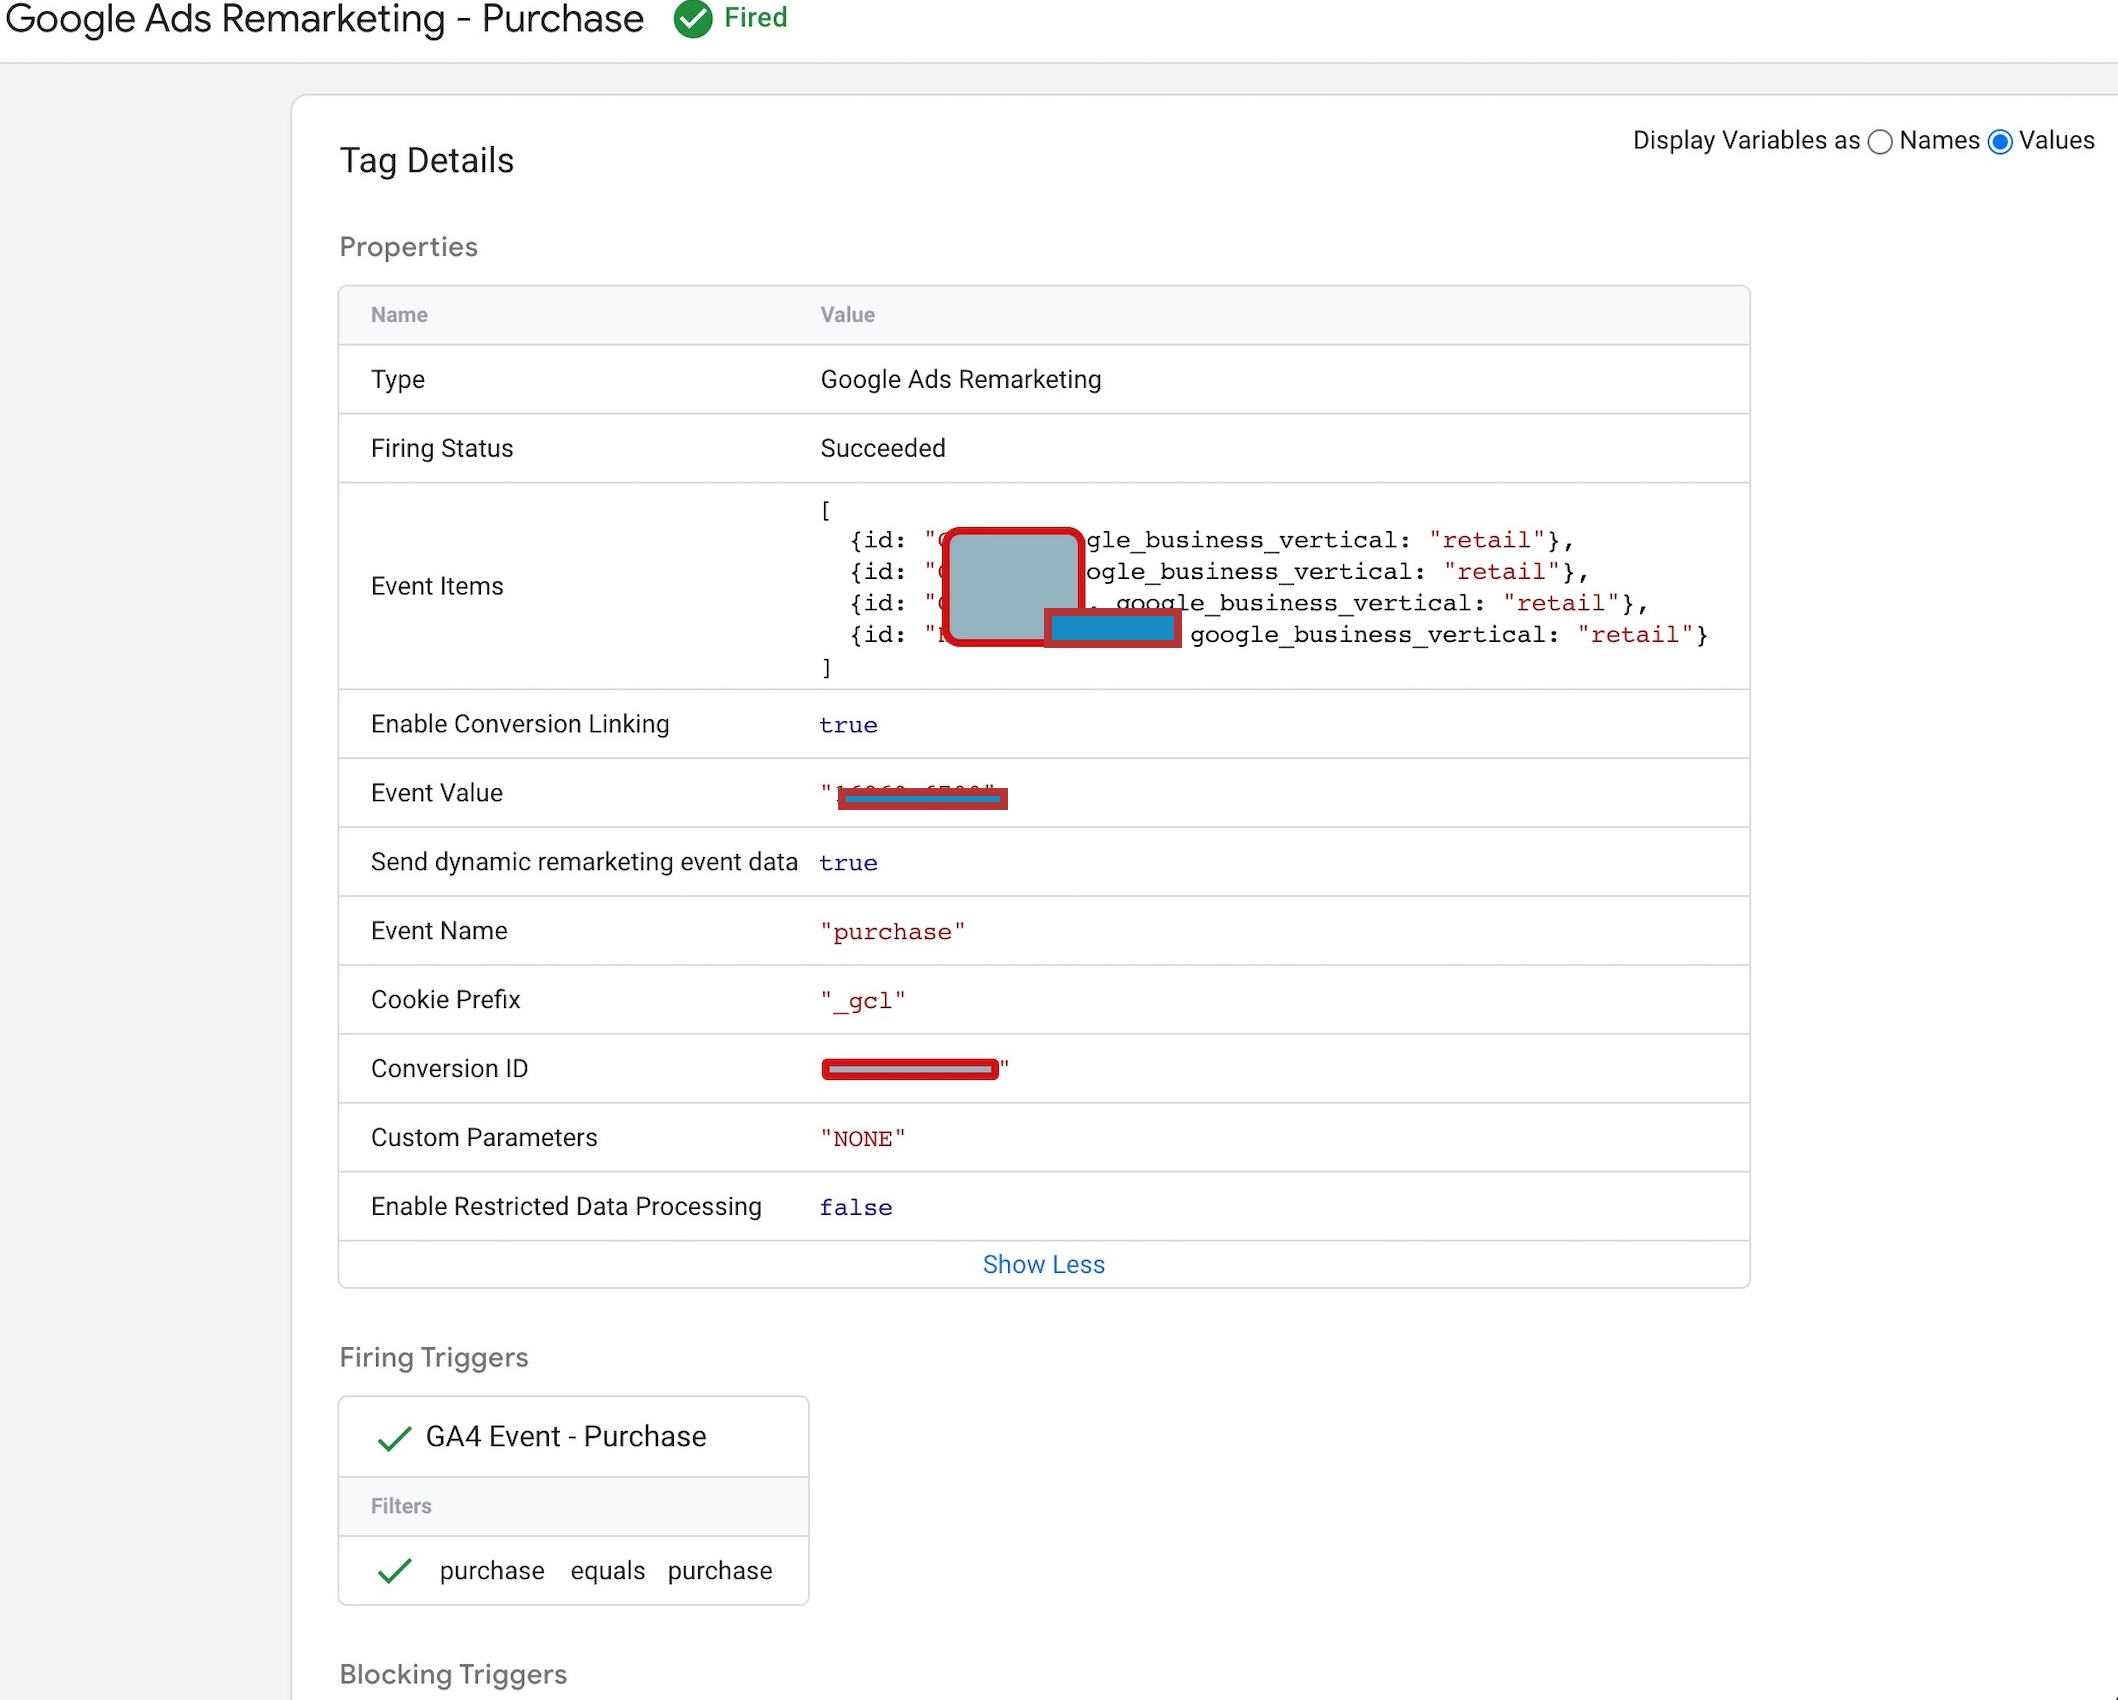
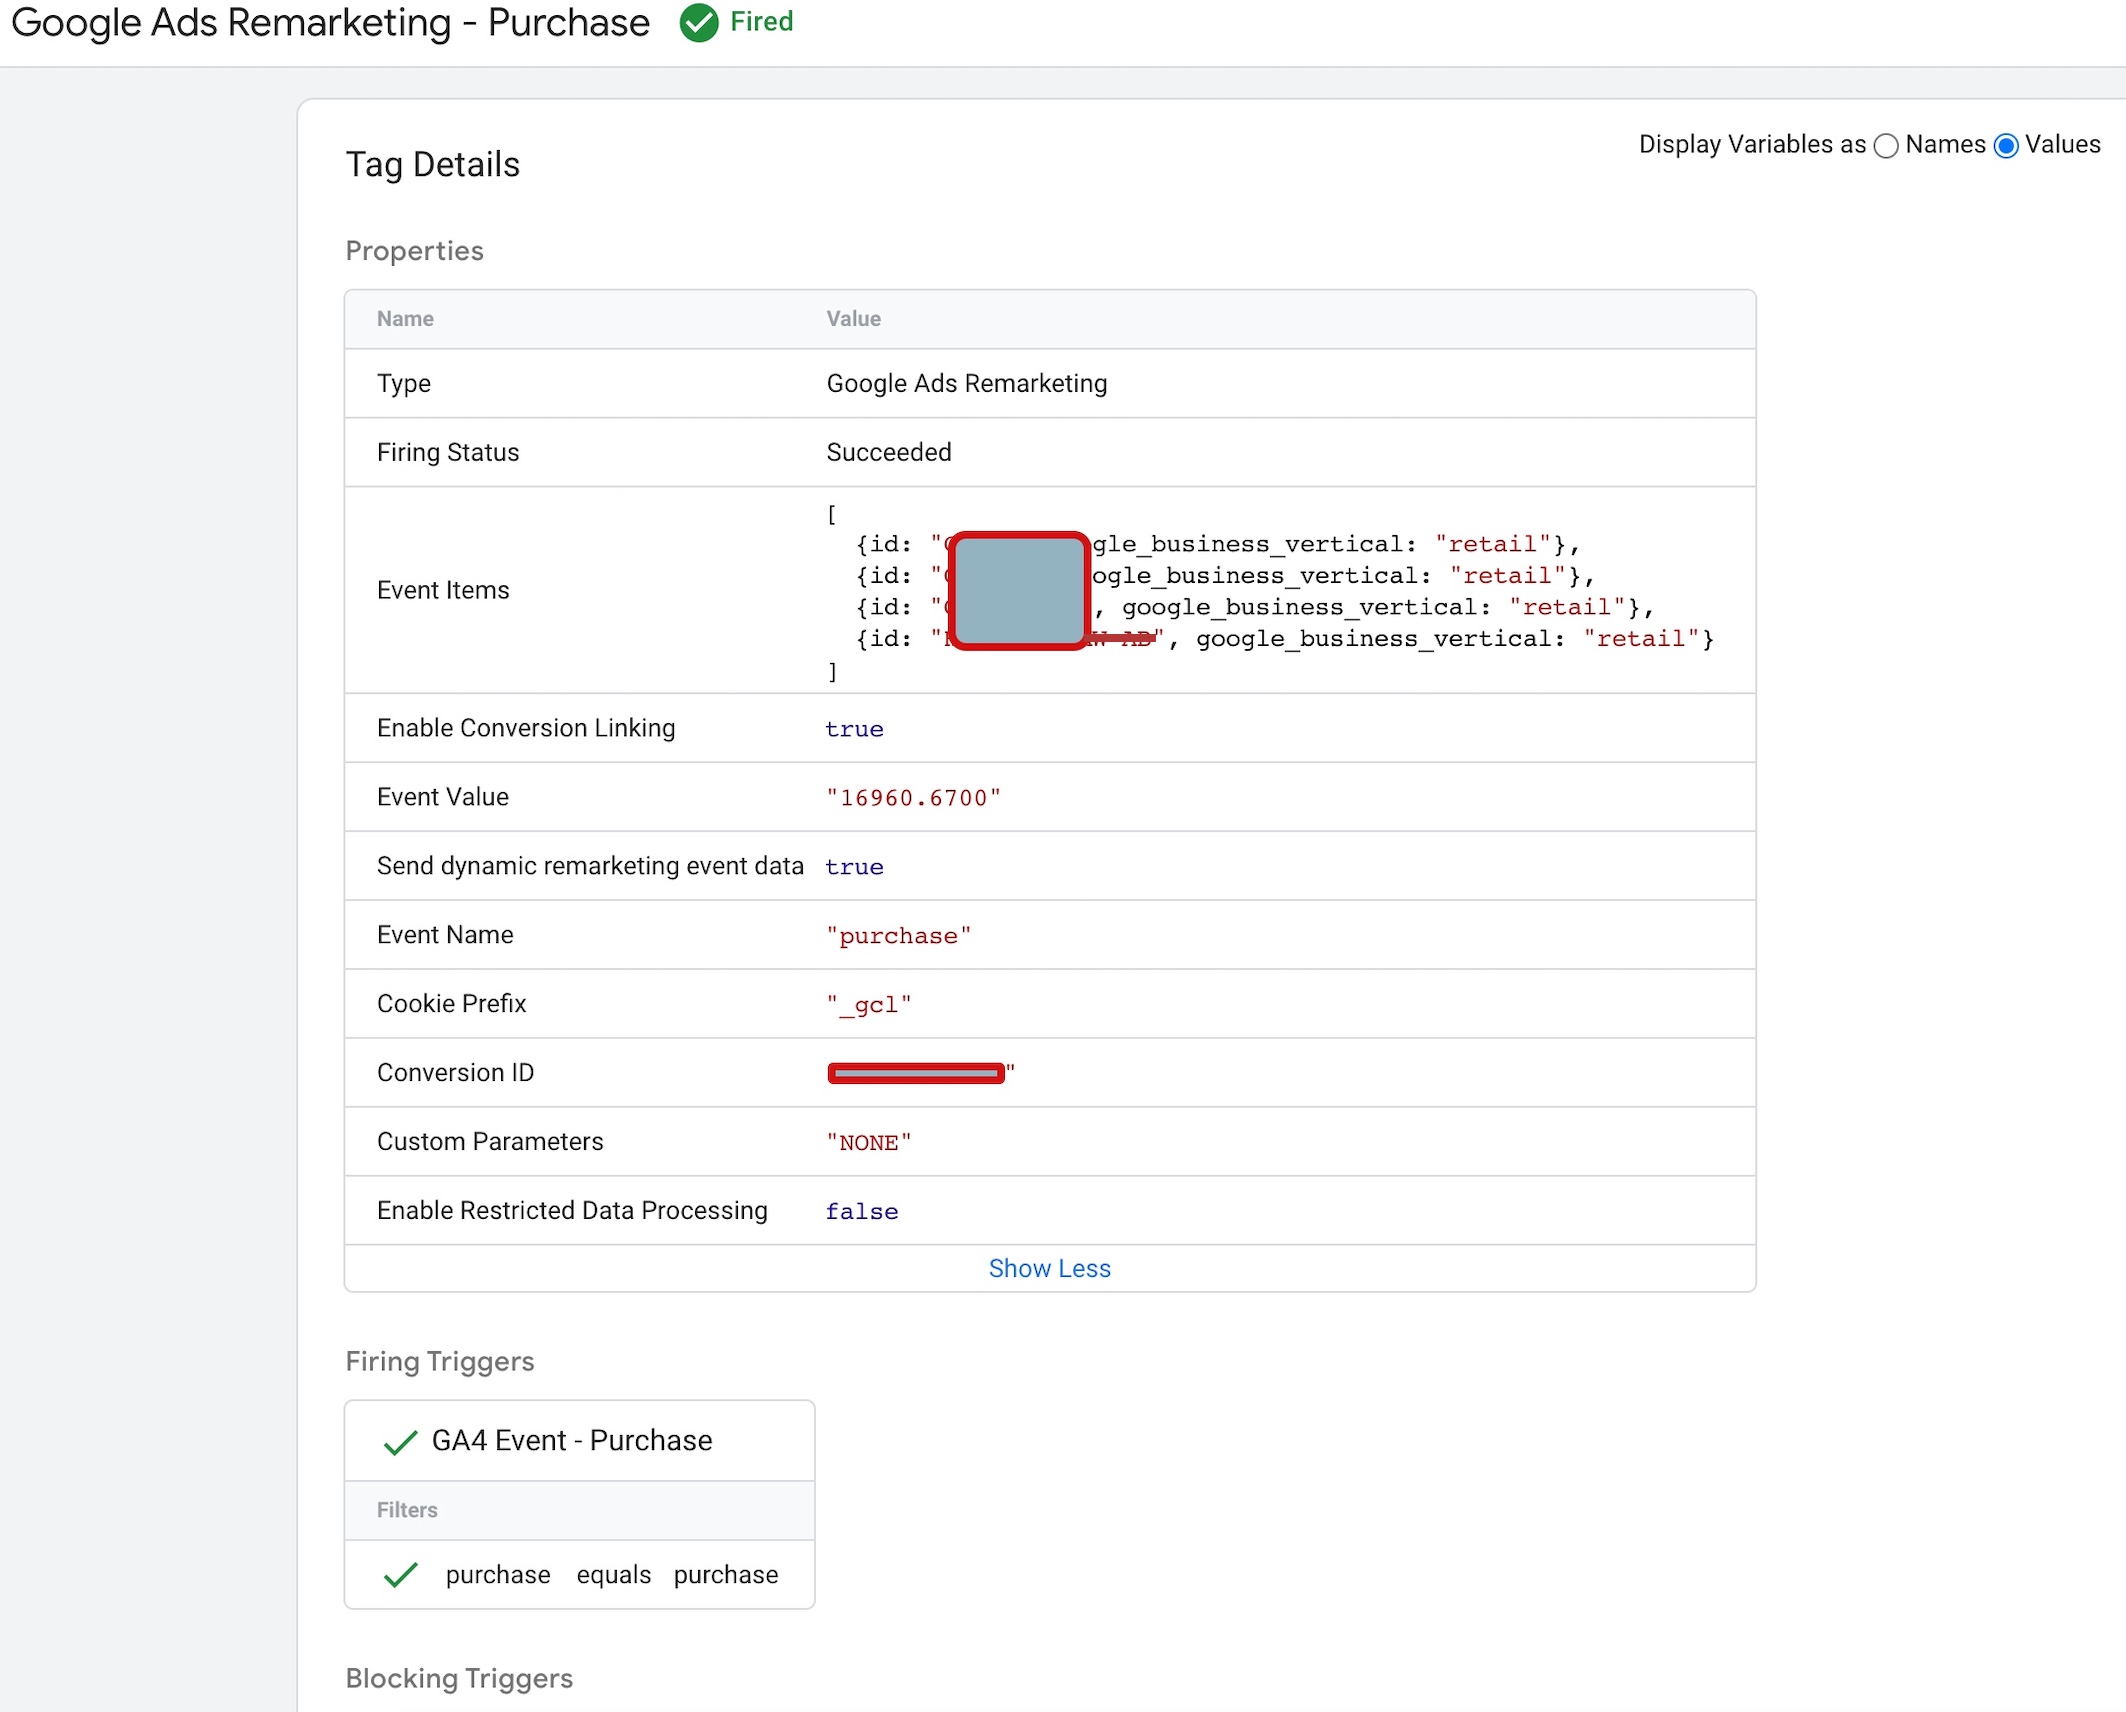
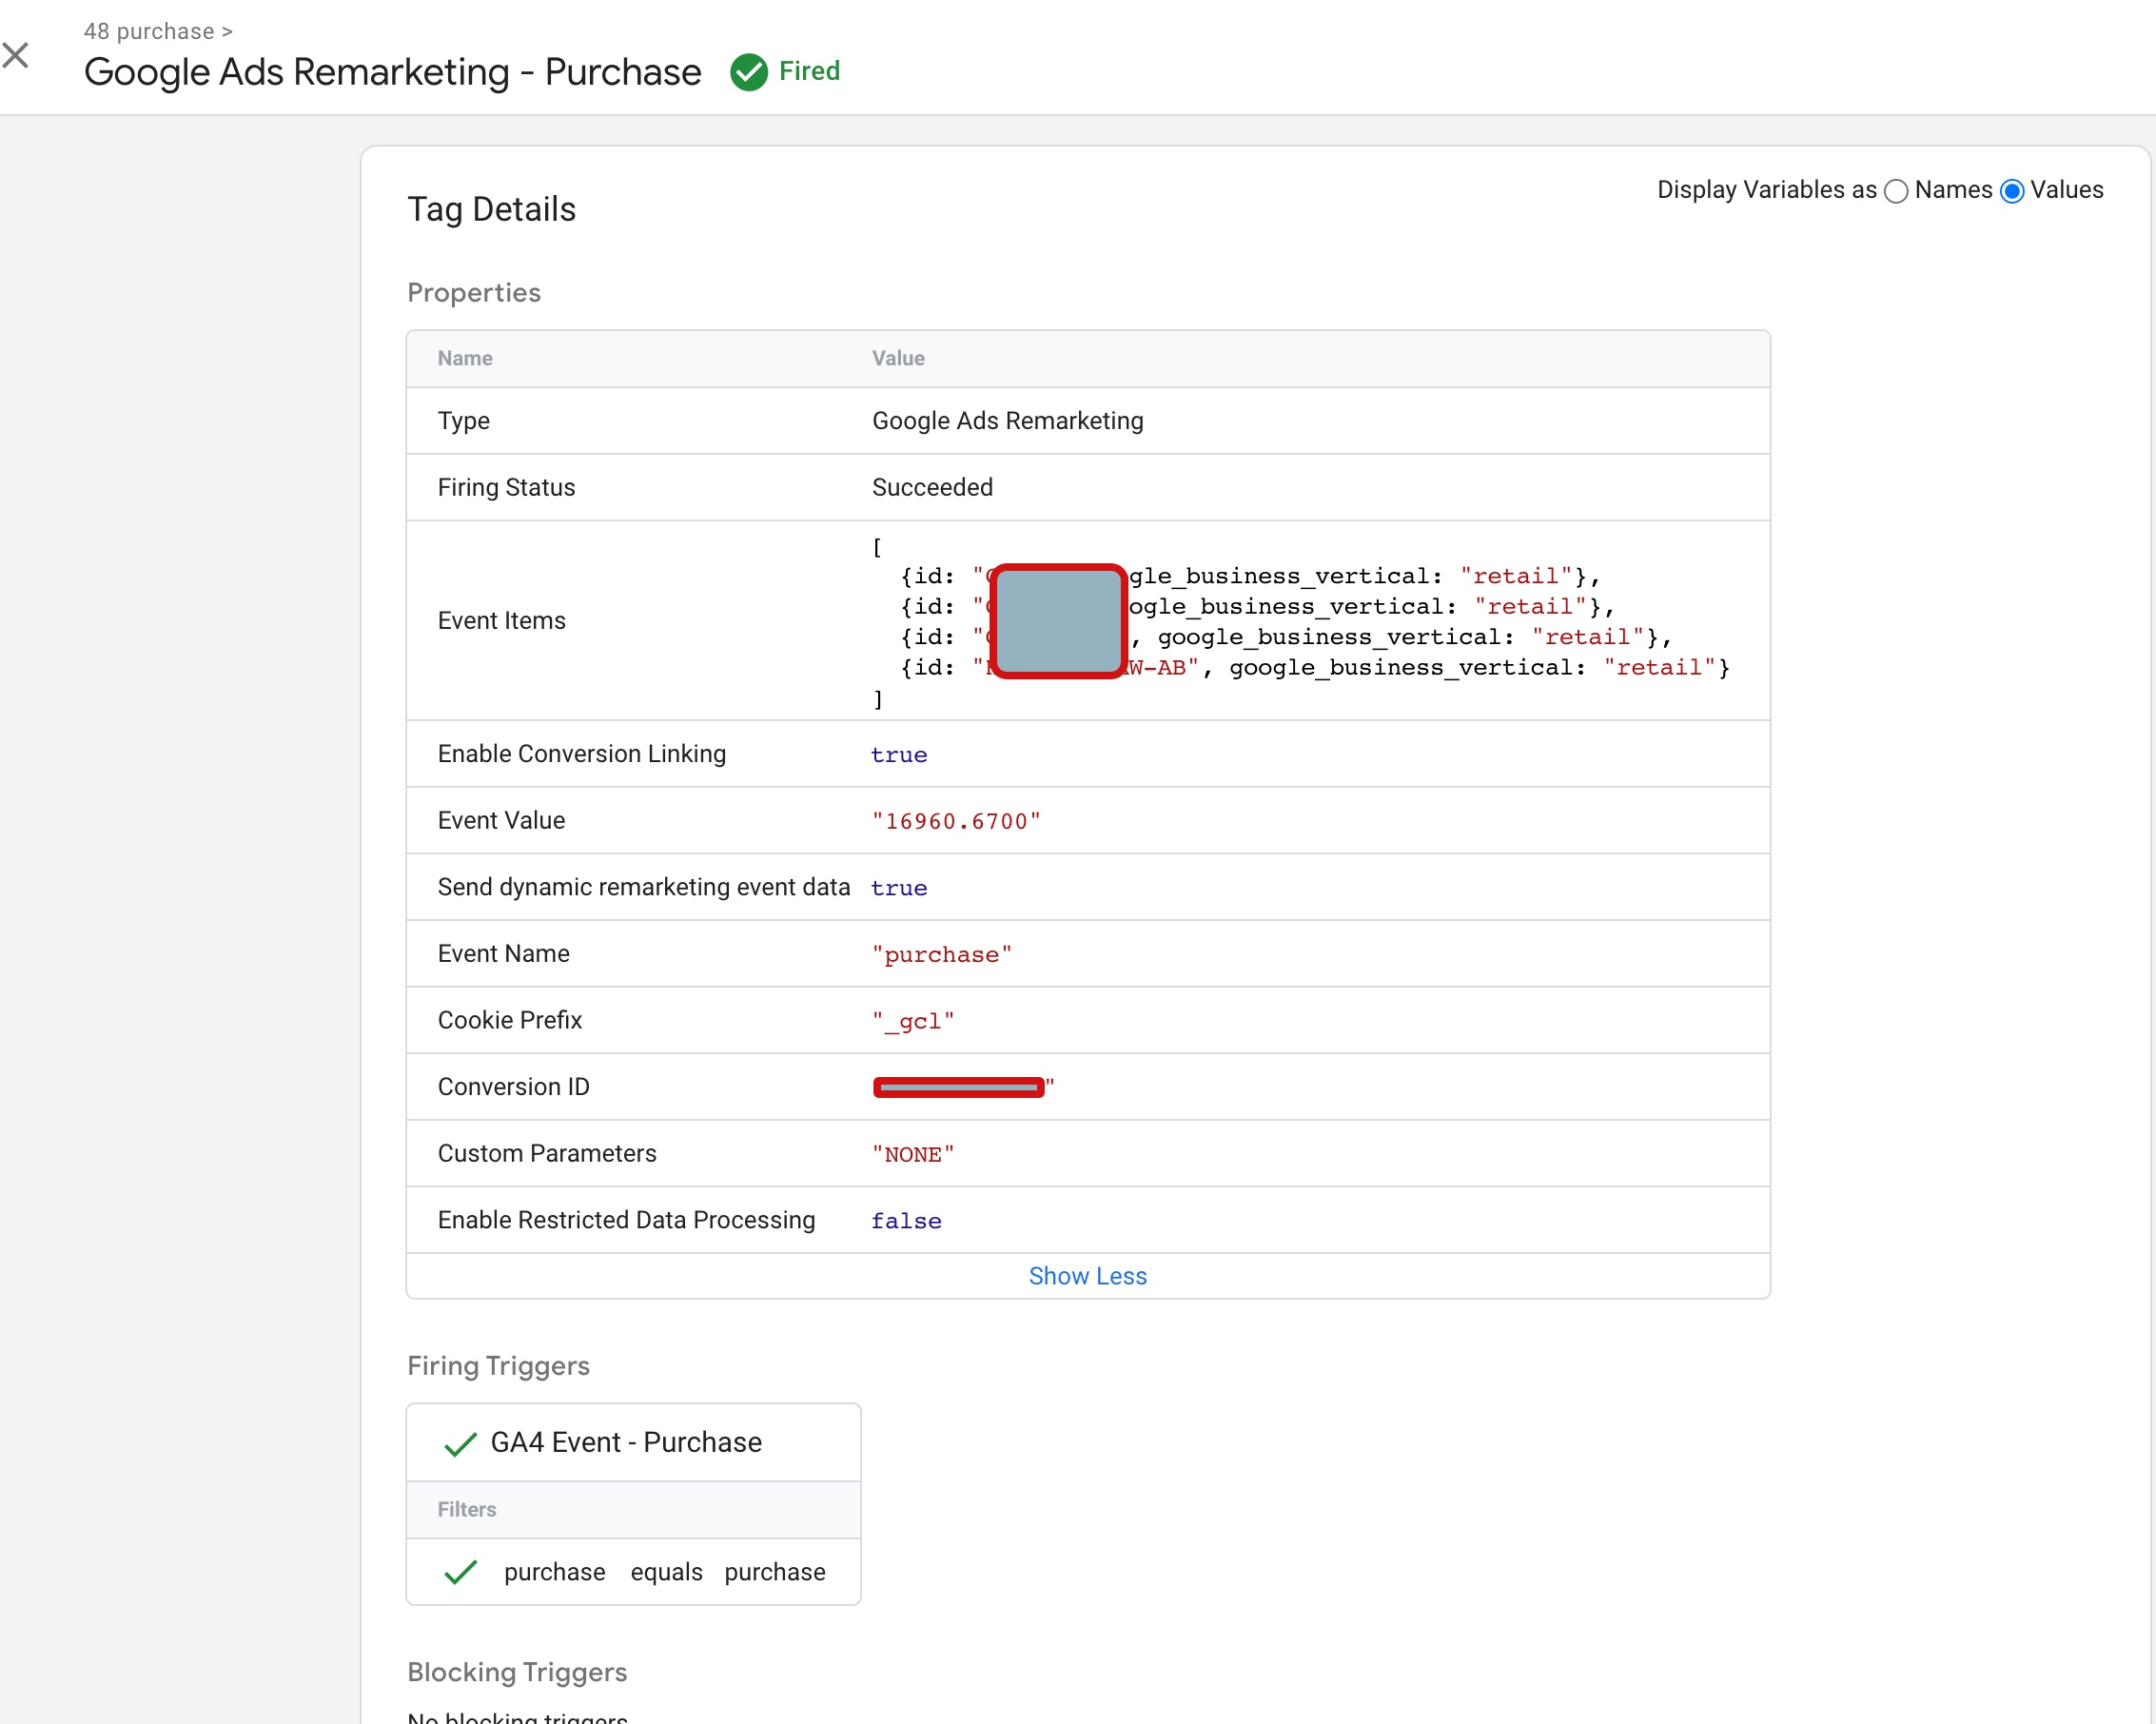
The ‘event’, ‘purchase‘ dynamic remarketing tag for a Shopify store is a tracking code that allows you to monitor when a visitor completes a purchase on your store. By using this tag, you can create customized ads that show the visitor related products or accessories to the ones they have already purchased, or promote future sales and discounts, to encourage repeat purchases and build customer loyalty.
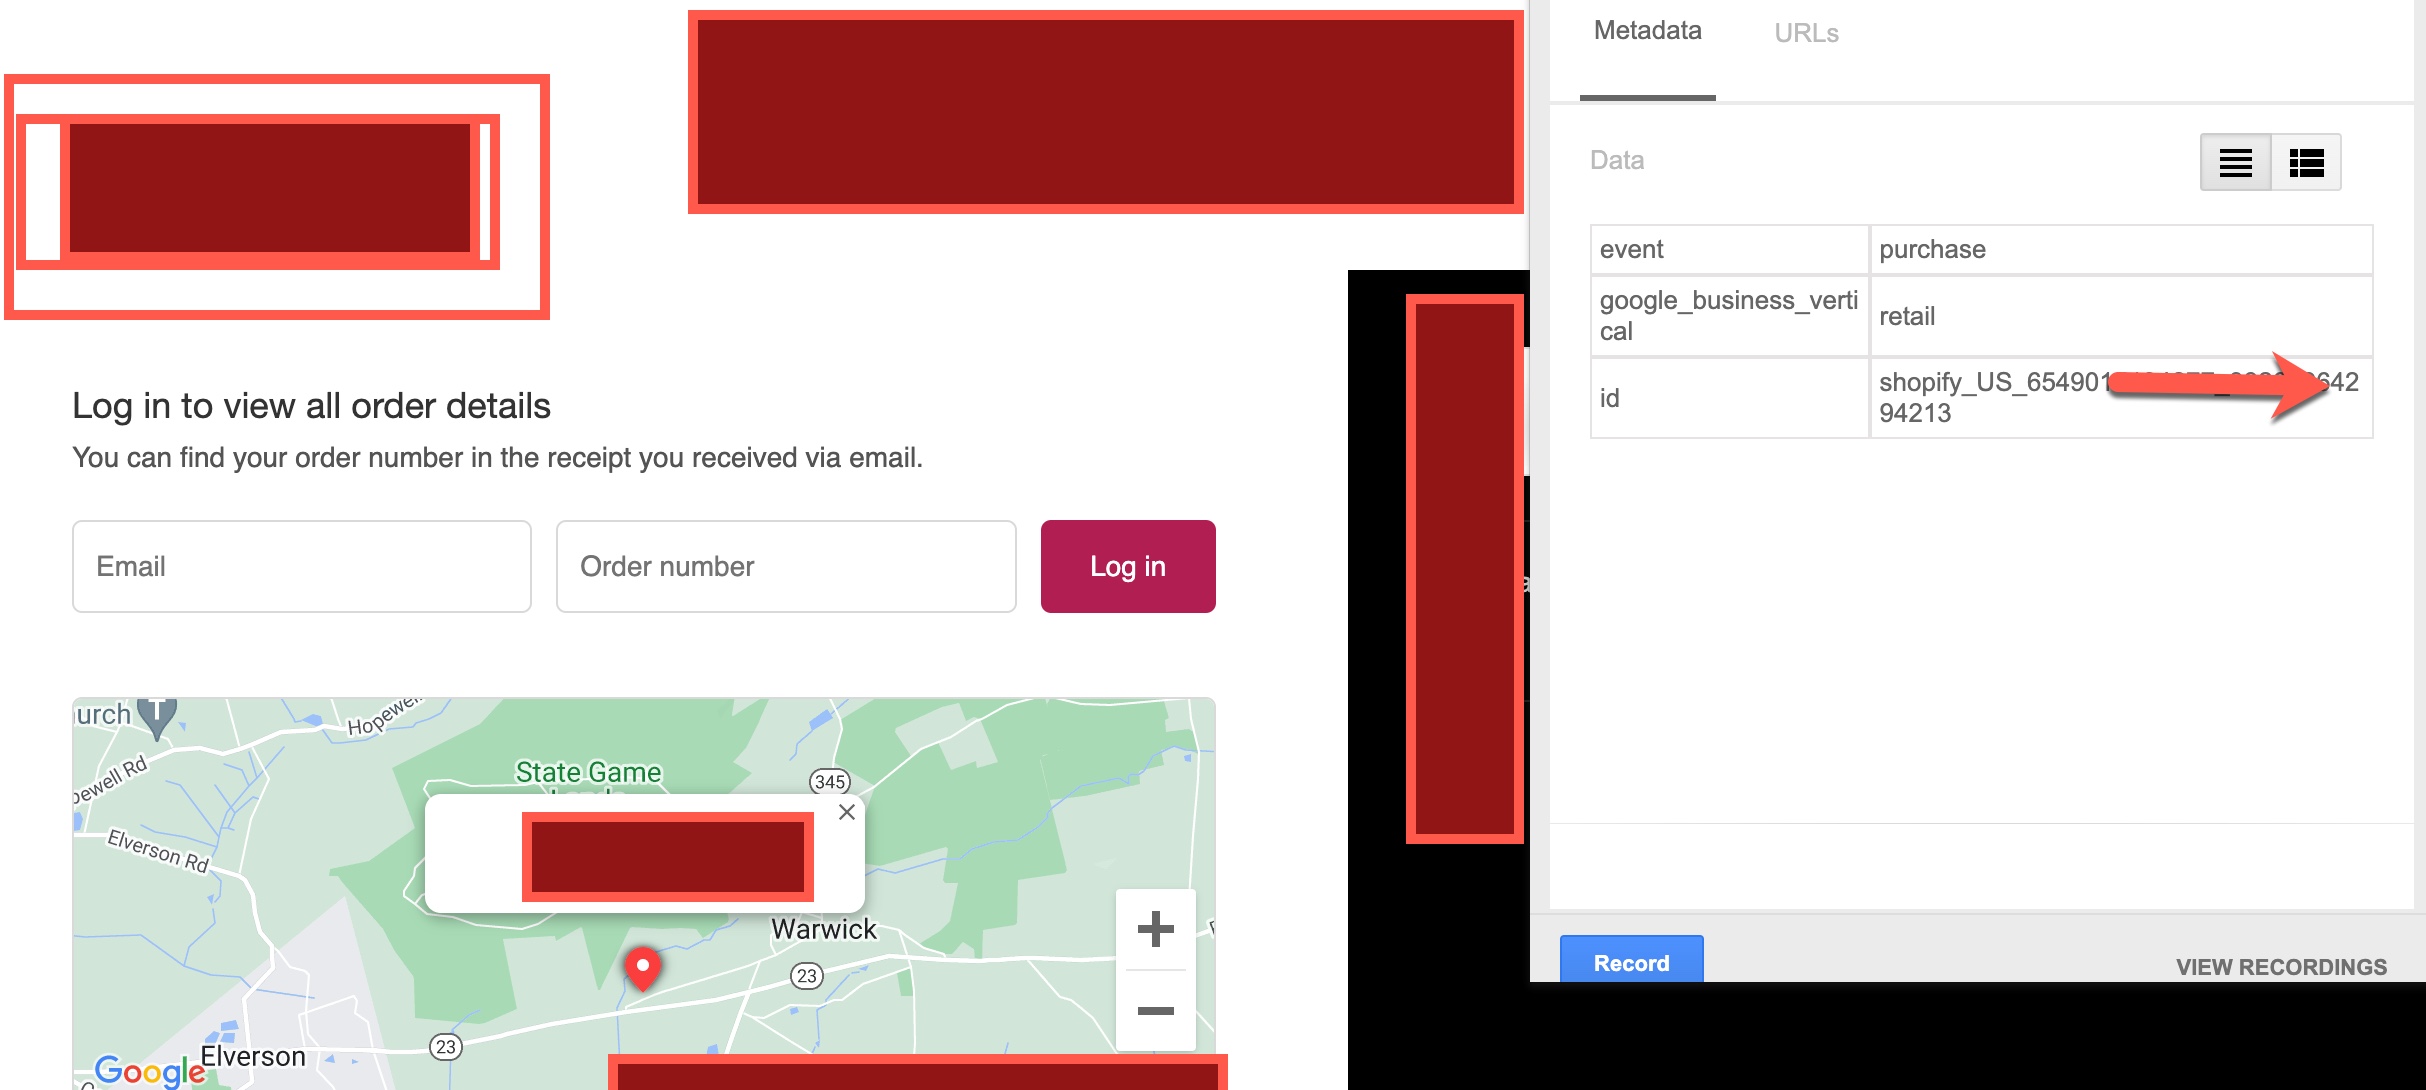
Google Ads Dynamic Remarketing for Shopify

Conversion Tracking and Dynamic Remarketing Tag for Shopify using Google Tag Manager

Warning: If you don’t know about javascript or don’t have developing knowledge then don’t try to Google Ads Dynamic Remarketing Tags for a Shopify store usig Google Tag Manager that can break your site, Cart and other functionality 

Disclaimer: Google tag manager belongs to Google property 

For Contact: mappchero@gmail.com

I am available for Hire on Freelancer: Freelancer.com

I am available for Hire on Upwork: Upwork.com

I am available for Hire on Peopleperhour: Peopleperhour.com

I am available for Hire on Guru: Guru.com

Commerce7 Google Ads Dynamic Remarketing Tag using Google Tag Manager

Standard

Commerce7 is a powerful platform designed for wineries, breweries, and distilleries. It provides a comprehensive suite of tools to help these businesses manage their online presence, including website design, eCommerce functionality, and marketing automation. One of the most effective marketing tools available on the platform is Google Ads Dynamic Remarketing, which allows businesses to target users who have already interacted with their website with personalized ads. In this article, we will explain the Commerce7 Google Ads Dynamic Remarketing Tag and how it works.

What is Google Ads Dynamic Remarketing?

Google Ads Dynamic Remarketing is a powerful advertising tool that allows businesses to target users who have already visited their website with personalized ads. By leveraging data from Google Analytics and AdWords, businesses can create dynamic ads that are tailored to the specific interests and behaviors of their website visitors. These ads can be displayed on a range of different websites and devices, including desktop and mobile, and can be customized to match the look and feel of the business’s website.

How does Google Ads Dynamic Remarketing work?

Google Ads Dynamic Remarketing works by placing a tracking tag on the business’s website. This tag collects data about the user’s behavior on the site, including the pages they visit, the products they view, and the actions they take. This data is then used to create a profile of the user’s interests and behaviors, which can be used to target them with personalized ads.

Once a user leaves the business’s website, they will begin to see ads that are tailored to their interests and behaviors. For example, if a user visits a winery’s website and views a specific wine, they may see an ad for that wine when they visit another website or social media platform. This ad may include a discount or other promotional offer to encourage the user to return to the winery’s website and make a purchase.

What is the Commerce7 Google Ads Dynamic Remarketing Tag?

The Commerce7 Google Ads Dynamic Remarketing Tag is a specific implementation of the Google Ads Dynamic Remarketing tool that is designed to work with Commerce7 websites. This tag is a small piece of code that is added to the business’s website, which allows Commerce7 to collect data about the user’s behavior on the site. This data is then used to create personalized ads that are displayed to the user after they leave the site.

The Commerce7 Google Ads Dynamic Remarketing Tag is easy to install and can be added to a Commerce7 website in just a few steps. Once the tag is installed, businesses can begin using Google Ads Dynamic Remarketing to target users with personalized ads based on their behavior on the site.

What are the benefits of using the Commerce7 Google Ads Dynamic Remarketing Tag?

There are several benefits to using the Commerce7 Google Ads Dynamic Remarketing Tag:

Increased conversions: By targeting users with personalized ads based on their behavior on the site, businesses can increase the likelihood of those users making a purchase.

Improved ROI: Google Ads Dynamic Remarketing is a cost-effective advertising tool that can provide a high ROI for businesses.

Customized ad messaging: The Commerce7 Google Ads Dynamic Remarketing Tag allows businesses to create customized ad messaging that is tailored to the user’s interests and behaviors.

Greater reach: Google Ads Dynamic Remarketing allows businesses to reach users on a range of different websites and devices, increasing their overall reach and visibility.

Easy to use: The Commerce7 Google Ads Dynamic Remarketing Tag is easy to install and can be set up in just a few steps, making it accessible to businesses of all sizes.

In conclusion, the Commerce7 Google Ads Dynamic Remarketing Tag is a powerful marketing tool that can help wineries, breweries, and distilleries increase their online visibility and drive more sales. By targeting users with personalized ads based on their behavior on the

3DCart Google Ads Dynamic Remarketing Tag in Google Tag Manager

Standard

3DCart is an e-commerce platform that enables merchants to create online stores and sell their products through various channels. Google Ads Dynamic Remarketing is a feature of Google Ads that enables advertisers to show personalized ads to users who have previously interacted with their website or app. The 3DCart Google Ads Dynamic Remarketing Tag is a piece of code that enables 3DCart merchants to implement Google Ads Dynamic Remarketing on their website and show personalized ads to their website visitors.

The 3DCart Google Ads Dynamic Remarketing Tag works by placing a cookie on the user’s browser when they visit the merchant’s website. This cookie contains information about the user’s interactions with the website, such as the pages they viewed and the products they added to their cart. This information is used by Google Ads to create personalized ads that are relevant to the user’s interests and behavior.

The 3DCart Google Ads Dynamic Remarketing Tag has several benefits for merchants. Firstly, it enables merchants to show personalized ads to users who have previously interacted with their website. This can increase the likelihood of these users returning to the website and making a purchase. Secondly, it enables merchants to create ads that are relevant to the user’s interests and behavior. This can increase the effectiveness of the ads and improve the ROI of the merchant’s advertising campaigns. Finally, it enables merchants to track the performance of their ads and make data-driven decisions about their advertising strategy.

To implement the 3DCart Google Ads Dynamic Remarketing Tag, merchants need to follow several steps. Firstly, they need to create a Google Ads account and set up a remarketing campaign. This involves creating ads, setting up targeting options, and selecting the audience for the campaign. Secondly, they need to install the Google Ads Remarketing Tag on their website. This involves adding the tag code to the website’s header or footer. Finally, they need to configure the tag by setting up custom parameters that capture the user’s interactions with the website.

The custom parameters that merchants can set up using the 3DCart Google Ads Dynamic Remarketing Tag include:

Page type: This parameter captures the type of page the user visited on the website, such as a product page, a category page, or a checkout page. This enables merchants to create ads that are relevant to the user’s interests and behavior.

Product ID: This parameter captures the ID of the product the user viewed or added to their cart. This enables merchants to create ads that feature the specific products that the user is interested in.

Cart value: This parameter captures the total value of the products in the user’s cart. This enables merchants to create ads that offer discounts or promotions based on the value of the user’s cart.

Purchase ID: This parameter captures the ID of the purchase that the user made on the website. This enables merchants to create ads that feature complementary products or offer discounts on future purchases.

Once the 3DCart Google Ads Dynamic Remarketing Tag is installed and configured, merchants can start creating personalized ads that are tailored to the user’s interests and behavior. They can use a variety of ad formats, including display ads, dynamic ads, and responsive ads, to reach their audience on various channels, such as the Google Display Network, YouTube, and Gmail.

In summary, the 3DCart Google Ads Dynamic Remarketing Tag enables 3DCart merchants to implement Google Ads Dynamic Remarketing on their website and show personalized ads to their website visitors. The tag works by placing a cookie on the user’s browser and capturing information about the user’s interactions with the website. Merchants can set up custom parameters to capture specific information about the user’s behavior, such as the pages they viewed and the products they added to their cart. This enables merchants to create personalized ads

WooCommerce Google Ads Dynamic Remarketing Tag in Google Tag Manager

Standard

WooCommerce Google Ads Dynamic Remarketing Tag is a feature that allows online businesses to track and target website visitors who have interacted with their products or services, and show them personalized ads on the Google Display Network.

To set up the WooCommerce Google Ads Dynamic Remarketing Tag, you will need to have a WooCommerce store, a Google Ads account, and a Google Analytics account. You will also need to have the WooCommerce Google Ads integration plugin installed on your WooCommerce store, which will automatically add the necessary code snippets to your website.

The first step in setting up the WooCommerce Google Ads Dynamic Remarketing Tag is to create a Google Ads account and link it to your Google Analytics account. Once you have linked your accounts, you can create a new remarketing tag by navigating to the “Audience Manager” section of your Google Ads account.

To create the remarketing tag, you will need to choose the type of tag you want to use (in this case, the “Google Ads remarketing tag” option), and then select the appropriate settings for your website. You can choose to track specific pages or actions on your website, such as product pages or add-to-cart events.

Once you have created the remarketing tag, you will need to add it to your website by inserting the code snippet into the header of your website. This can be done manually by editing the code of your website, or by using a plugin such as the WooCommerce Google Ads integration plugin.

Once the tag is installed on your website, it will start tracking the behavior of your website visitors who have interacted with your products or services. The tag will place a cookie in the user’s browser, which can be used to track their activity and show them personalized ads on the Google Display Network.

To create a dynamic remarketing campaign, you will need to create a new campaign in your Google Ads account and select the “Dynamic remarketing” option. You will then need to choose the appropriate settings for your campaign, such as the type of ad format and the targeting options.

One of the key benefits of the WooCommerce Google Ads Dynamic Remarketing Tag is that it allows you to show personalized ads to users who have already shown interest in your products or services. For example, if a user visits a specific product page on your website but doesn’t make a purchase, you can show them an ad that features that same product or similar products.

This type of personalized targeting can be very effective in driving conversions and increasing sales on your website. By showing relevant ads to users who have already shown interest in your products, you can increase the likelihood that they will return to your site and make a purchase.

In addition to dynamic remarketing, the WooCommerce Google Ads integration plugin also supports other types of Google Ads campaigns, such as Google Shopping and Google AdWords. This allows you to easily manage all of your Google Ads campaigns from within your WooCommerce store, and track their performance using Google Analytics.

Overall, the WooCommerce Google Ads Dynamic Remarketing Tag is a powerful tool for online businesses that want to increase conversions and drive sales on their website. By tracking and targeting users who have already shown interest in your products or services, you can create personalized ads that are more likely to convert and drive sales.

Drupal Google Ads Dynamic Remarketing Tag using Google Tag Manager

Standard

The Drupal Google Ads Dynamic Remarketing Tag is a powerful tool that allows Drupal site owners to track visitor behavior and target them with personalized ads based on their actions. This can help to increase conversions and sales, as well as build brand awareness and loyalty. Here’s how it works:

Dynamic remarketing involves placing a cookie in the browser of a visitor to your Drupal site, which allows you to track their behavior and serve them personalized ads later on. This can be done through the Google Ads platform, which provides a remarketing tag code that needs to be added to your Drupal site. Once the tag code is in place, you can begin tracking visitor behavior and targeting them with specific ads that are tailored to their interests and actions on your site.

The first step to setting up the Drupal Google Ads Dynamic Remarketing Tag is to create a Google Ads account if you don’t already have one. Once you have an account, you’ll need to create a dynamic remarketing campaign in Google Ads. This involves selecting the business type and product categories you want to target, as well as setting up your ad groups and targeting options.

Once your campaign is set up, you’ll be provided with a remarketing tag code that needs to be added to your Drupal site. This can be done using a custom module or by editing your Drupal theme’s template files. The tag code should be added to every page of your site that you want to track for dynamic remarketing.

Once you’ve added the Drupal Google Ads Dynamic Remarketing Tag code to your site, you can start tracking visitors and serving up personalized ads on the Google Display Network. Be sure to monitor your campaign performance regularly and make adjustments as needed to optimize your results.

Some tips for using the Drupal Google Ads Dynamic Remarketing Tag effectively include:

  1. Set clear goals and objectives for your campaign. What do you hope to achieve with dynamic remarketing, and how will you measure success?

2. Use segmentation and targeting to personalize your ads. Make sure your ads are relevant and engaging to your target audience.

3. Test and optimize your ad creative and messaging. Experiment with different ad formats, headlines, and calls to action to find what works best.

4. Monitor your campaign performance regularly and adjust as needed. Use data and analytics to track your progress and make informed decisions about how to optimize your campaign.

Overall, the Drupal Google Ads Dynamic Remarketing Tag can be a powerful tool for increasing conversions and sales on your site. By tracking visitor behavior and serving up personalized ads, you can build brand awareness, loyalty, and engagement with your target audience. Just be sure to set clear goals and objectives, use segmentation and targeting to personalize your ads, test and optimize your ad creative and messaging, and monitor your campaign performance regularly

Lightspeed Commerce Google Ads Dynamic Remarketing Tags

Standard

Lightspeed Commerce is a cloud-based e-commerce platform that provides merchants with the tools to build and manage their online stores. Google Ads dynamic remarketing tags are an advanced feature of Google Ads that enable advertisers to track and target users who have previously interacted with their website or products.

When a user visits an e-commerce website powered by Lightspeed Commerce, the Google Ads dynamic remarketing tag is triggered. This tag sends information about the user’s behavior on the site, such as the pages they visited, the products they viewed, and the items they added to their cart. This information is then used by Google Ads to display targeted ads to the user across the Google Display Network.

Dynamic remarketing is an effective way to re-engage with users who have already shown an interest in a merchant’s products. By showing targeted ads to users who have already interacted with their website, merchants can increase the chances of converting them into customers. Dynamic remarketing is especially useful for merchants who have a high volume of website traffic but a low conversion rate.

To implement Google Ads dynamic remarketing tags with Lightspeed Commerce, merchants need to have a Google Ads account and a Google Merchant Center account. They also need to install the Google Ads conversion tracking tag on their website. The conversion tracking tag is a small piece of code that tracks user behavior on the site and sends information back to Google Ads.

Once the conversion tracking tag is installed, merchants can set up their dynamic remarketing campaign. They can choose which products or pages to include in the campaign, set a budget, and create ads using Google Ads templates or their own custom designs. Google Ads then uses the information collected by the conversion tracking tag to target users who have interacted with the merchant’s website.

Dynamic remarketing campaigns can be customized in a variety of ways to target specific user segments. For example, merchants can create campaigns that target users who abandoned their cart or users who visited a specific product page. They can also create campaigns that target users who have made a purchase in the past and encourage them to make another purchase.

One of the benefits of using dynamic remarketing with Lightspeed Commerce is that merchants can track the performance of their campaigns in real-time. Google Ads provides detailed reports that show how many impressions, clicks, and conversions each ad received. Merchants can use this information to optimize their campaigns and improve their ROI.

Another benefit of using dynamic remarketing with Lightspeed Commerce is that it can help merchants save time and money on their advertising campaigns. By targeting users who have already shown an interest in their products, merchants can reduce the amount of money they spend on advertising to users who are unlikely to convert. This can help them to achieve a higher ROI and make more effective use of their advertising budget.

In conclusion, Lightspeed Commerce Google Ads dynamic remarketing tags are an advanced feature that enable merchants to re-engage with users who have previously interacted with their website or products. By using the conversion tracking tag and creating dynamic remarketing campaigns, merchants can show targeted ads to users who have already shown an interest in their products, increasing the chances of converting them into customers. Dynamic remarketing campaigns can be customized in a variety of ways to target specific user segments, and Google Ads provides detailed reports that show the performance of each ad. Overall, dynamic remarketing can help merchants save time and money on their advertising campaigns while improving their ROI.

OpenCart Google Ads Dynamic Remarketing Tag using Google Tag Manager

Standard

Google Ads Dynamic Remarketing is a powerful advertising tool that allows online businesses to reach out to users who have previously visited their website. By using this advertising feature, businesses can display personalized ads to these users, showcasing products and services they have previously shown interest in. OpenCart, a popular e-commerce platform, allows users to add Google Ads Dynamic Remarketing Tag to their online store, making it easier to retarget their visitors with targeted ads.

In this article, we will explain how to add the Google Ads Dynamic Remarketing Tag to your OpenCart online store and how it can benefit your business.

What is Google Ads Dynamic Remarketing Tag?

Google Ads Dynamic Remarketing Tag is a snippet of code that needs to be added to your website to track user behavior and capture information about the products or services they are interested in. The information captured includes product ID, product name, product category, and other relevant information.

Once the tag is installed on your website, it starts tracking the user’s behavior and creates an audience list of users who have shown interest in your products or services. This list can be used to display personalized ads to these users when they browse other websites that are part of the Google Display Network.

Adding Google Ads Dynamic Remarketing Tag to OpenCart

To add the Google Ads Dynamic Remarketing Tag to your OpenCart online store, follow these steps:

Step 1: Log in to your Google Ads account and navigate to the Shared Library section.

Step 2: Click on the “Audience manager” option and then select “Audiences.”

Step 3: Click on the “Set up remarketing” button, and then select “Web.”

Step 4: You will be presented with a code snippet. Copy the code to your clipboard.

Step 5: Log in to your OpenCart store, and navigate to the “Extensions” section.

Step 6: Click on “Analytics” and select “Google Analytics” from the list.

Step 7: Paste the code snippet you copied earlier into the “Code” field.

Step 8: Save the changes, and you’re done.

Benefits of Google Ads Dynamic Remarketing Tag

There are several benefits to adding the Google Ads Dynamic Remarketing Tag to your OpenCart online store. Some of these include:

Retargeting visitors: The tag allows you to retarget visitors who have shown interest in your products or services, even after they have left your website. This increases the chances of them returning to your website to make a purchase.

Personalized ads: With the audience list created by the tag, you can display personalized ads to users, showcasing the products or services they have previously shown interest in. This makes the ads more relevant to the user, increasing the chances of them clicking on the ad and returning to your website.

Increased conversions: By displaying personalized ads to users who have previously shown interest in your products or services, you are increasing the chances of converting them into customers. This can lead to increased sales and revenue for your business.

Better ROI: Google Ads Dynamic Remarketing Tag allows you to display targeted ads to users who are more likely to make a purchase, increasing your ROI. You are not wasting advertising spend on users who are less likely to convert, leading to a better return on investment.

In conclusion, adding the Google Ads Dynamic Remarketing Tag to your OpenCart online store can help increase conversions, improve ROI, and personalize ads for users who have shown interest in your products or services. By following the steps outlined in this article, you can easily add the tag to your website and start retargeting visitors with personalized ads.

The “view_item_list” event in dynamic remarketing for OpenCart refers to when a user views a list of products on your website. This event can be tracked using a tracking code or pixel that is installed on your website, and can be used to create personalized ads that are targeted to users who have viewed specific products or product categories.

Google Remarketing Tag and Conversion Tracking for OpenCart

Google Ads Dynamic Remarketing Tag Feed for OpenCart using Google Tag Manager

The “view_item” event is a specific type of event that can be tracked by the Google Ads Dynamic Remarketing Tag in OpenCart. This event is triggered when a user views a specific item on your website, such as a product page.

Dynamic Remarketing Code for OpenCart

OpenCart Google Ads Dynamic Remarketing Tag using Google Tag Manager

The “add_to_cart” event in dynamic remarketing tags for OpenCart refers to when a user adds a product to their cart on your website. This event can be tracked using a tracking code or pixel that is installed on your website, and can be used to create personalized ads that are targeted to users who have added specific products to their cart.

 Remarketing Tag on openCart

Add Google Remarketing code on openCart using Google Tag Manager

When a user completes a purchase on your website, the tracking code will capture this event and send the information to your dynamic remarketing platform. The platform can then use this information to measure the performance of your campaigns and optimize your targeting and bidding strategies to drive higher returns on ad spend.

Google Ads Dynamic Remarketing Tag Setup for OpenCart

Google Dynamic Remarketing Tag for OpenCart using Google Tag Manager

Warning: If you don’t know about javascript or don’t have developing knowledge then don’t try toOpenCart Google Ads Dynamic Remarketing Tag  that can break your site, Cart and other functionality 

Disclaimer: Google tag manager belongs to Google property 

For Contact: mappchero@gmail.com

I am available for Hire on Freelancer: Freelancer.com

I am available for Hire on Upwork: Upwork.com

I am available for Hire on Peopleperhour: Peopleperhour.com

I am available for Hire on Guru: Guru.com
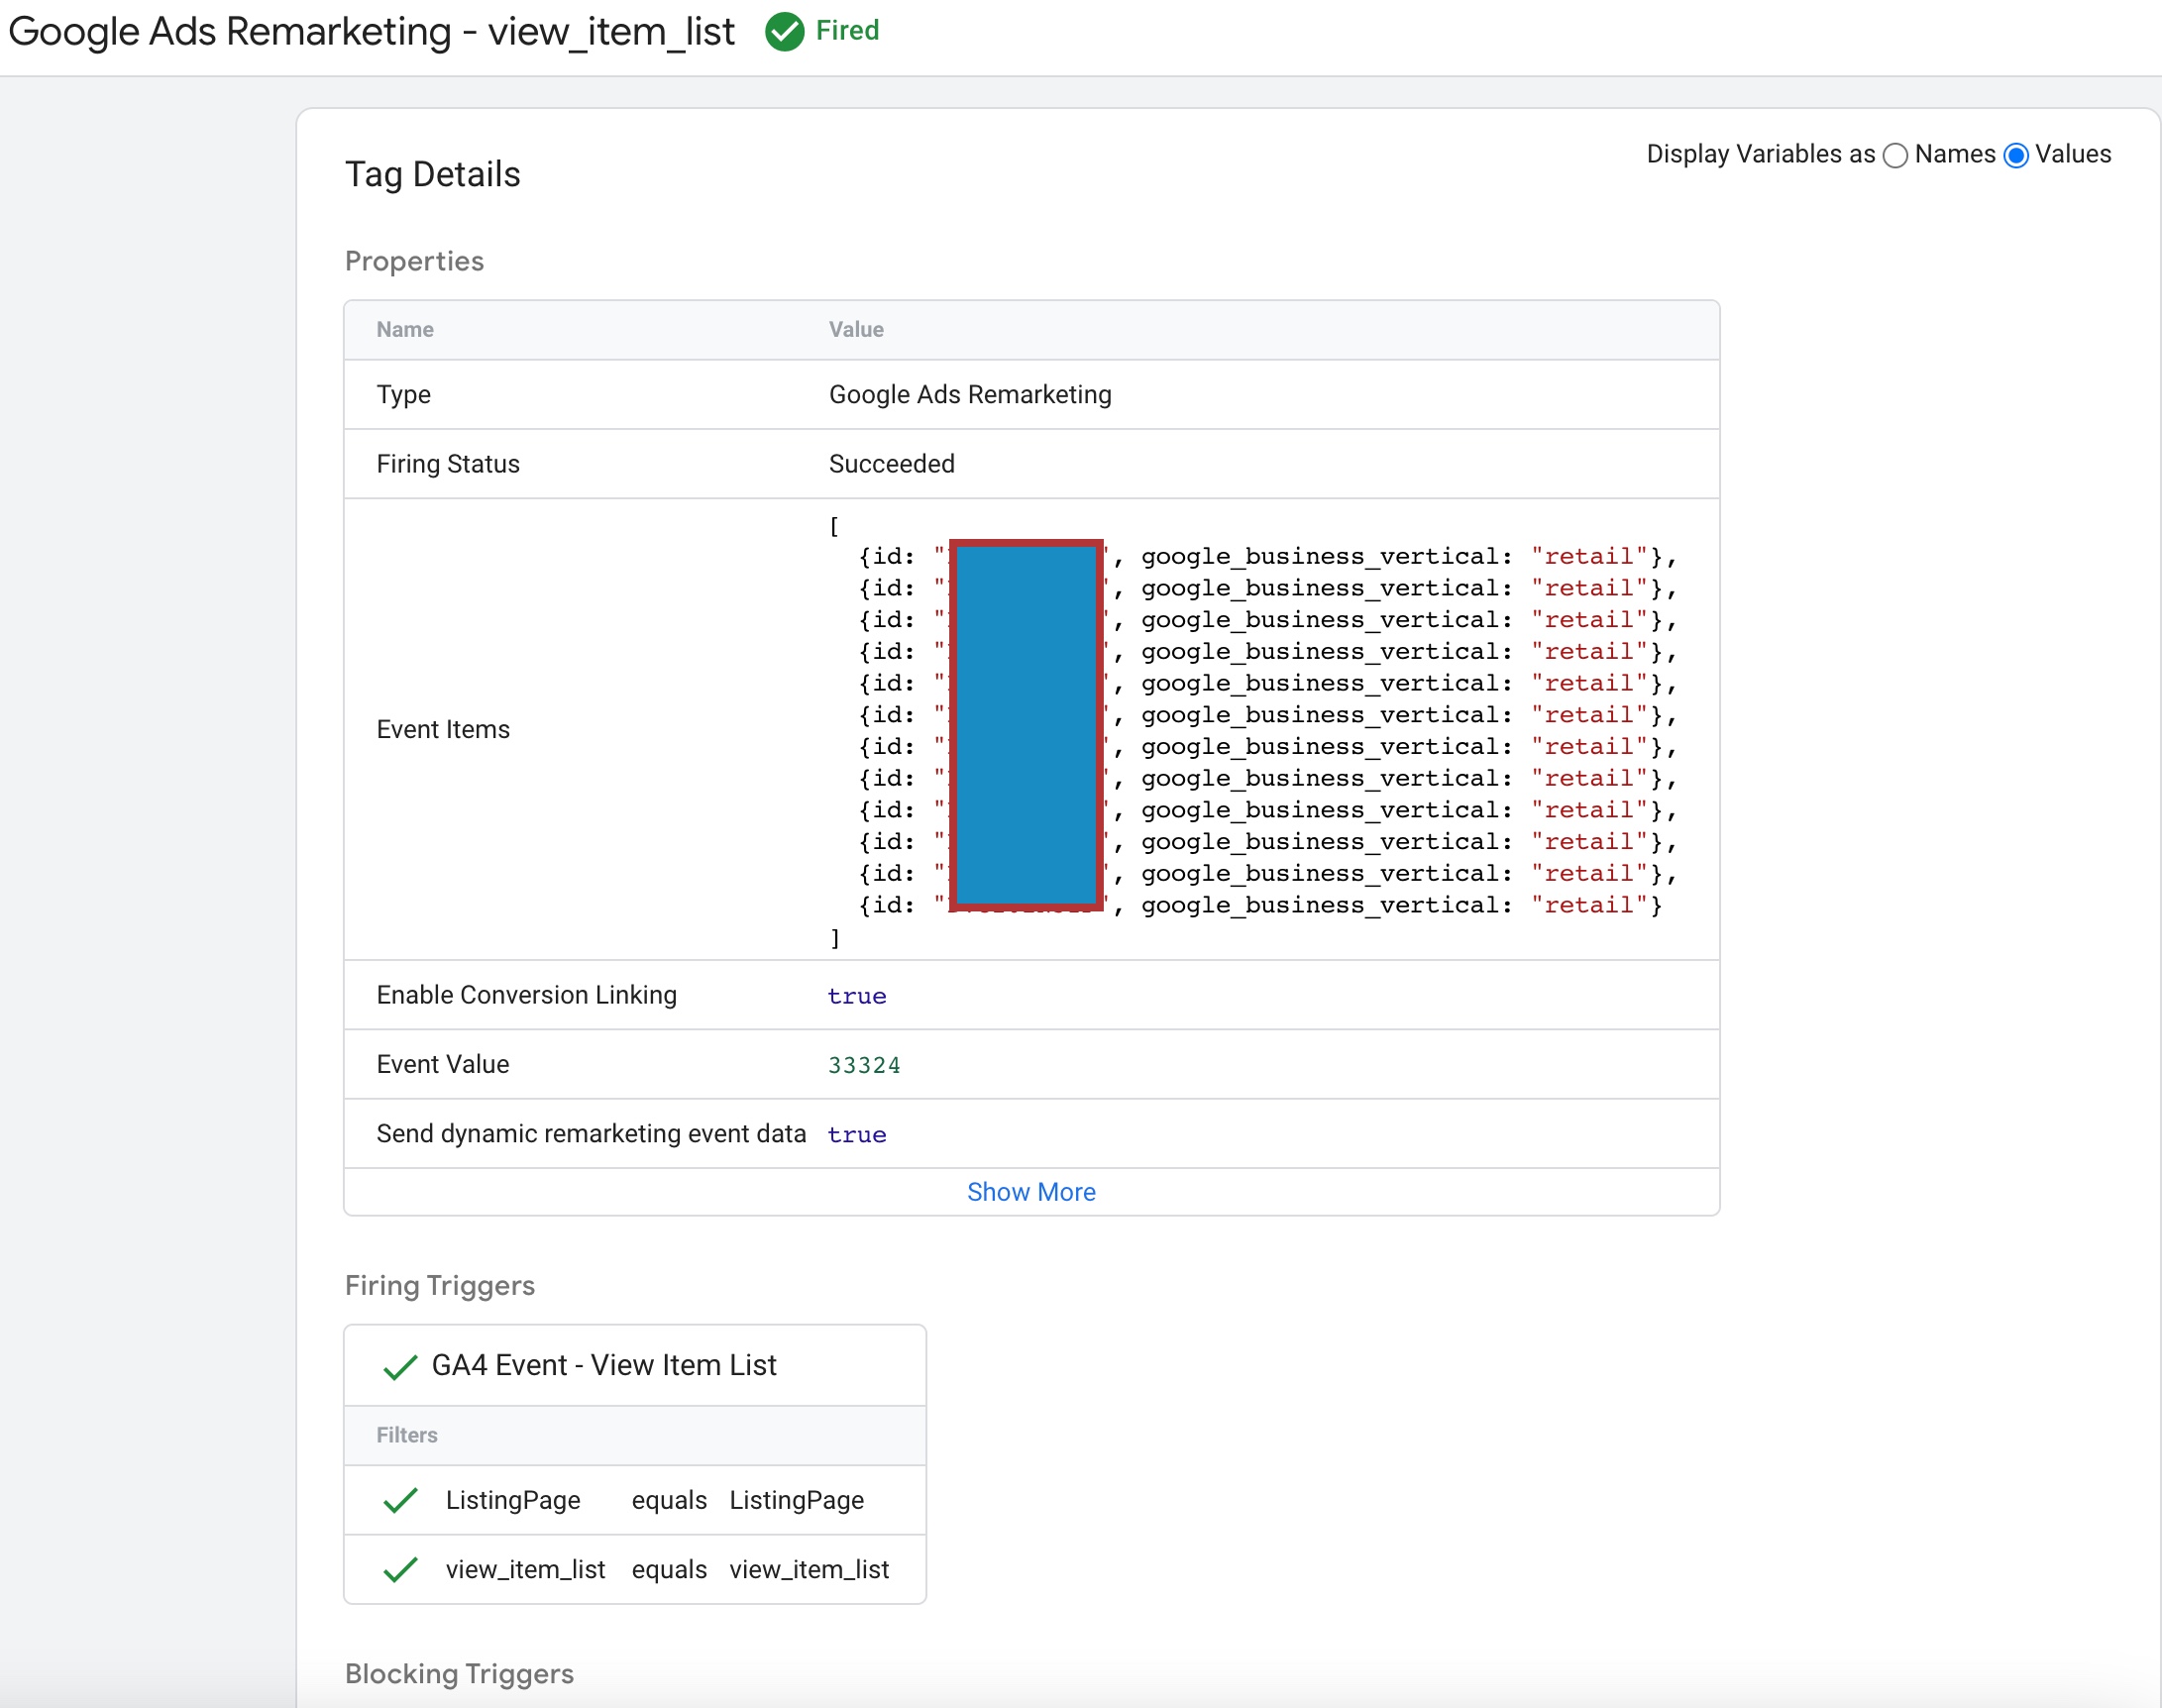
Magento 2 Google Ads Dynamic Remarketing Tag

Standard

Magento 2 is an open-source e-commerce platform that offers a range of features and functionalities for online businesses. One such feature is the integration of Google Ads Dynamic Remarketing Tag, which allows businesses to advertise their products to potential customers who have already visited their website.

Dynamic Remarketing Tag is a code snippet that is added to the website’s source code to track user behavior on the site. The data collected is then used to show personalized ads to the user when they browse other websites or search on Google. These ads show products that the user has previously viewed, making them more likely to revisit the website and complete their purchase.

Here’s a step-by-step guide on how to set up Google Ads Dynamic Remarketing Tag on Magento 2:

Step 1: Create a Google Ads account

If you don’t have a Google Ads account, you’ll need to create one. Go to the Google Ads website and sign up for an account. Once you’ve created an account, you’ll need to create a new remarketing tag for your website.

Step 2: Create a remarketing tag

To create a remarketing tag, click on the ‘Tools’ tab in your Google Ads account and select ‘Audience Manager’ from the drop-down menu. Click on the ‘Data sources’ tab and select ‘Website visitors.’ Click on the ‘Tag setup’ button and select ‘Google Tag Manager.’ Copy the code snippet that appears on the screen.

Step 3: Install Google Tag Manager on Magento 2

Google Tag Manager is a tool that allows you to manage multiple tracking tags on your website. Install Google Tag Manager on Magento 2 by following these steps:

a) Sign in to your Magento 2 admin panel
b) Go to ‘Stores’ and select ‘Configuration’
c) Click on ‘Sales’ and select ‘Google API’
d) Click on ‘Google Tag Manager’ and enter your Google Tag Manager ID
e) Click on ‘Save Config’

Step 4: Add the remarketing tag to Google Tag Manager

To add the remarketing tag to Google Tag Manager, follow these steps:

a) Sign in to your Google Tag Manager account
b) Click on ‘Tags’ and select ‘New’
c) Select ‘Google Ads Remarketing’ from the ‘Tag Configuration’ section
d) Enter your Google Ads Conversion ID and Remarketing ID
e) Paste the code snippet you copied in Step 2 into the ‘Tag Configuration’ section
f) Click on ‘Save’

Step 5: Set up a remarketing campaign in Google Ads

To set up a remarketing campaign in Google Ads, follow these steps:

a) Sign in to your Google Ads account
b) Click on ‘Campaigns’ and select ‘New Campaign’
c) Select ‘Display’ as your campaign type and ‘Standard Display Campaign’ as your campaign subtype
d) Choose your campaign settings, such as budget, target audience, and ad format
e) Click on ‘Create campaign’

Step 6: Add your ad creatives

To create your ad creatives, follow these steps:

a) Click on ‘Ads & Extensions’ and select ‘Ad gallery’
b) Choose a display ad template or create your own ad
c) Enter your ad copy and upload your images
d) Click on ‘Create’

Step 7: Add your remarketing tag to your website

To add your remarketing tag to your website, follow these steps:

a) Sign in to your Magento 2 admin panel
b) Go to ‘Stores’ and select ‘Configuration’
c) Click on ‘Sales’ and select ‘Google API’
d) Click on ‘Google Ads Remarketing’ and select ‘Yes’ for ‘Enable’
e) Paste the remarketing tag code snippet into the ‘

In Magento 2, ‘event’ and ‘view_item’ are used in conjunction to track when a user views a specific product on the website.

In Magento 2, the ‘event’ ‘view_item_list‘ is used to track when a user views a list of products on the website, such as a category page or search results page. This tracking information can be used to create personalized recommendations and retargeting campaigns.

Dynamic Remarketing Setup for Google Ads for Magento 2

Dynamic Remarketing Tag in Magento 2 using Google Tag Manager

An event in Google Analytics is a user’s interaction with a website that can be tracked, such as clicking a button or viewing a page. ‘view_item‘ is an event that is used to track when a user views a specific item on an e-commerce website. When a user views a product page on a Magento 2 website, the ‘view_item‘ event is triggered and the data is sent to Google Analytics.

Magento 2 Google Ads Dynamic Remarketing Tag

Magento 2 Google Ads Dynamic Remarketing Tag using Google Tag Manager

In Magento 2, the ‘event’ and ‘add_to_cart‘ are used together to track when a user adds a product to their cart. This tracking information can be used to create personalized recommendations, retargeting campaigns, and abandoned cart emails.

Google Ads Remarketing For Magento 2

Add Google Remarketing tag in Magento 2 using Google Tag Manager

In Magento 2, the ‘event’ and ‘purchase‘ are used together to track when a user completes a purchase on the website. This tracking information can be used to create dynamic remarketing campaigns, which show personalized ads to users who have already visited your website and made a purchase.

Enable Google Remarketing Tag in Magento 2

Google Ads (AdWords) Dynamic Remarketing for Magento 2 using Google Tag Manager

Warning: If you don’t know about javascript or don’t have developing knowledge then don’t try to Magento 2 Google Ads Dynamic Remarketing Tag using Google Tag Manager that can break your site, Cart and other functionality 

Disclaimer: Google tag manager belongs to Google property 

For Contact: mappchero@gmail.com

I am available for Hire on Freelancer: Freelancer.com

I am available for Hire on Upwork: Upwork.com

I am available for Hire on Peopleperhour: Peopleperhour.com

I am available for Hire on Guru: Guru.com
Pestashop Google Ads Dynamic Remarketing Tags

Standard

Prestashop is an open-source e-commerce platform that allows businesses to create and manage an online store. It is a popular platform that is used by many businesses to sell their products online. Google Ads is an advertising platform that allows businesses to create and display ads on Google’s search engine and partner sites. Dynamic remarketing is a feature in Google Ads that allows businesses to show personalized ads to people who have previously visited their website or app.

Prestashop Google Ads Dynamic Remarketing Tags are a set of code snippets that need to be added to the Prestashop store’s pages in order to enable dynamic remarketing with Google Ads. These tags allow Google Ads to collect data about the products that people are viewing on the Prestashop store and use this data to show personalized ads to them on the Google Display Network.

The process of setting up Prestashop Google Ads Dynamic Remarketing Tags involves a few steps. First, the business needs to have a Google Ads account set up and linked to their Prestashop store. They also need to have enabled the Google Ads dynamic remarketing feature. Once these prerequisites are met, they can proceed with the following steps.

Install the Google Ads remarketing tag: The first step is to install the Google Ads remarketing tag on the Prestashop store. This involves copying the code provided by Google Ads and pasting it into the Prestashop store’s header section. The remarketing tag is a piece of JavaScript code that allows Google Ads to track the people who visit the store.

Add the product ID to the tag: The next step is to modify the Google Ads remarketing tag to include the product ID of the products that people view on the store. This is important because it allows Google Ads to collect data about the products that people are interested in and use this data to show personalized ads to them.

Add the product details to the tag: In addition to the product ID, businesses can also add other product details such as the product name, category, and price to the Google Ads remarketing tag. This information is useful for creating more personalized ads.

Configure the Google Ads campaign: Once the Google Ads remarketing tag is set up on the Prestashop store, the business needs to configure the Google Ads campaign. This involves setting up the targeting options, ad format, and ad content. The ads can be customized to show the products that people have viewed on the Prestashop store, as well as other related products.

By using dynamic remarketing with Google Ads, businesses can show highly relevant ads to people who have already shown an interest in their products. This can help increase conversions and drive more sales for the business. The personalized nature of the ads can also help build brand loyalty and keep people coming back to the store.

In addition to the benefits mentioned above, Prestashop Google Ads Dynamic Remarketing Tags offer several other advantages. For example:

Easy to set up: Setting up the Google Ads remarketing tag on a Prestashop store is relatively easy and can be done by anyone with basic technical knowledge.

Cost-effective: Dynamic remarketing with Google Ads can be a cost-effective way to drive more sales for the business. Since the ads are only shown to people who have already shown an interest in the products, the likelihood of conversion is higher.

Customizable: The ads can be customized to show the products that people have viewed on the Prestashop store, as well as other related products. This allows businesses to tailor the ads to the interests of the people who are most likely to convert.

In conclusion, Prestashop Google Ads Dynamic Remarketing Tags are an important tool for businesses that want to increase sales and build brand loyalty. By using dynamic remarketing with Google Ads, businesses

The Prestashop Dynamic Remarketing Tag view_item_list is a code snippet that can be added to a Prestashop store to track when a user views a list of products on a page. This tag is used in dynamic remarketing campaigns to collect data about the products that users have viewed and use this data to show personalized ads to them on the Google Display Network.

Dynamic Remarketing Google Ads

Google Dynamic Remarketing for PrestaShop using Google Tag Manager

The Prestashop Dynamic Remarketing Tag view_item is a code snippet that can be added to a Prestashop store to track when a user views a specific product on a page. 

Google Dynamic Remarketing Tag for Prestashop

Prestashop Google Ads Dynamic Remarketing Tag Implementation using Google Tag Manager

The Prestashop Dynamic Remarketing Tag add_to_cart is a code snippet that can be added to a Prestashop store to track when a user adds a product to their cart.

PrestaShop Dynamic Remarketing Google Ads

Google Dynamic Remarketing Tag for PrestaShop using Google Tag Manager

The Prestashop Dynamic Remarketing Tag purchase is a code snippet that can be added to a Prestashop store to track when a user makes a purchase.

Warning: If you don’t know about javascript or don’t have developing knowledge then don’t try to Pestashop Google Ads Dynamic Remarketing Tags using Google Tag Manager that can break your site, Cart and other functionality 

Disclaimer: Google tag manager belongs to Google property 

For Contact: mappchero@gmail.com

I am available for Hire on Freelancer: Freelancer.com

I am available for Hire on Upwork: Upwork.com

I am available for Hire on Peopleperhour: Peopleperhour.com

I am available for Hire on Guru: Guru.com
OpenCart Google Ads Dynamic Remarketing Tag Setup

Standard

OpenCart Google Ads Dynamic Remarketing Tag Setup is a process of adding a specific tracking code on an OpenCart website to enable Google Ads to track and target visitors with personalized ads.

Dynamic Remarketing is a Google Ads advertising feature that allows advertisers to show ads to people who have previously visited their website. The feature allows advertisers to create remarketing lists and display ads that are tailored to a user’s previous actions on their website.

The Google Ads Dynamic Remarketing Tag is a specific tracking code that needs to be added to an OpenCart website to enable Google Ads to track user behavior and create customized ads based on their past actions. The tag is a snippet of code that is placed on the website, which tracks users’ activity on the site and helps Google Ads to identify which products or services a user has viewed, and then shows ads promoting those products or services on other websites that the user subsequently visits.

By setting up the OpenCart Google Ads Dynamic Remarketing Tag, advertisers can retarget users with ads across the Google Display Network, encouraging them to return to their website and complete a purchase, sign up for a newsletter, or take any other desired action.

OpenCart Google Ads Dynamic Remarketing Tag Setup is needed to help online businesses create more targeted and effective advertising campaigns by retargeting visitors who have previously interacted with their website. Here are some of the key reasons why businesses may need to set up the Google Ads Dynamic Remarketing Tag on their OpenCart website:

Improve ad targeting: Dynamic remarketing allows businesses to serve ads to users who have previously visited their website, promoting specific products or services based on their past interactions with the site. This helps to ensure that ads are more relevant and targeted, increasing the likelihood of conversion.

Increase conversions: By targeting users who have already interacted with their website, businesses can encourage them to return and complete a purchase or other desired action. This can help to increase conversion rates and overall revenue.

Maximize ROI: Retargeting with dynamic remarketing allows businesses to maximize the value of their advertising spend by targeting users who are more likely to convert. This can help to improve the ROI of advertising campaigns, making them more cost-effective.

Build brand awareness: By displaying ads to users who have previously interacted with their website, businesses can help to build brand awareness and recognition, increasing the likelihood of repeat business and word-of-mouth referrals.

Overall, OpenCart Google Ads Dynamic Remarketing Tag Setup is a powerful tool that can help businesses to improve the effectiveness of their advertising campaigns and drive more conversions and revenue.

Dynamic Remarking”view_item_list” Events: The Open Dynamic Remarketing Tag for “view_item_list” is a tracking code that can be added to an OpenCart website to enable Google Ads to track user behavior and create personalized ads based on the specific product or service a user has viewed on the website.

Dynamic Remarking”view_item” Events: The Dynamic Remarketing Tag for “view_item” is a specific type of tracking code that can be added to an OpenCart website to enable Google Ads to track user behavior and create personalized ads based on the specific product or service a user has viewed on the website.