
Magento 2 is an open-source e-commerce platform that offers a range of features and functionalities for online businesses. One such feature is the integration of Google Ads Dynamic Remarketing Tag, which allows businesses to advertise their products to potential customers who have already visited their website.
Dynamic Remarketing Tag is a code snippet that is added to the website’s source code to track user behavior on the site. The data collected is then used to show personalized ads to the user when they browse other websites or search on Google. These ads show products that the user has previously viewed, making them more likely to revisit the website and complete their purchase.
Here’s a step-by-step guide on how to set up Google Ads Dynamic Remarketing Tag on Magento 2:
Step 1: Create a Google Ads account
If you don’t have a Google Ads account, you’ll need to create one. Go to the Google Ads website and sign up for an account. Once you’ve created an account, you’ll need to create a new remarketing tag for your website.
Step 2: Create a remarketing tag
To create a remarketing tag, click on the ‘Tools’ tab in your Google Ads account and select ‘Audience Manager’ from the drop-down menu. Click on the ‘Data sources’ tab and select ‘Website visitors.’ Click on the ‘Tag setup’ button and select ‘Google Tag Manager.’ Copy the code snippet that appears on the screen.
Step 3: Install Google Tag Manager on Magento 2
Google Tag Manager is a tool that allows you to manage multiple tracking tags on your website. Install Google Tag Manager on Magento 2 by following these steps:
a) Sign in to your Magento 2 admin panel
b) Go to ‘Stores’ and select ‘Configuration’
c) Click on ‘Sales’ and select ‘Google API’
d) Click on ‘Google Tag Manager’ and enter your Google Tag Manager ID
e) Click on ‘Save Config’
Step 4: Add the remarketing tag to Google Tag Manager
To add the remarketing tag to Google Tag Manager, follow these steps:
a) Sign in to your Google Tag Manager account
b) Click on ‘Tags’ and select ‘New’
c) Select ‘Google Ads Remarketing’ from the ‘Tag Configuration’ section
d) Enter your Google Ads Conversion ID and Remarketing ID
e) Paste the code snippet you copied in Step 2 into the ‘Tag Configuration’ section
f) Click on ‘Save’
Step 5: Set up a remarketing campaign in Google Ads
To set up a remarketing campaign in Google Ads, follow these steps:
a) Sign in to your Google Ads account
b) Click on ‘Campaigns’ and select ‘New Campaign’
c) Select ‘Display’ as your campaign type and ‘Standard Display Campaign’ as your campaign subtype
d) Choose your campaign settings, such as budget, target audience, and ad format
e) Click on ‘Create campaign’
Step 6: Add your ad creatives
To create your ad creatives, follow these steps:
a) Click on ‘Ads & Extensions’ and select ‘Ad gallery’
b) Choose a display ad template or create your own ad
c) Enter your ad copy and upload your images
d) Click on ‘Create’
Step 7: Add your remarketing tag to your website
To add your remarketing tag to your website, follow these steps:
a) Sign in to your Magento 2 admin panel
b) Go to ‘Stores’ and select ‘Configuration’
c) Click on ‘Sales’ and select ‘Google API’
d) Click on ‘Google Ads Remarketing’ and select ‘Yes’ for ‘Enable’
e) Paste the remarketing tag code snippet into the ‘
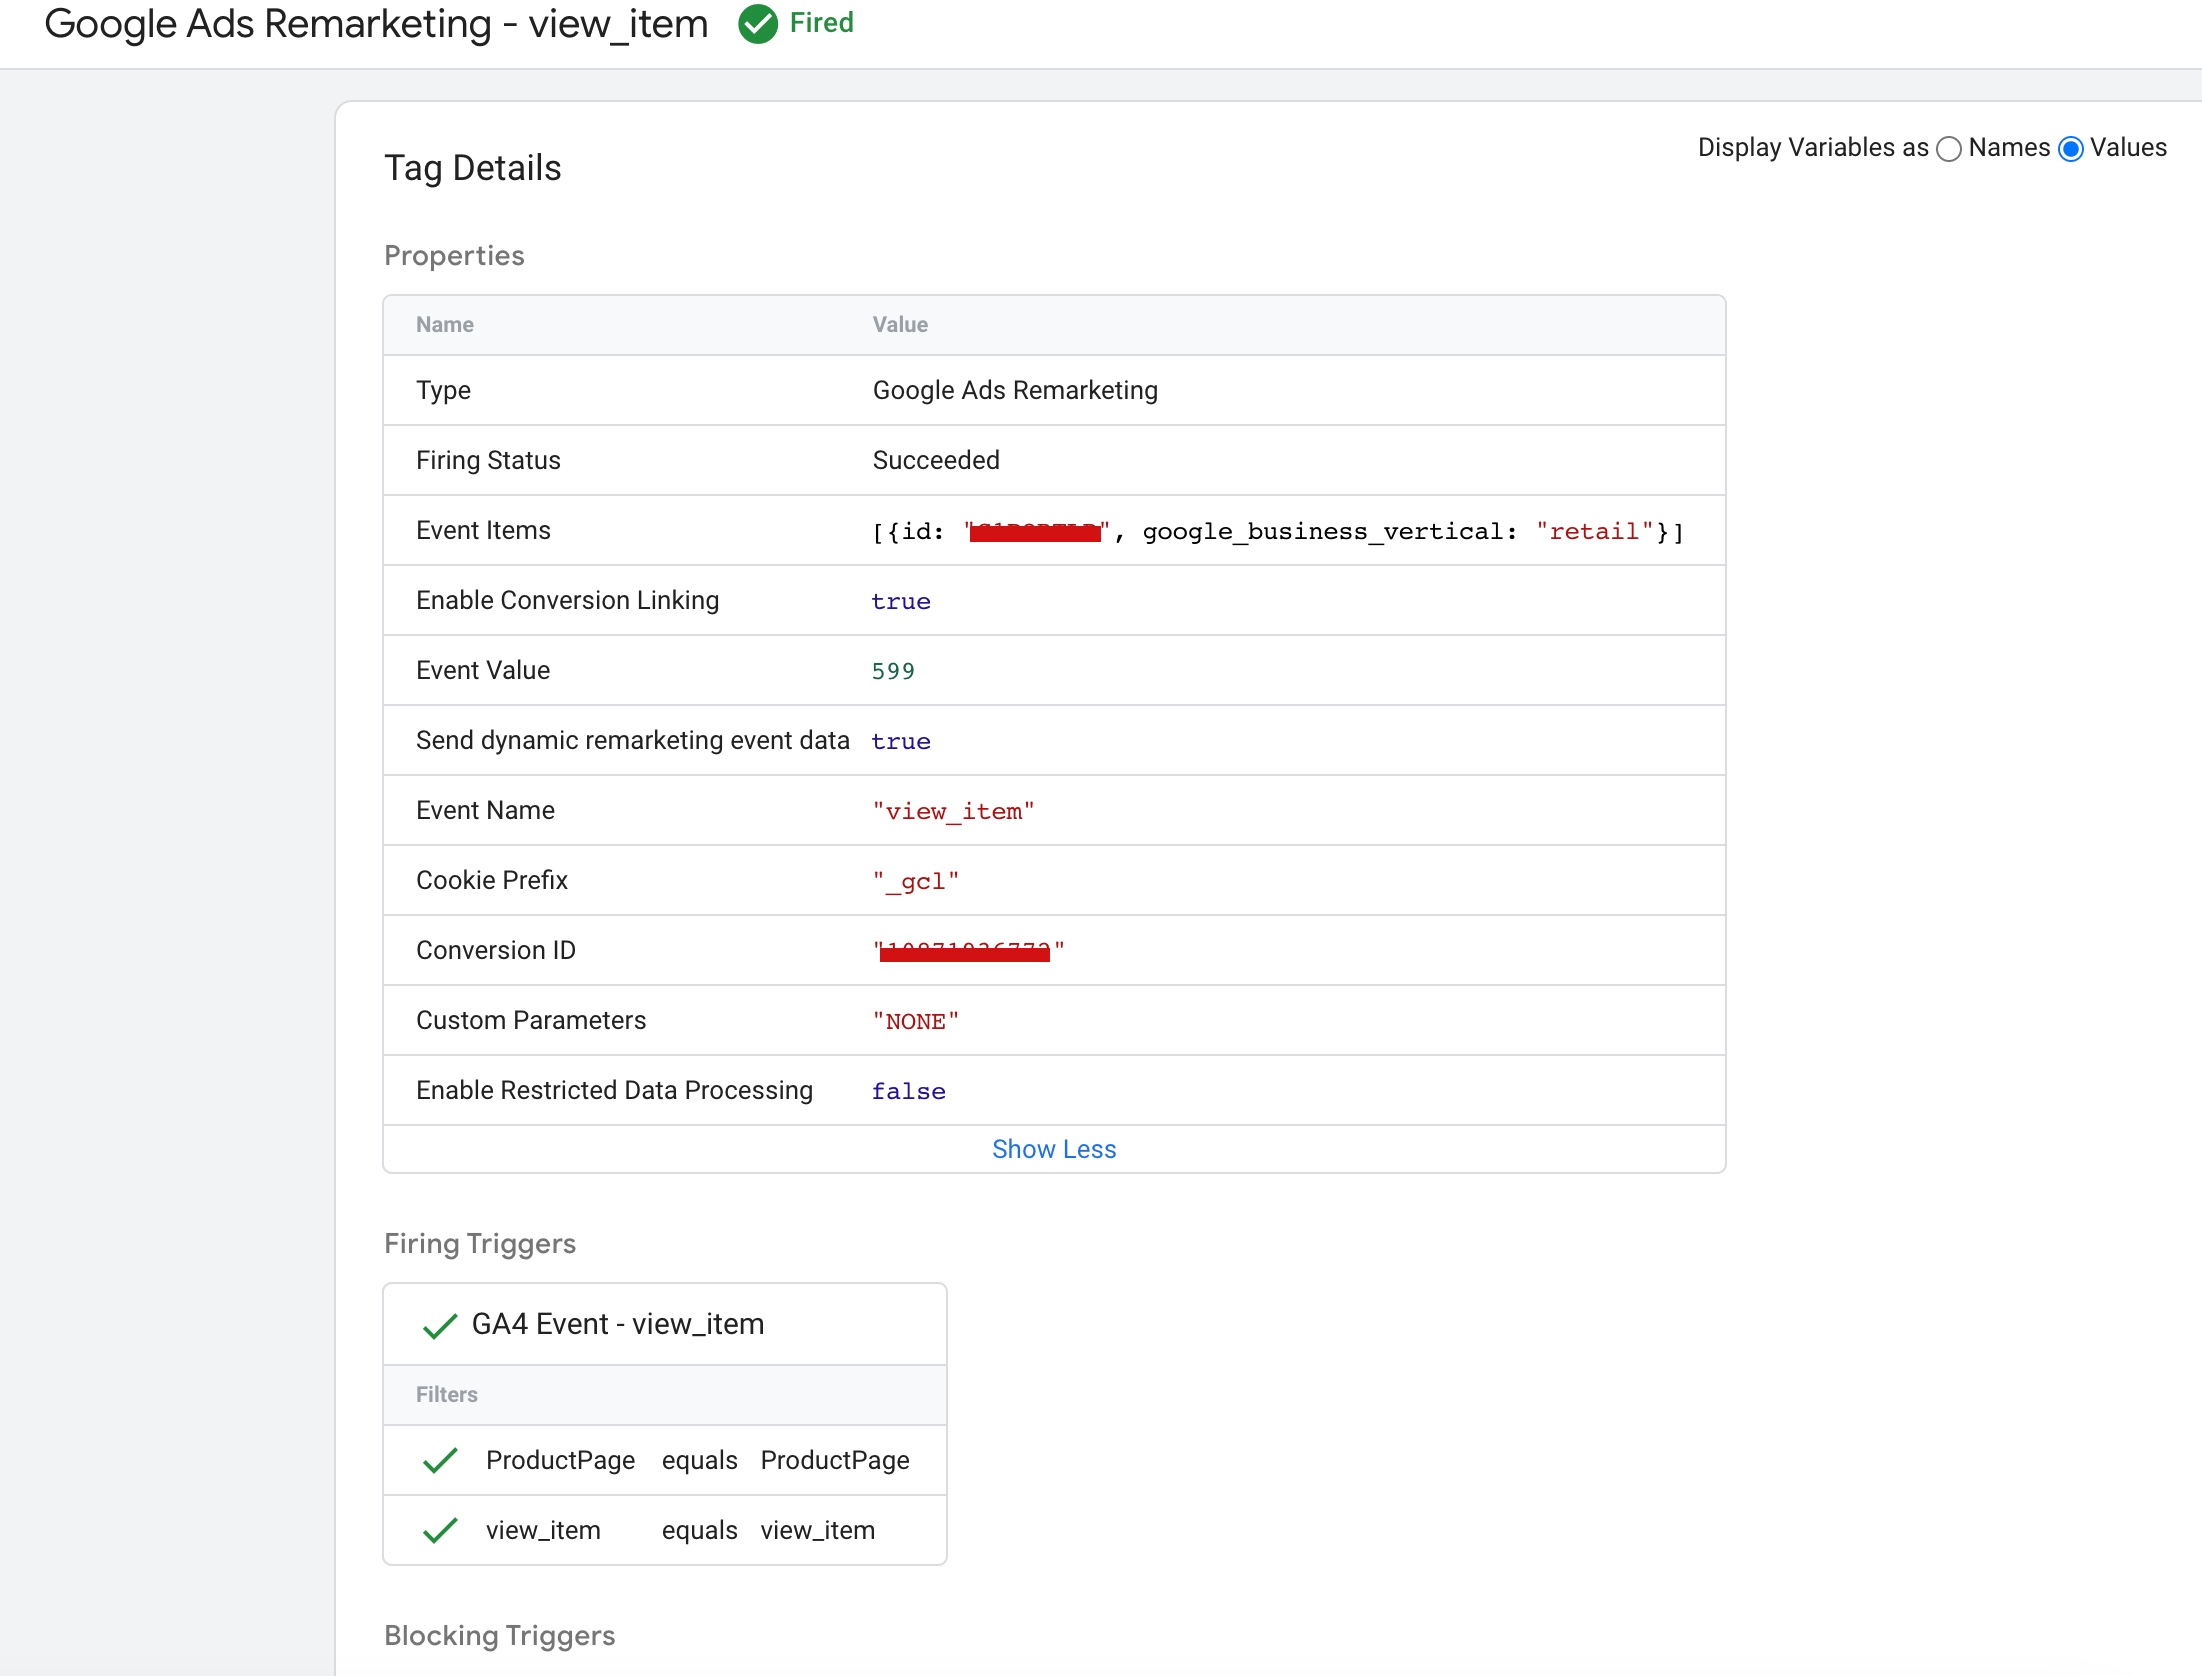
In Magento 2, ‘event’ and ‘view_item’ are used in conjunction to track when a user views a specific product on the website.
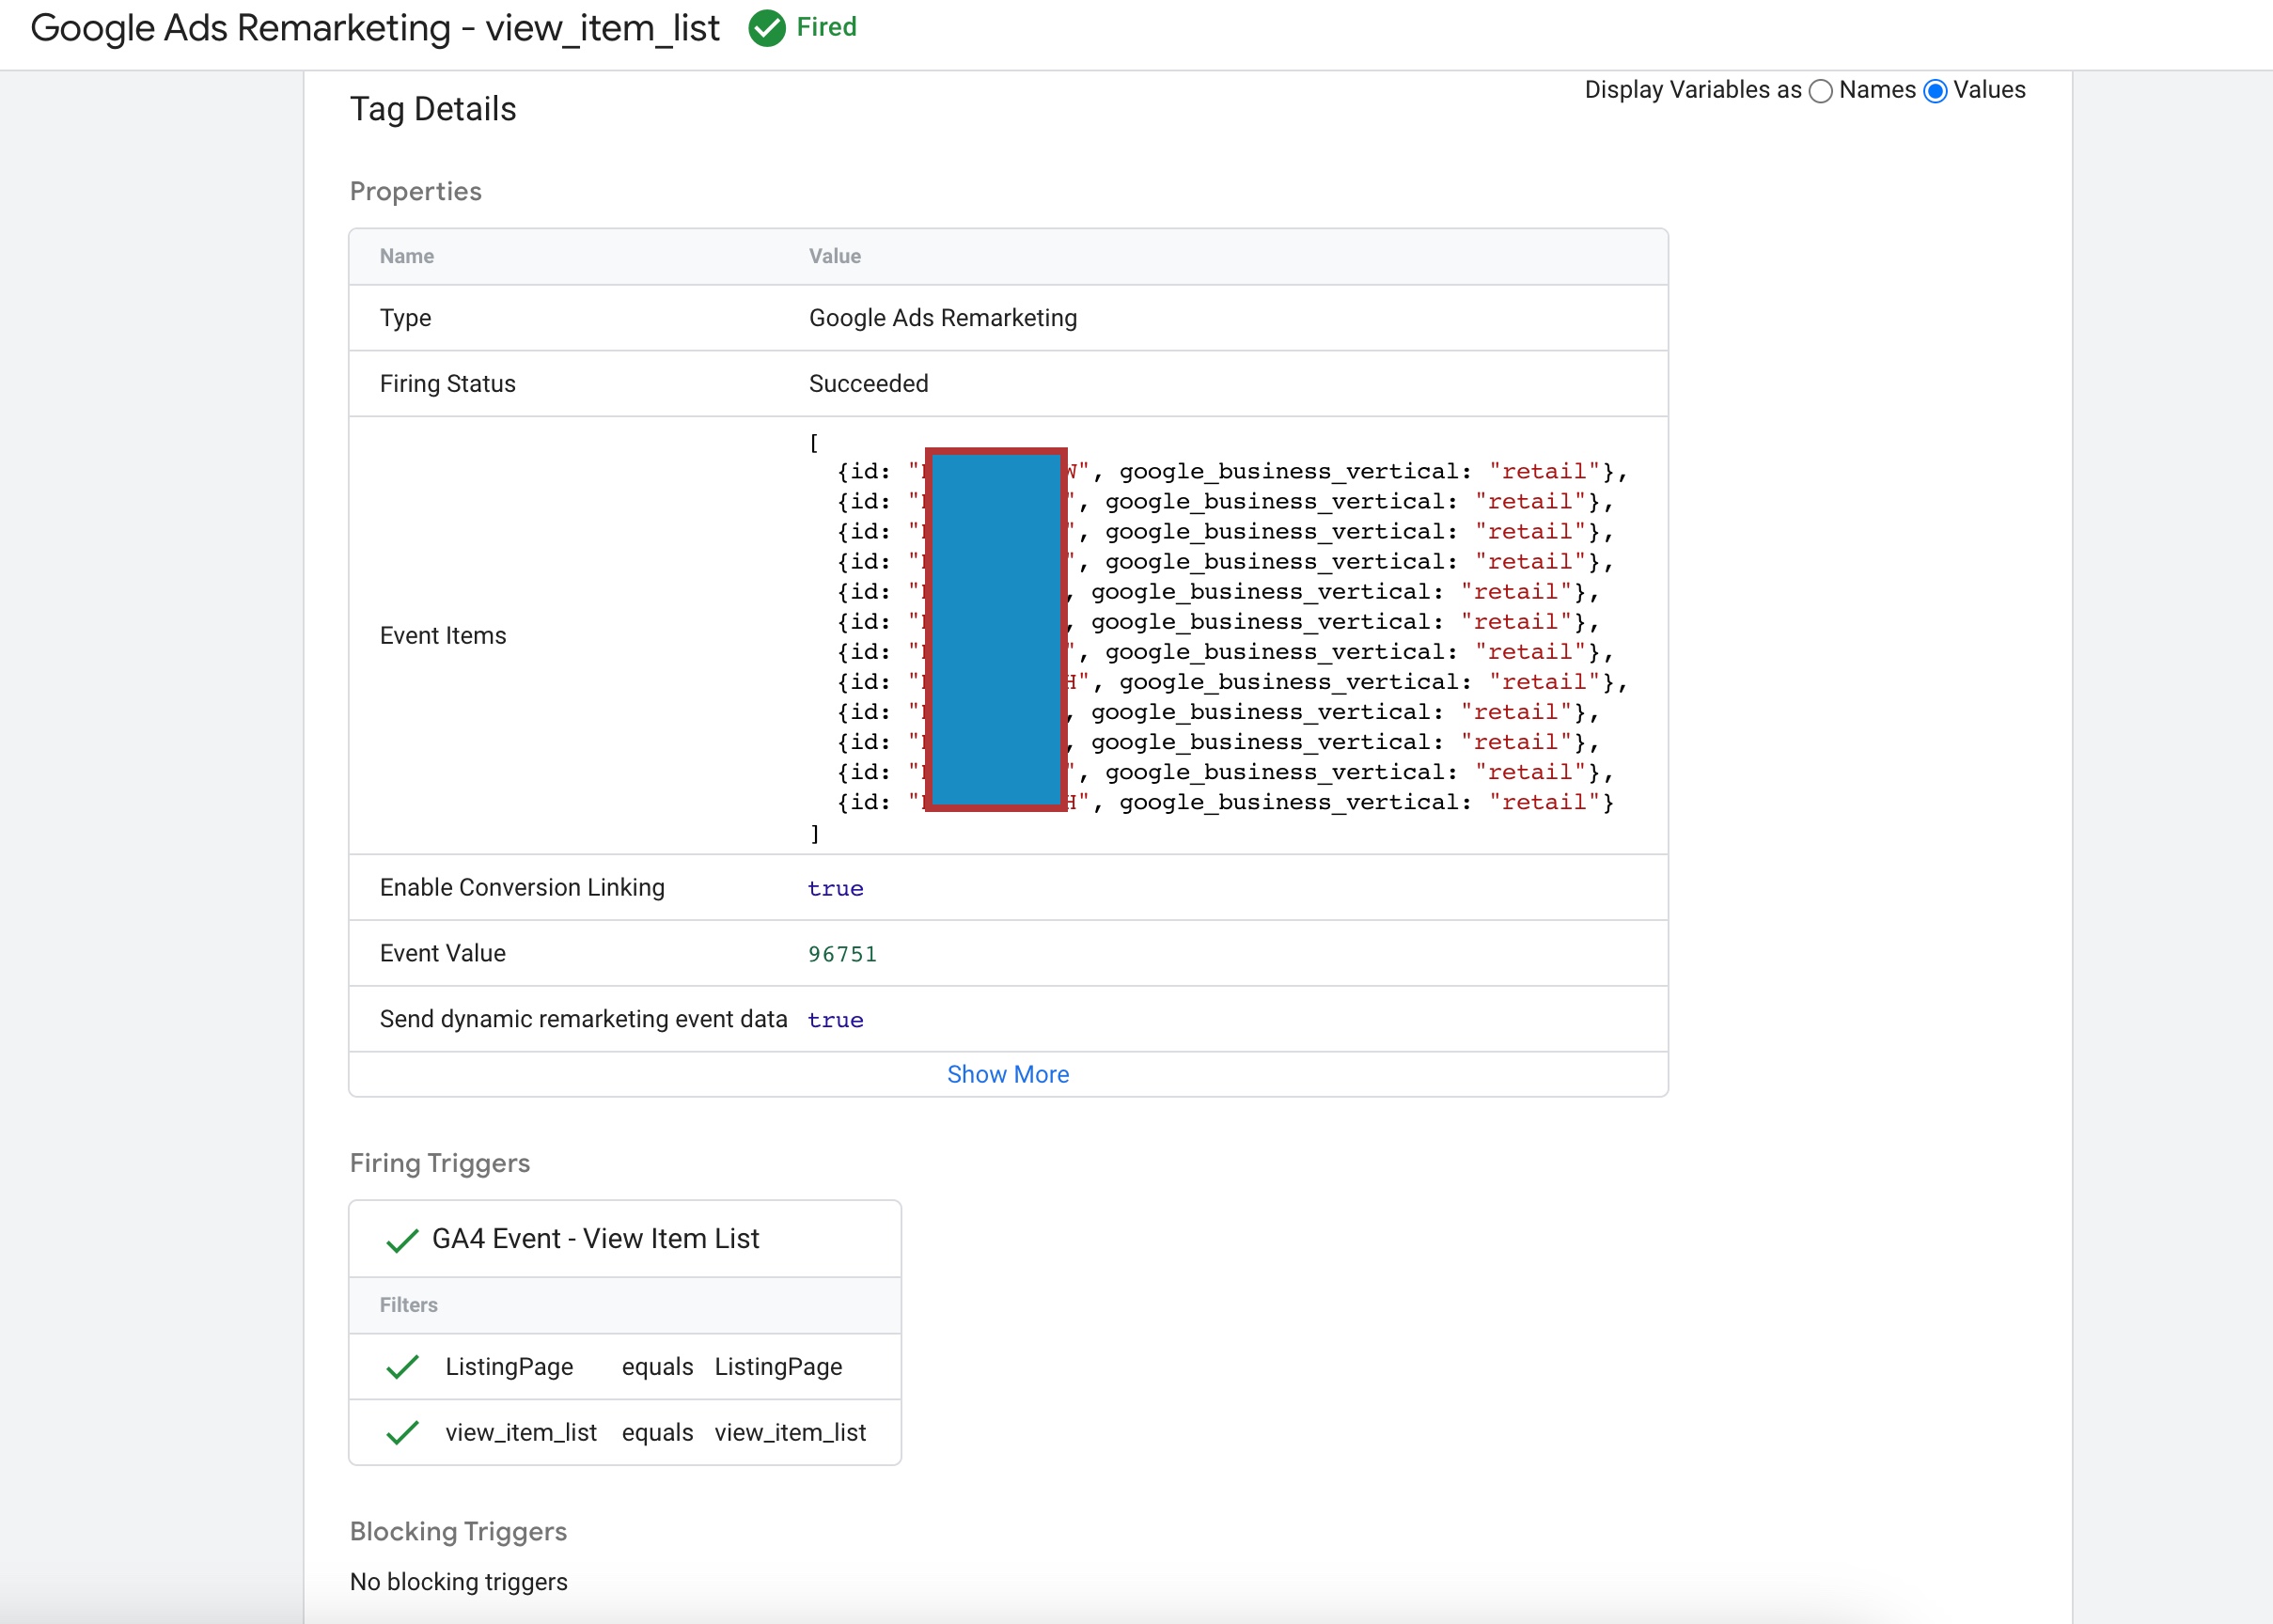
In Magento 2, the ‘event’ ‘view_item_list‘ is used to track when a user views a list of products on the website, such as a category page or search results page. This tracking information can be used to create personalized recommendations and retargeting campaigns.
Dynamic Remarketing Tag in Magento 2 using Google Tag Manager
An event in Google Analytics is a user’s interaction with a website that can be tracked, such as clicking a button or viewing a page. ‘view_item‘ is an event that is used to track when a user views a specific item on an e-commerce website. When a user views a product page on a Magento 2 website, the ‘view_item‘ event is triggered and the data is sent to Google Analytics.
Magento 2 Google Ads Dynamic Remarketing Tag using Google Tag Manager
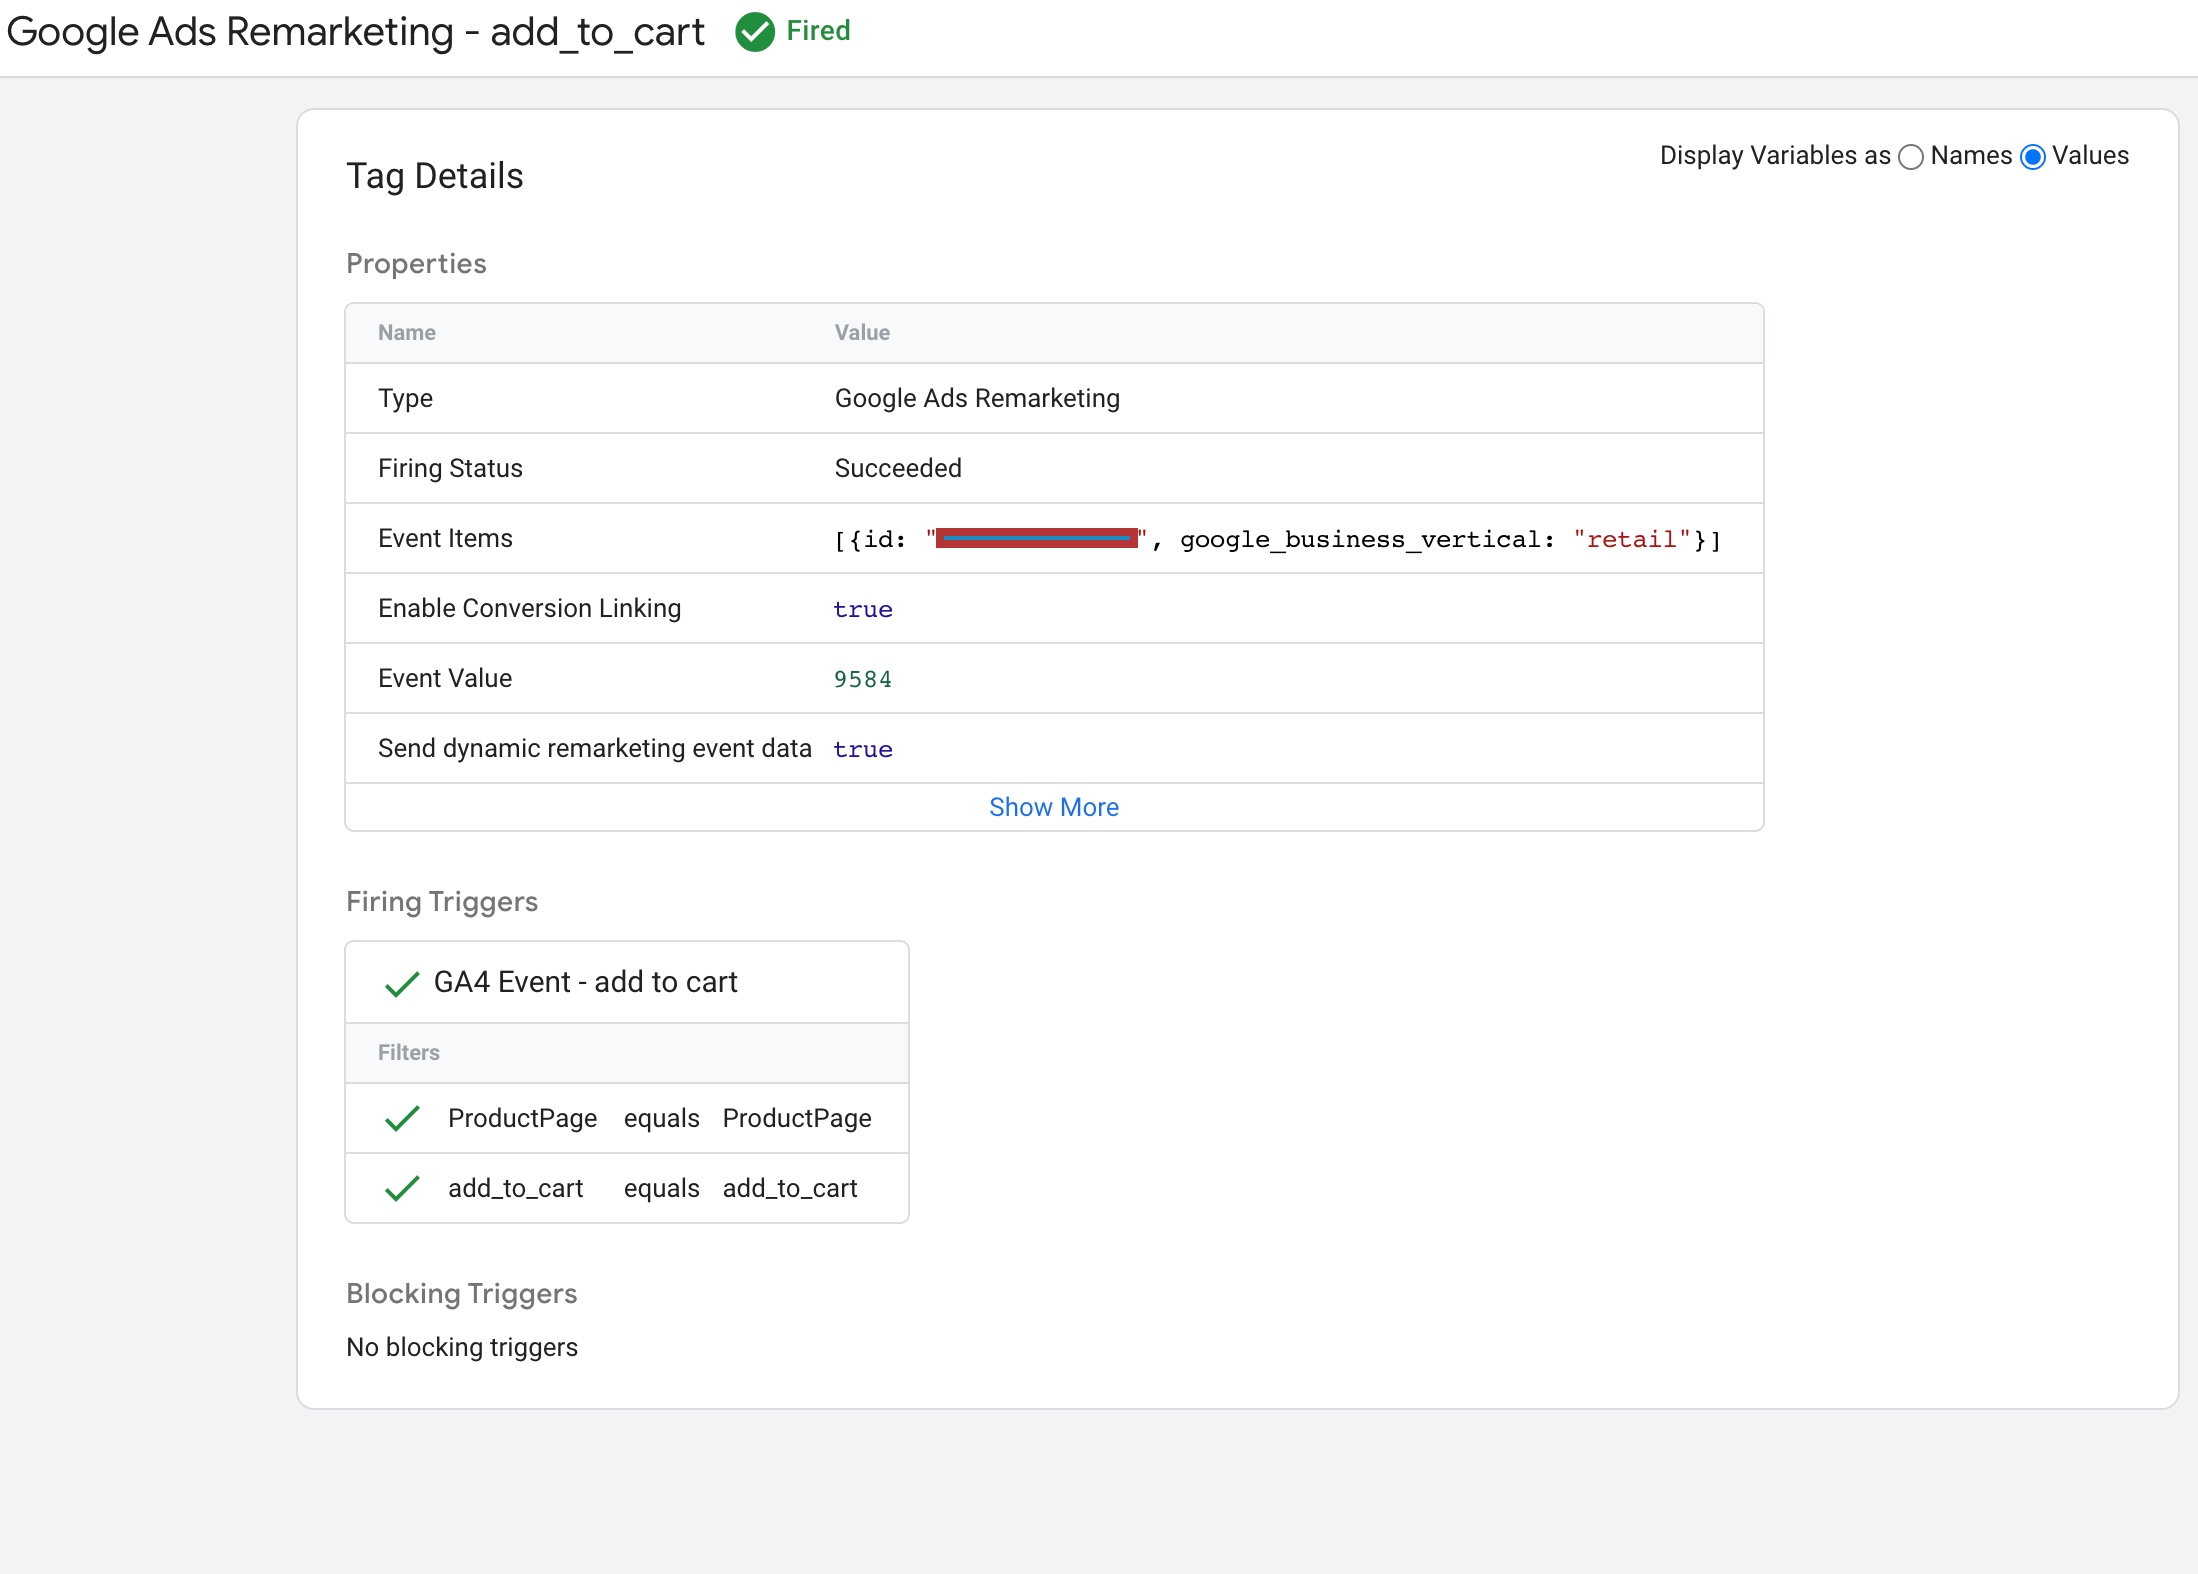
In Magento 2, the ‘event’ and ‘add_to_cart‘ are used together to track when a user adds a product to their cart. This tracking information can be used to create personalized recommendations, retargeting campaigns, and abandoned cart emails.
Add Google Remarketing tag in Magento 2 using Google Tag Manager
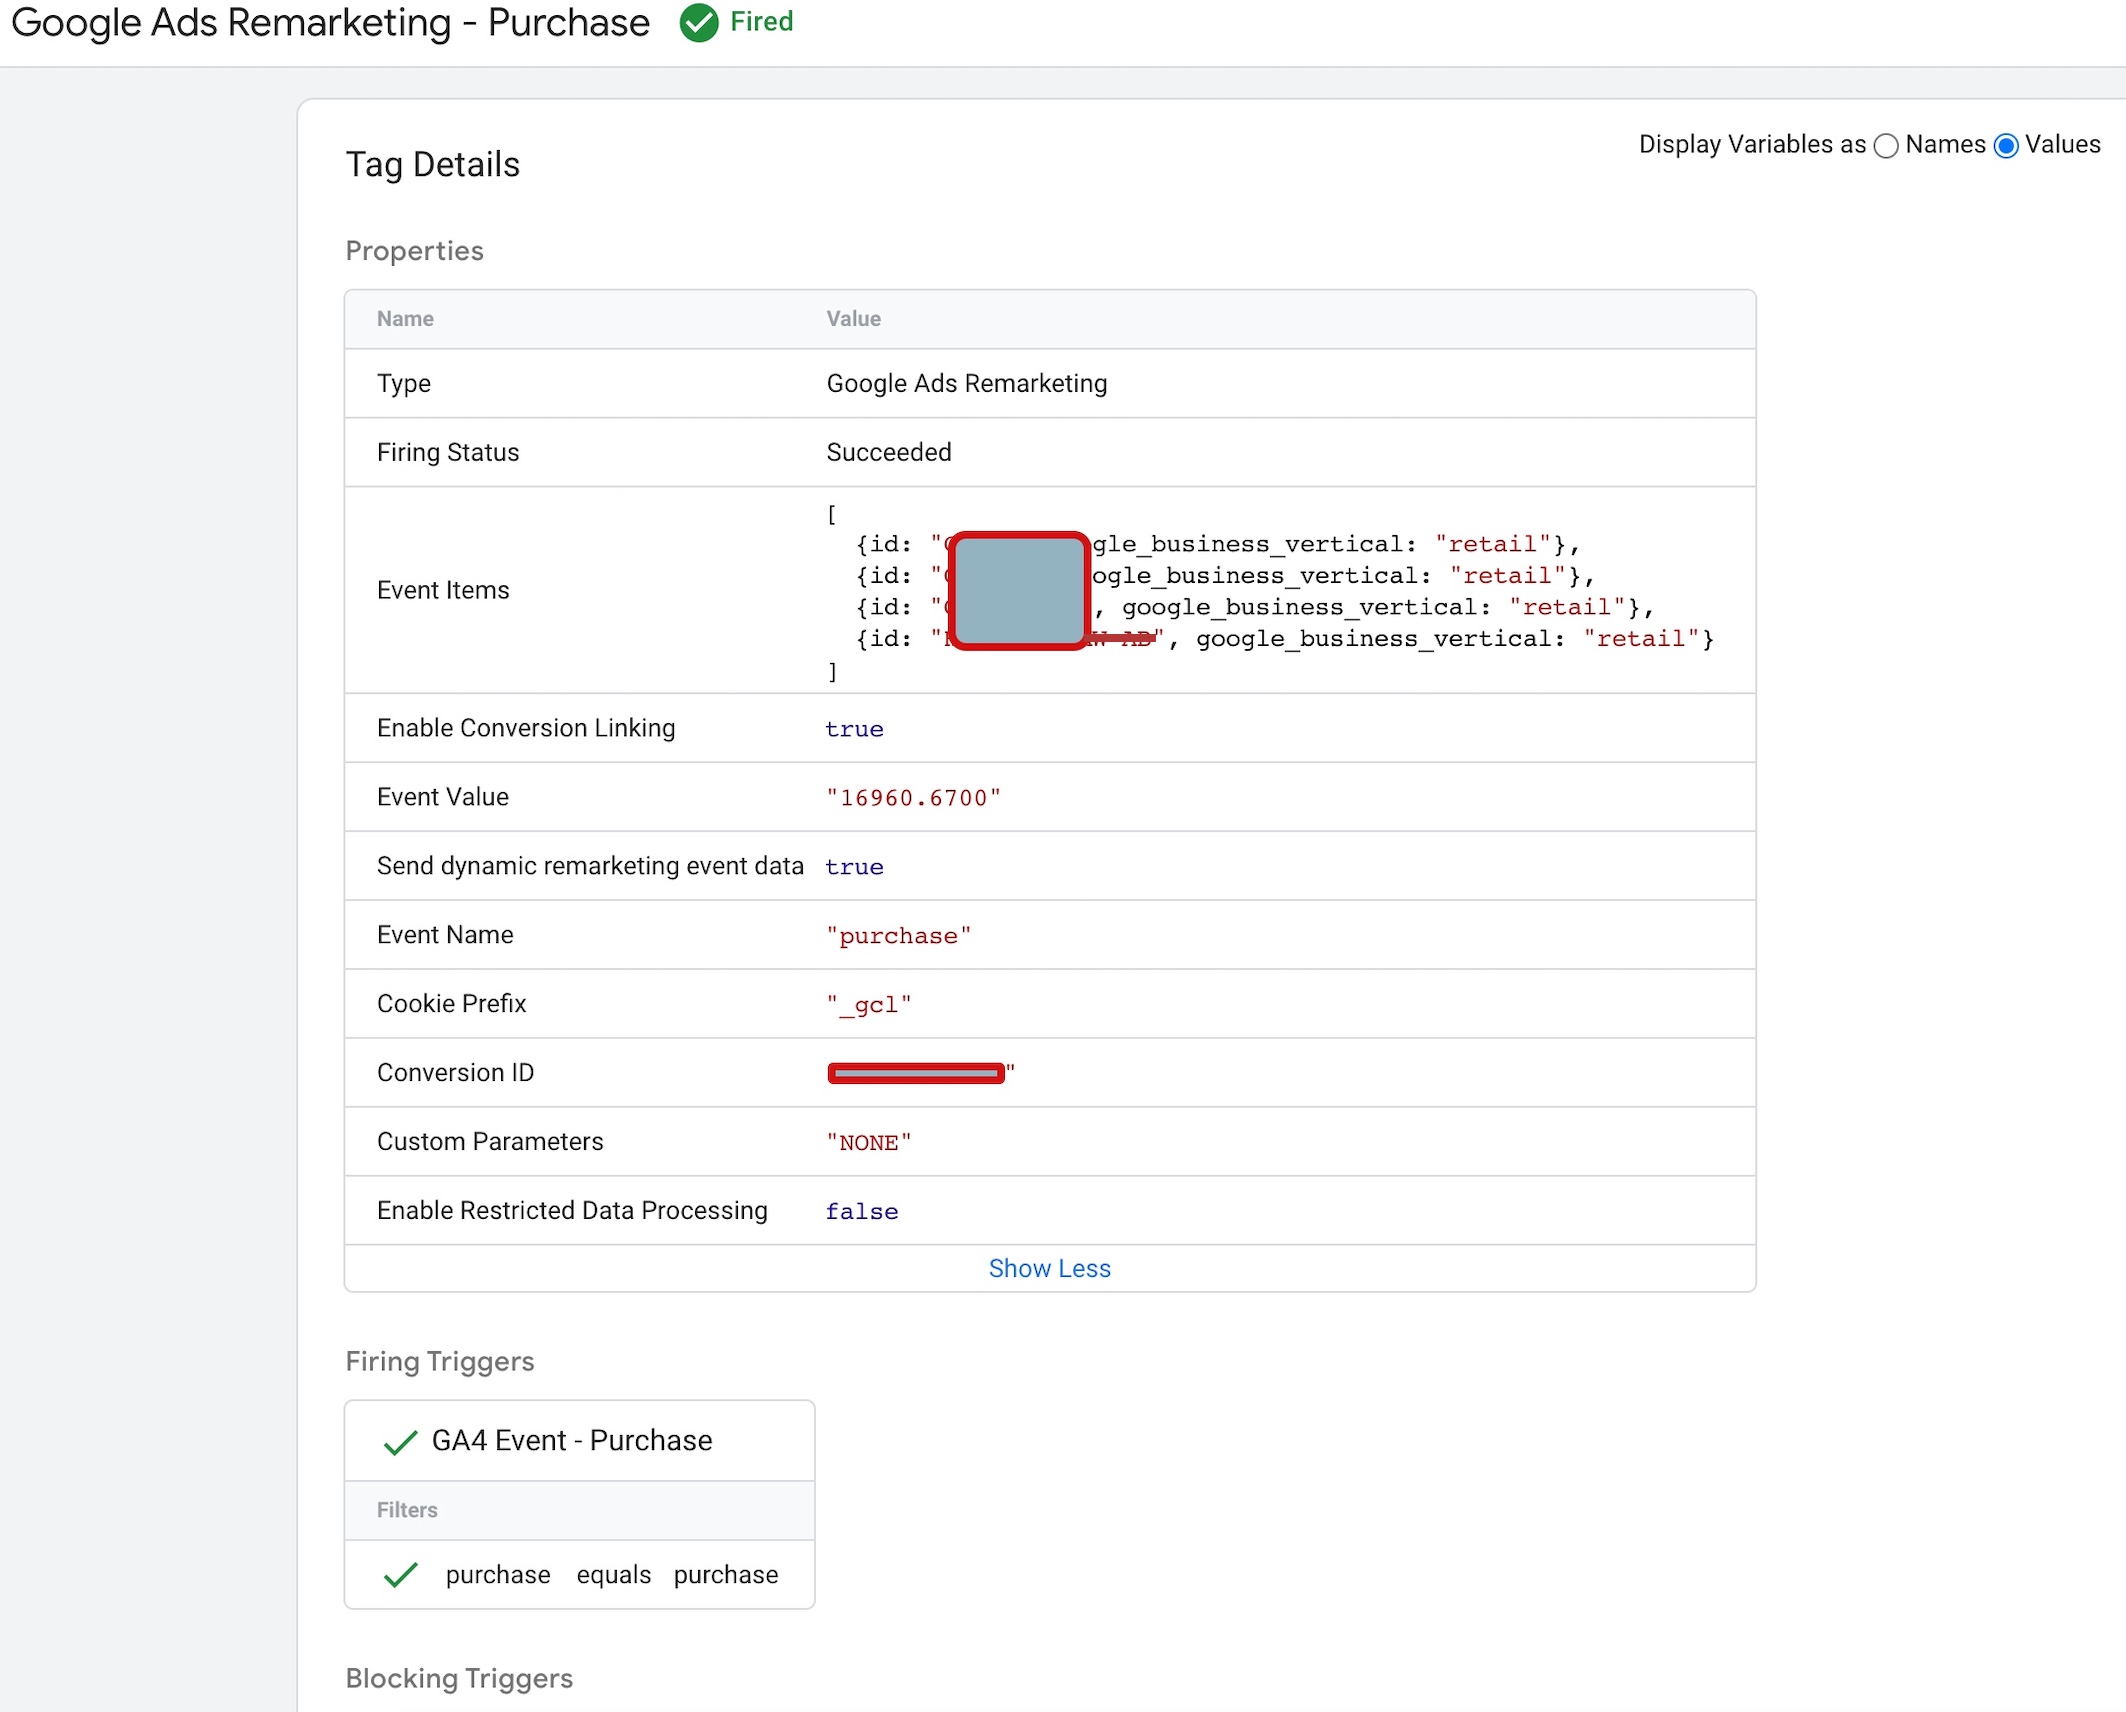
In Magento 2, the ‘event’ and ‘purchase‘ are used together to track when a user completes a purchase on the website. This tracking information can be used to create dynamic remarketing campaigns, which show personalized ads to users who have already visited your website and made a purchase.
Google Ads (AdWords) Dynamic Remarketing for Magento 2 using Google Tag Manager
Warning: If you don’t know about javascript or don’t have developing knowledge then don’t try to Magento 2 Google Ads Dynamic Remarketing Tag using Google Tag Manager that can break your site, Cart and other functionality
Disclaimer: Google tag manager belongs to Google property
For Contact: mappchero@gmail.com
I am available for Hire on Freelancer: Freelancer.com
I am available for Hire on Upwork: Upwork.com
I am available for Hire on Peopleperhour: Peopleperhour.com
I am available for Hire on Guru: Guru.com
Related posts:
 Google Analytics 4 (GA4) Enhanced Ecommerce Tracking for Google Tag Manager
Set Up GA4 eCommerce tracking on Shopify Plus with Google Tag Manager
Google Ads Dynamic Remarketing Tracking and Smart Shopping for BigCommerce
Implement Google Analytics 4 (GA4) For Ecommerce & Enhanced Ecommerce using Google Tag Manager
Set Up Google Ads Dynamic Remarketing Tag for Shopify Using Google Tag Manager
Pestashop Google Ads Dynamic Remarketing Tags
Google Ads Dynamic Remarketing Events and Parameters with Google Tag Manager
Magento 2 Google Analytics 4 Enhanced Ecommerce tracking using Google Tag Manager
Google Analytics 4 (GA4) Enhanced Ecommerce Tracking for Google Tag Manager
Set Up GA4 eCommerce tracking on Shopify Plus with Google Tag Manager
Google Ads Dynamic Remarketing Tracking and Smart Shopping for BigCommerce
Implement Google Analytics 4 (GA4) For Ecommerce & Enhanced Ecommerce using Google Tag Manager
Set Up Google Ads Dynamic Remarketing Tag for Shopify Using Google Tag Manager
Pestashop Google Ads Dynamic Remarketing Tags
Google Ads Dynamic Remarketing Events and Parameters with Google Tag Manager
Magento 2 Google Analytics 4 Enhanced Ecommerce tracking using Google Tag Manager