Tag your website for Google Ads dynamic remarketing to Shopify
To exhibit dynamic advertisements to persons who have visited your web page, add the dynamic remarketing tag with customized parameters to your website. The dynamic remarketing tag collects knowledge, such because the IDs of the products or services that folks viewed for your site, the types of pages considered to corresponding to looking cart pages, and the complete value of items.
To implement Google Ads Dynamic Remarketing for Shopify, you can follow these steps:
- Create a Google Ads account and link it to your Shopify store.
2. Set up Google Ads Conversion Tracking on your Shopify store to track the conversion events that you want to use for remarketing.
3. Create a Google Ads Remarketing tag and install it on your Shopify store.
4. Set up a Google Ads Remarketing campaign in Google Ads, selecting the Dynamic Remarketing campaign type and the appropriate product or service category.
5. Customize your Dynamic Remarketing campaign by creating product feeds that include your product information, such as images, descriptions, and prices.
6. Set up your Dynamic Remarketing ad templates, which will automatically pull the product information from your product feeds and generate ads for each product.
7. Launch your Dynamic Remarketing campaign and monitor its performance to optimize your ad targeting and bidding strategy.
More factors to use dynamic remarketing Tags for Shopify Dynamic Remarketing Campaign
To implement Google Ads Dynamic Remarketing for Shopify, you can use the following events to track user actions on your website:
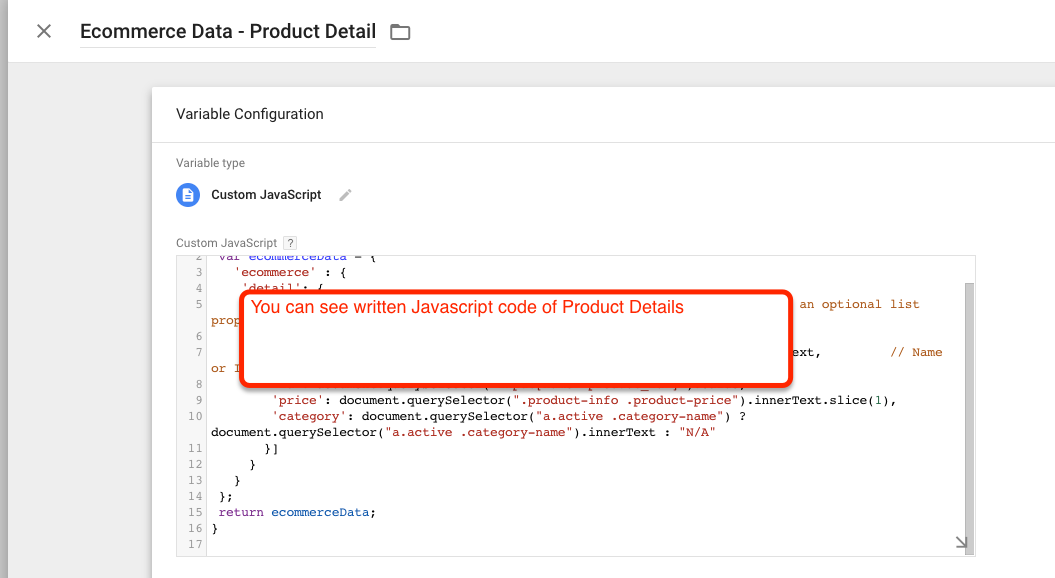
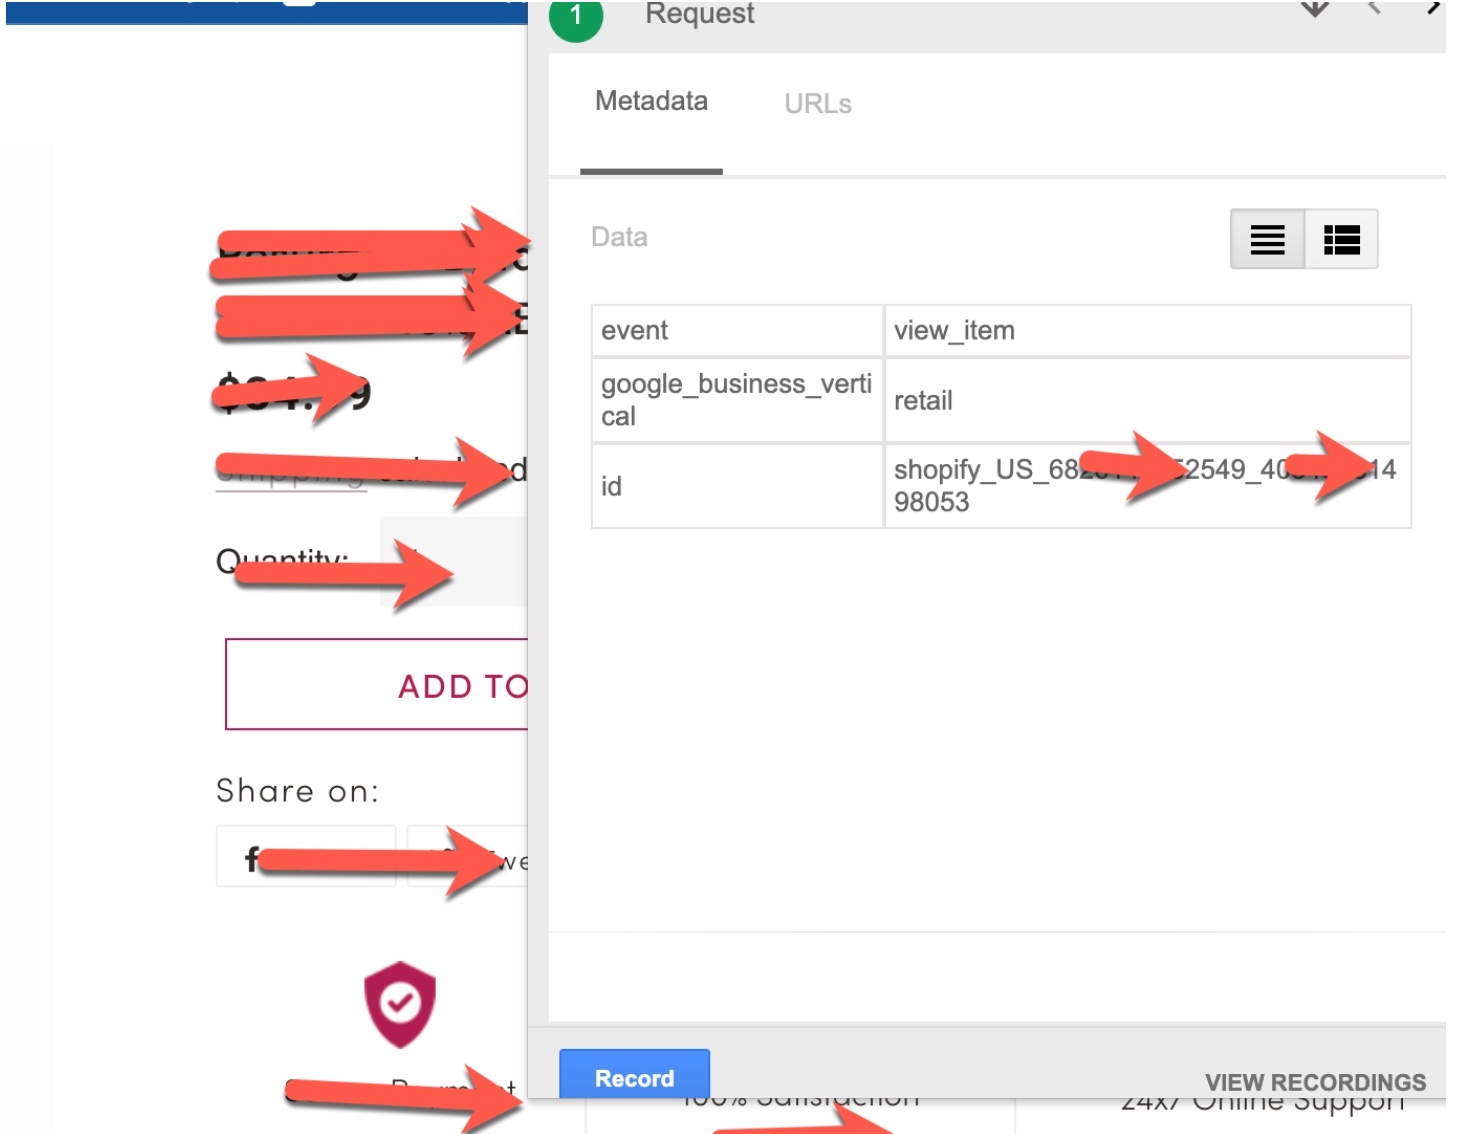
view_item: This event should be triggered when a user views a specific product page. You can use this event to track which products a user has shown interest in and use this data to create highly targeted remarketing campaigns for those products. view_item_list: This event should be triggered when
view_item_list: This event should be triggered when a user views a list of products, such as a collection page or search results page. You can use this event to track which products a user has shown interest in.
view_search_results: This event should be triggered when a user performs a search on your website and views the search results page. You can use this event to track which search queries a user has performed and which products they have shown interest in.
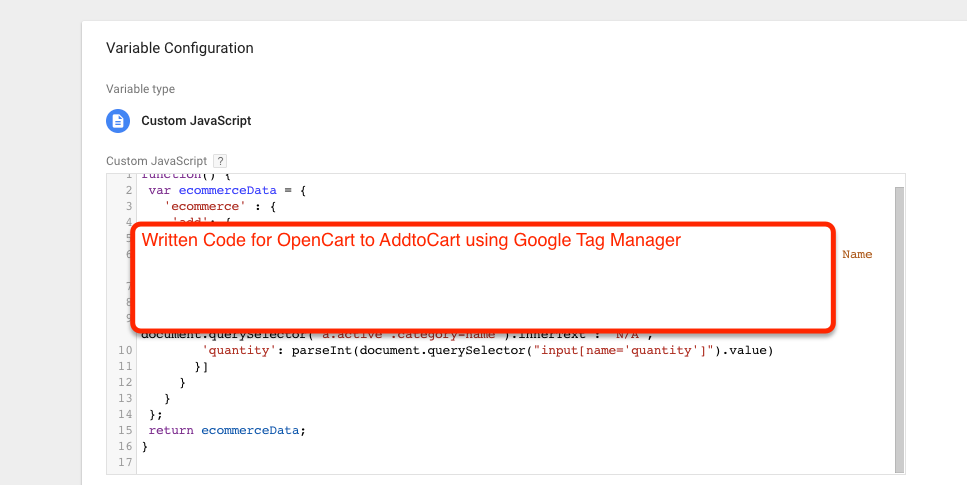
add_to_cart: This event should be triggered when a user adds a product to their cart. You can use this event to track which products a user is interested in purchasing.
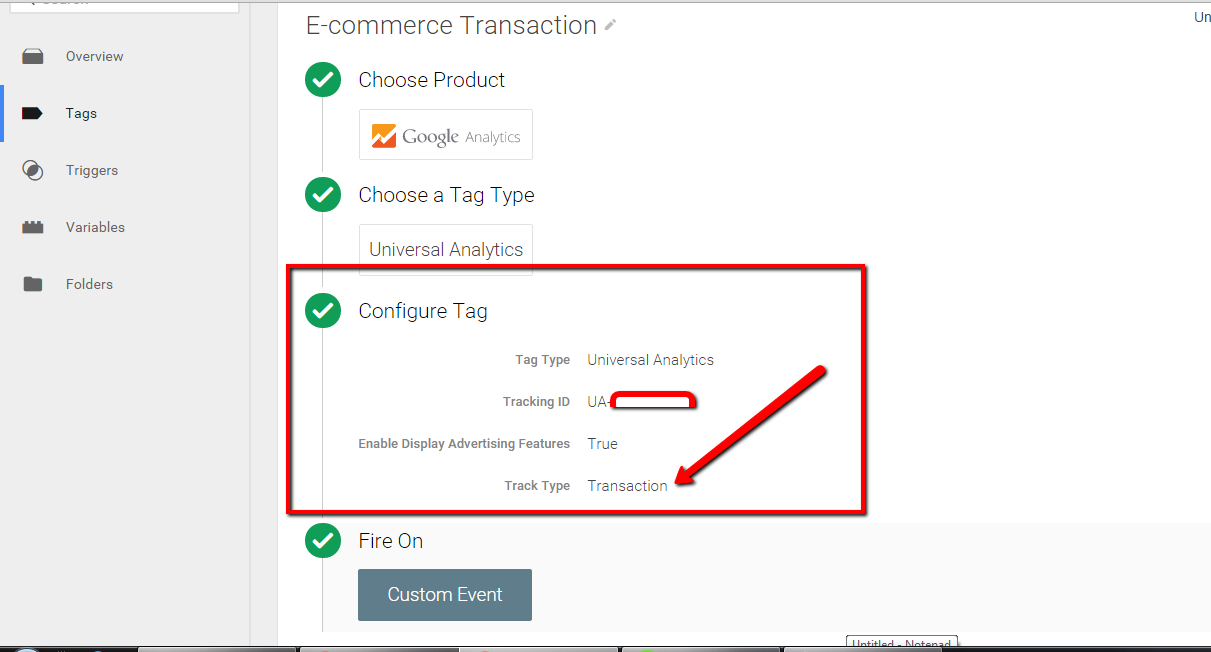
purchase: This event should be triggered when a user completes a purchase. You can use this event to track which products were purchased and how much revenue was generated.
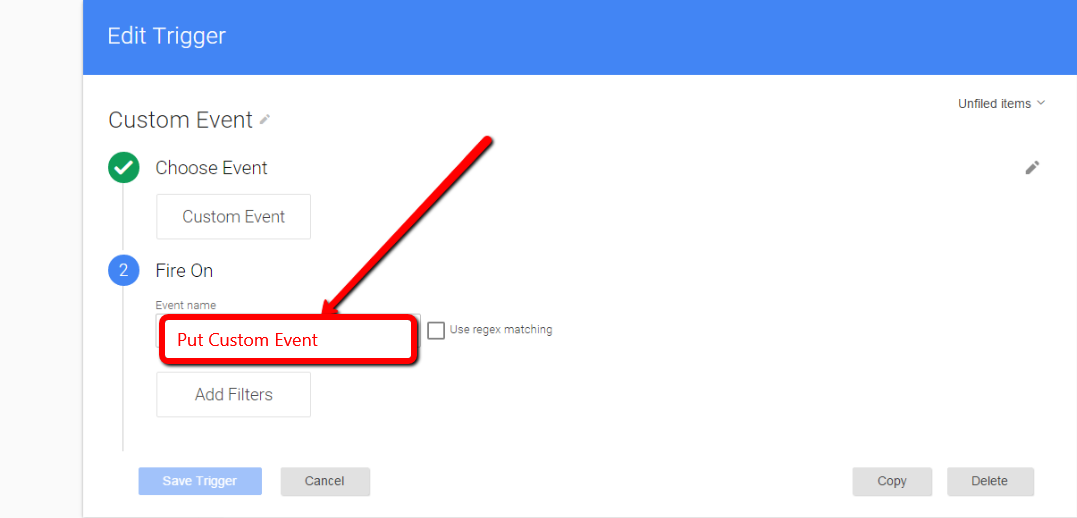
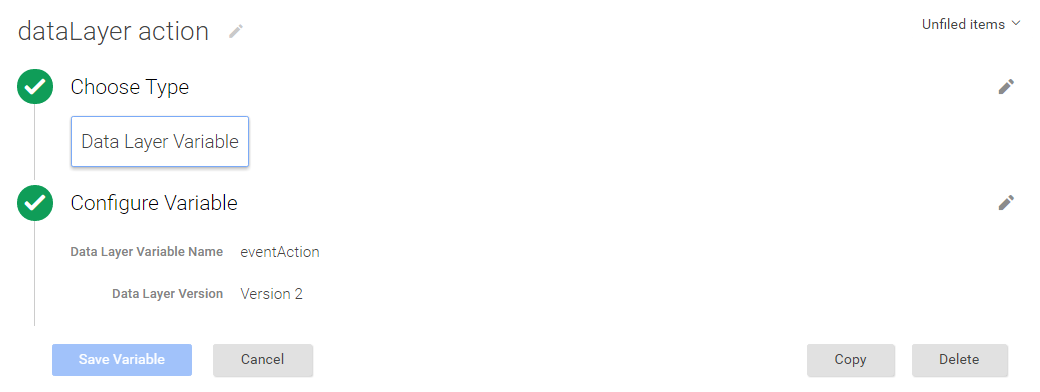
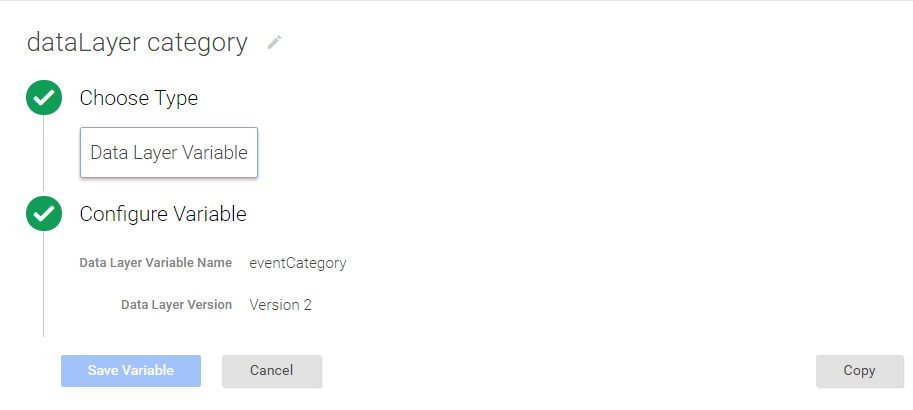
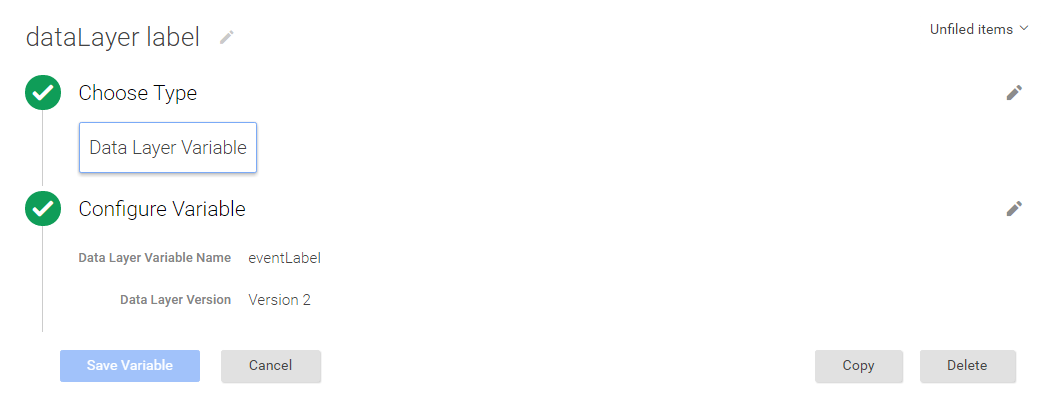
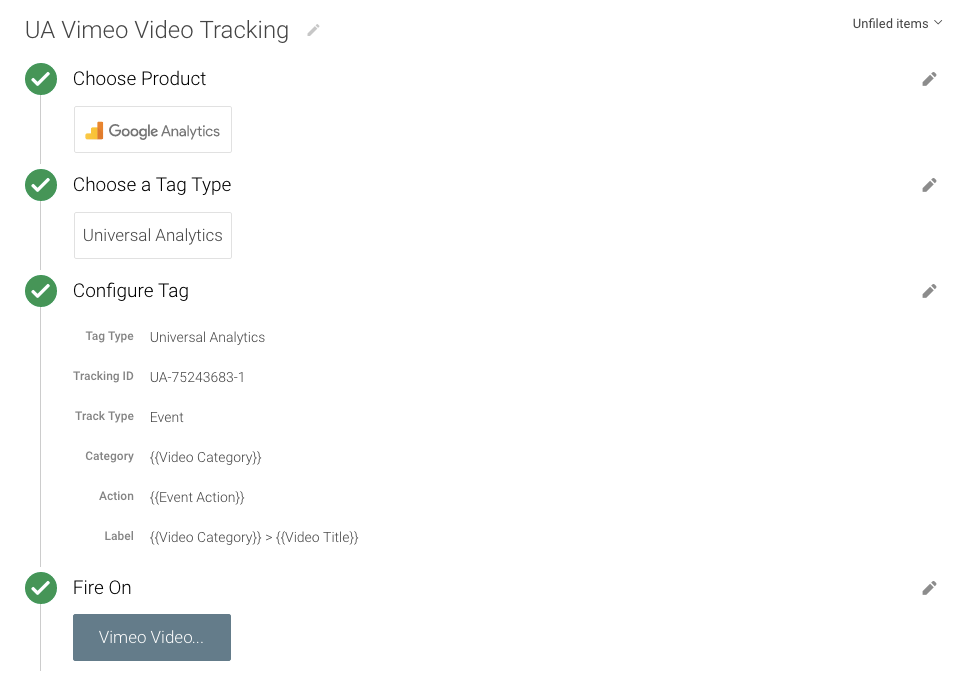
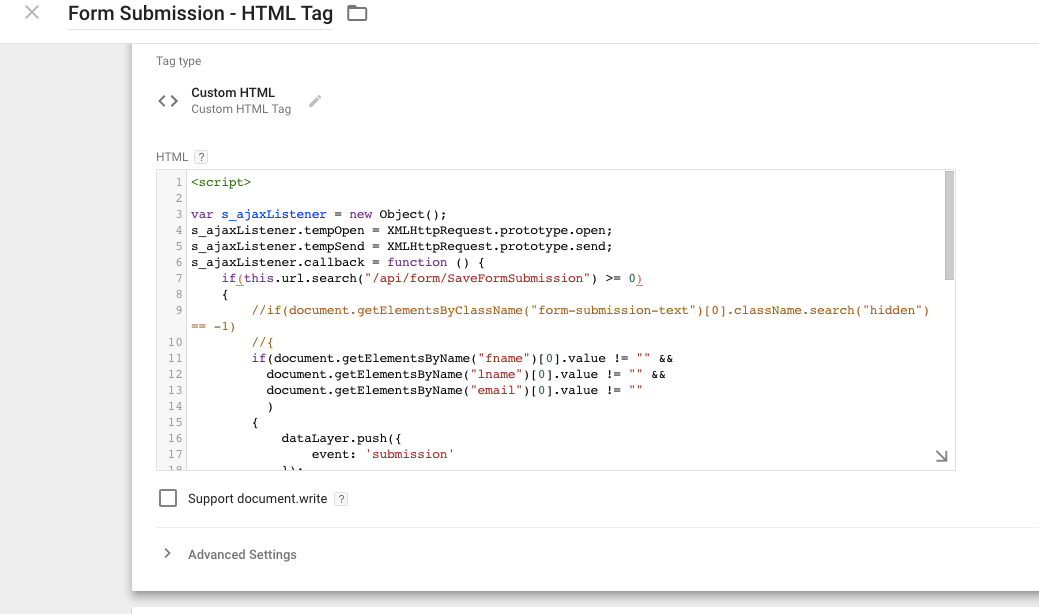
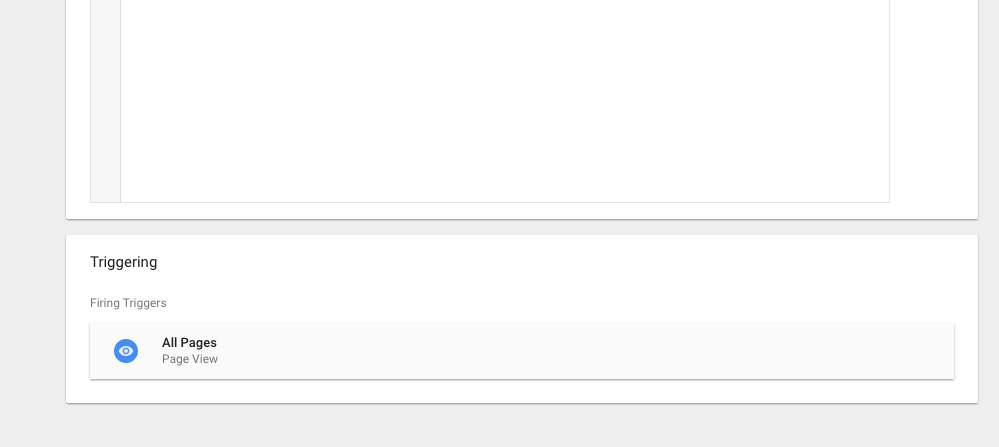
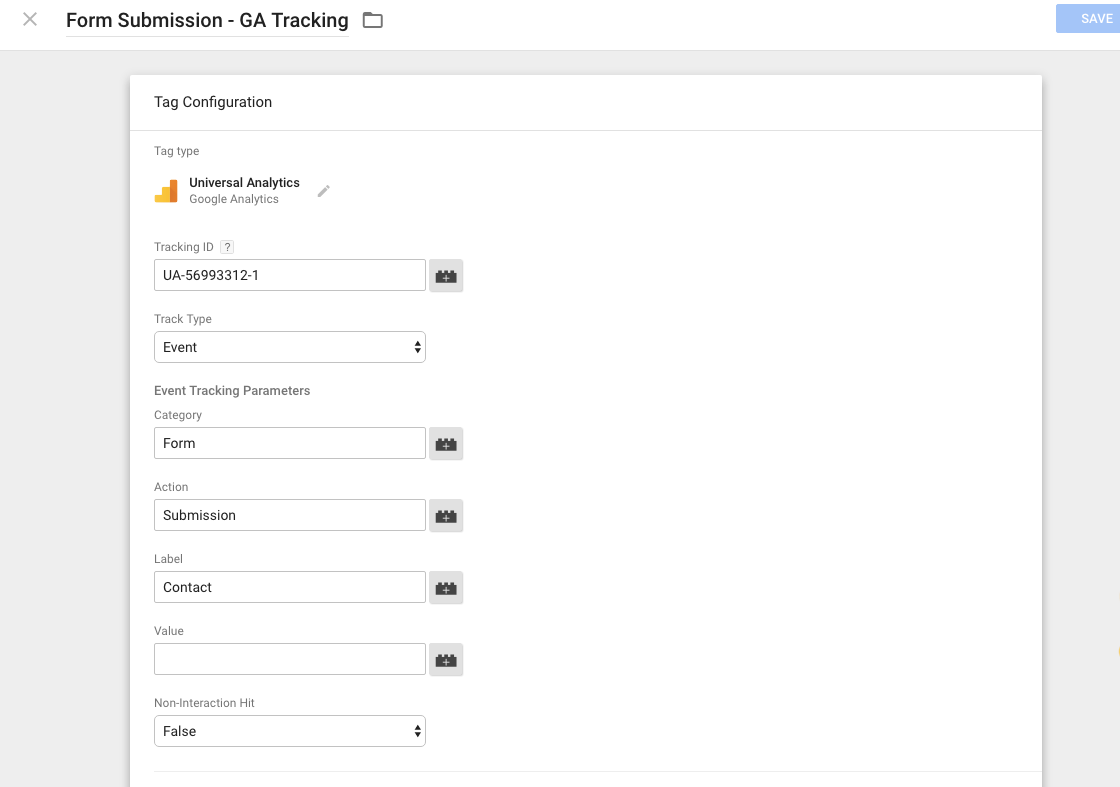
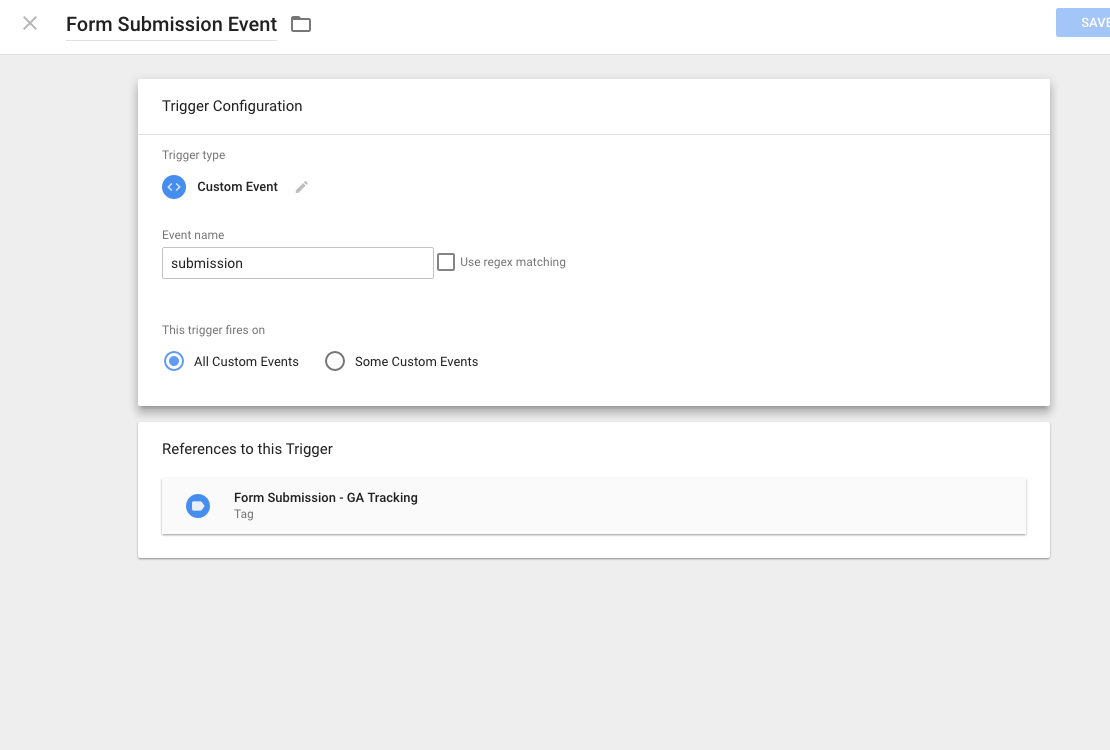
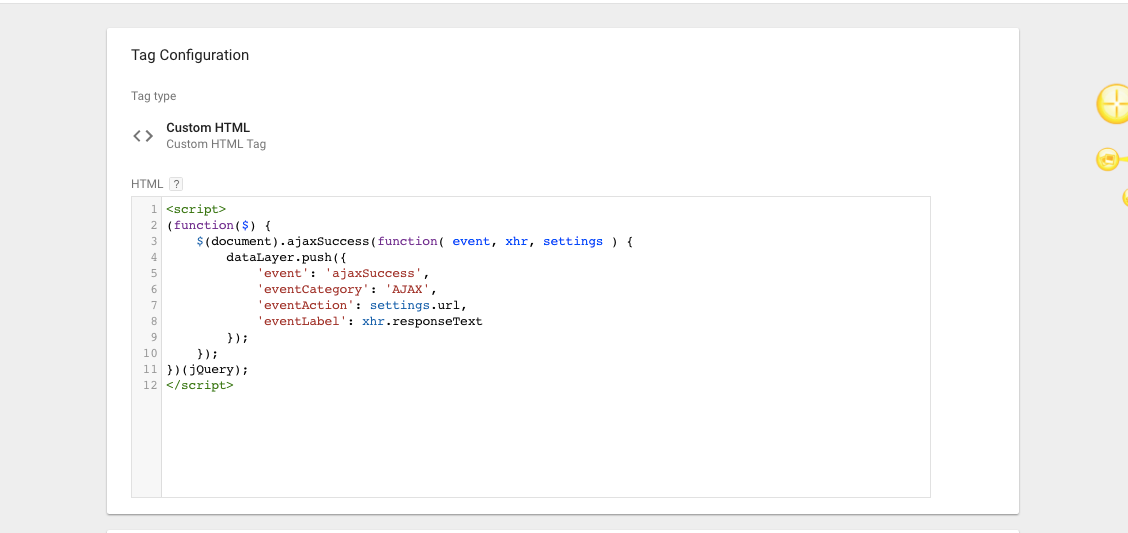
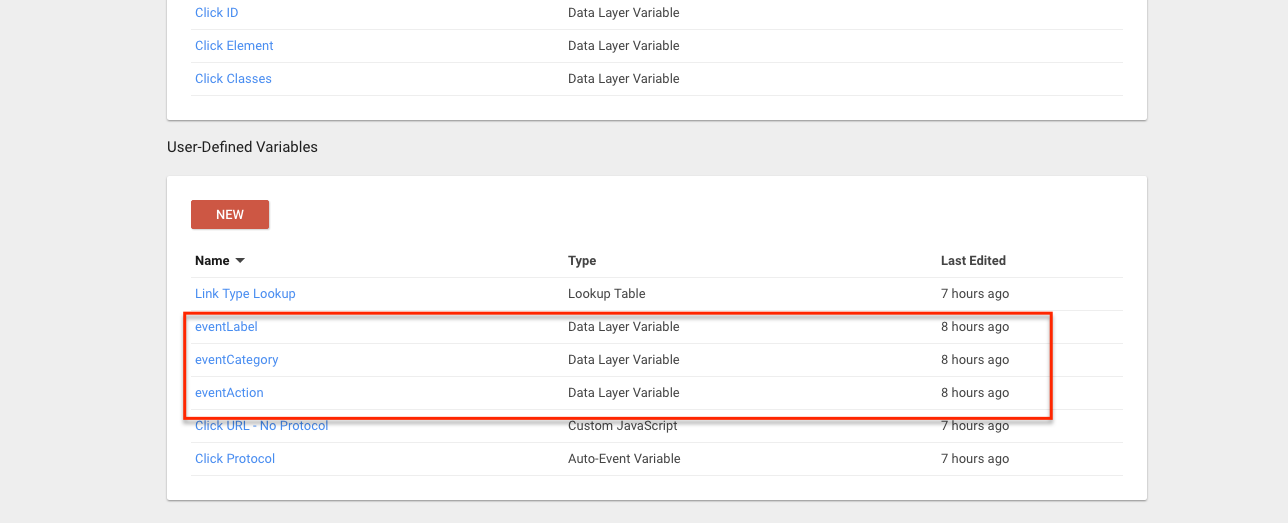
By tracking these events, you can use the data to create highly-targeted remarketing campaigns that show users the products they have shown interest in or abandoned in their cart. To implement these events, you can use Google Tag Manager to set up event tracking and trigger the appropriate events based on user actions. Once the events are tracked, you can use them to create custom audiences and dynamic remarketing campaigns in Google Ads.
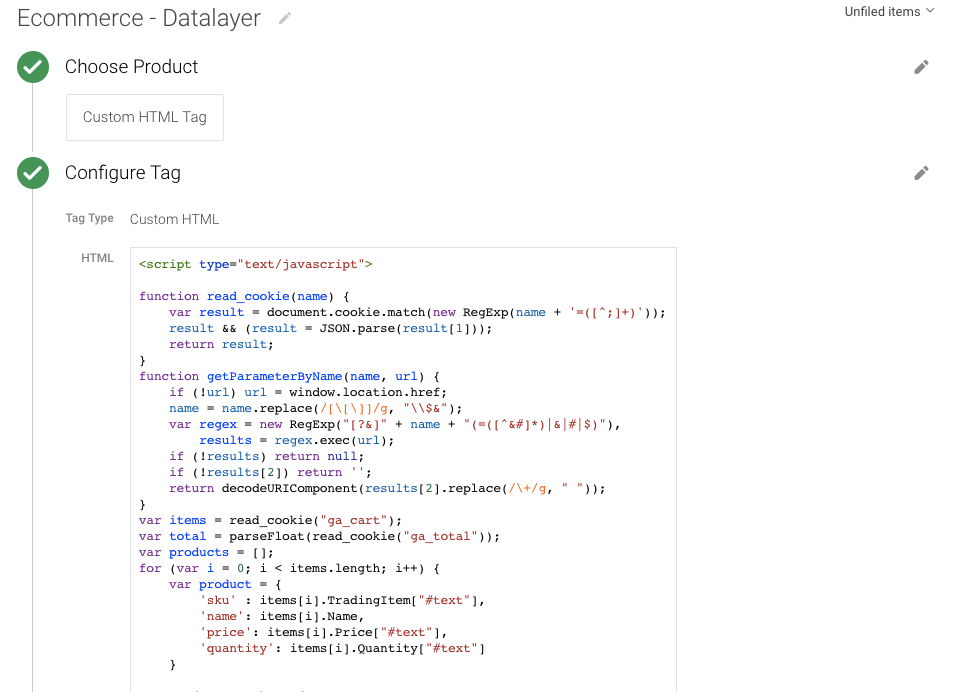
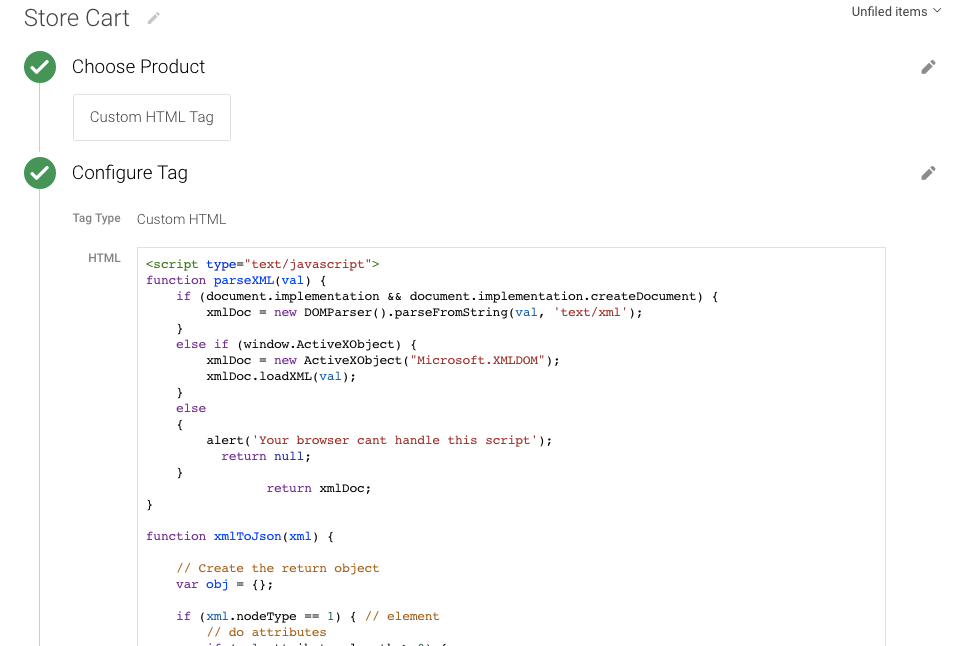
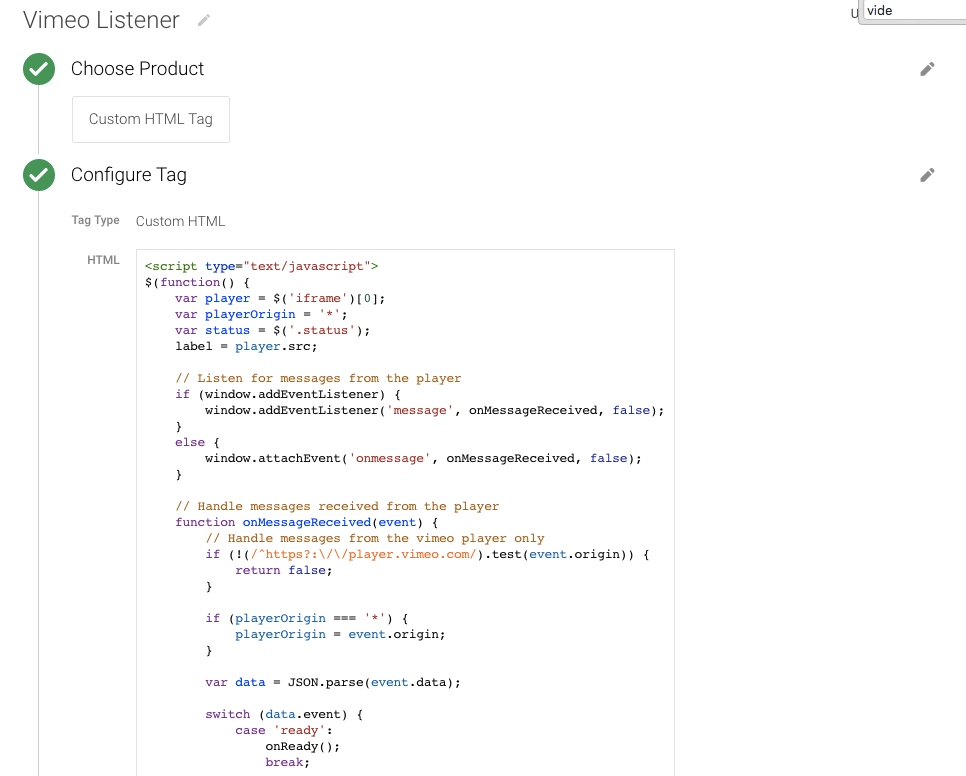
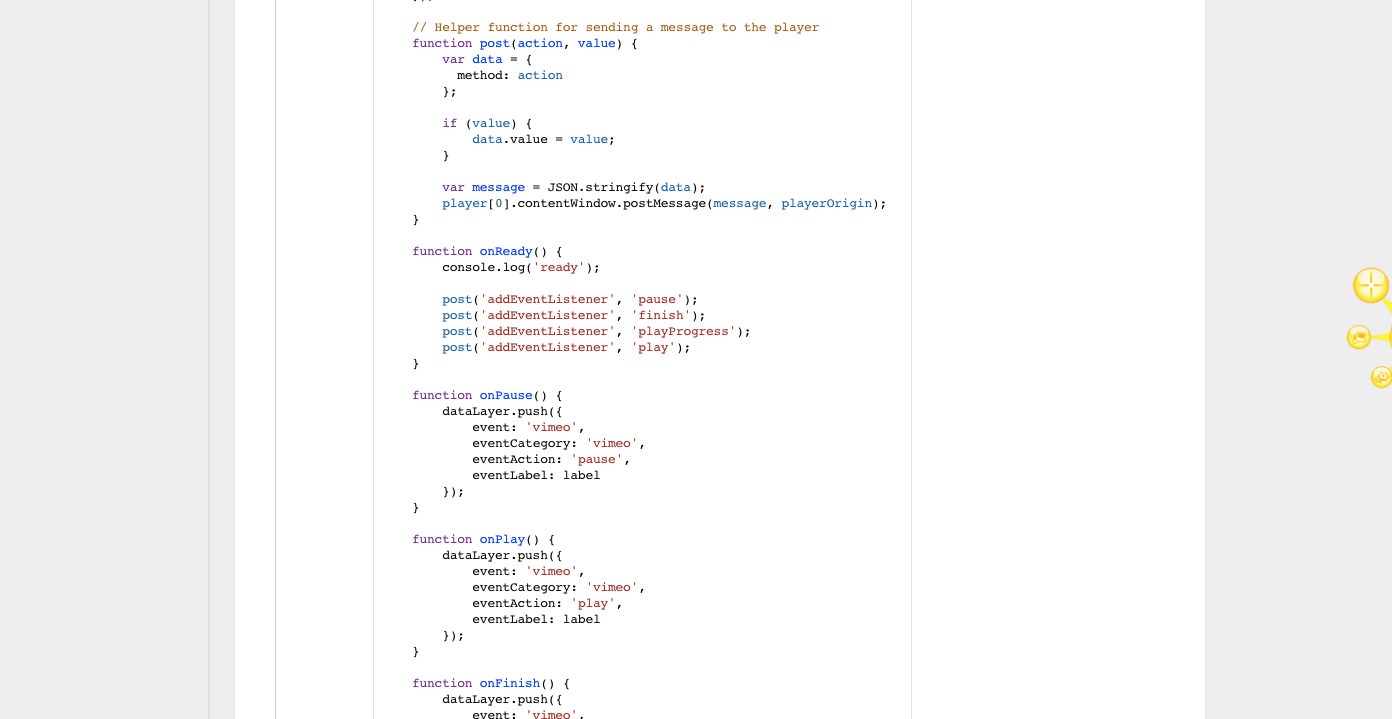
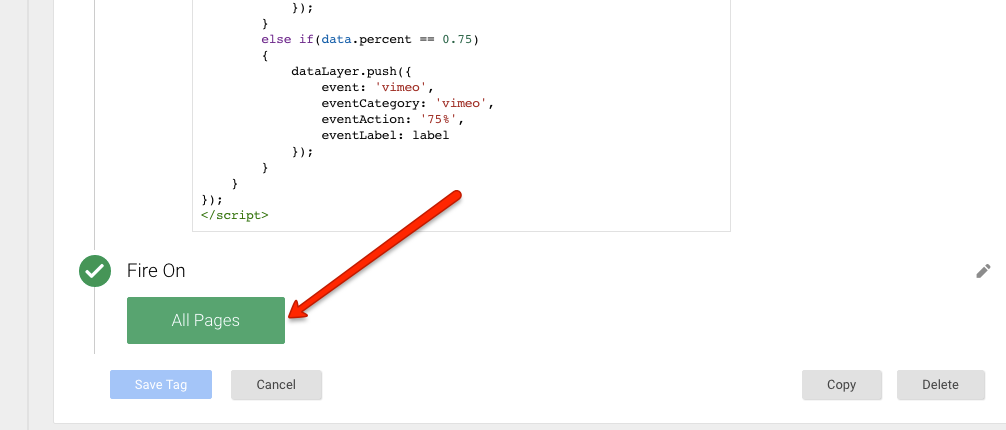
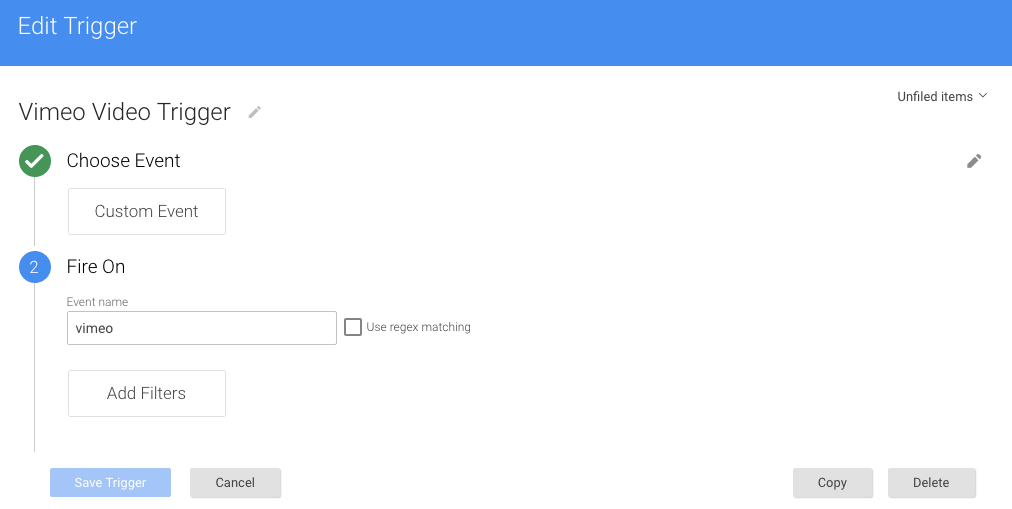
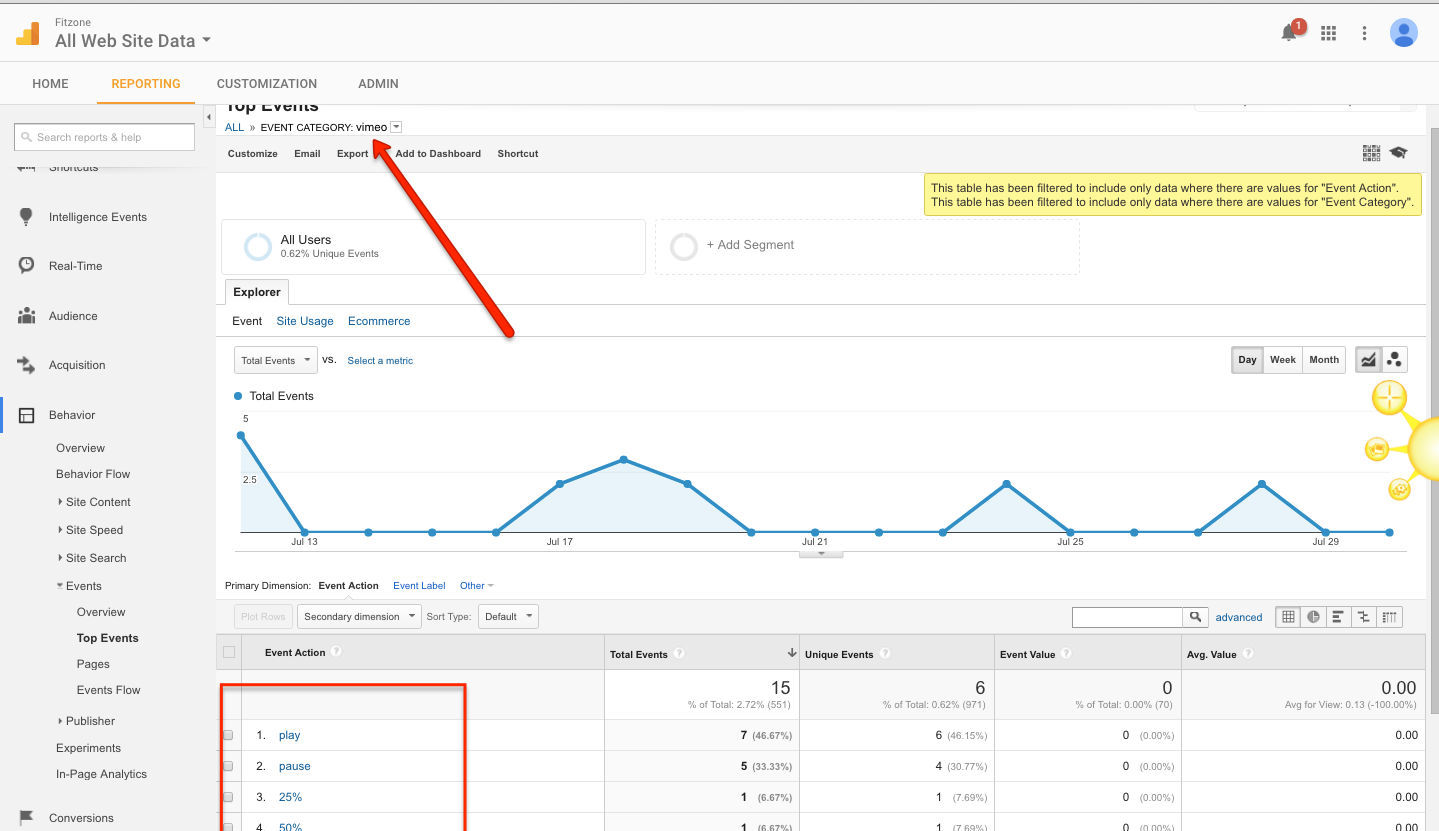
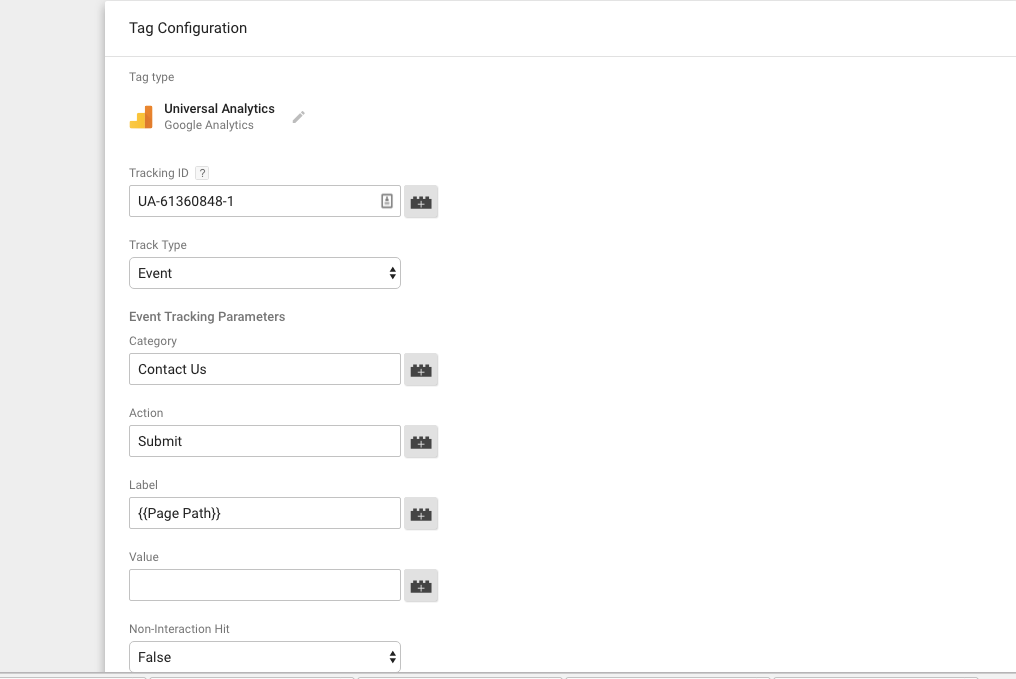
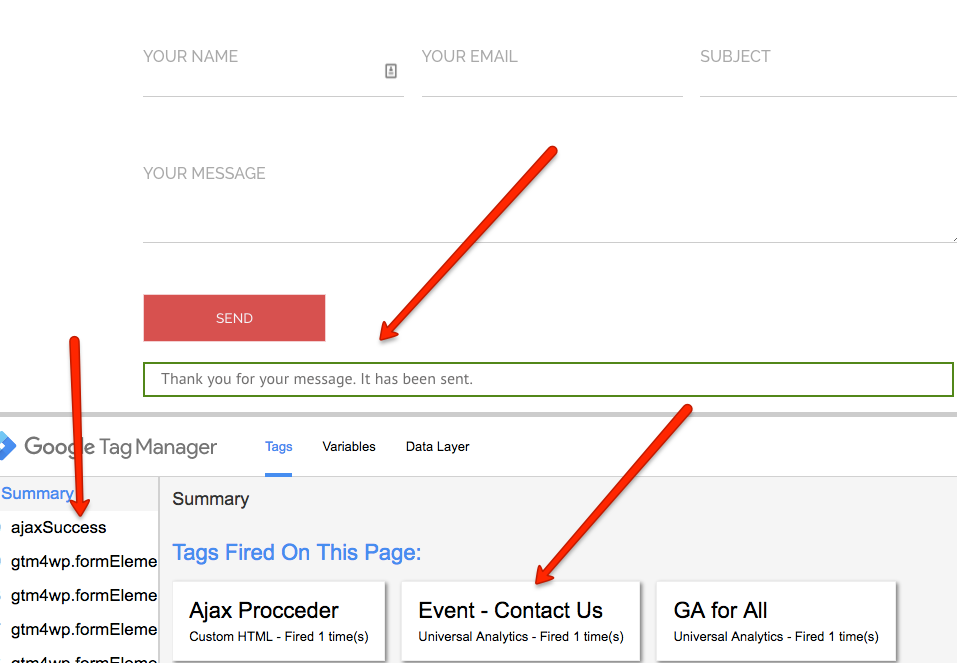
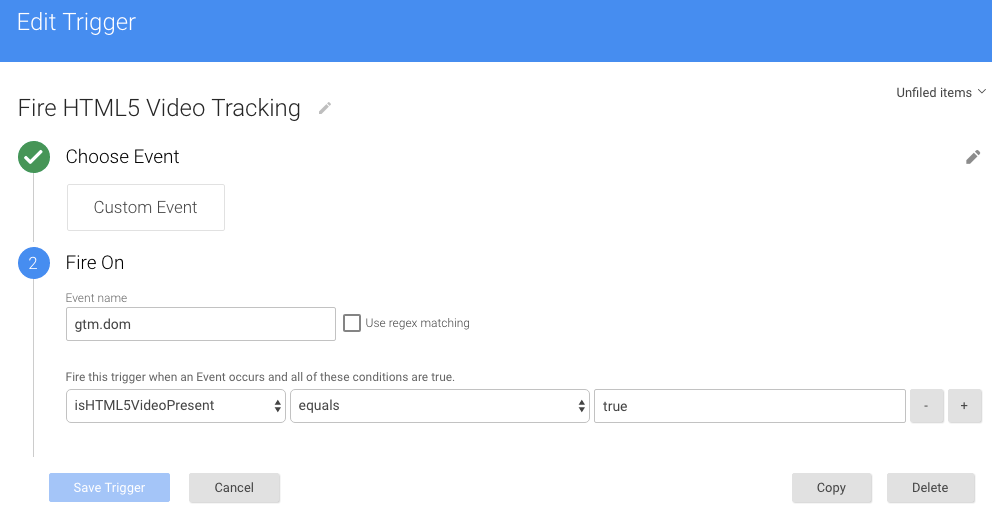
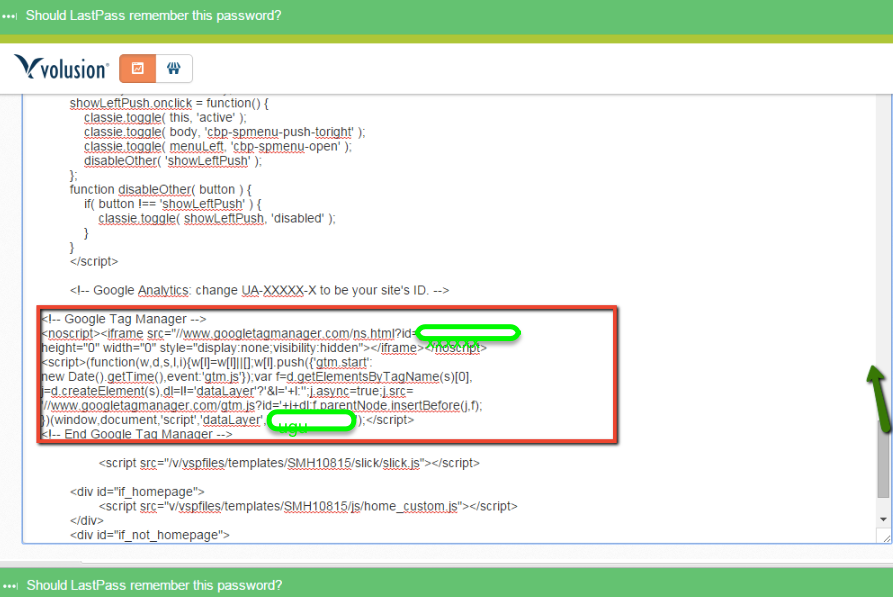
Implementation Google Ads Dynamic Remarketing for Shopify using Google Tag Manager
- High performance layouts: AdWords calls which advertising layout that is dynamic is likely to perform best for the individual, arrangement, and stage where the advertisement will show.
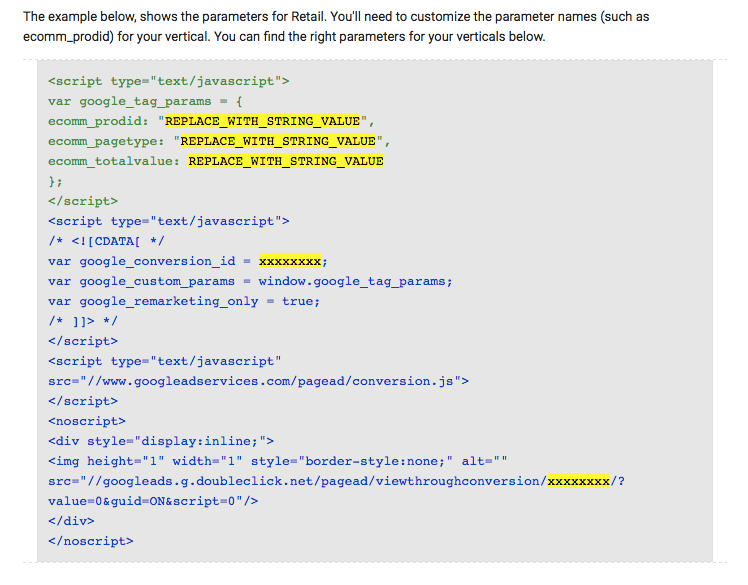
Custom Dynamic Tag with custom parameters for Shopify Dynamic Remarketing
<script type=”text/javascript”>
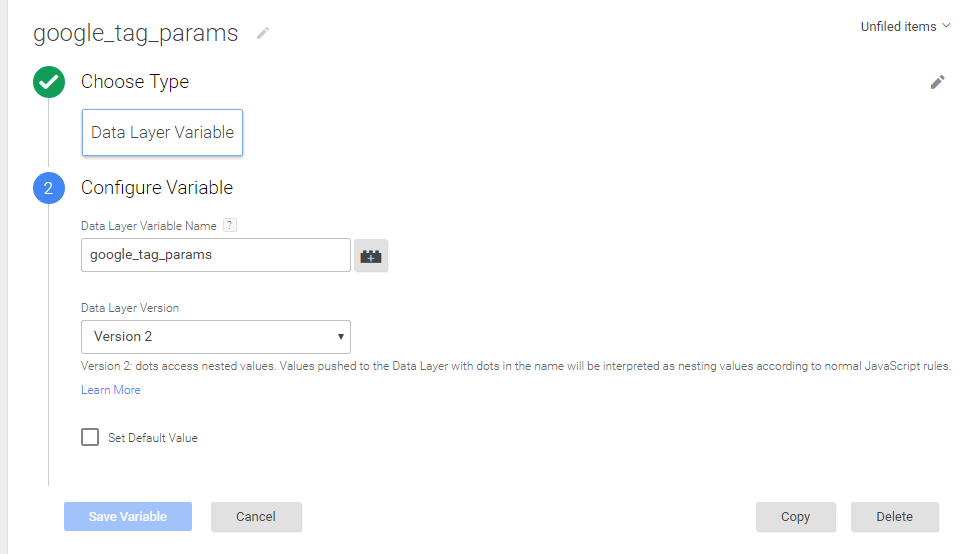
var google_tag_params = {
ecomm_prodid: “REPLACE_WITH_STRING_VALUE“,
ecomm_pagetype: “REPLACE_WITH_STRING_VALUE“,
ecomm_totalvalue: REPLACE_WITH_STRING_VALUE
};
</script>
Dynamic Remarketing Tags Implement in Shopify
- Following the below instruction to set up dynamic Remarketing tags for Shopify
Login with Admin —–> Go to Online Store —–> Themes. (Place it immediately before the closing <body> tag.)
<script type=”text/javascript”>
{% if template contains ‘product’ %}
var google_tag_params = {
ecomm_prodid: ‘{{ product.id }}’,
ecomm_pagetype: ‘product’,
ecomm_totalvalue: {{ product.price | money_without_currency | replace: ‘,’, ” }}
};
{% elsif template contains ‘cart’ %}
var google_tag_params = {
{% if cart.item_count > 1 %}
ecomm_prodid: [{% for item in cart.items %}'{{ item.product_id }}_{{ item.variant.id }}'{% if forloop.last != true %},{% endif %}{% endfor %}],
{% elsif cart.item_count == 1 %}
ecomm_prodid: {% for item in cart.items %}'{{ item.product_id }}_{{ item.variant.id }}'{% endfor %},
{% else %}
ecomm_prodid: ”,
{% endif %}
ecomm_pagetype: ‘cart’,
ecomm_totalvalue: {{ cart.total_price | money_without_currency | replace: ‘,’, ” }}
};
{% elsif template contains ‘search’ %}
var google_tag_params = {
ecomm_prodid: ”,
ecomm_pagetype: ‘searchresults’,
ecomm_totalvalue: ”
};
{% elsif template contains ‘index’ %}
var google_tag_params = {
ecomm_pagetype: ‘home’,
};
{% else %}
var google_tag_params = {
ecomm_prodid: ”,
ecomm_pagetype: ‘other’,
ecomm_totalvalue: ”
};
{% endif %}
</script>
<script type=”text/javascript”>
/* <![CDATA[ */
var google_conversion_id = xxxxxx;
var google_custom_params = window.google_tag_params;
var google_remarketing_only = true;
/* ]]> */
</script>
<script type=”text/javascript” src=”//www.googleadservices.com/pagead/conversion.js”>
</script>
<noscript>
<div style=”display:inline;”>
<img height=”1″ width=”1″ style=”border-style:none;” alt=”” src=”//googleads.g.doubleclick.net/pagead/viewthroughconversion/xxxxxxx/?value=0&guid=ON&script=0″/>
</div>
</noscript>
Note: Make you will replace with your google_conversion_id
2. Shopify Dynamic Remarketing Tags for Order Confirmation Page
<script type=”text/javascript”>
var google_tag_params = {
ecomm_prodid: [{% for line_item in order.line_items %}'{{ line_item.id }}'{% unless forloop.last %},{% endunless %}{% endfor %}],
ecomm_pagetype: ‘purchase’,
ecomm_totalvalue: {{order.total_price | money_without_currency }},
};
</script>
<script type=”text/javascript”>
/* <![CDATA[ */
var google_conversion_id = xxxxxxxx;
var google_custom_params = window.google_tag_params;
var google_remarketing_only = true;
/* ]]> */
</script>
<script type=”text/javascript” src=”//www.googleadservices.com/pagead/conversion.js”>
</script>
<noscript>
<div style=”display:inline;”>
<img height=”1″ width=”1″ style=”border-style:none;” alt=”” src=”//googleads.g.doubleclick.net/pagead/viewthroughconversion/948315090/?value=0&guid=ON&script=0″/>
</div>
</noscript>
Dynamic Remarketing Setup for Google Ads in Shopify
Note: Make you will replace with your google_conversion_id
Dynamic Remarketing for Shopify– https://support.google.com/tagmanager/answer/6107169?hl=en
For Troubleshoot of Dynamic Remarketing – Use Tag Assistance – https://chrome.google.com/webstore/detail/tag-assistant-by-google/kejbdjndbnbjgmefkgdddjlbokphdefk?hl=en
For Contact: mappchero@gmail.com
Warning:if you do n’t know about javascript or do n’t have developing knowledge then do n’t try to implement on Dynamic Remarketing that can broke your site, Cart and other functionality
Disclaimer: Google tag manager belongs to Google property
I am avaible for Hire on Freelancer: Freelancer.com
I am avaible for Hire on Upwork: Upwork.com
I am avaible for Hire on Peopleperhour: Peopleperhour.com
I am avaible for Hire on Guru: Guru.com


 If home page