Lightspeed Commerce is a cloud-based e-commerce platform that provides merchants with the tools to build and manage their online stores. Google Ads dynamic remarketing tags are an advanced feature of Google Ads that enable advertisers to track and target users who have previously interacted with their website or products.
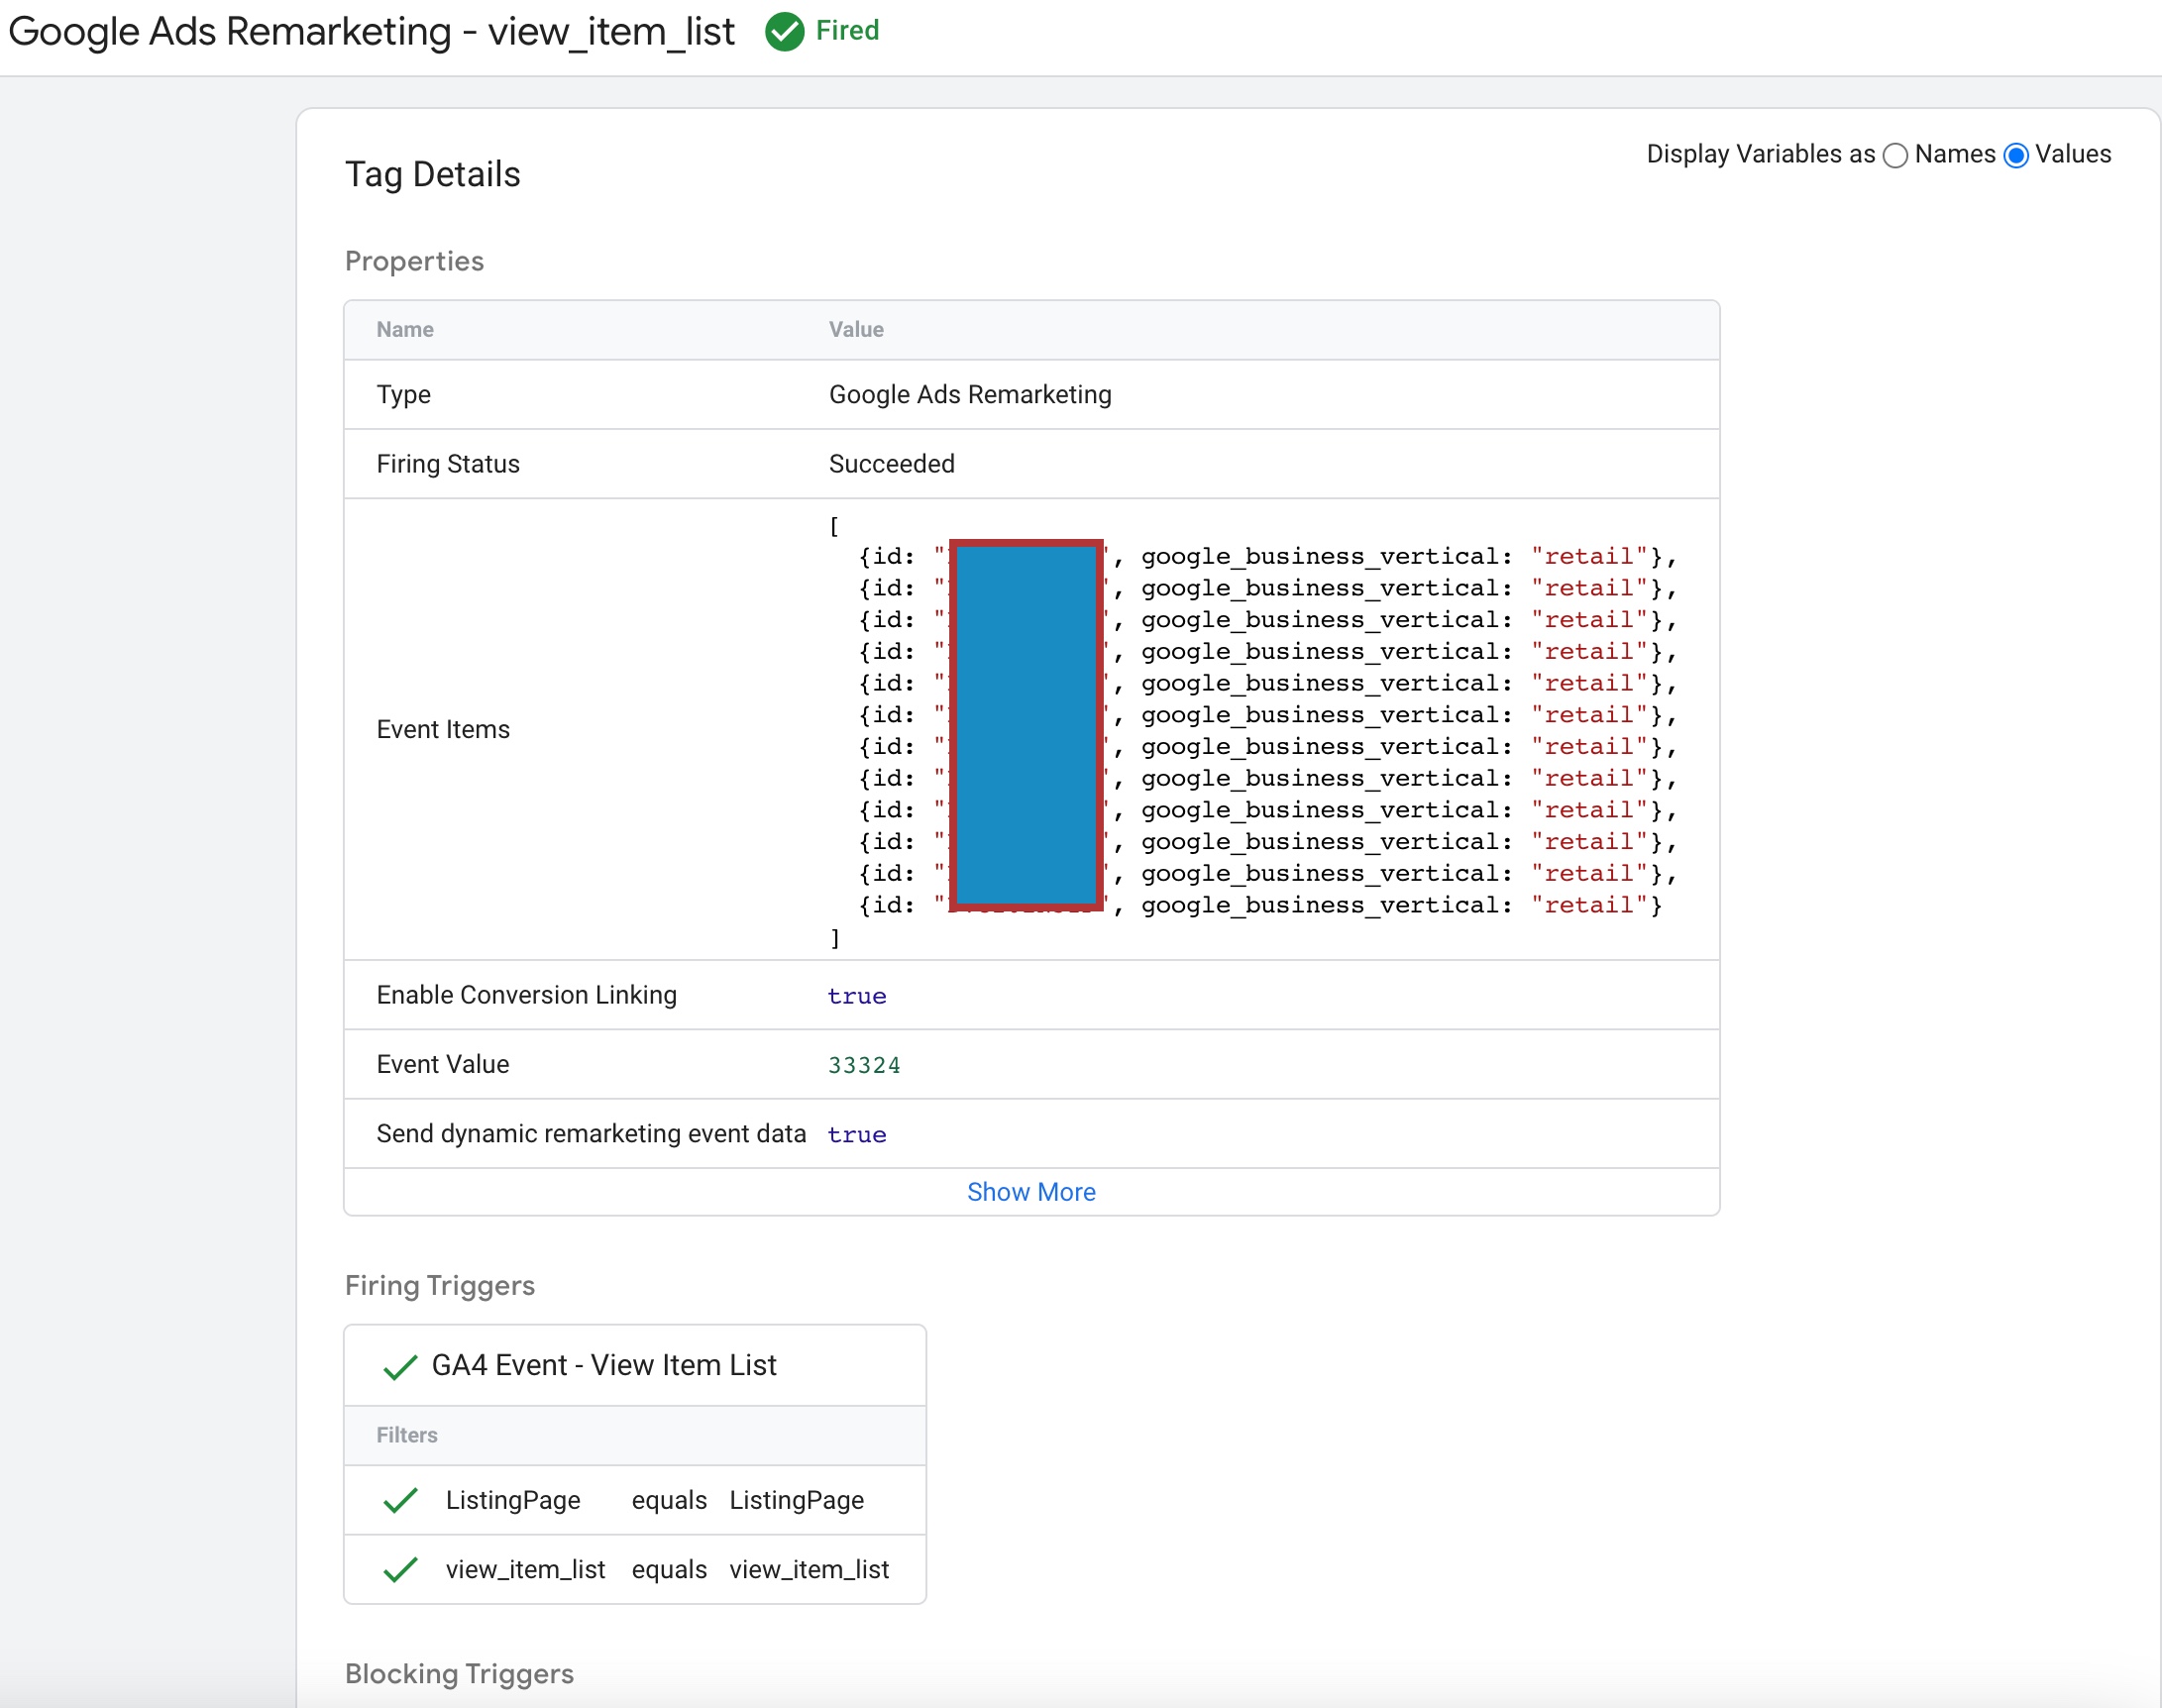
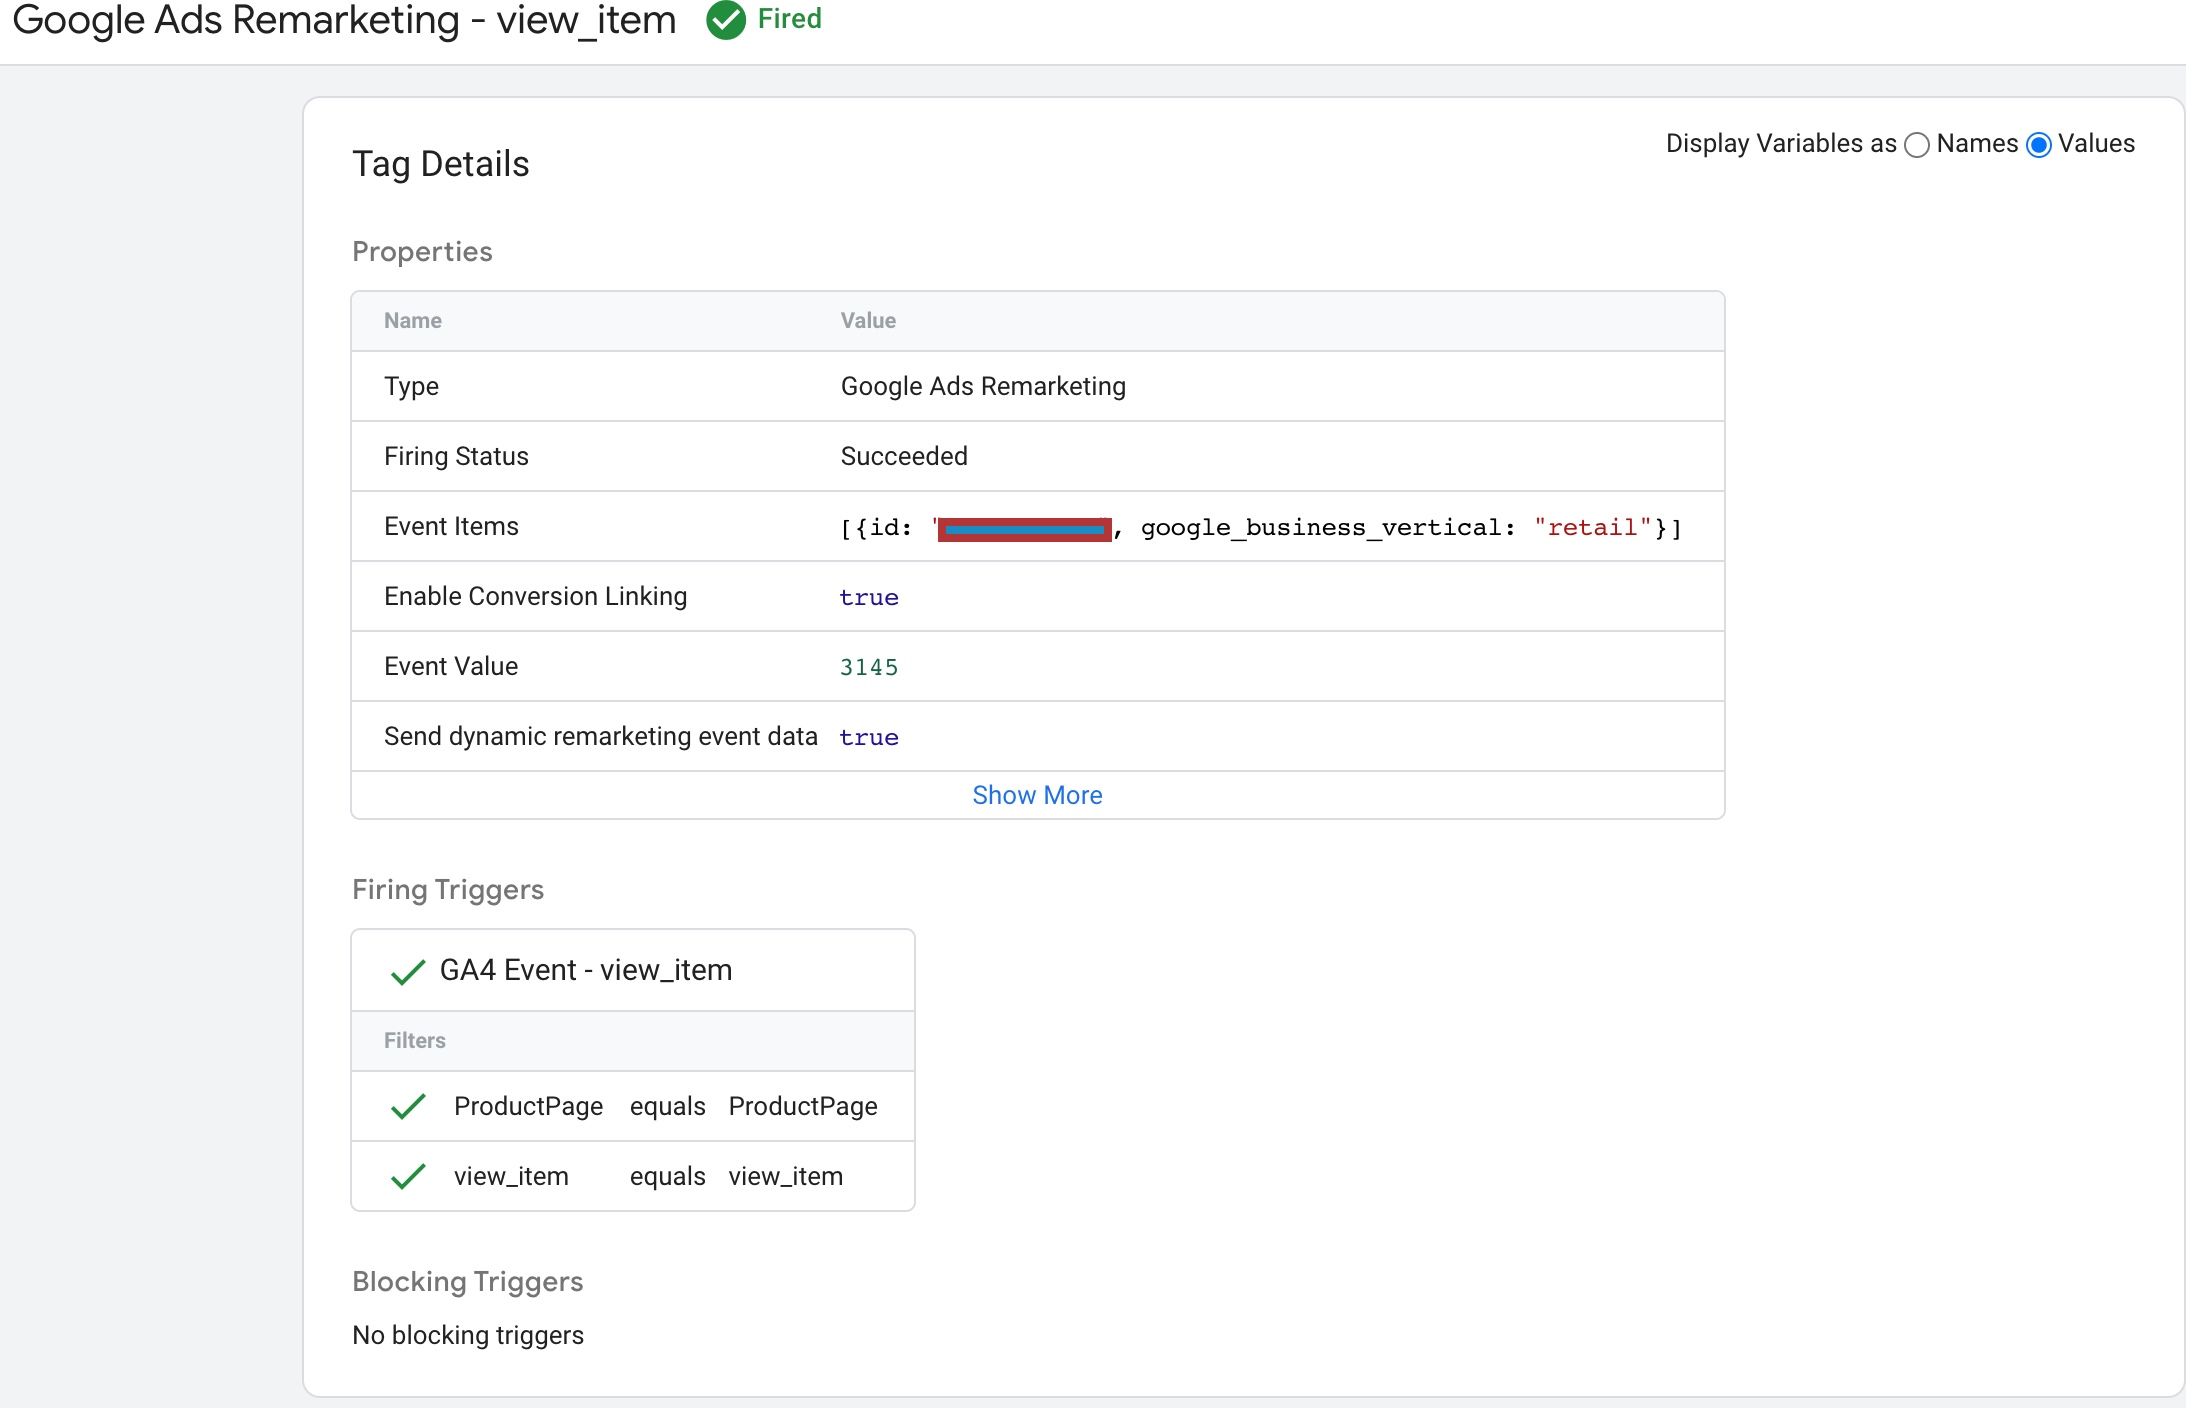
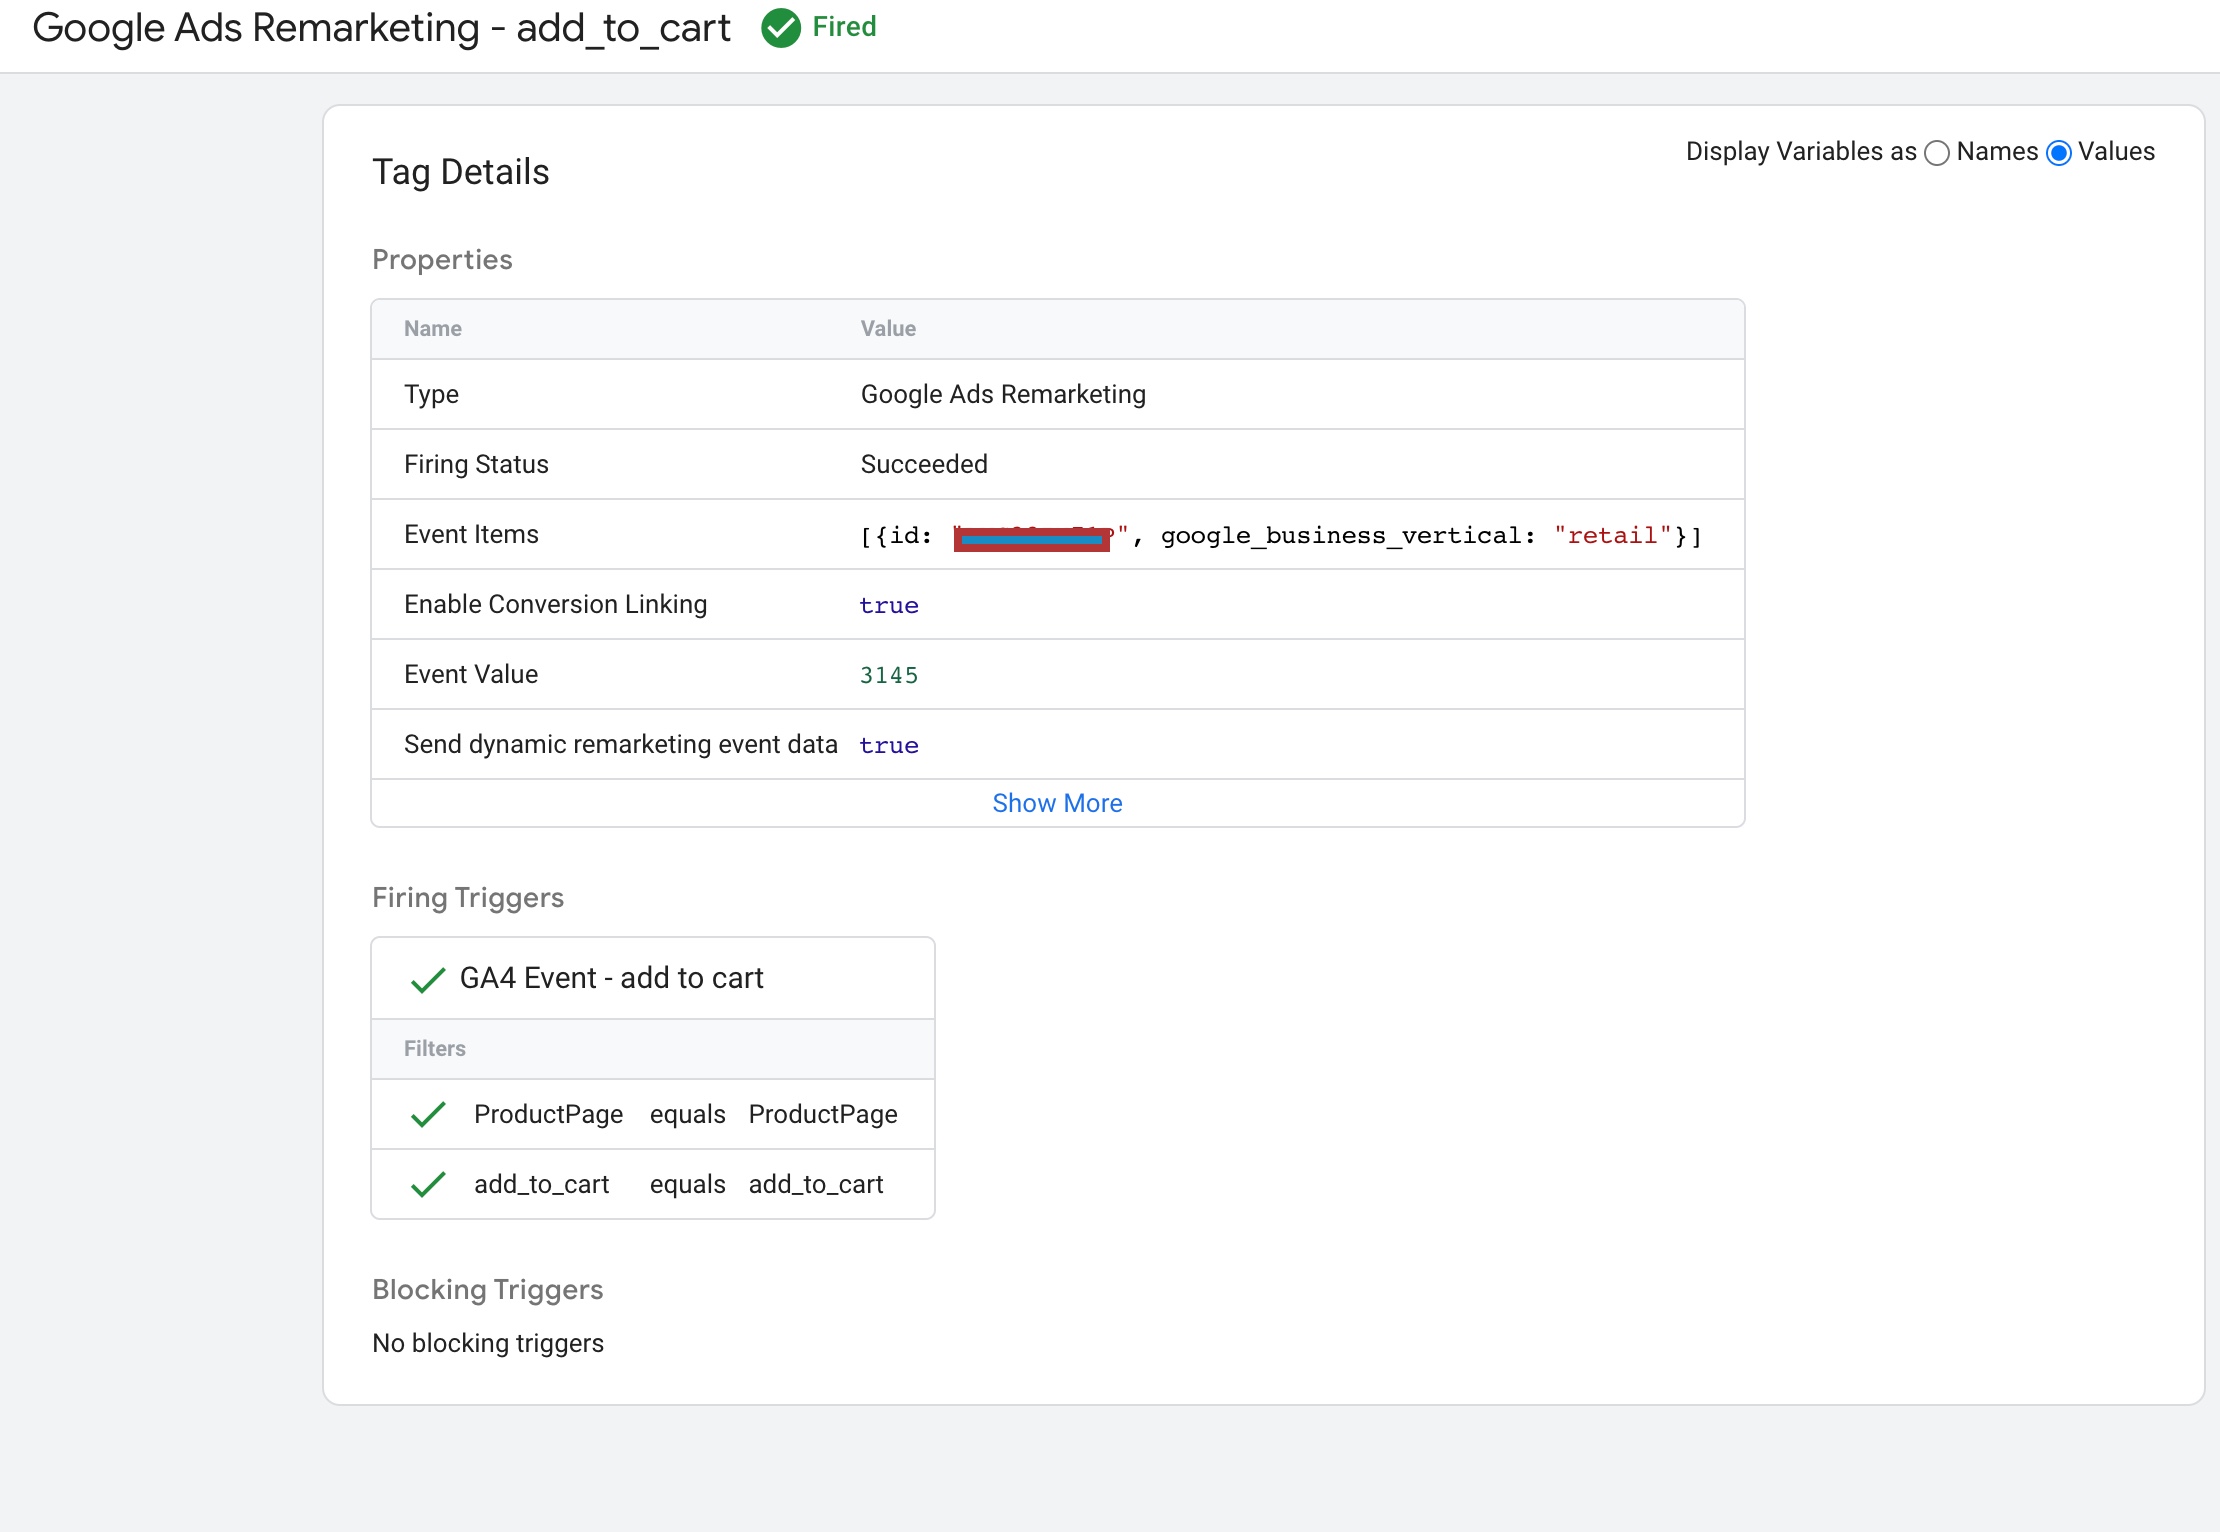
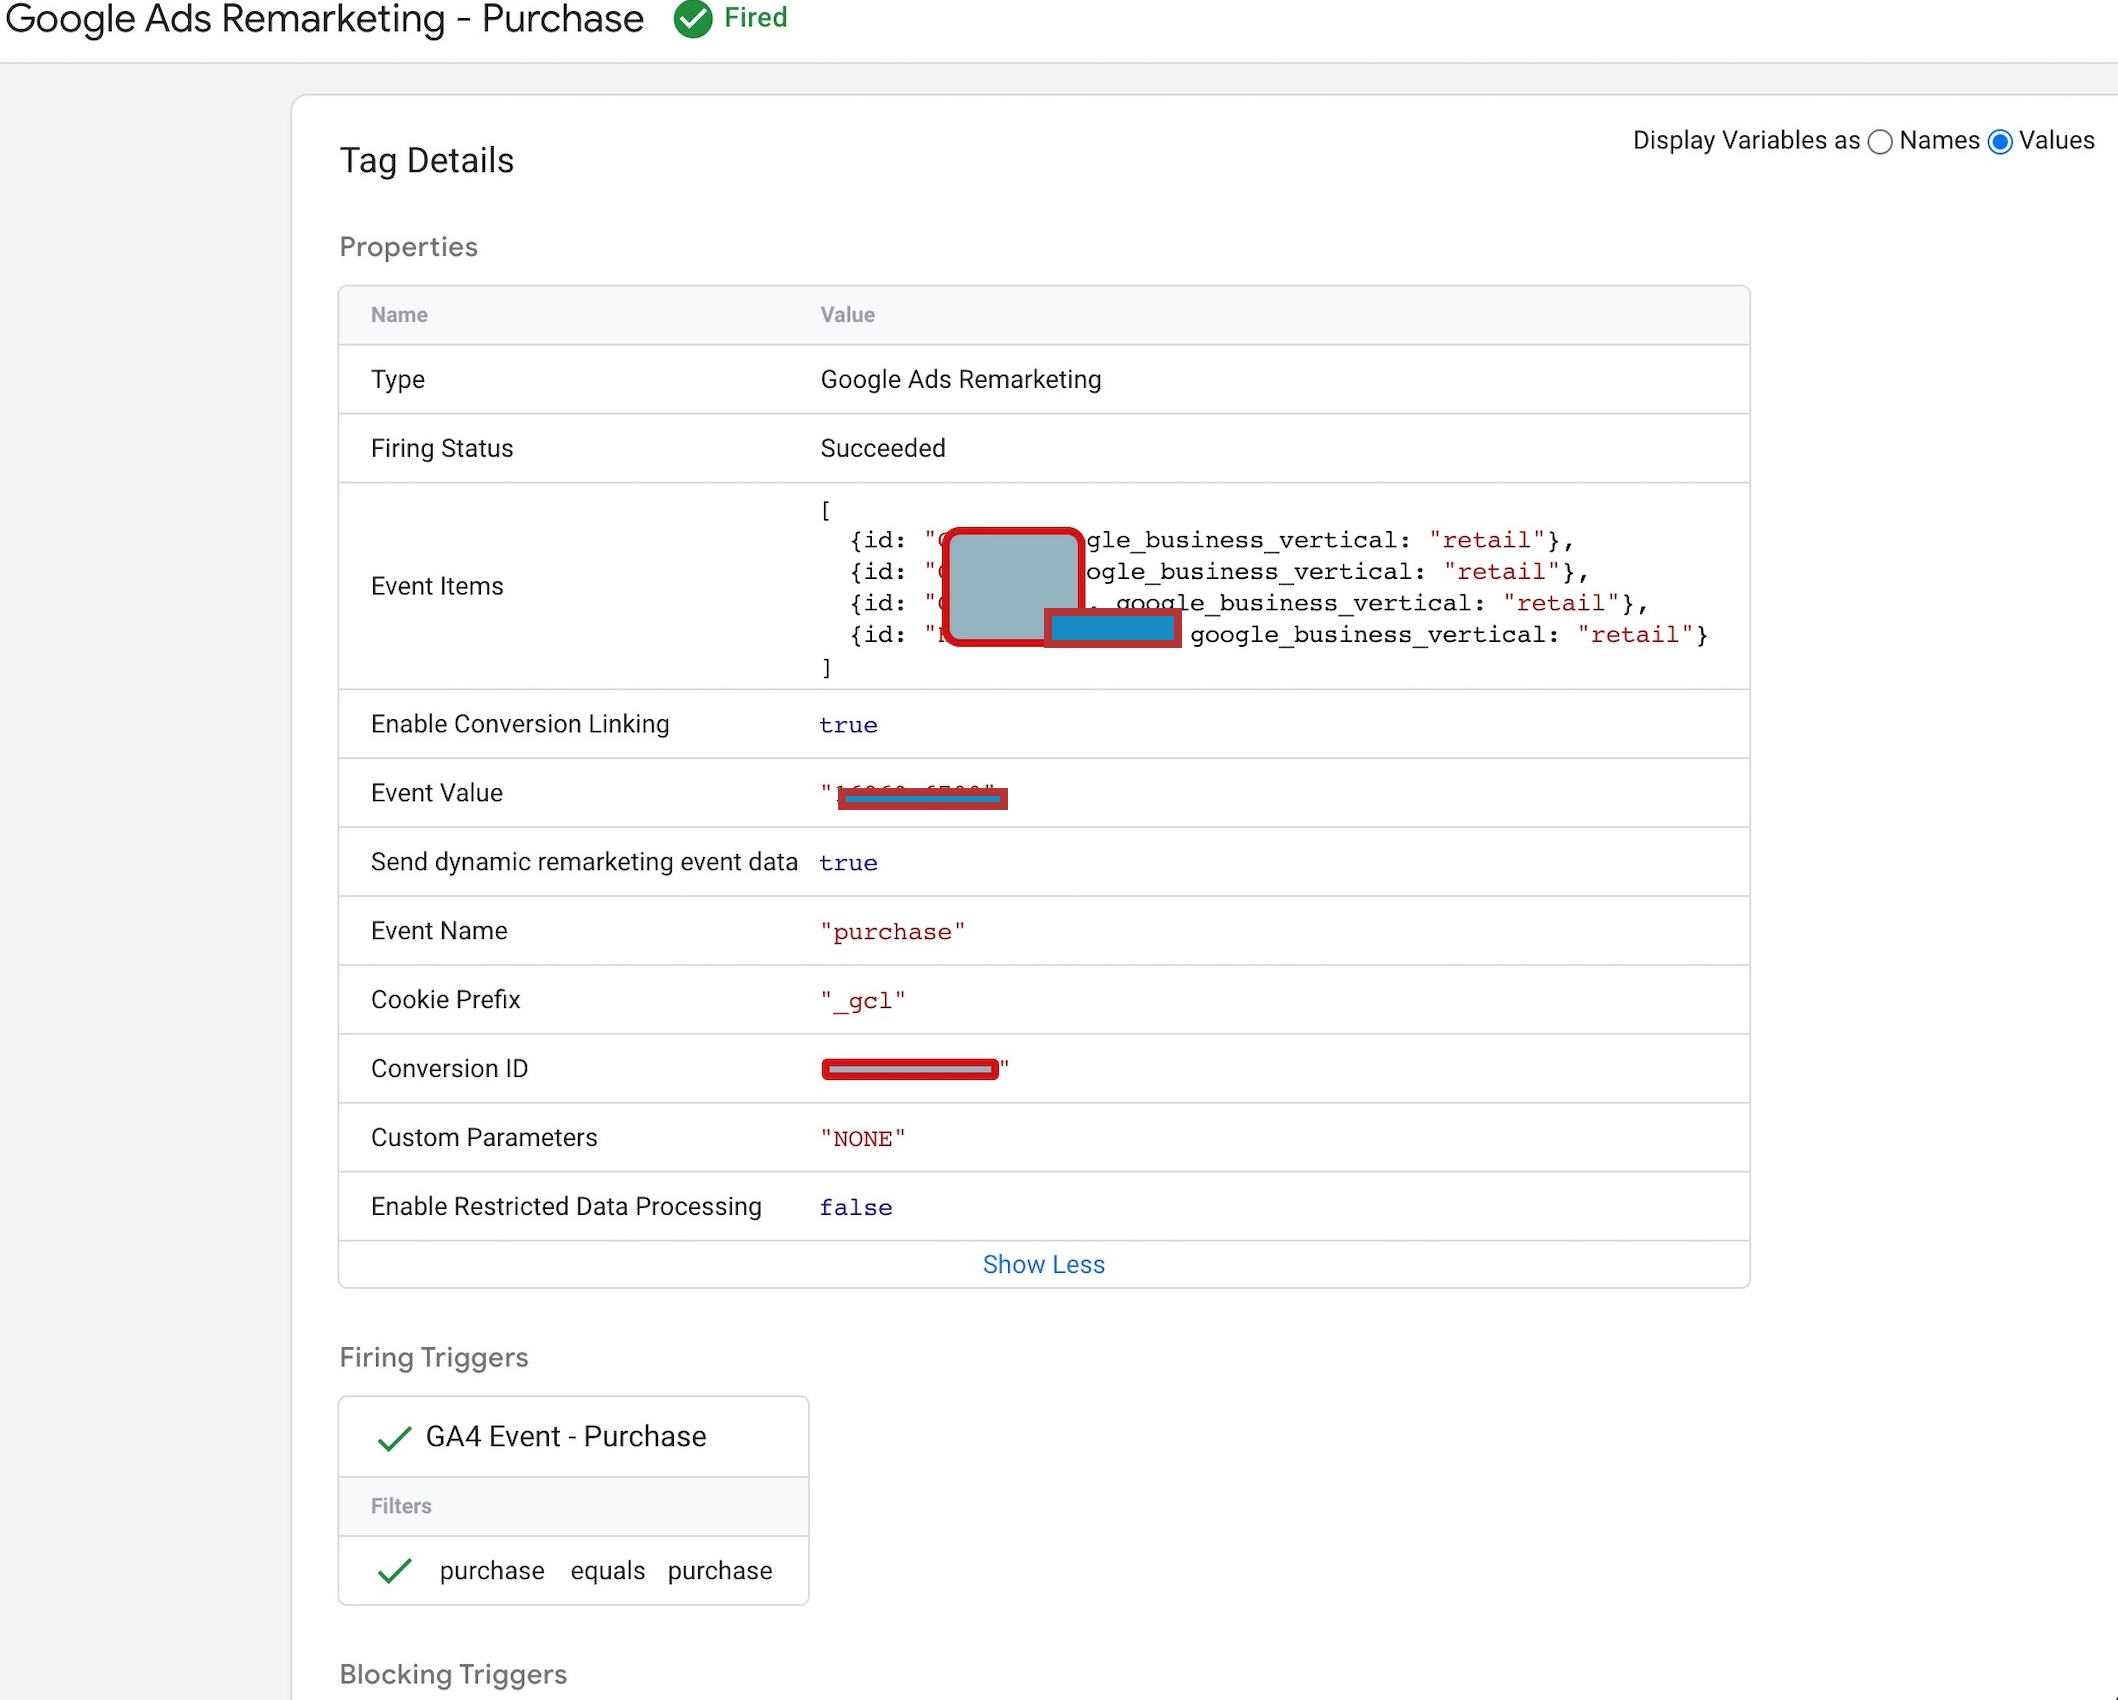
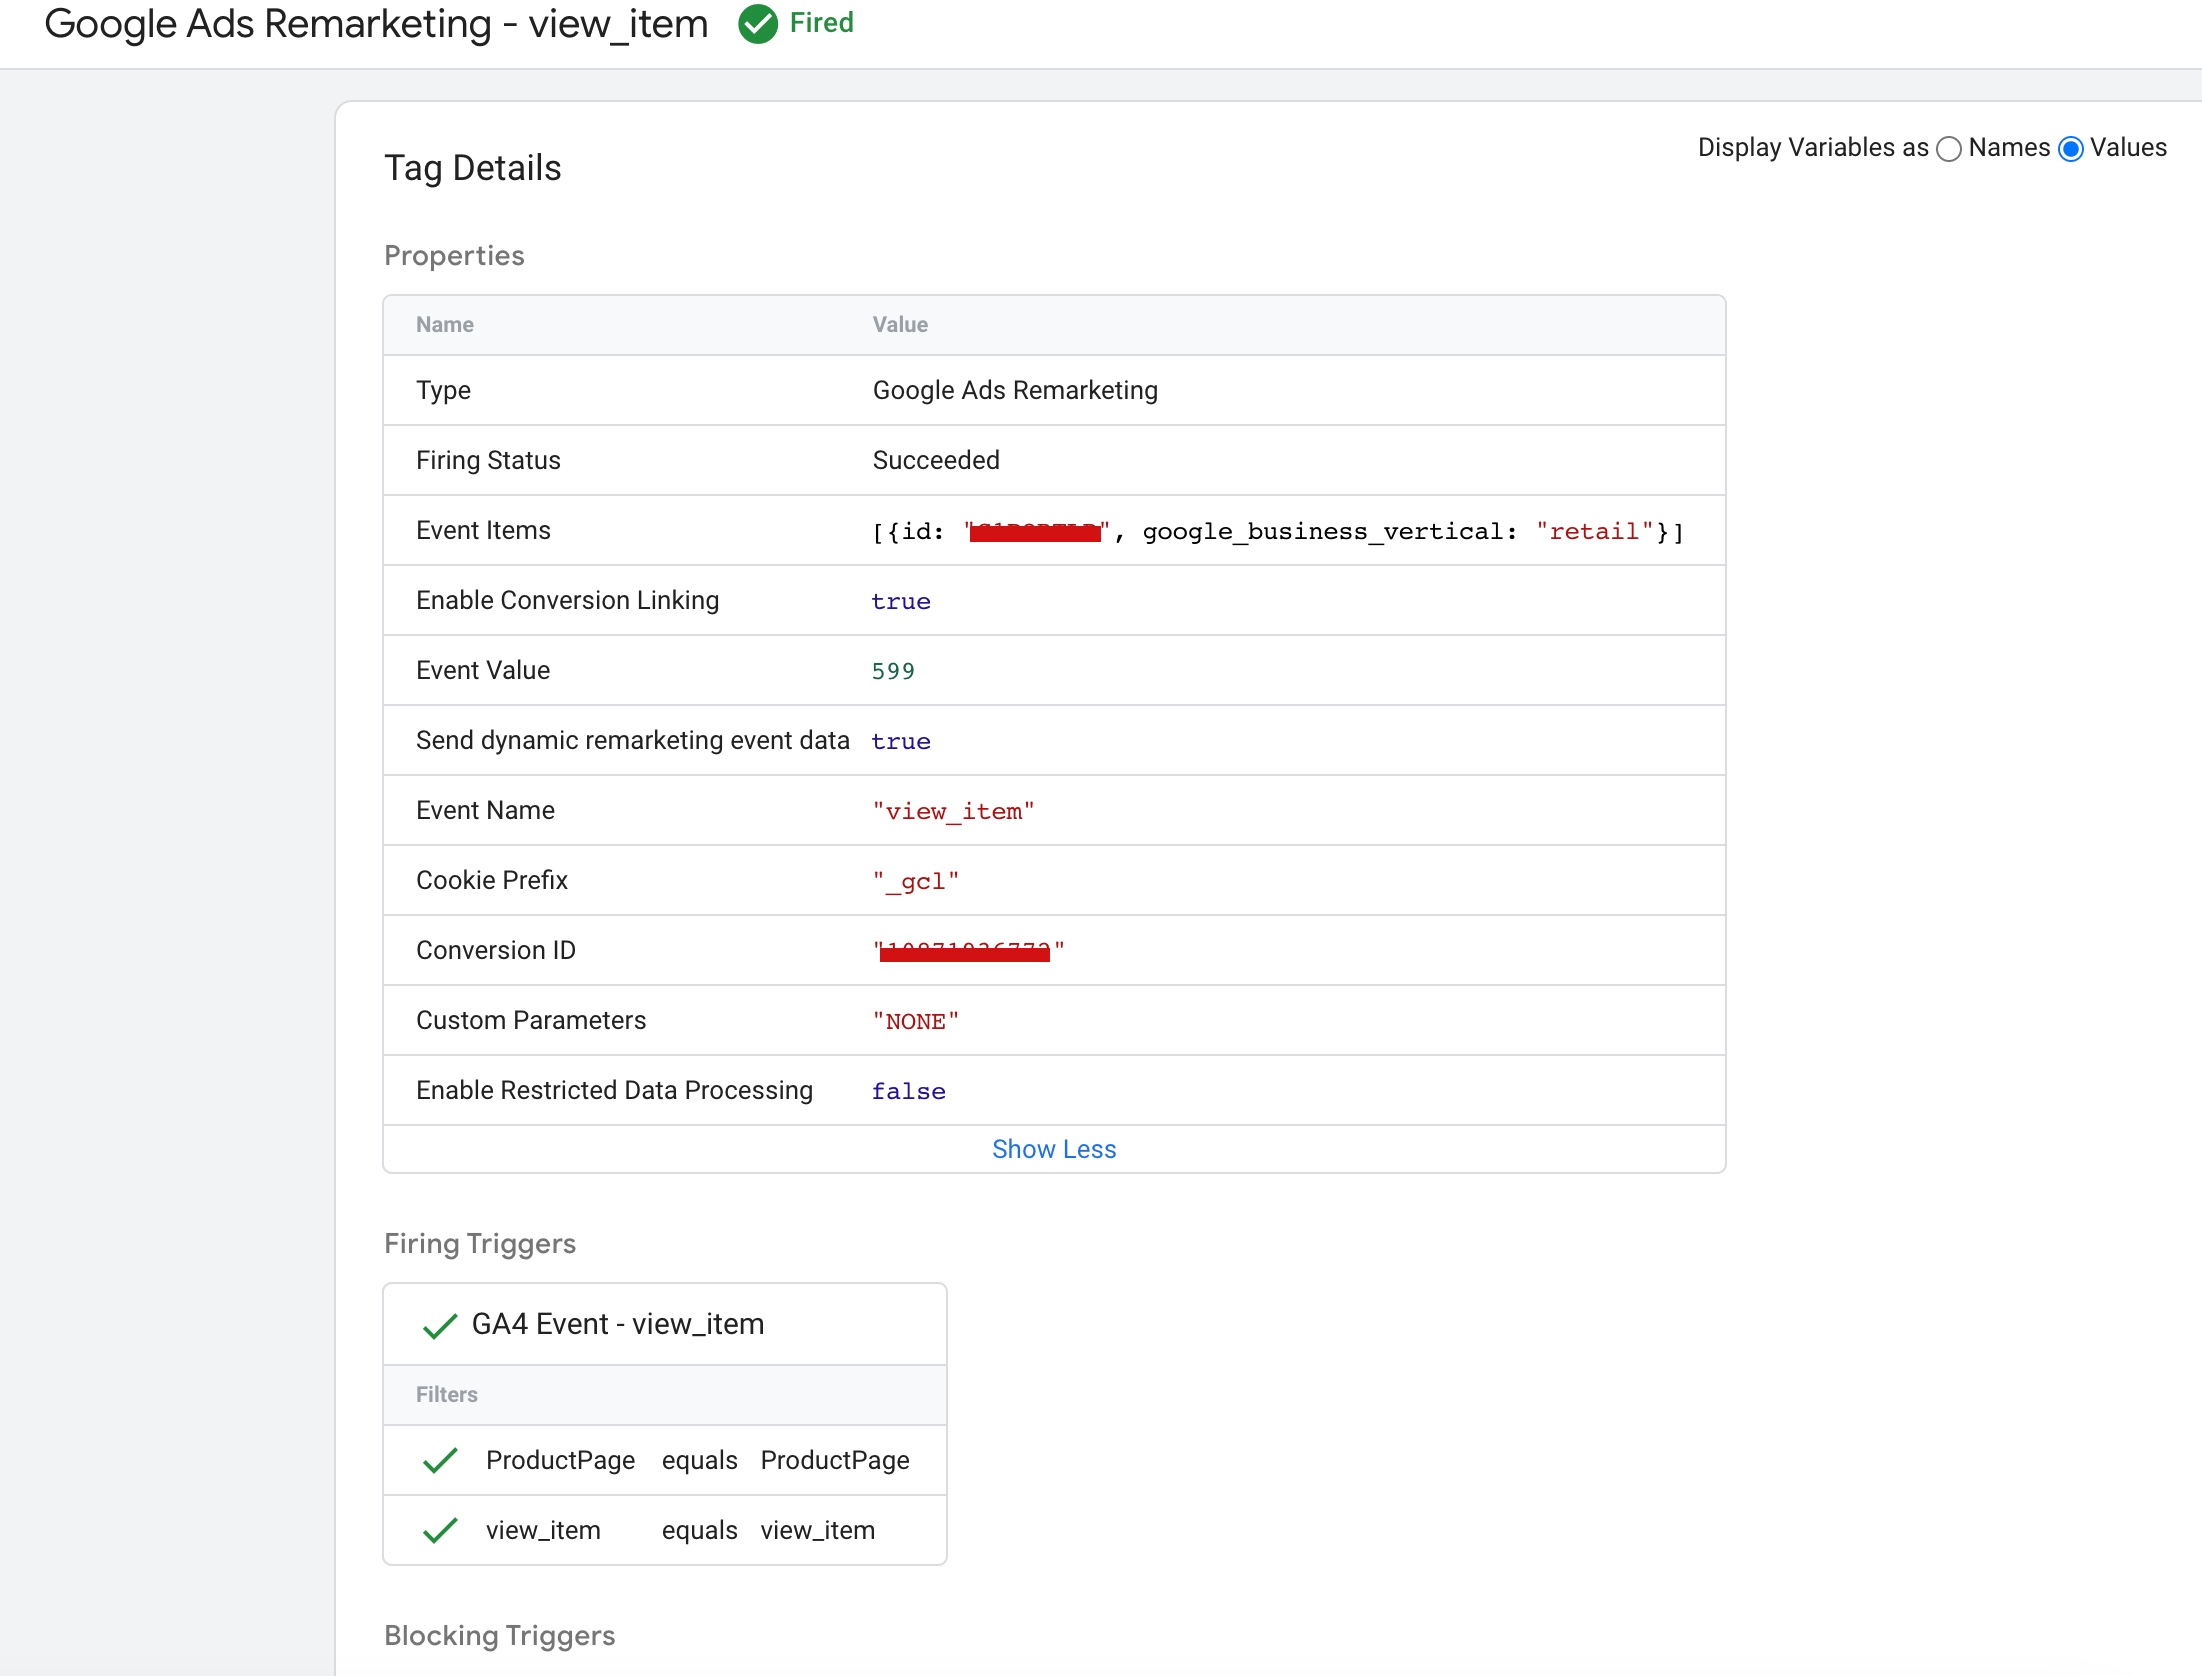
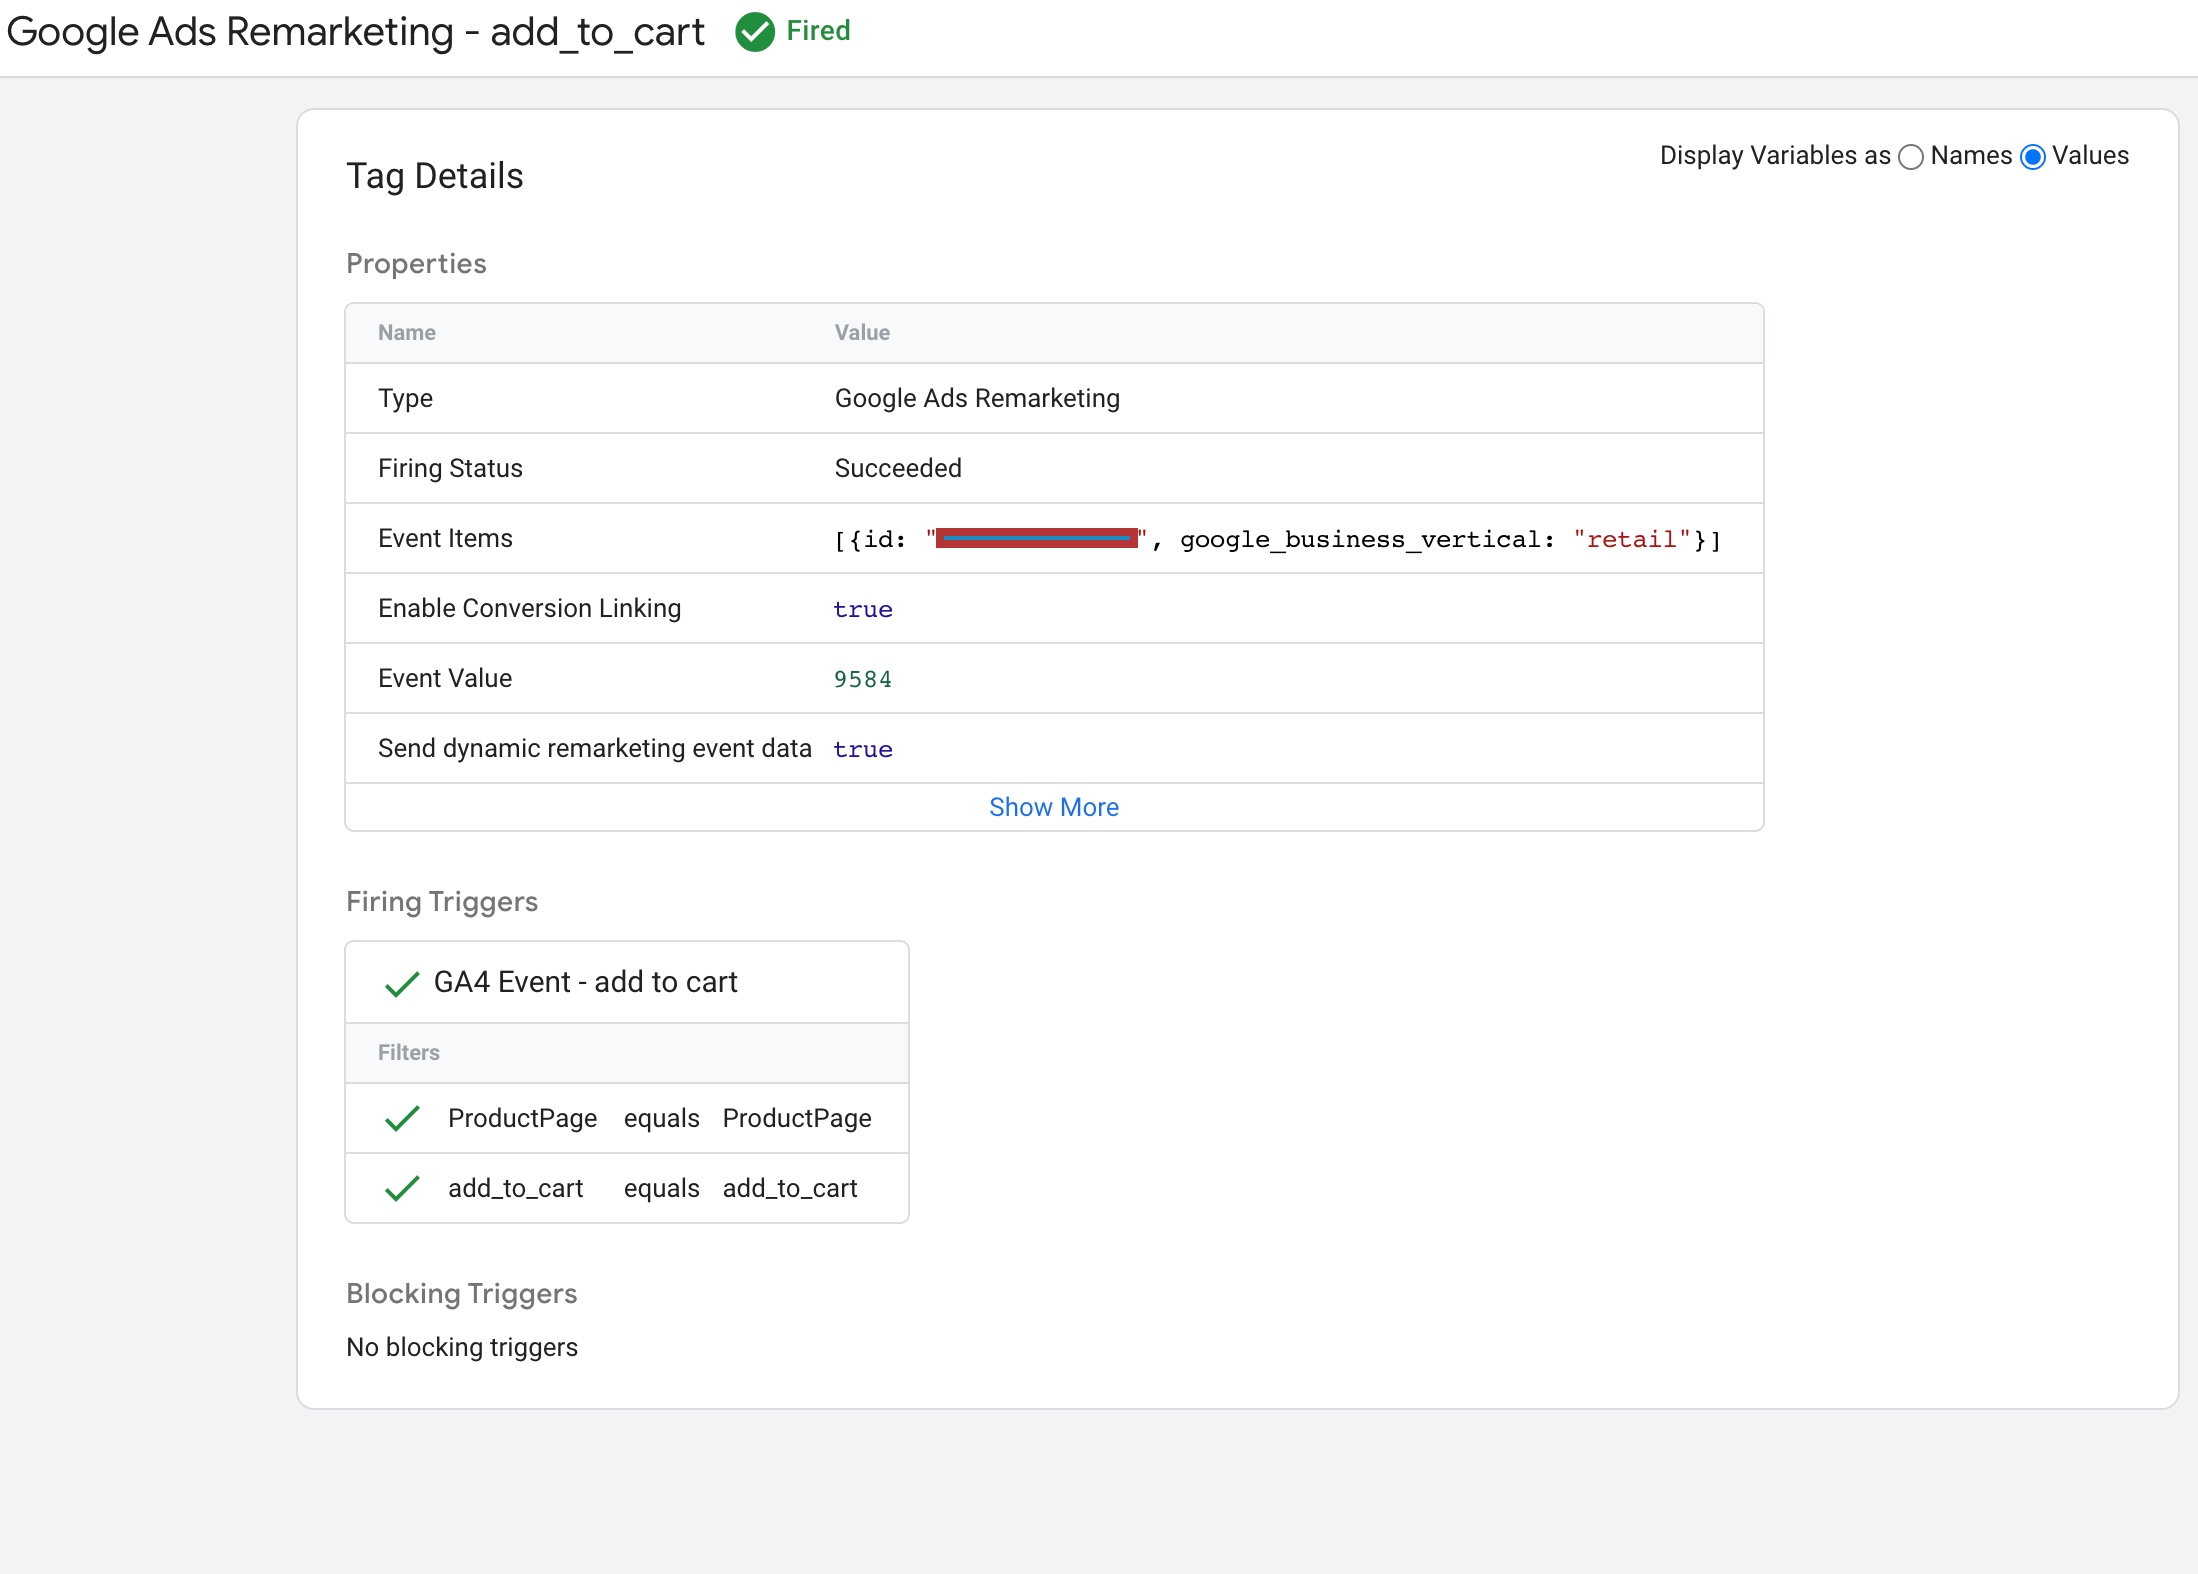
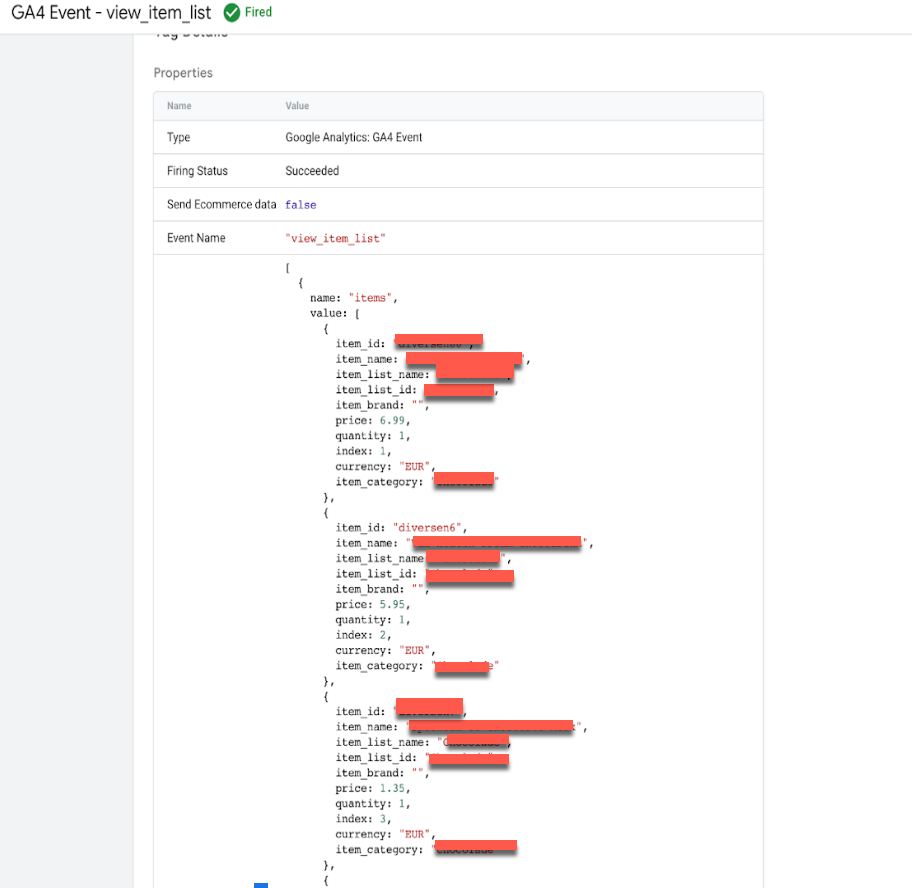
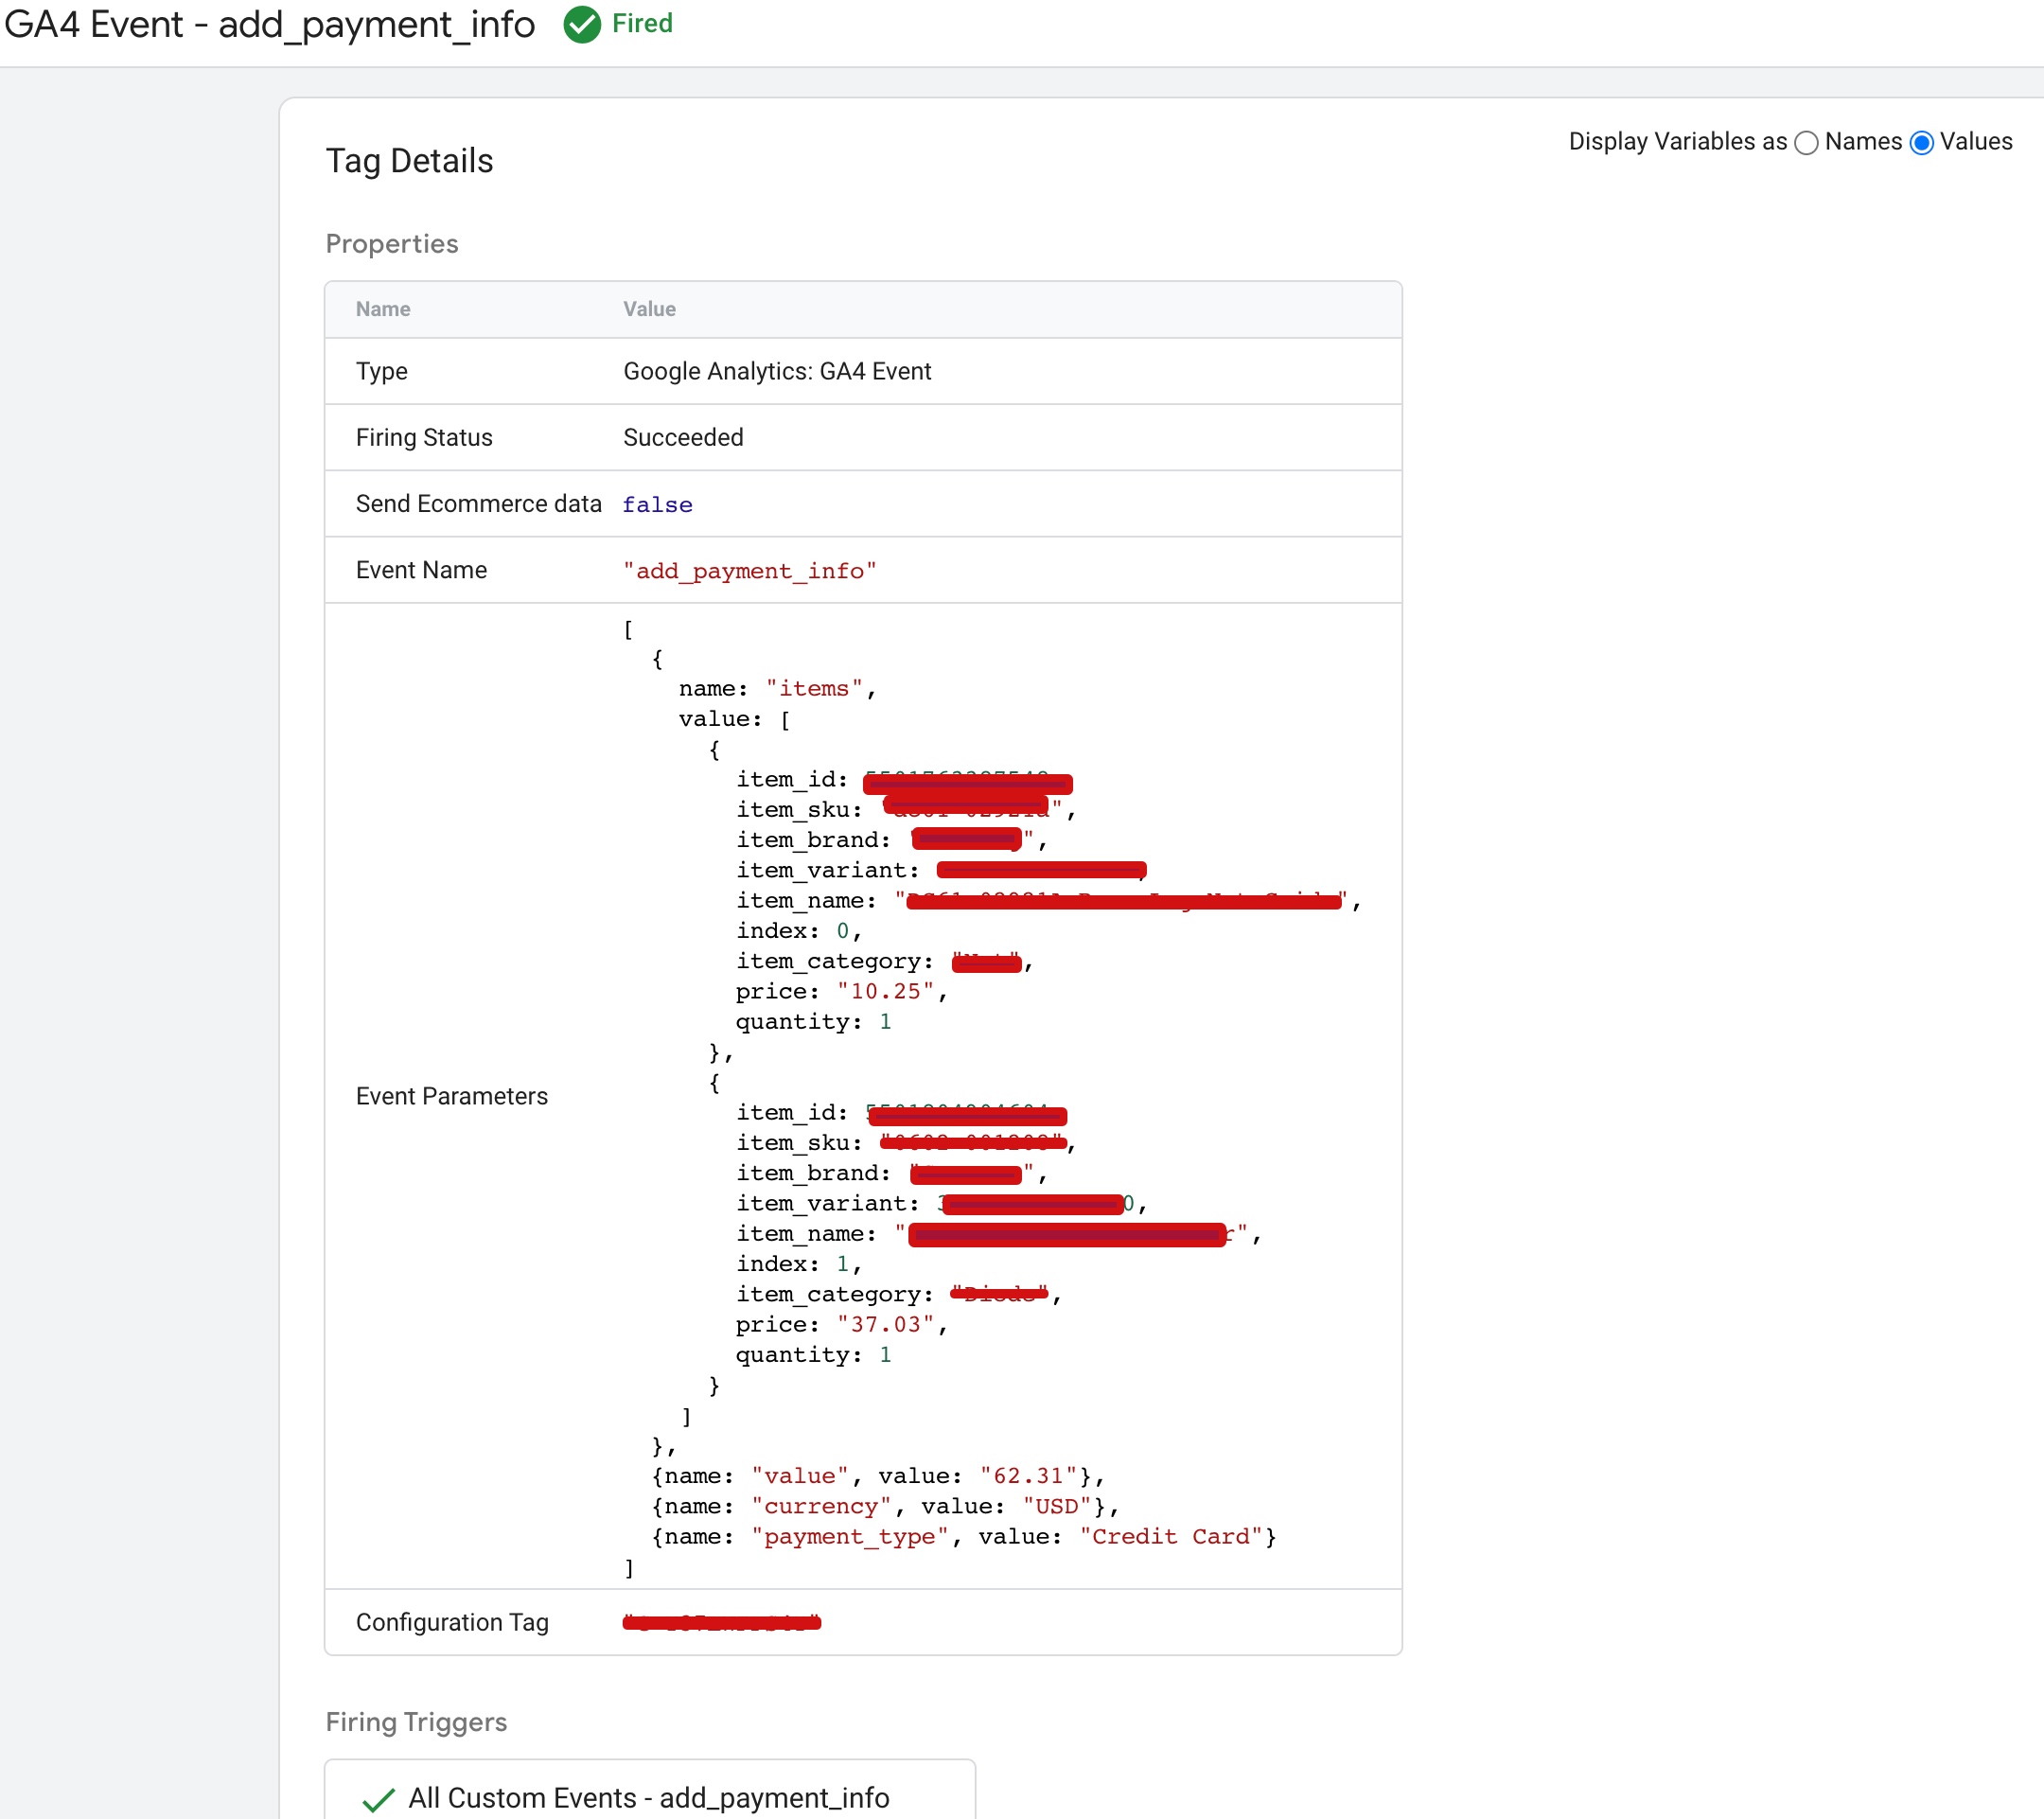
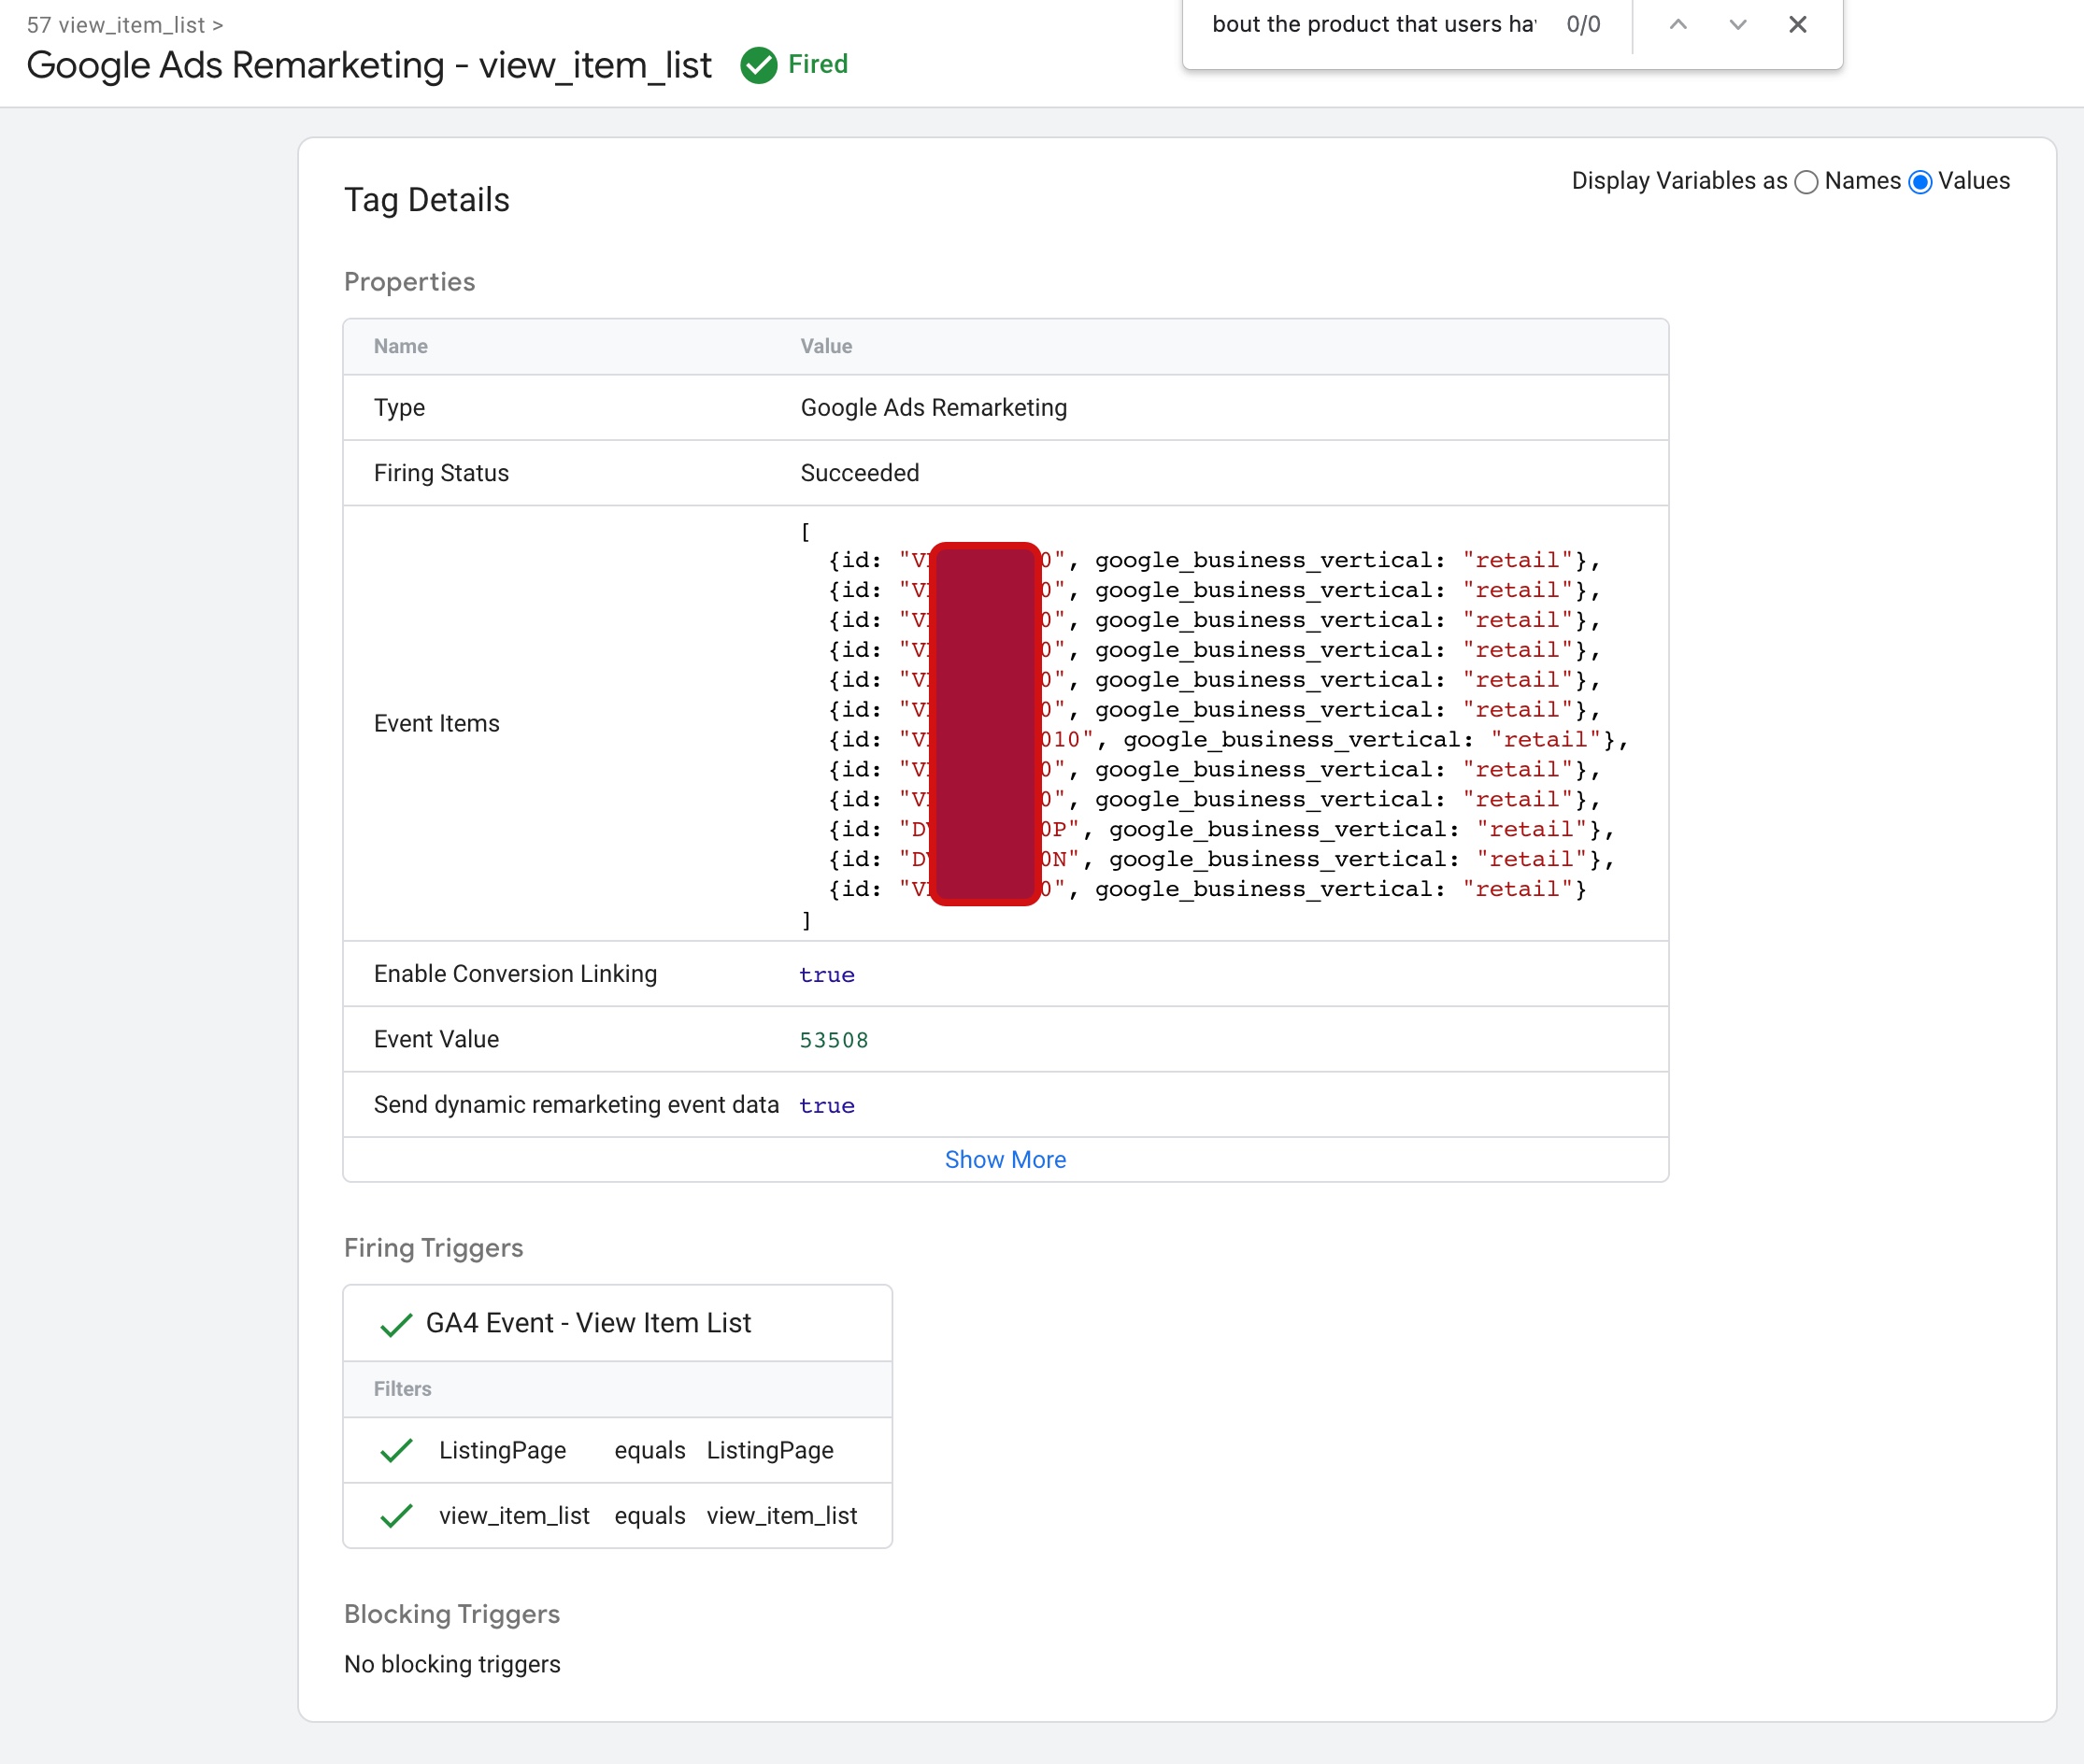
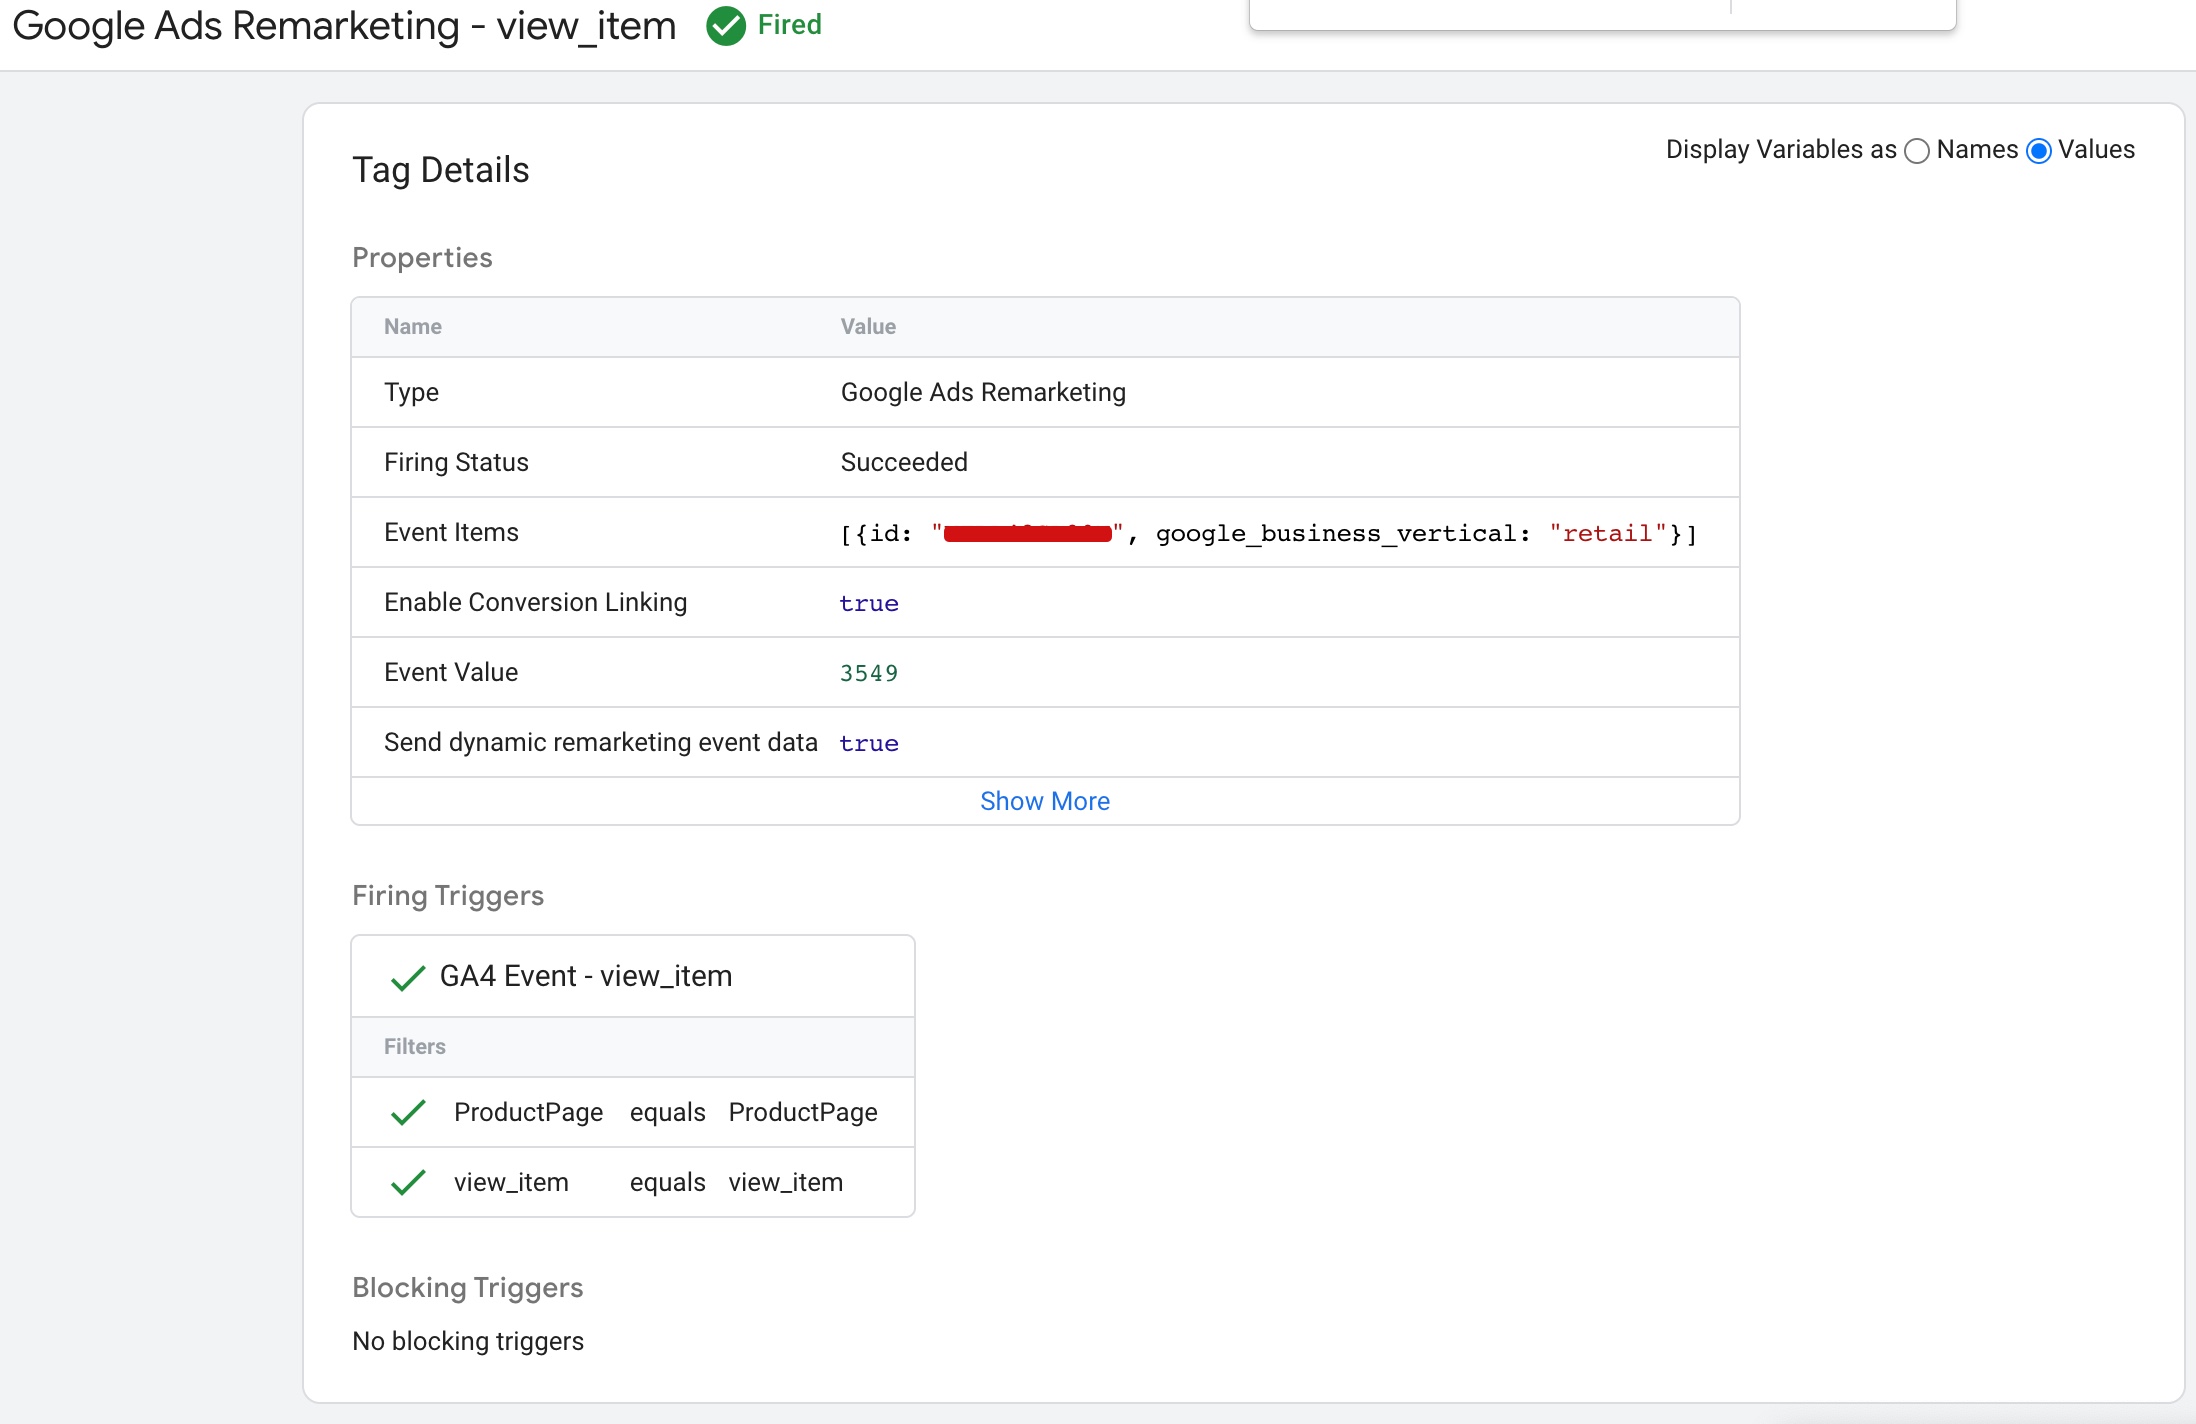
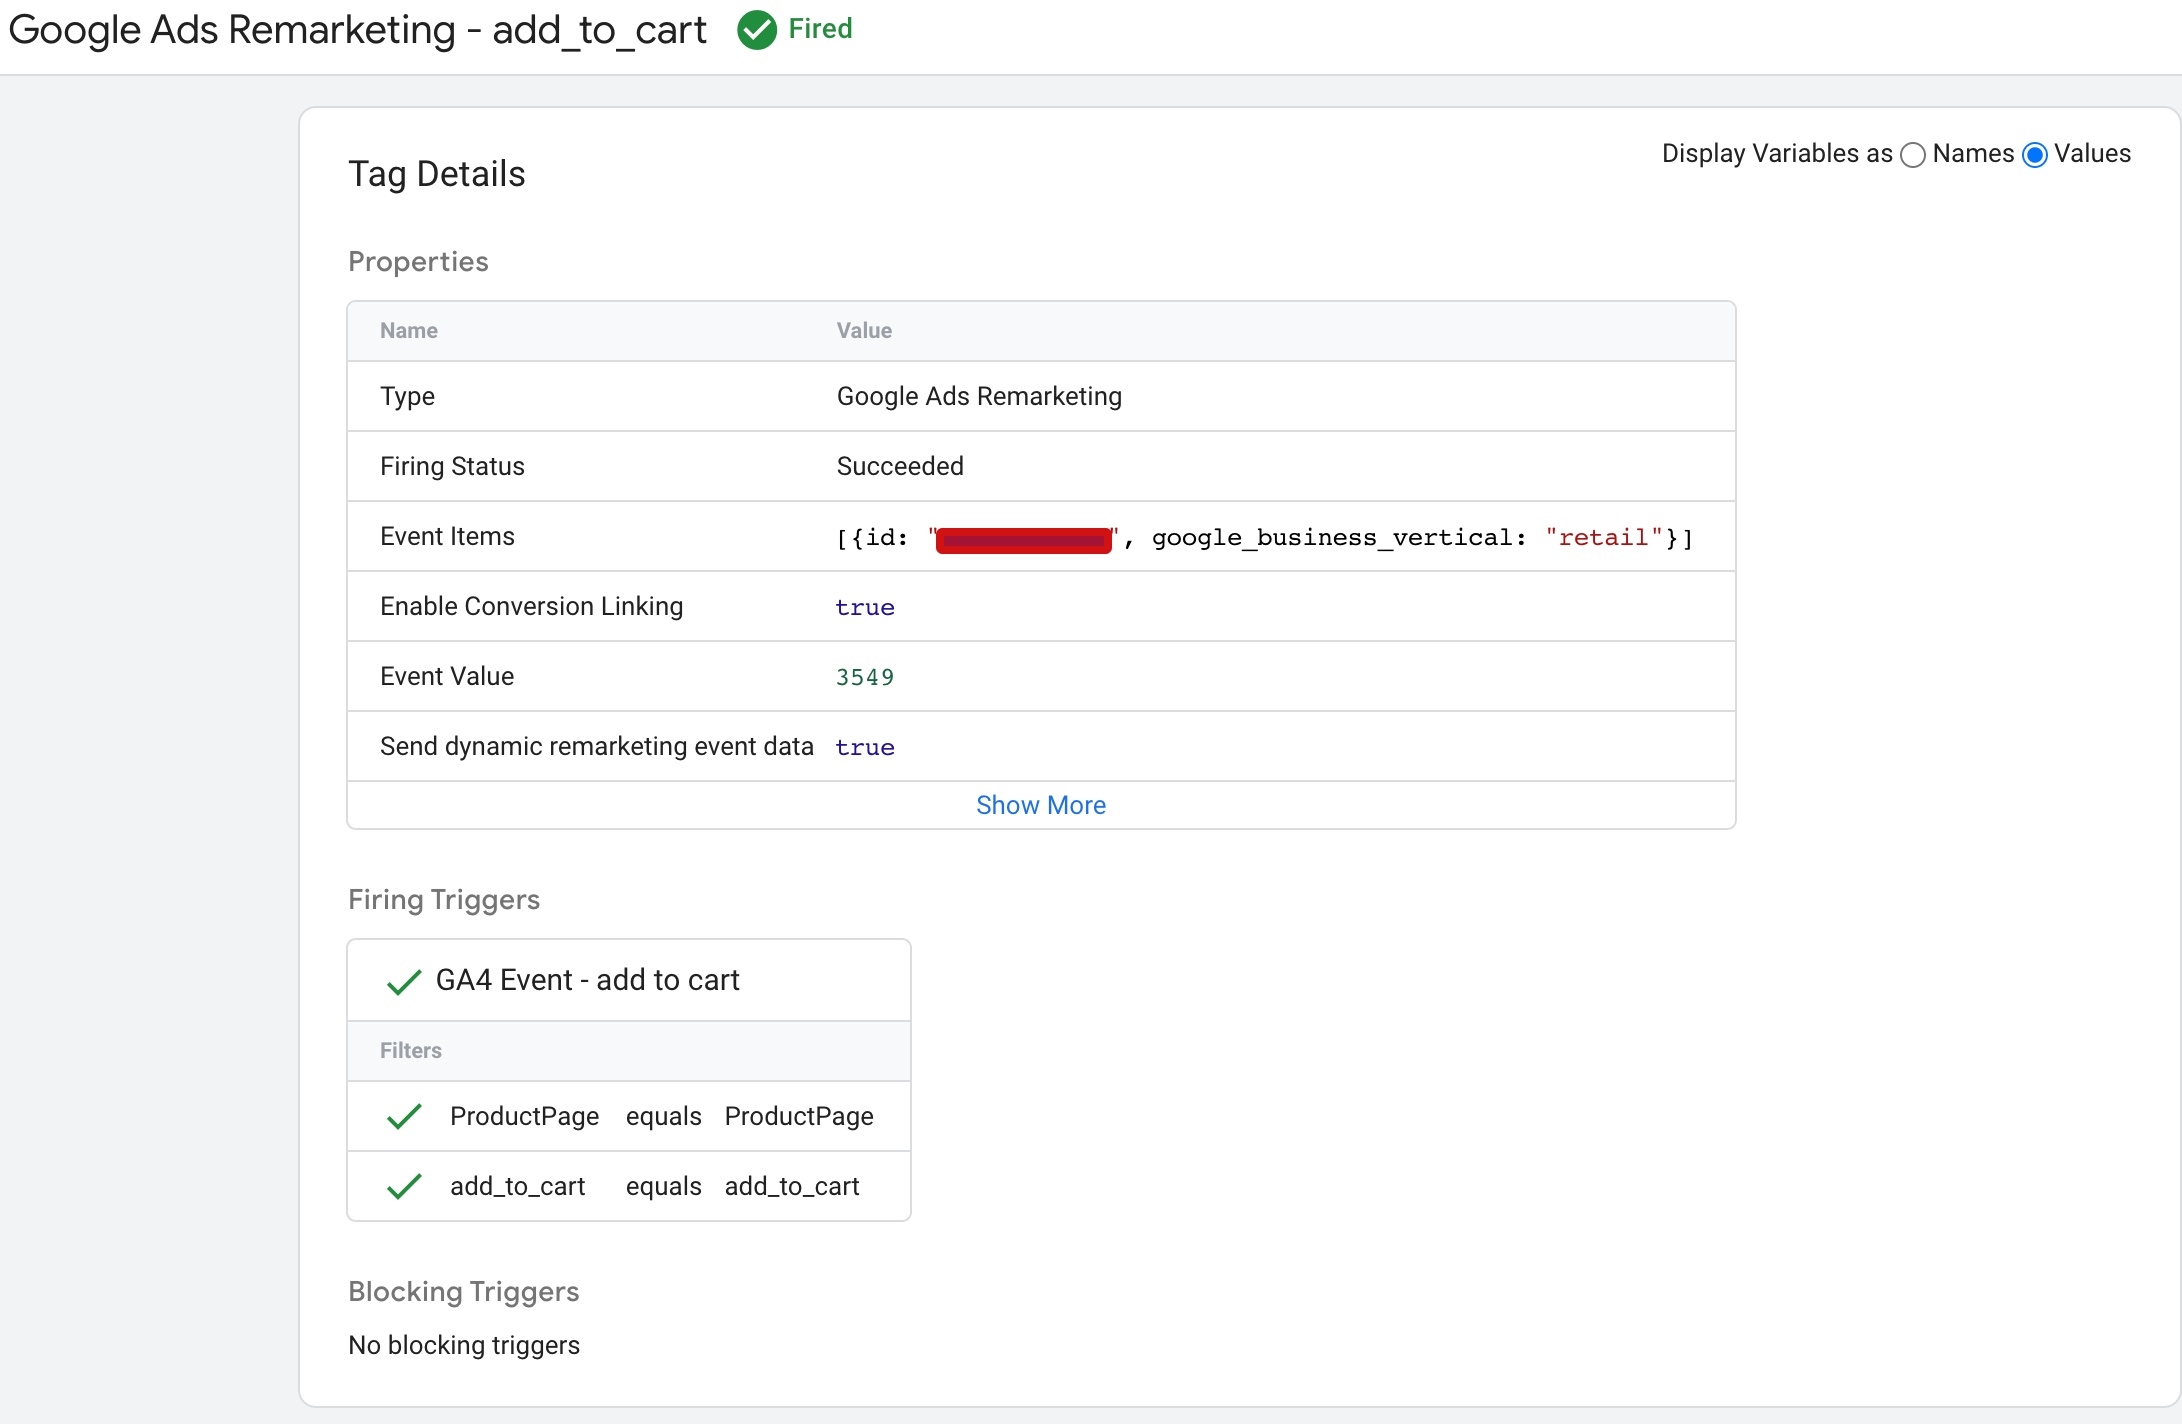
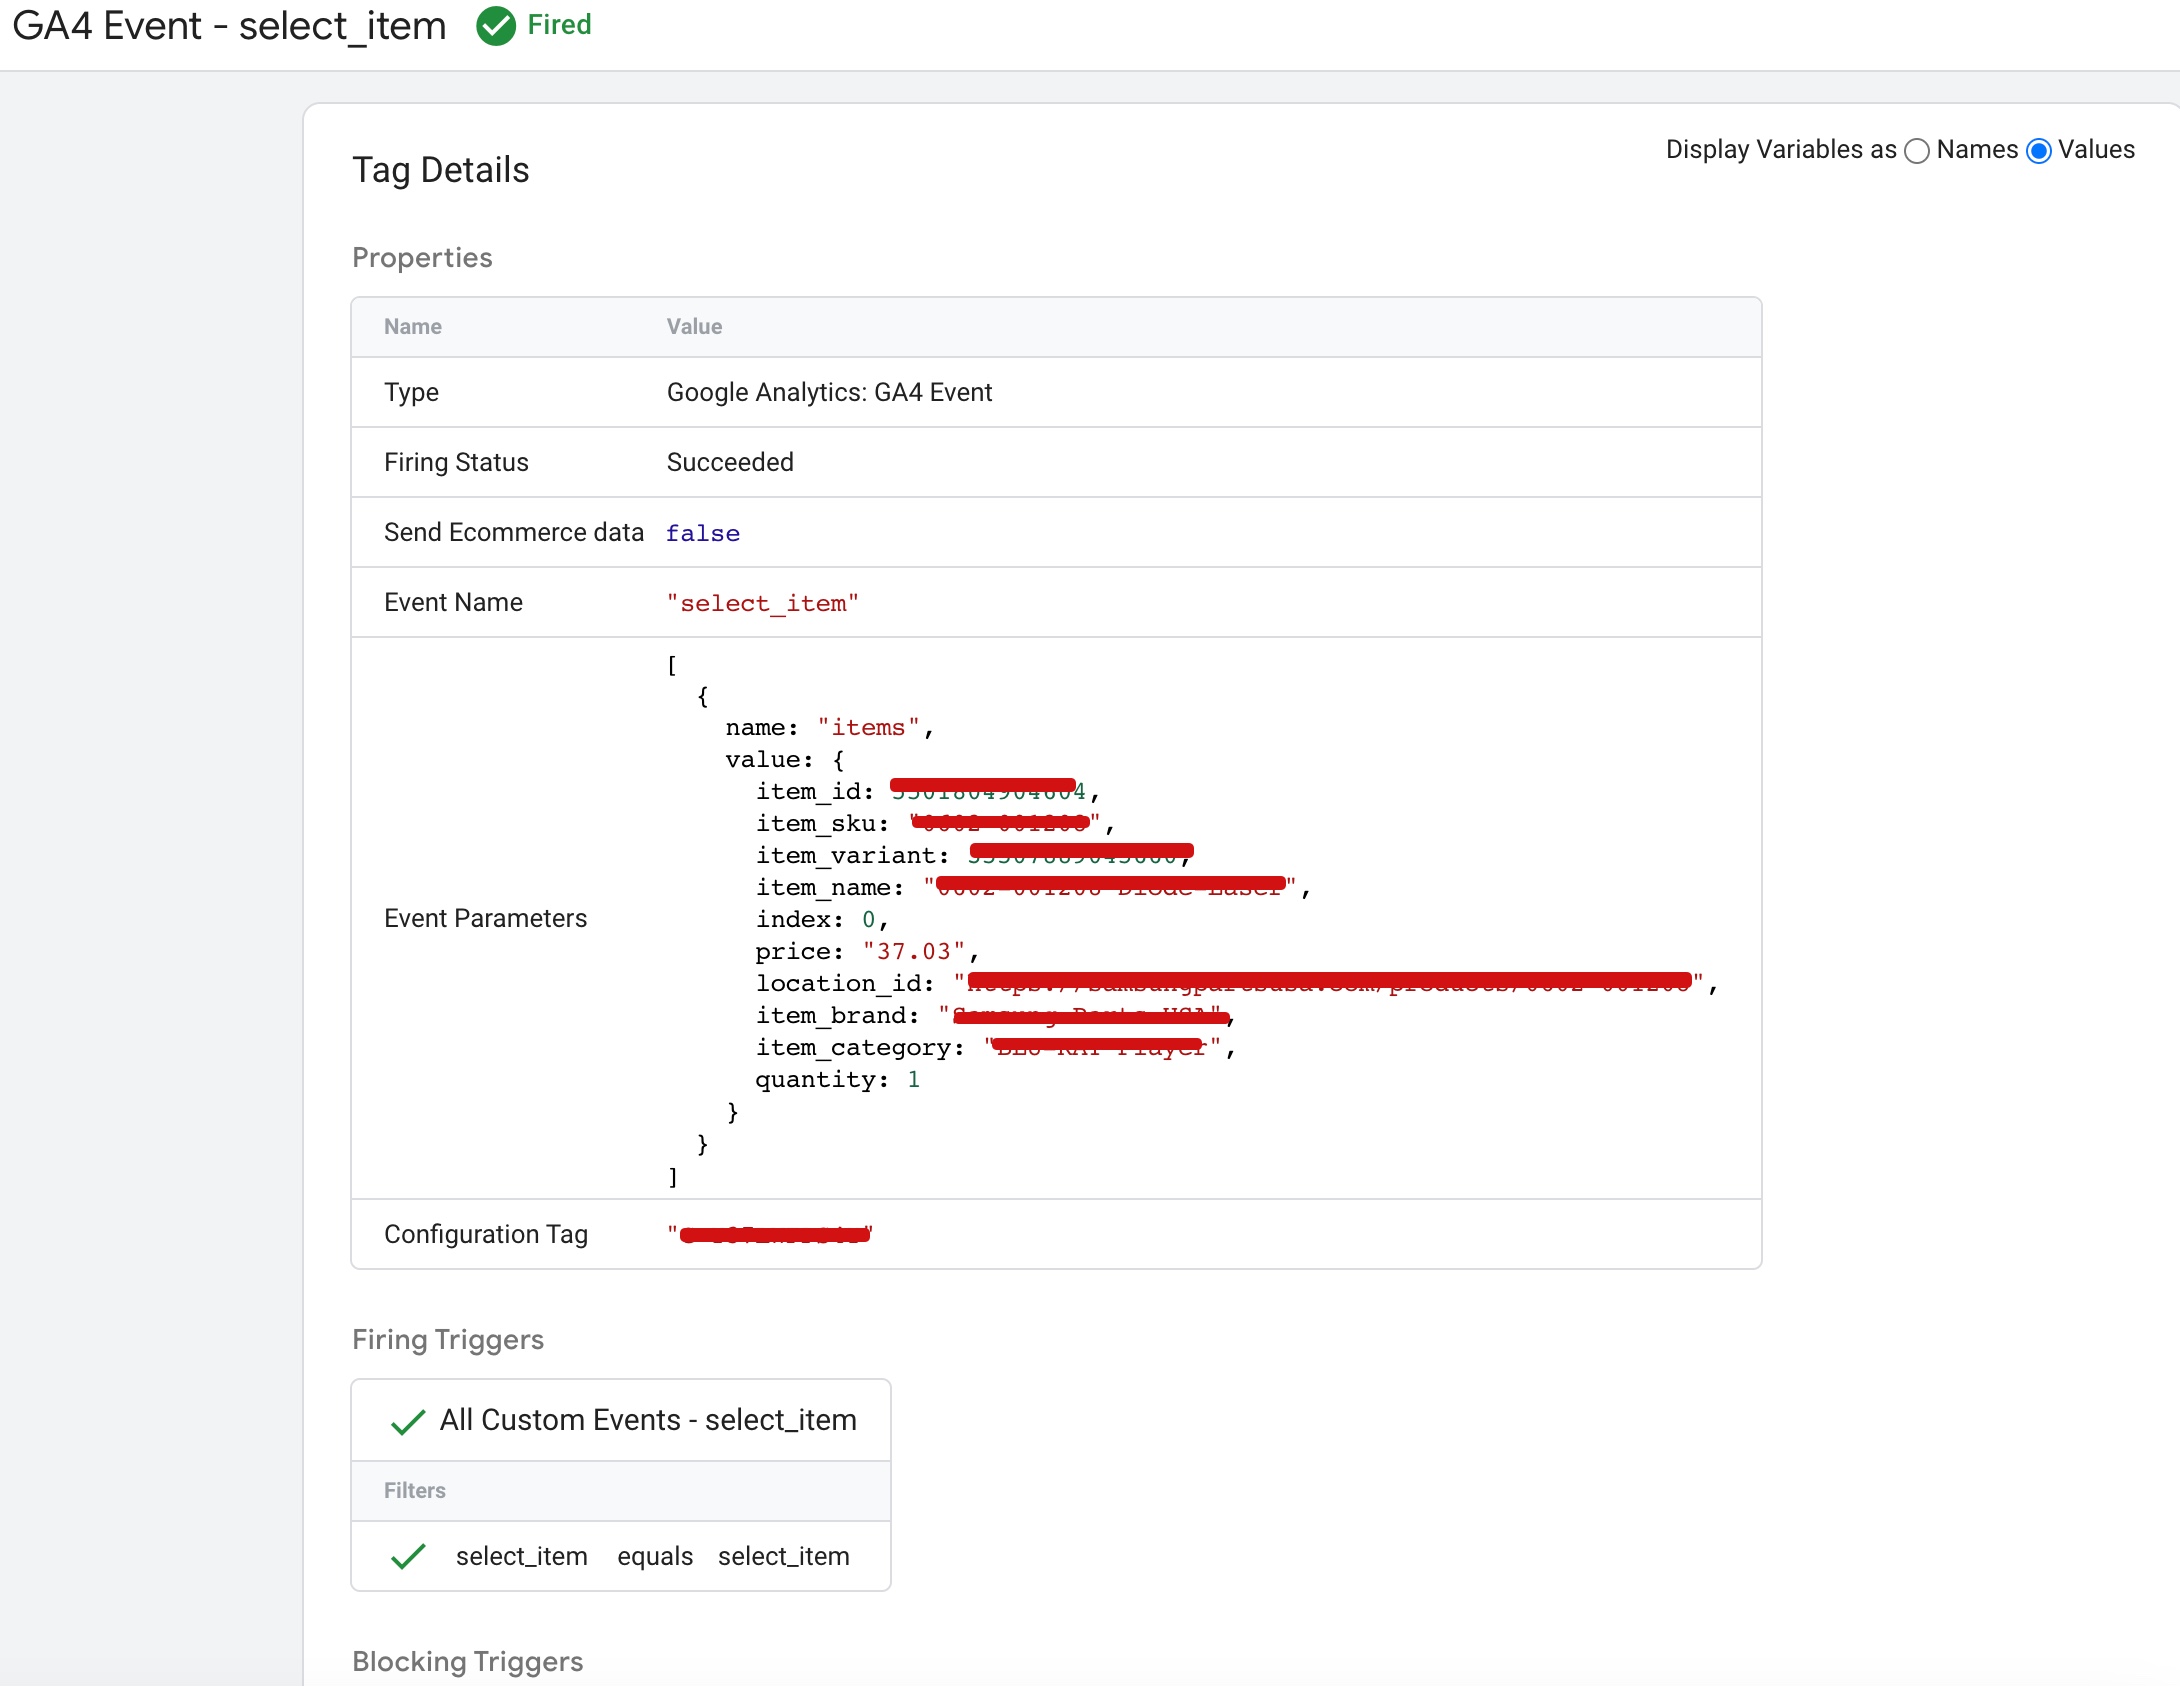
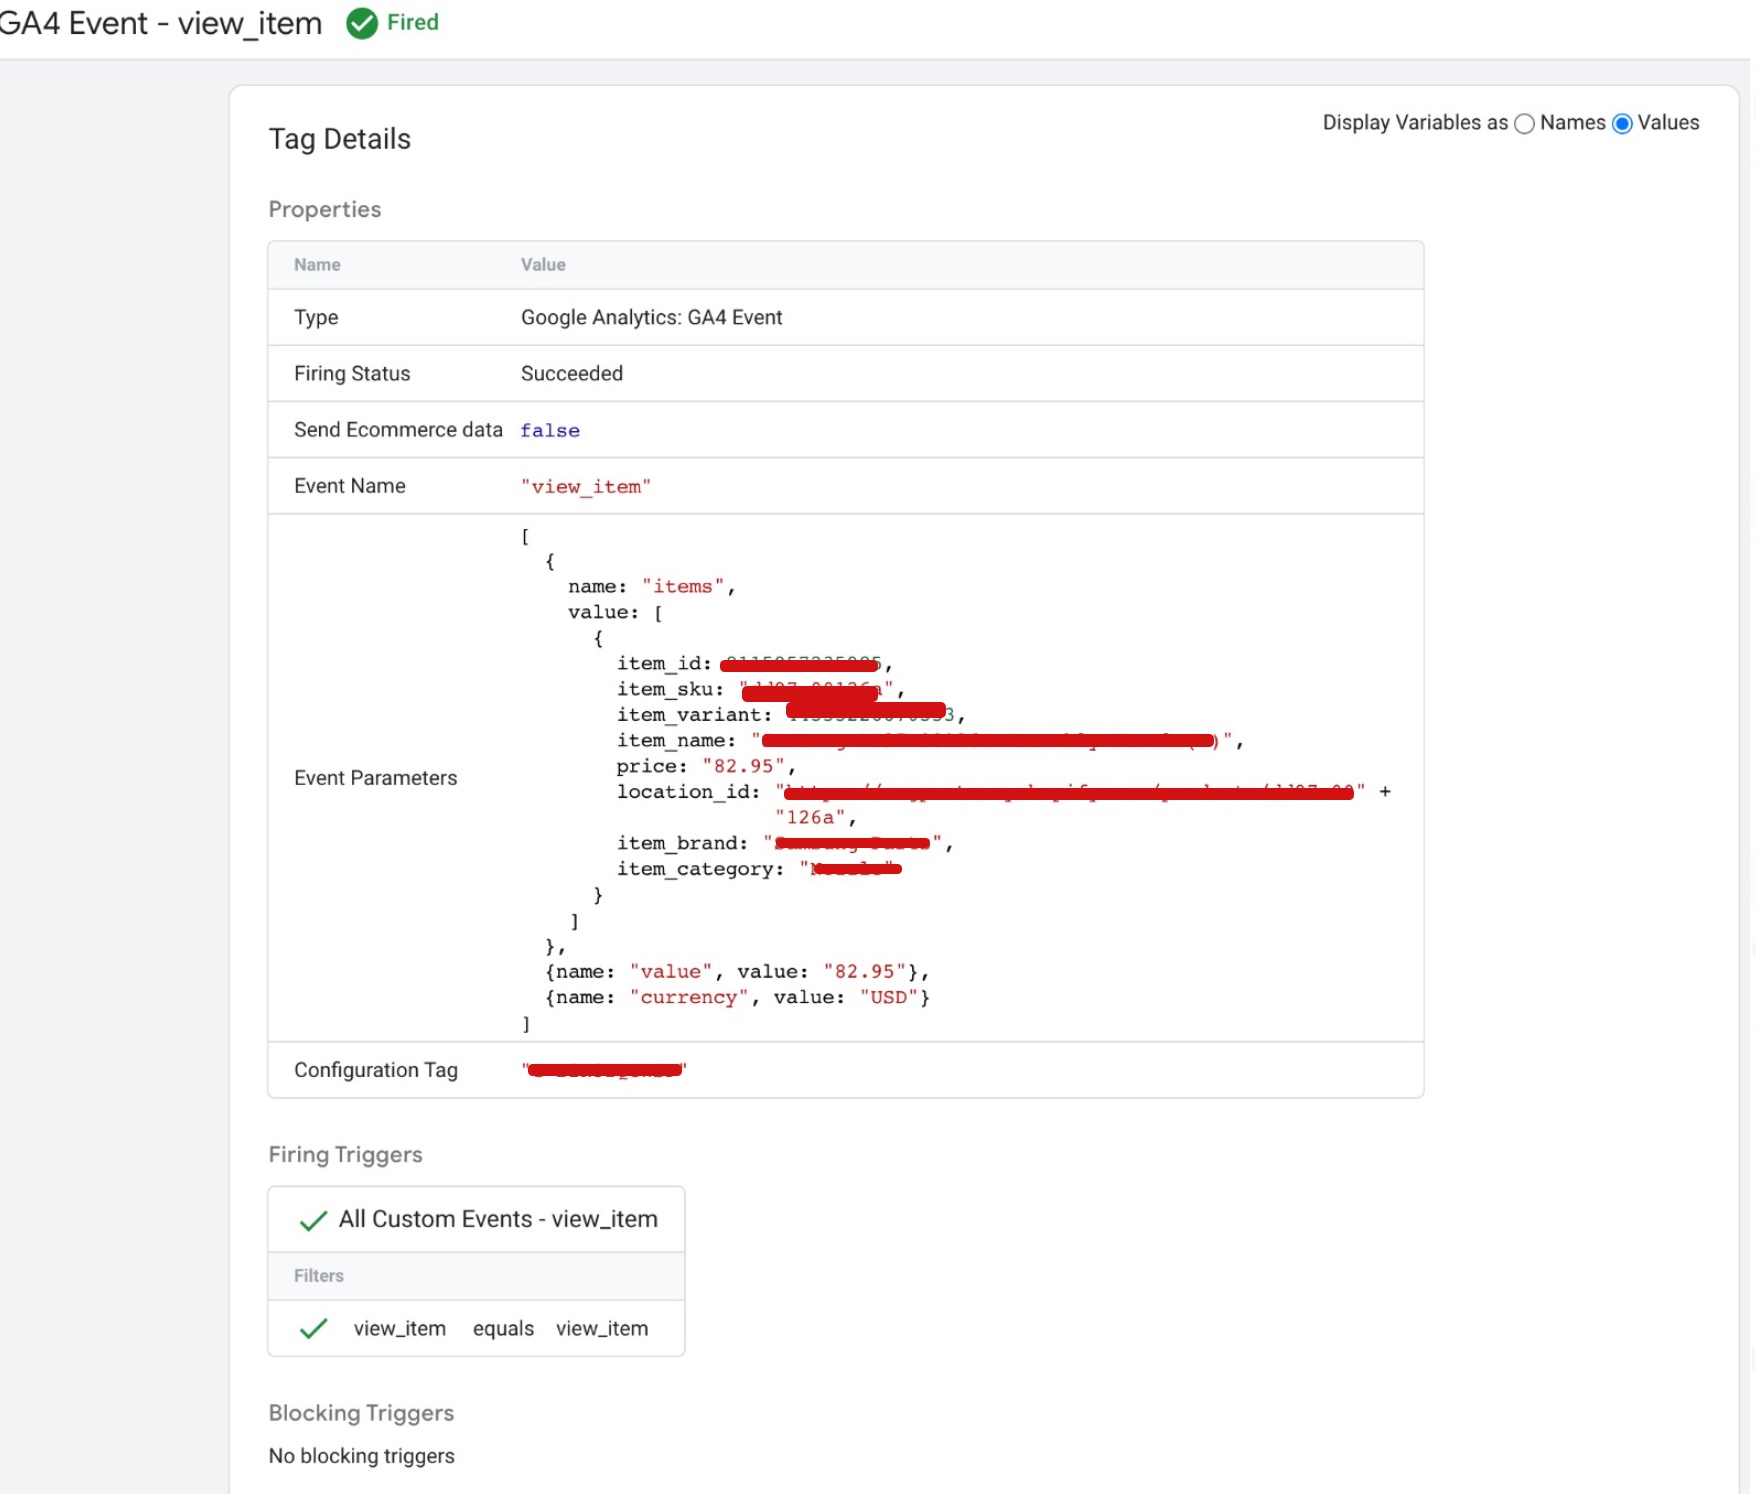
When a user visits an e-commerce website powered by Lightspeed Commerce, the Google Ads dynamic remarketing tag is triggered. This tag sends information about the user’s behavior on the site, such as the pages they visited, the products they viewed, and the items they added to their cart. This information is then used by Google Ads to display targeted ads to the user across the Google Display Network.
Dynamic remarketing is an effective way to re-engage with users who have already shown an interest in a merchant’s products. By showing targeted ads to users who have already interacted with their website, merchants can increase the chances of converting them into customers. Dynamic remarketing is especially useful for merchants who have a high volume of website traffic but a low conversion rate.
To implement Google Ads dynamic remarketing tags with Lightspeed Commerce, merchants need to have a Google Ads account and a Google Merchant Center account. They also need to install the Google Ads conversion tracking tag on their website. The conversion tracking tag is a small piece of code that tracks user behavior on the site and sends information back to Google Ads.
Once the conversion tracking tag is installed, merchants can set up their dynamic remarketing campaign. They can choose which products or pages to include in the campaign, set a budget, and create ads using Google Ads templates or their own custom designs. Google Ads then uses the information collected by the conversion tracking tag to target users who have interacted with the merchant’s website.
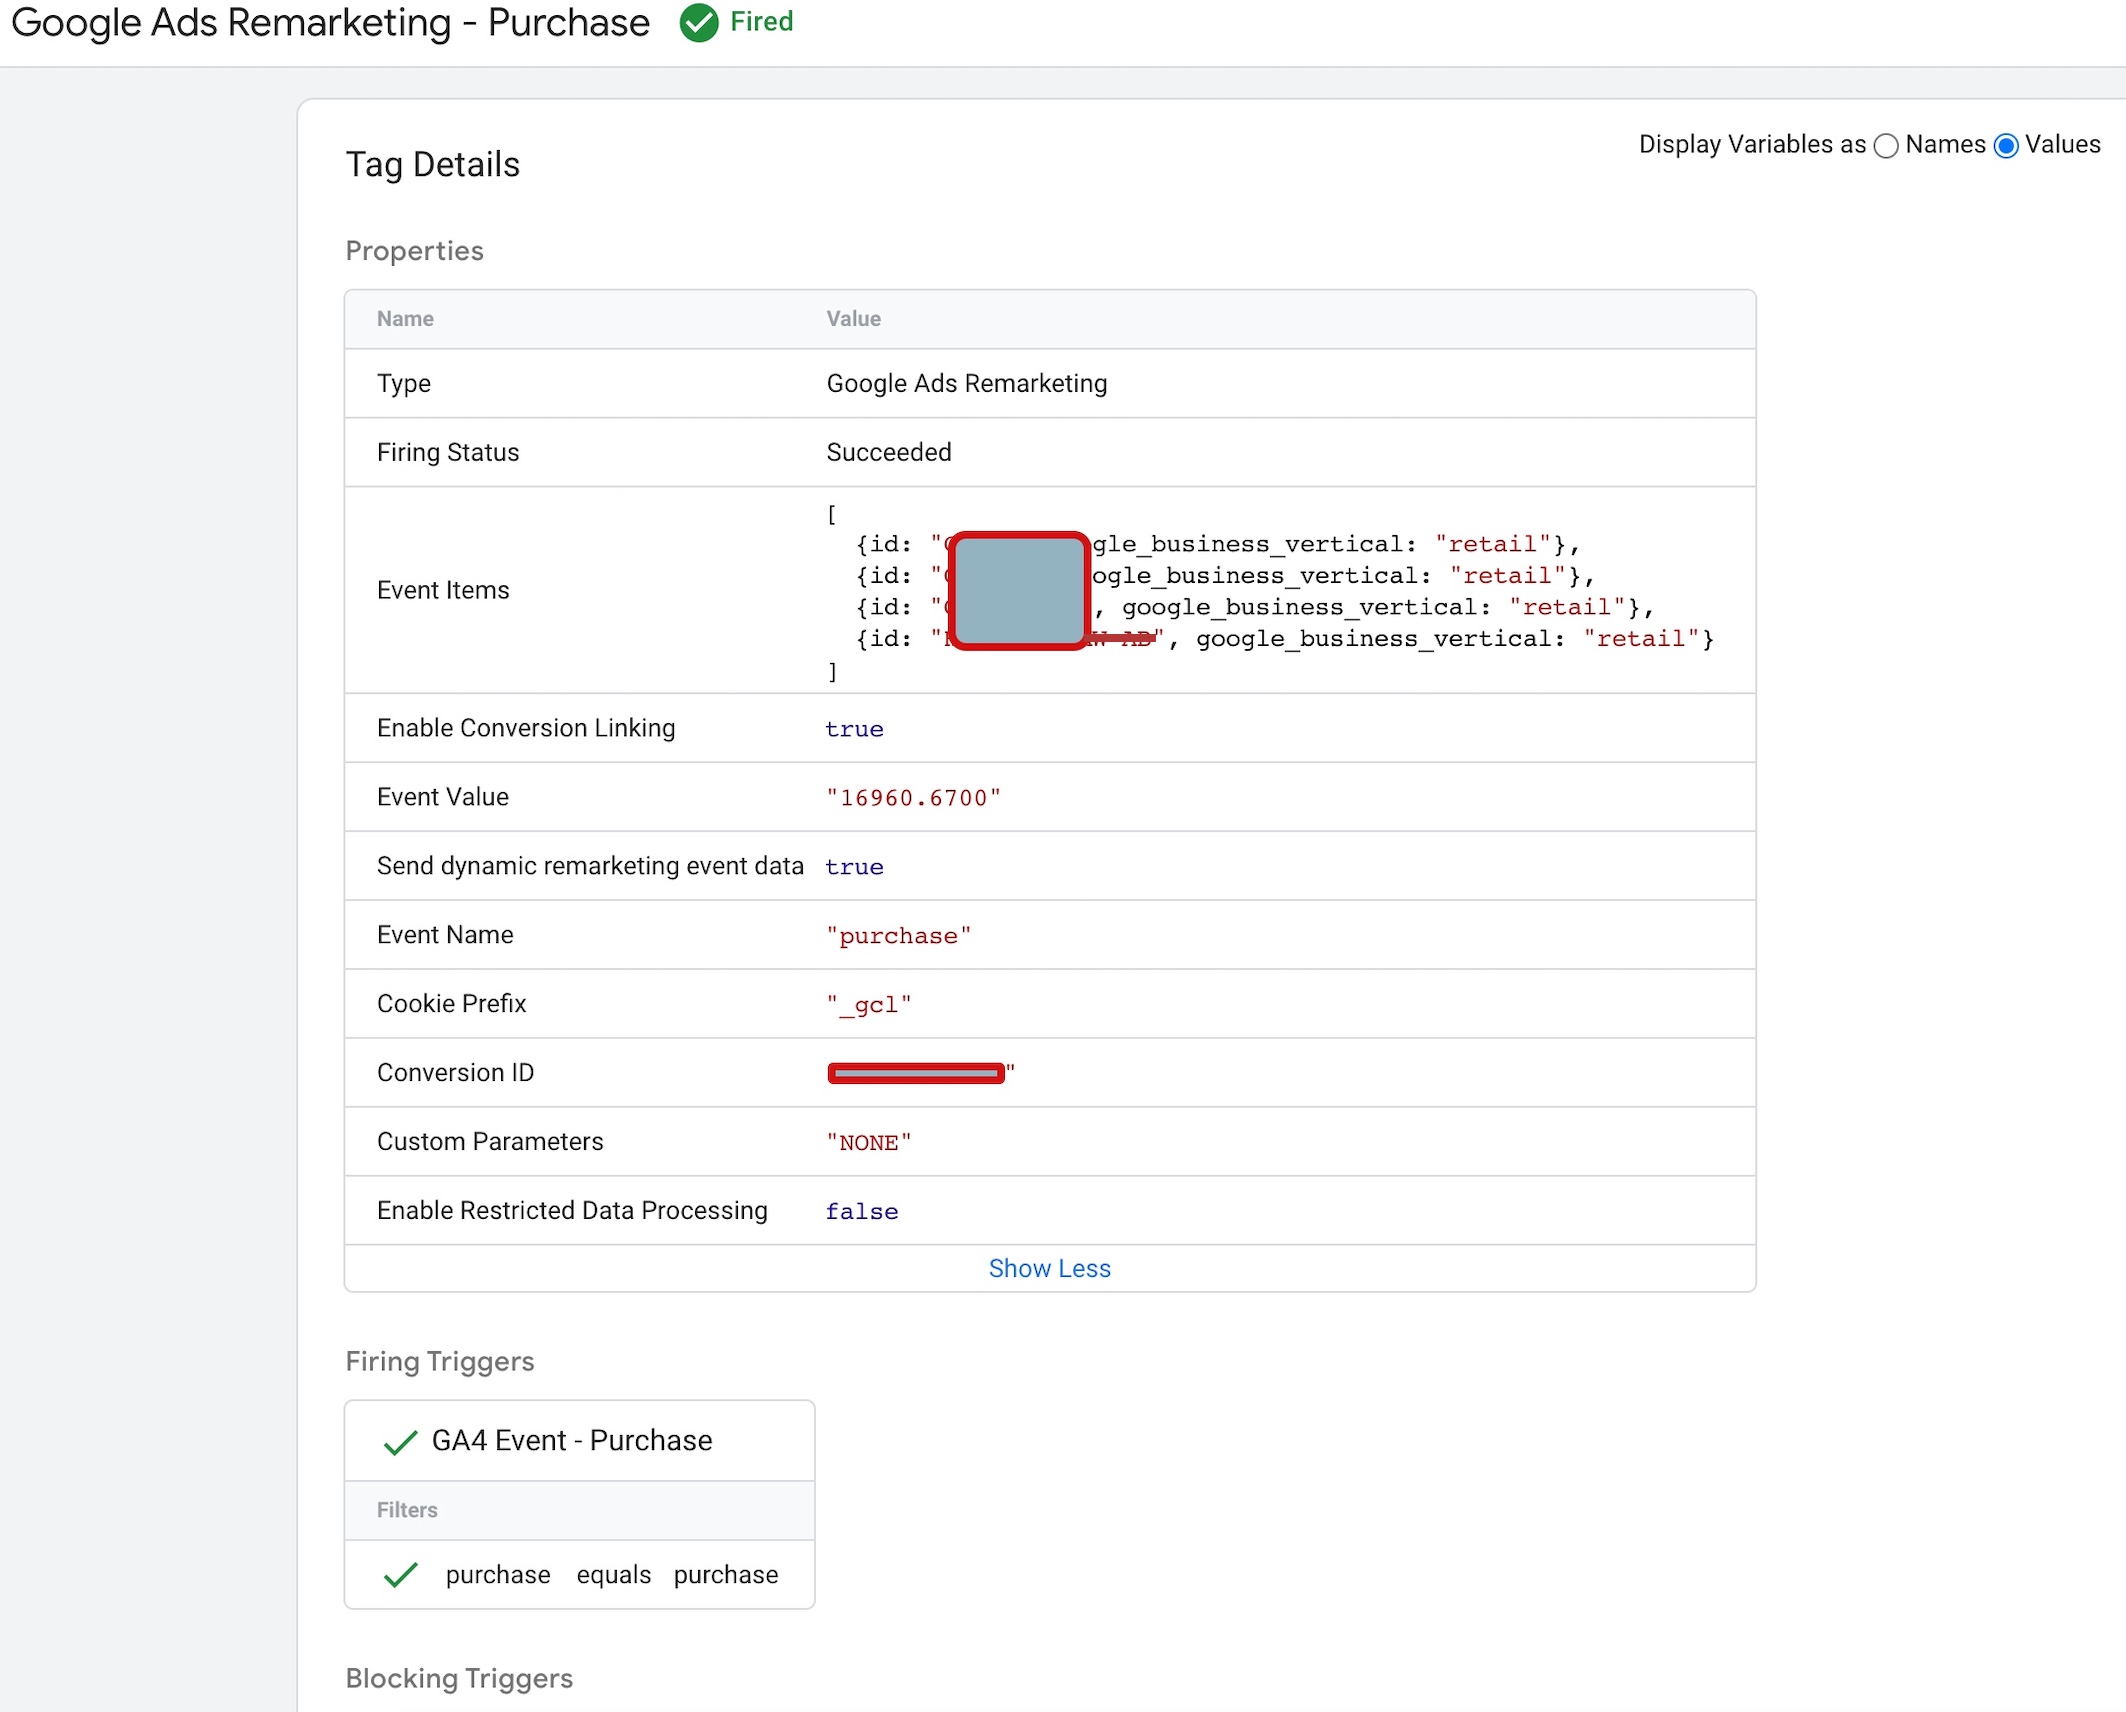
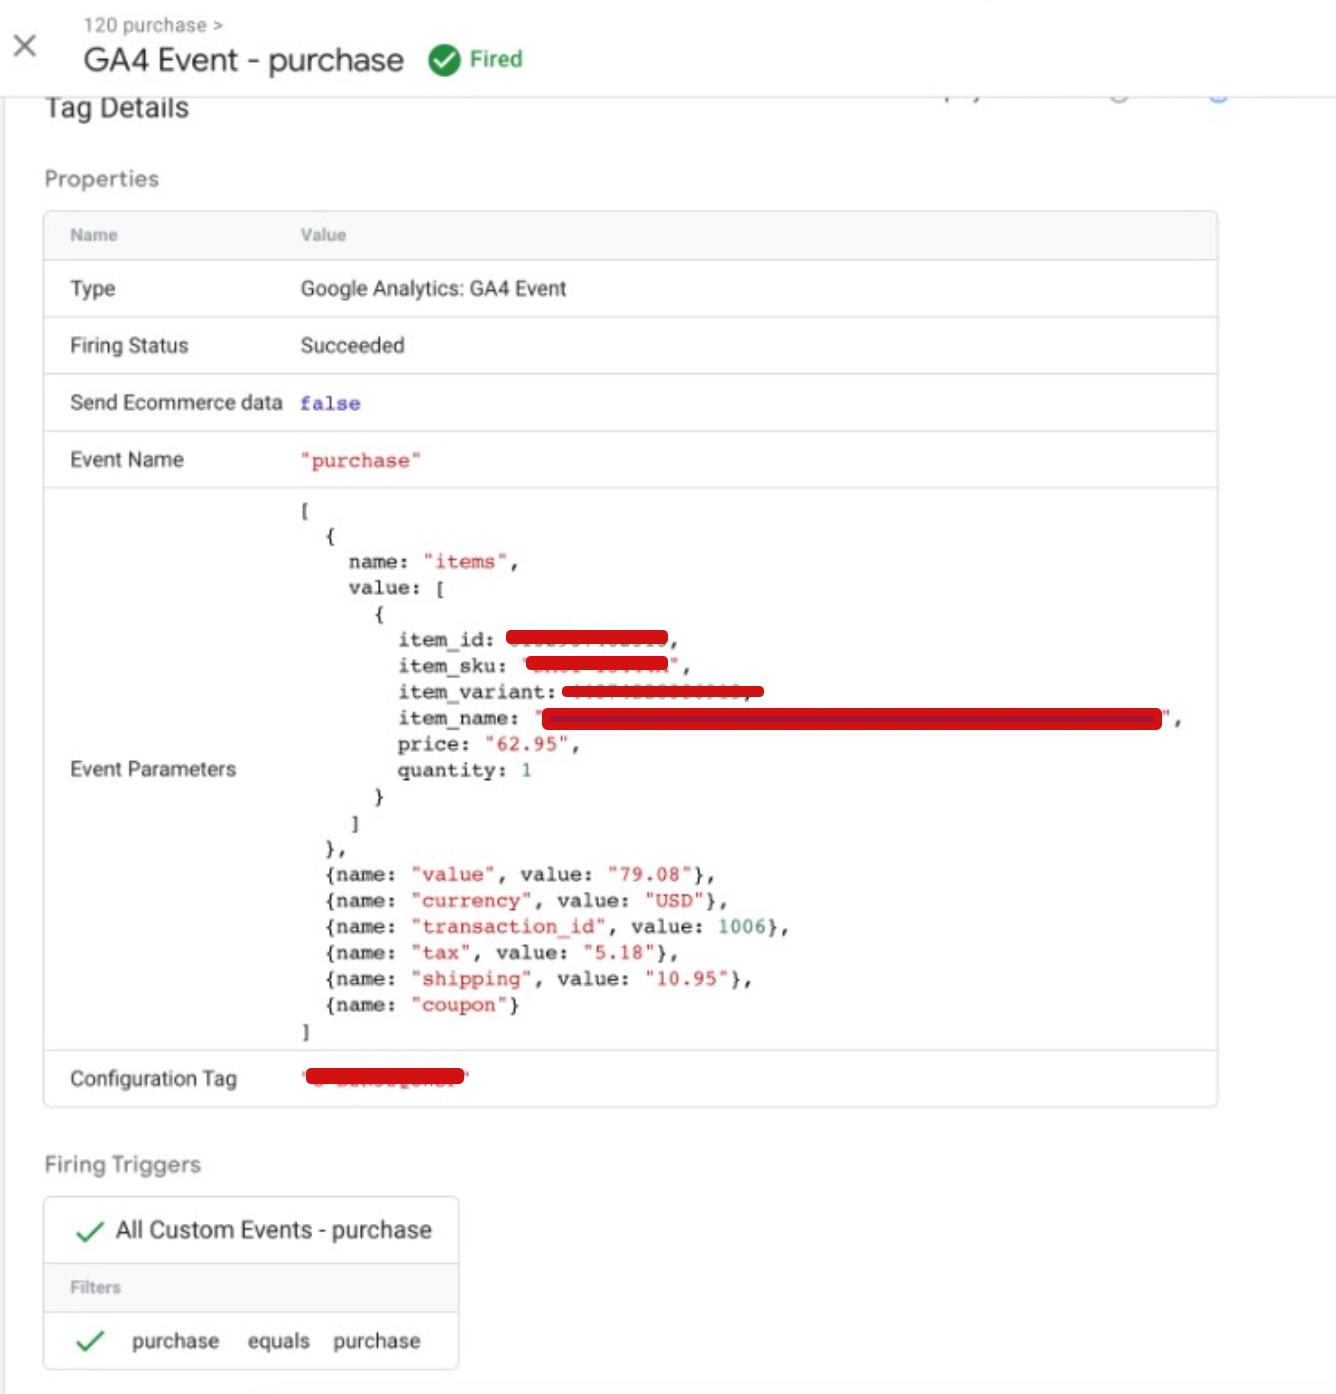
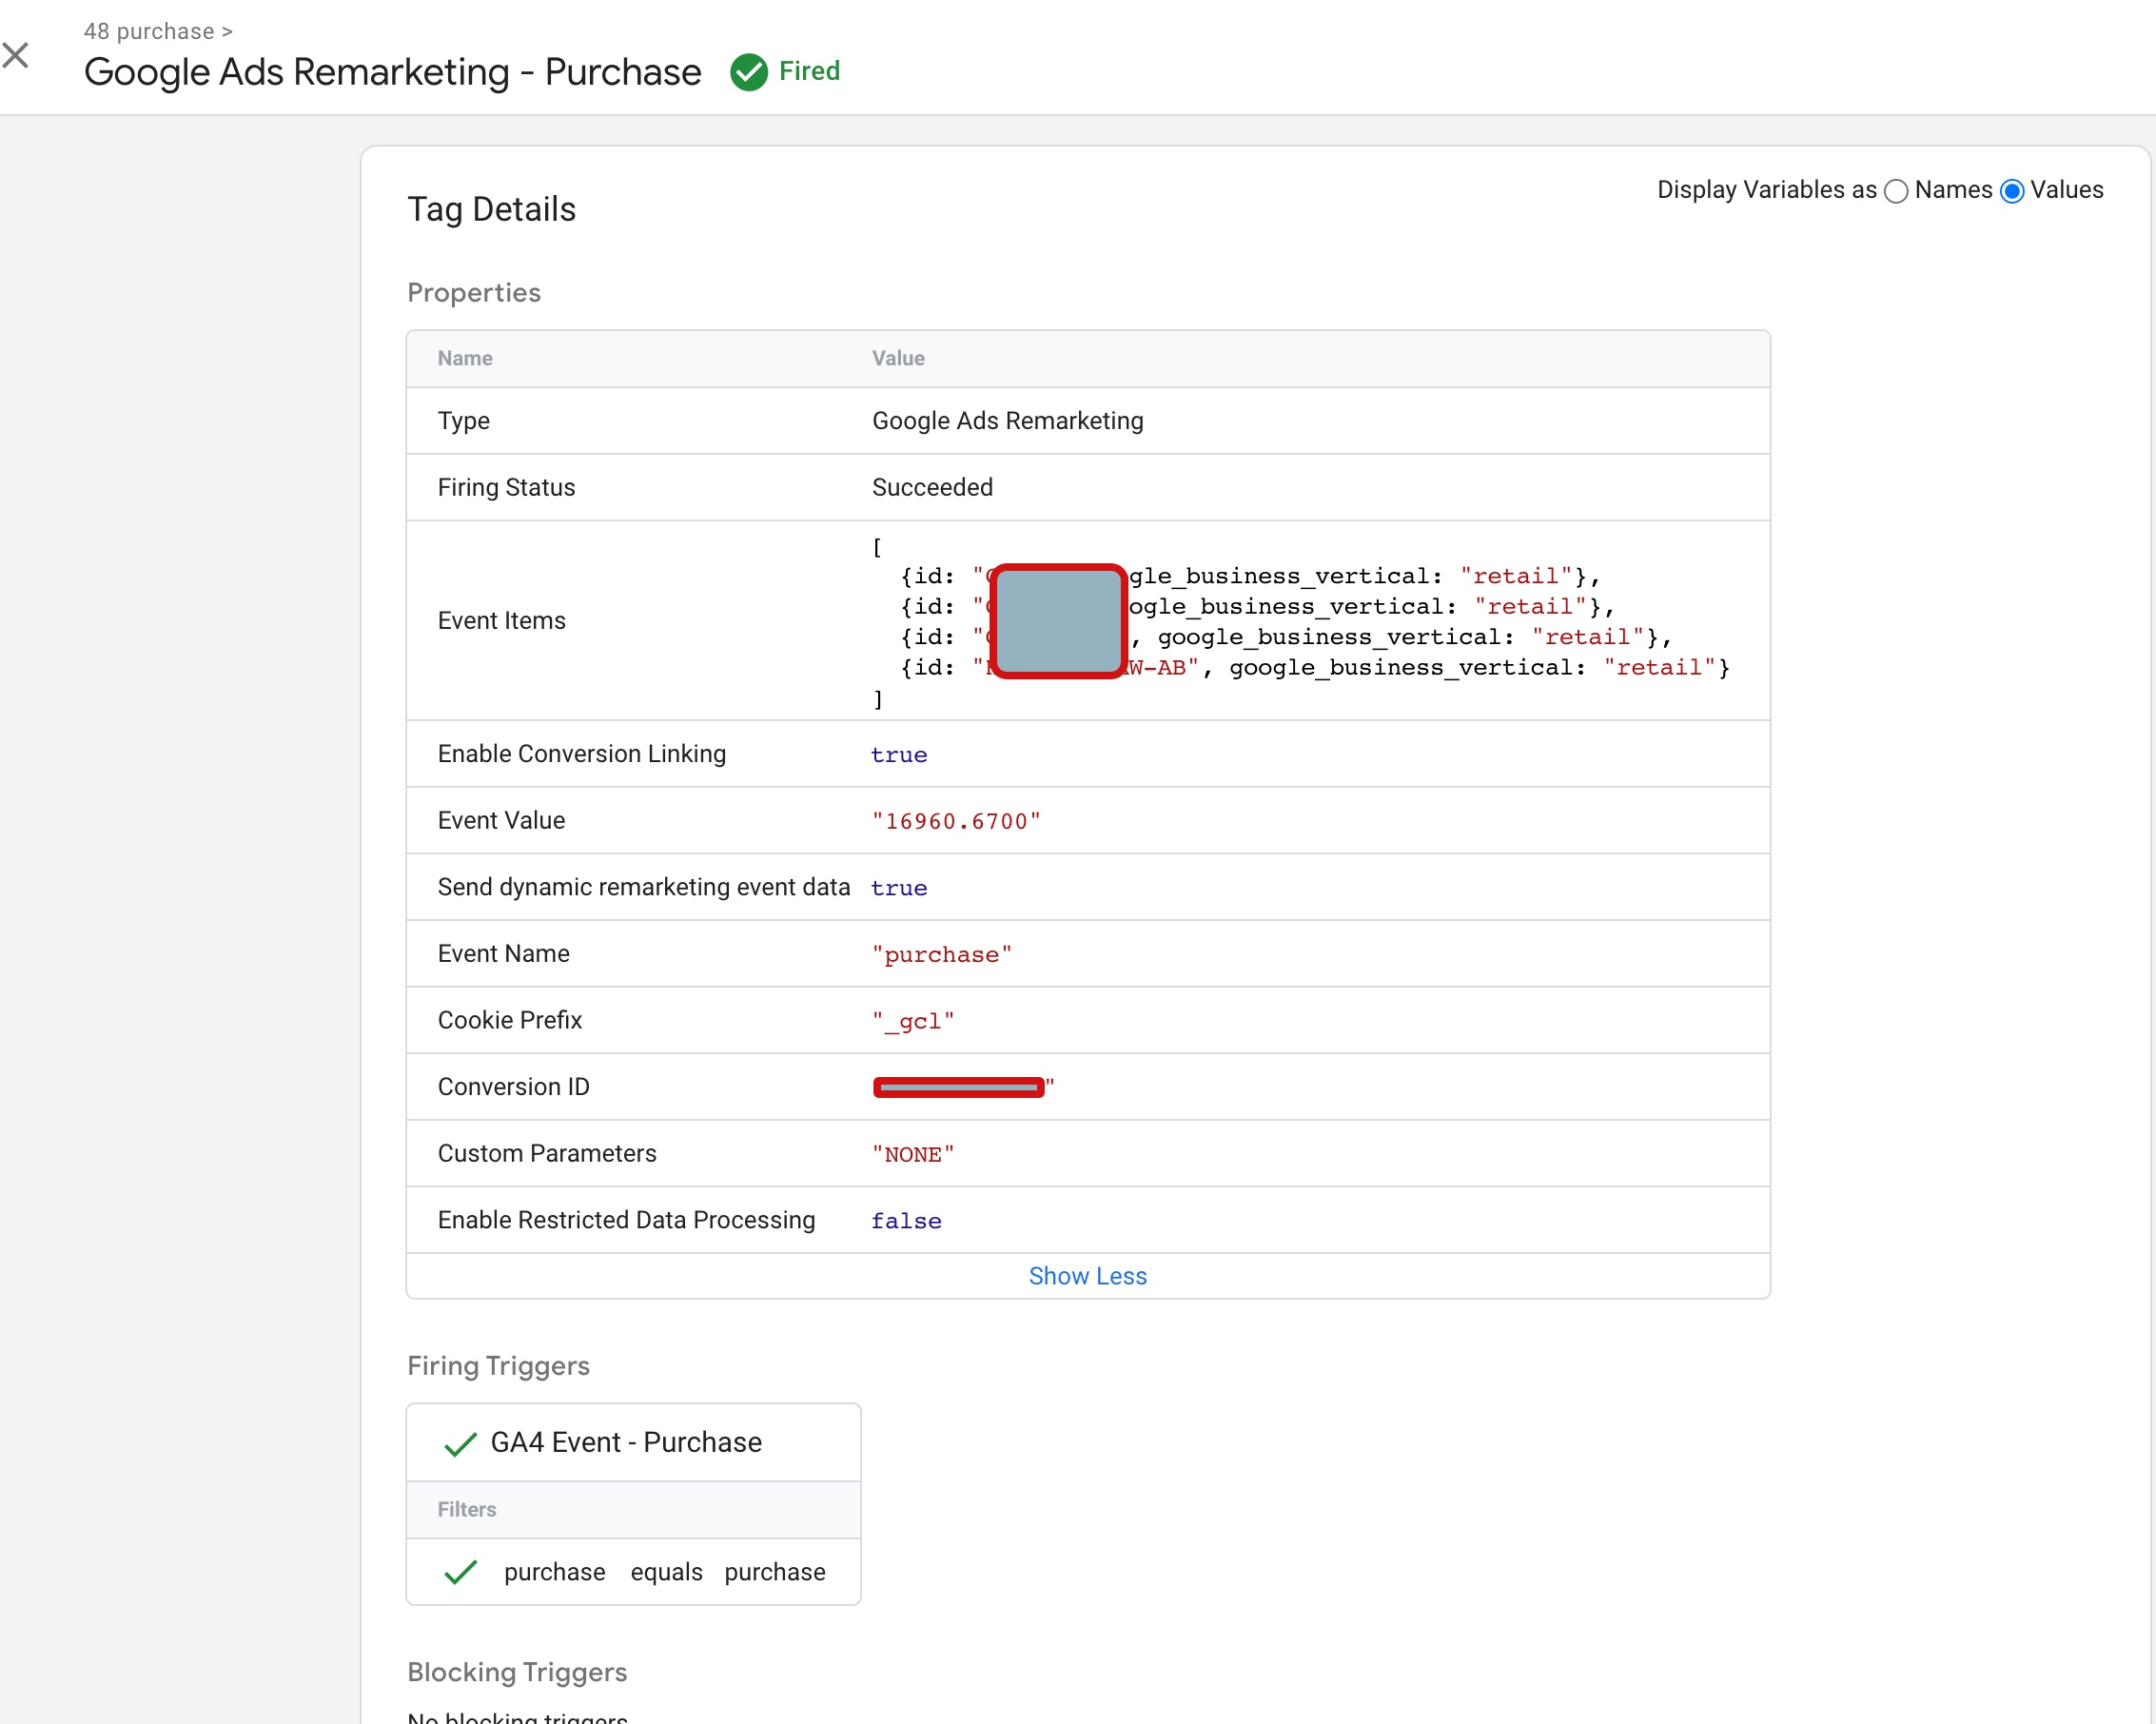
Dynamic remarketing campaigns can be customized in a variety of ways to target specific user segments. For example, merchants can create campaigns that target users who abandoned their cart or users who visited a specific product page. They can also create campaigns that target users who have made a purchase in the past and encourage them to make another purchase.
One of the benefits of using dynamic remarketing with Lightspeed Commerce is that merchants can track the performance of their campaigns in real-time. Google Ads provides detailed reports that show how many impressions, clicks, and conversions each ad received. Merchants can use this information to optimize their campaigns and improve their ROI.
Another benefit of using dynamic remarketing with Lightspeed Commerce is that it can help merchants save time and money on their advertising campaigns. By targeting users who have already shown an interest in their products, merchants can reduce the amount of money they spend on advertising to users who are unlikely to convert. This can help them to achieve a higher ROI and make more effective use of their advertising budget.
In conclusion, Lightspeed Commerce Google Ads dynamic remarketing tags are an advanced feature that enable merchants to re-engage with users who have previously interacted with their website or products. By using the conversion tracking tag and creating dynamic remarketing campaigns, merchants can show targeted ads to users who have already shown an interest in their products, increasing the chances of converting them into customers. Dynamic remarketing campaigns can be customized in a variety of ways to target specific user segments, and Google Ads provides detailed reports that show the performance of each ad. Overall, dynamic remarketing can help merchants save time and money on their advertising campaigns while improving their ROI.